Use this information to install a compute node.
To avoid possible danger, read and follow the following safety information.
S021
Hazardous energy is present when the blade is connected to the power source. Always replace the blade cover before installing the blade.
Before you install a compute node, complete the following step:
Read Installation Guidelines to ensure that you work safely.
To install a compute node, complete the following steps:
Figure 1. Compute node installation 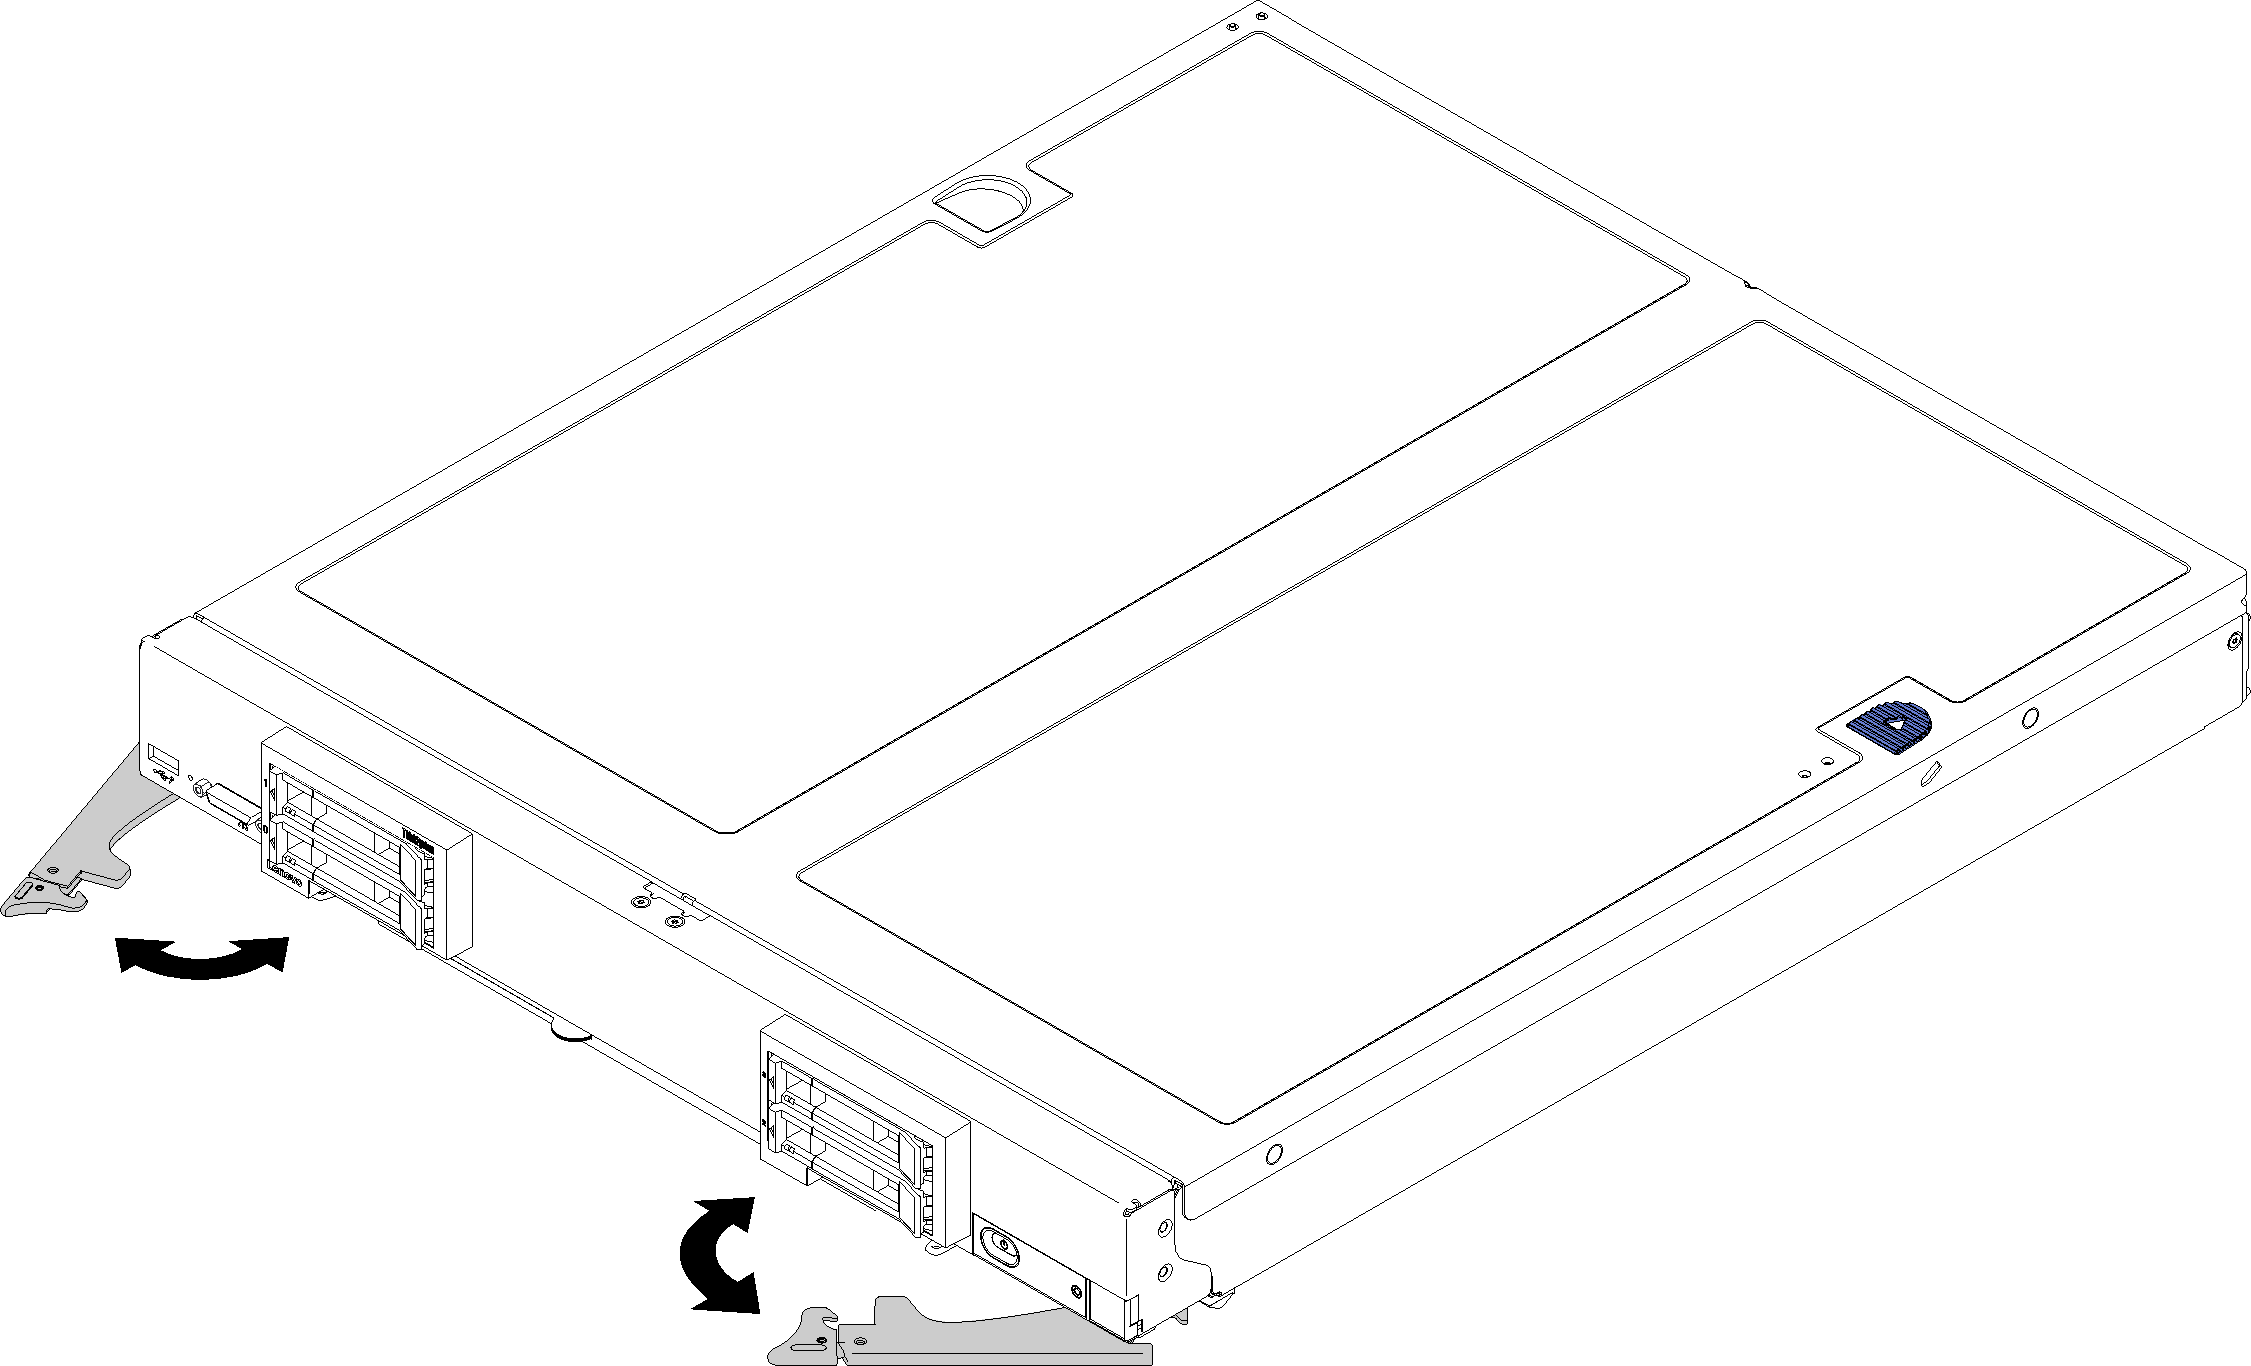
- Select the node bay.
- If you are reinstalling a compute node that you removed, you must install it in the same node bay from which you removed it. Some compute node configuration information and updates are established according to node bay number. Reinstalling a compute node into a different node bay can have unintended consequences. If you reinstall the compute node into a different node bay, you might have to reconfigure the compute node.
- To maintain proper system cooling, do not operate the Flex System chassis without a compute node, or node bay filler in each node bay.
- Make sure that:
Air baffle is installed in the compute node
Compute node cover is in place and secure
Both front handles are in the fully open position
- Slide the compute node into the node bay until it stops.
- Rotate both handles inward to push the compute node until the spring loaded releases snaps into place.
After the compute node is installed, the Lenovo XClarity Controller in the compute node initializes and synchronizes with the CMM. The time required for a compute node to initialize varies by system configuration. The power LED flashes rapidly when processing; the power button on the compute node does not respond until the power LED flashes slowly, indicating that the initialization process is complete.
- If you have other compute nodes to install, do so now.