Install a 2.5-inch hot-swap drive
Use this information to install a 2.5-inch hot-swap drive.
Before you install a 2.5-inch hot-swap drive, complete the following step:
Read Installation Guidelines to ensure that you work safely.
The compute node has four drive bays for installing hot-swap drives. One drive might already be installed in the compute node. If the compute node is equipped with one drive, you can install up to three additional drives.
See RAID configuration for instructions.
To install a 2.5-inch hot-swap drive, complete the following steps:
Figure 1. 2.5-inch hot-swap drive installation
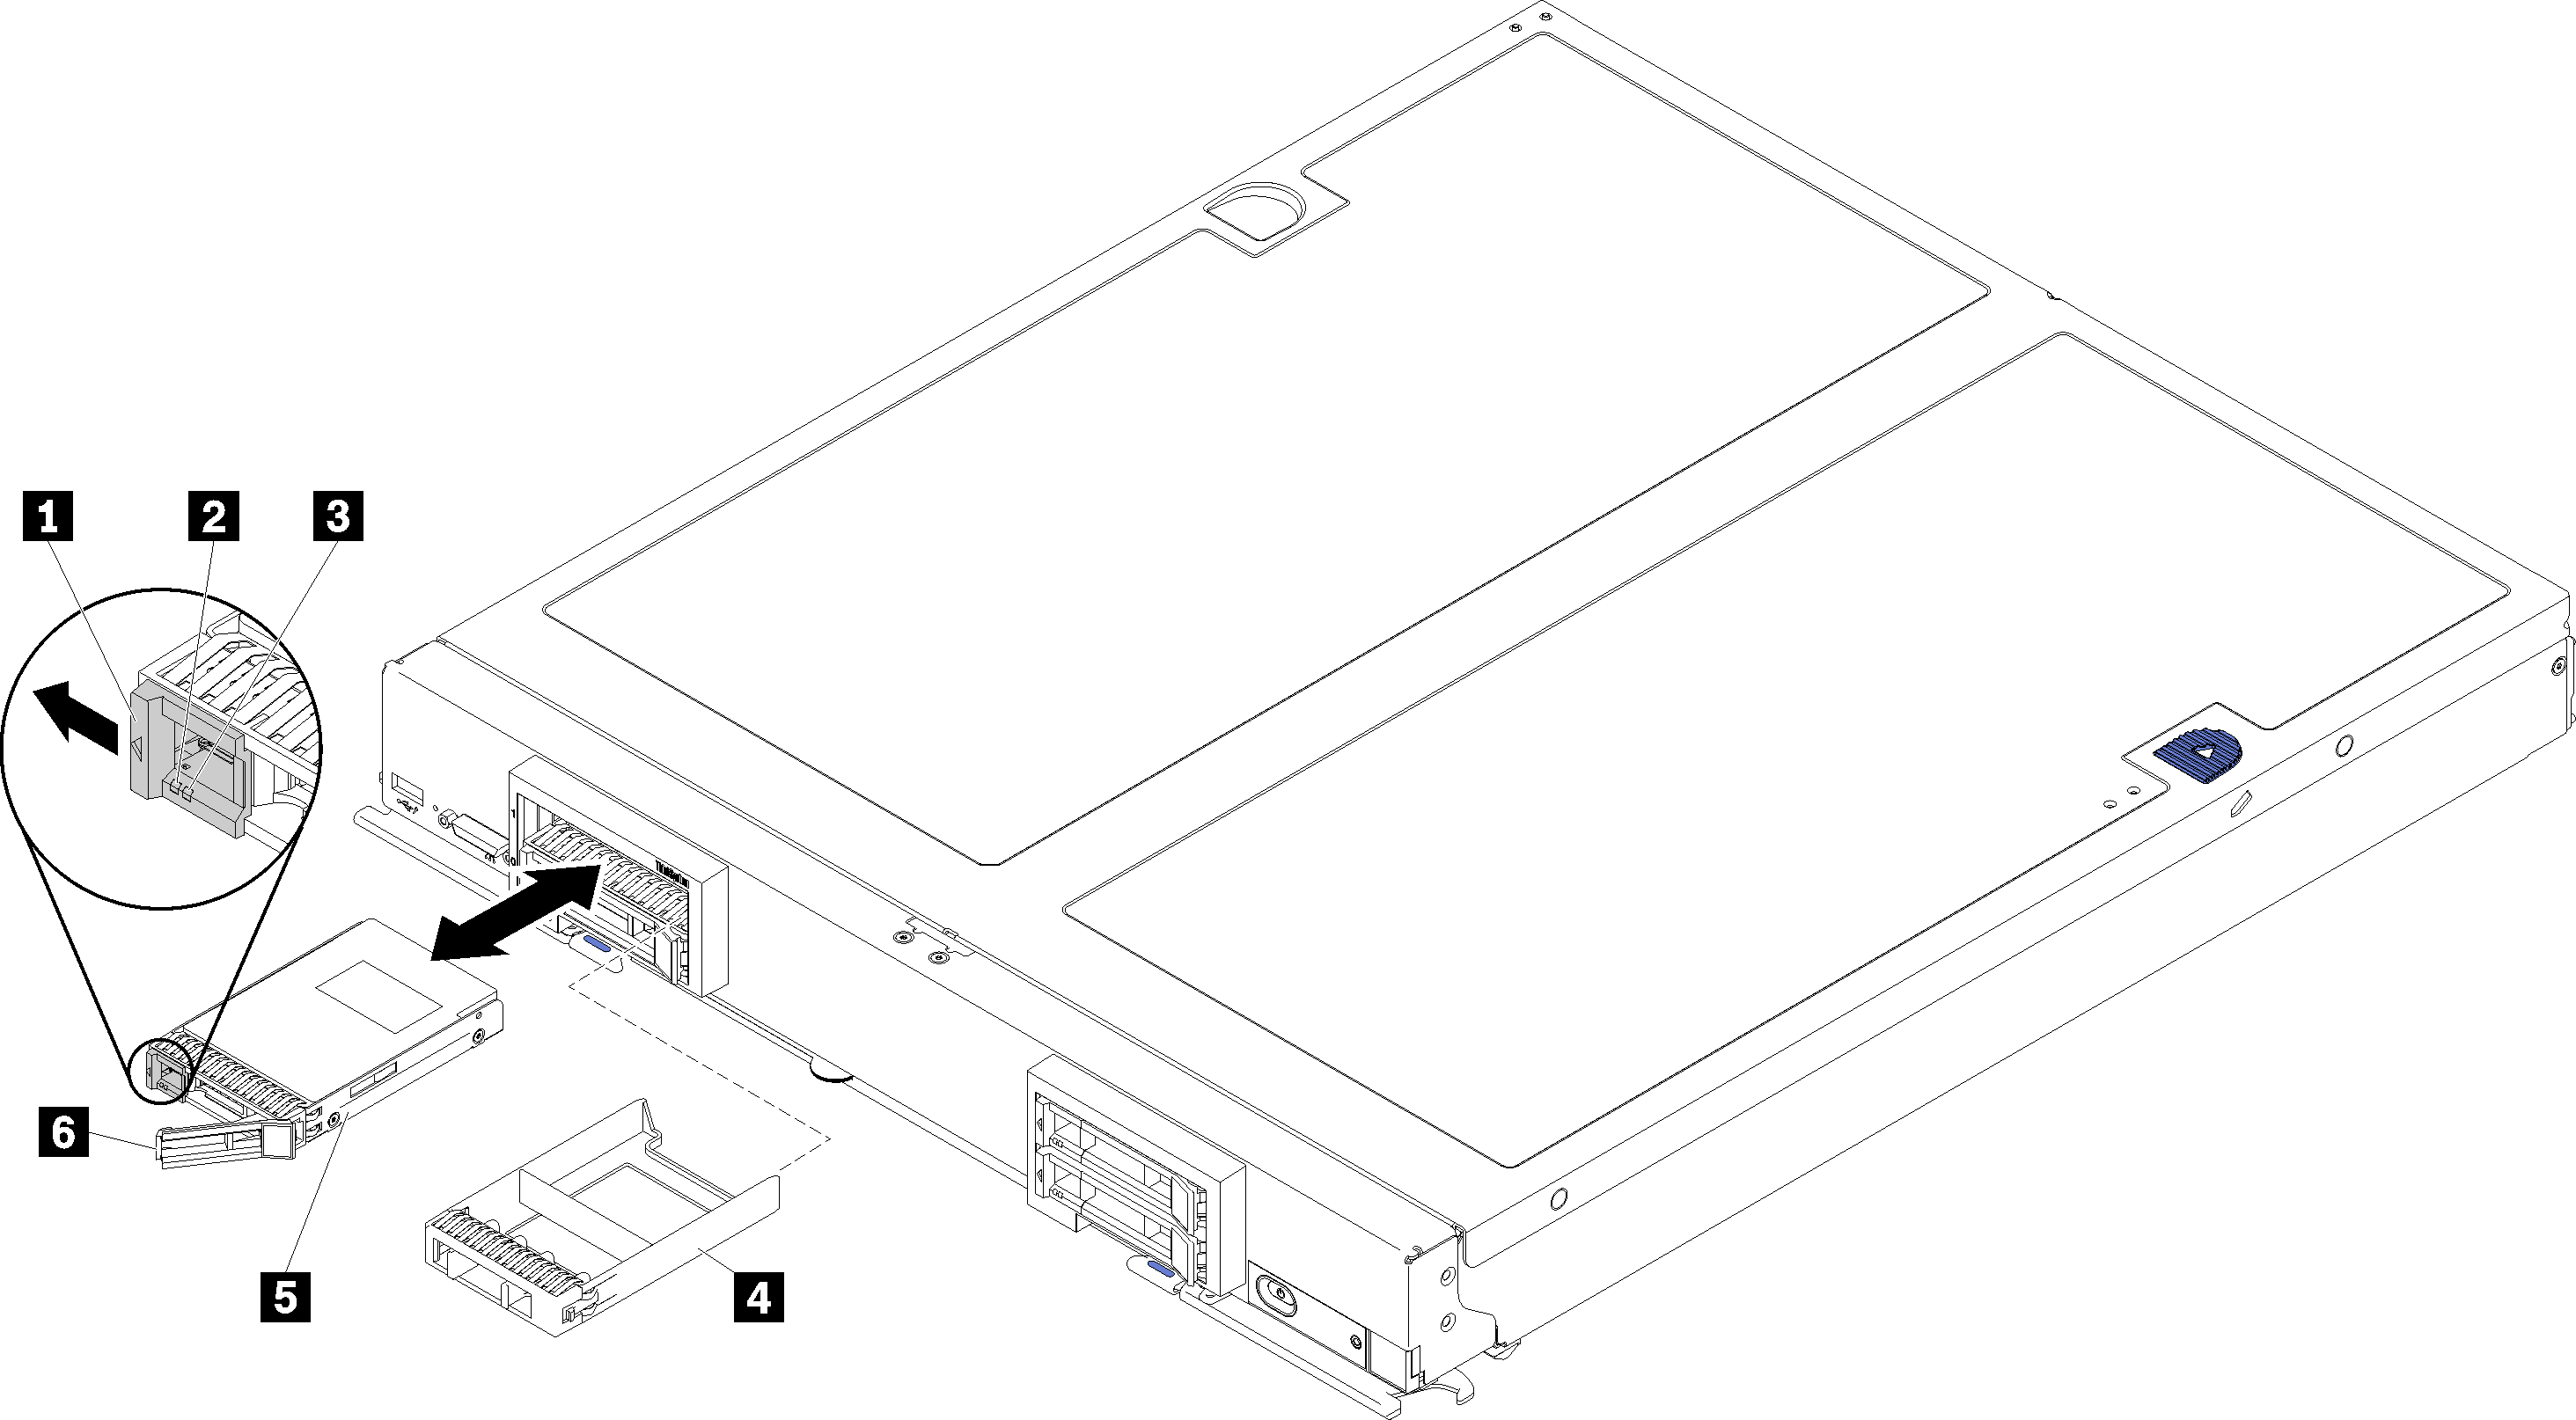
| 1 Release latch | 4 Drive bay filler |
| 2 Drive activity LED (green) | 5 Drive |
| 3 Drive status LED (yellow) | 6 Release handle |
- Identify the drive bay in which you plan to install the hot-swap drive.
- If a drive bay filler is installed, pinch the grip point and pull it away from the compute node.
- Touch the static-protective package that contains the hot-swap drive or solid-state drive to any unpainted metal surface on the Flex System chassis or any unpainted metal surface on any other grounded rack component; then, remove the drive from the package.
- Open the release handle on the drives into the bay until the release handle catches on the bezel, then rotate the handle to fully seat the drive.
- Lock the drives into place by closing the release handle until it clicks.
- Check the drive activity LEDs to make sure that the drive is operating correctly.
For RAID configuration, see RAID configuration for instructions.
Demo video
Give documentation feedback