Install a simple-swap disk drive
Use this information to install a simple-swap disk drive.
Read Safety and Installation Guidelines to ensure that you work safely.
Touch the static-protective package that contains the drive to any unpainted metal surface on the server; then, remove the drive from the package and place it on a static-protective surface.
Identify the drive bay in which you plan to install the simple-swap drive.
When SATA drives are installed and connected to SATA connectors 4-7 on system board (without a RAID adapter installed), the drive number will be reported by RAID utility as drives 4, 5, 6, and 7 (different from drive bay number)
When SAS or SATA drives are installed and connected to RAID adapter, the drive number will be 0, 1, 2, and 3 (same as drive bay number)
Drive bay 2 and 3 are not available when the two-drive backplate is installed.
To install a simple-swap disk drive, complete the following steps:
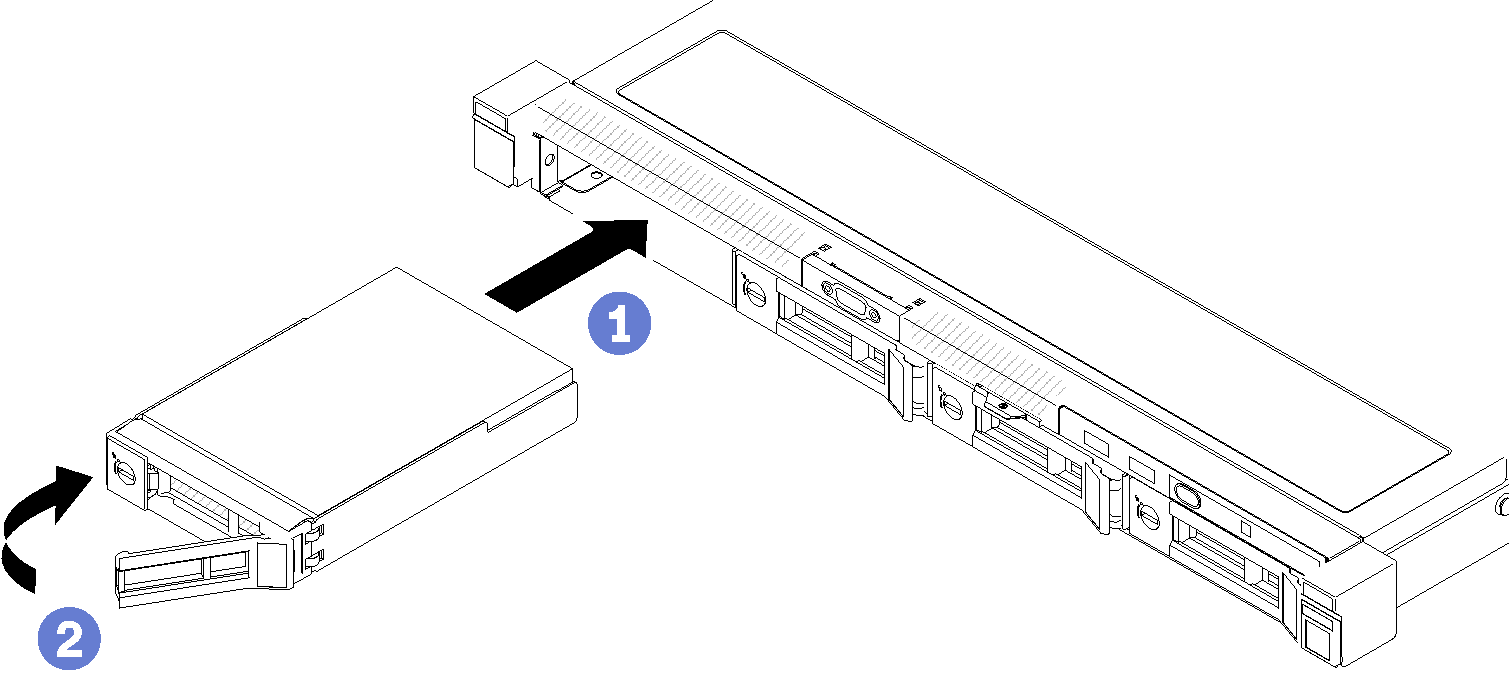
- Slide the drive into the drive bay. Make sure the drive handle is in the open position.
- Lock the drive into place by rotating the drive handle inward until it clicks.
If you are instructed to return the component or optional device, follow all packaging instructions, and use any packaging materials for shipping that are supplied to you.
Reconnect power cords and all external cables.