Install the PCIe riser assembly

Use this information to install the PCIe riser assembly.

Before you install the PCIe riser assembly, complete the following steps:
  1. Read Safety and Installation Guidelines to ensure that you work safely.

  2. Install adapters (see Install an adapter).

To install the PCIe riser assembly, complete the following steps:

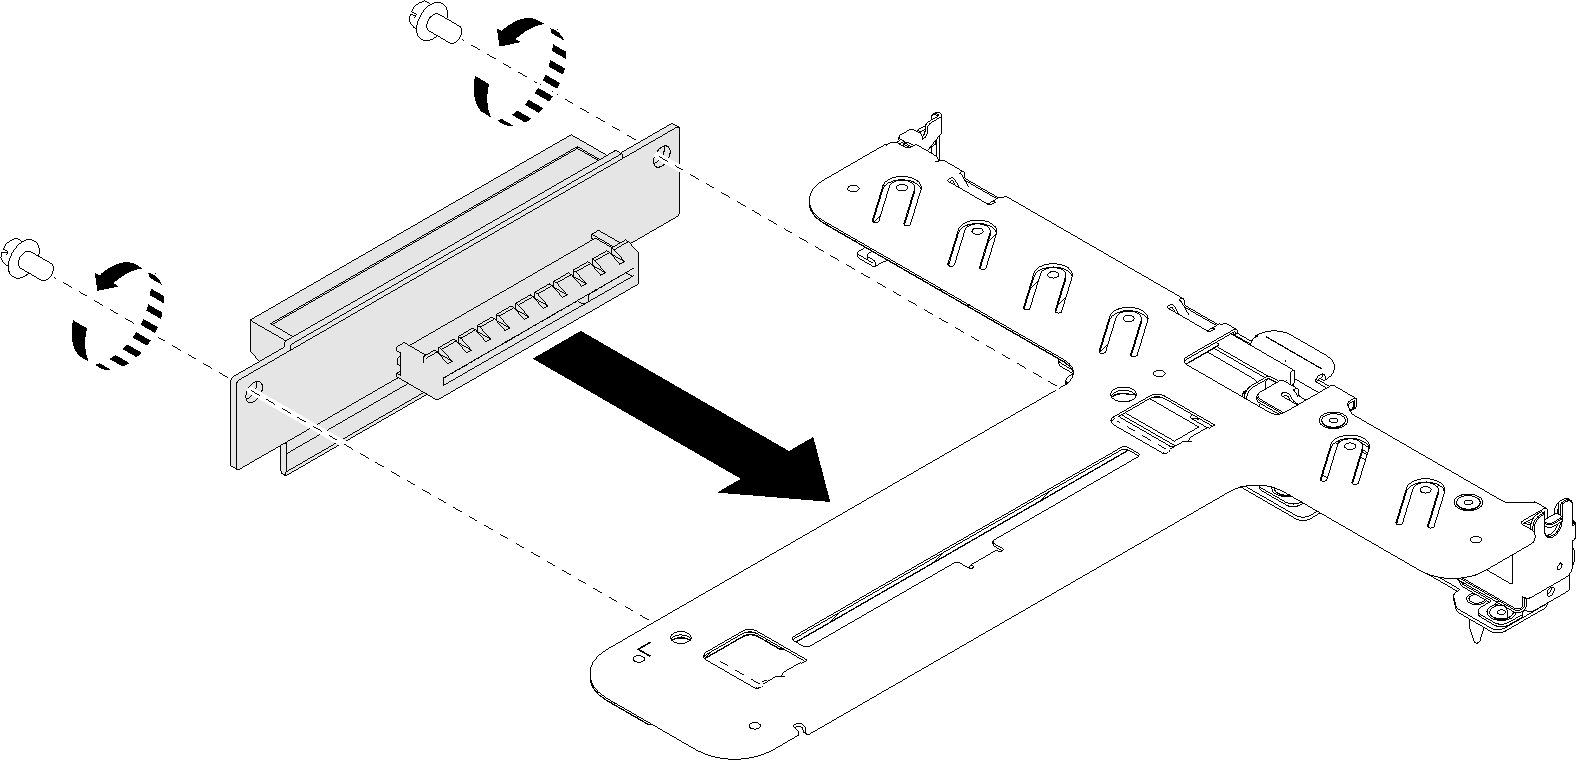
  1. Align the two screw slots on the PCIe riser card with the riser cage. Make sure two screw slot are aligned at the same time; then, fasten the screws to secure the riser card to the riser cage.
    Figure 1. PCIe riser assembly installation
    PCIe riser assembly installation
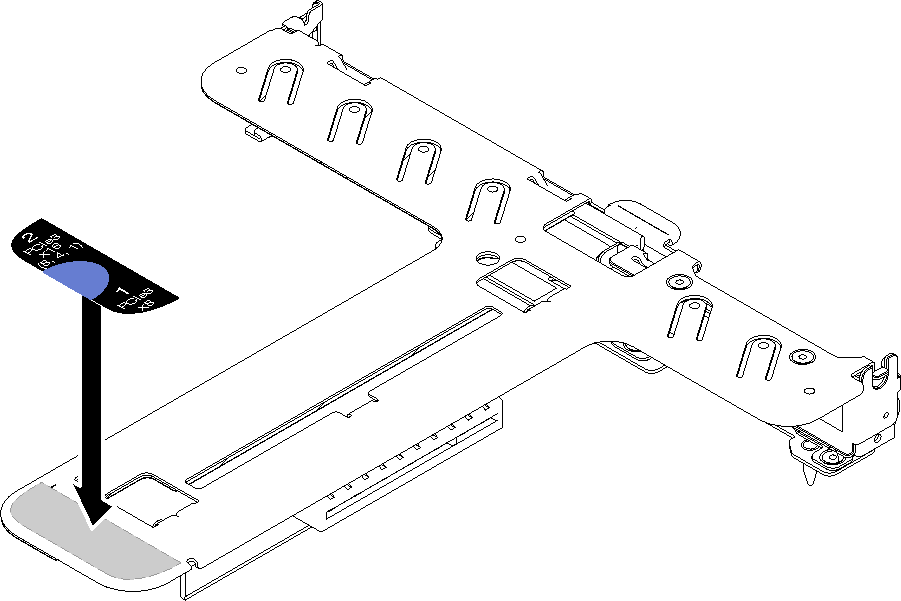
  2. Attach the label to the front side of the PCIe riser assembly.
    Figure 2. PCIe riser assembly installation
    PCIe riser assembly installation
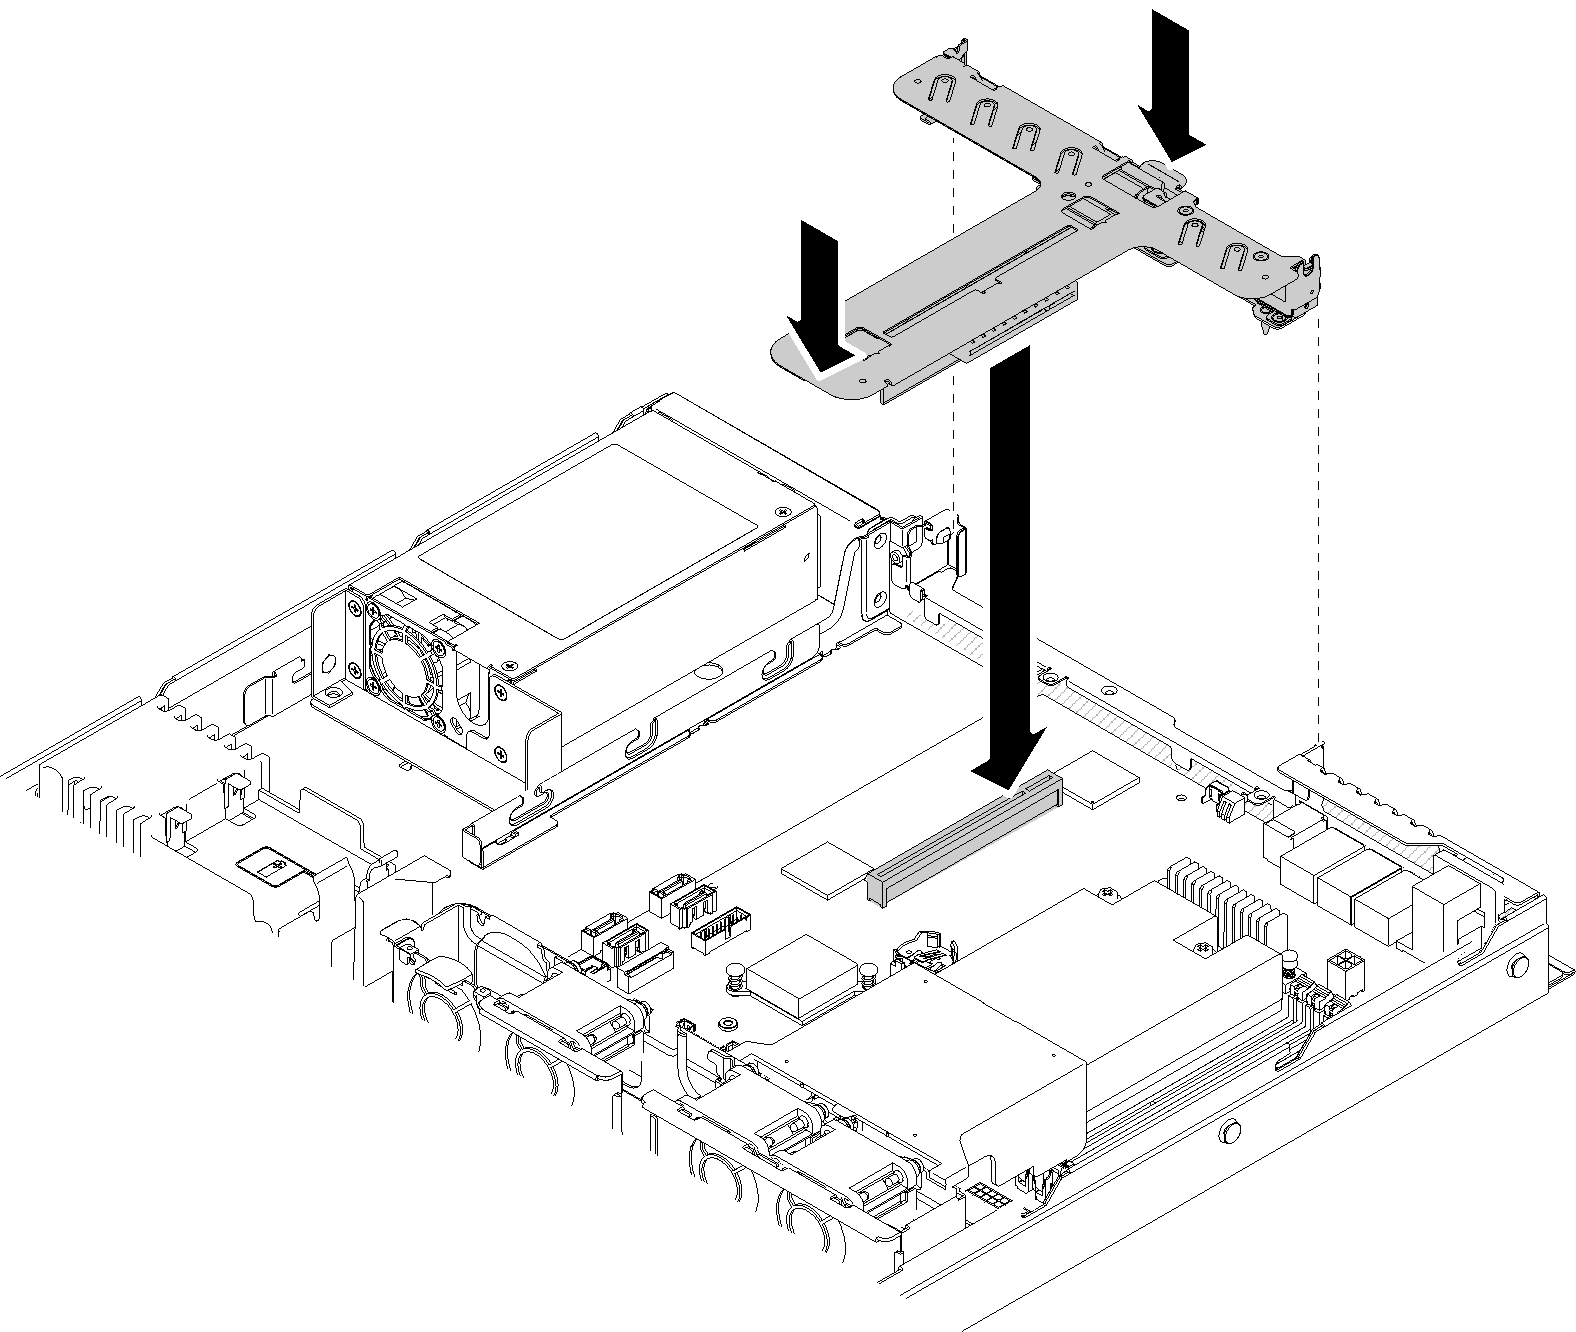
  3. Align the two tabs on PCIe riser assembly with the slots on the rear chassis; then, insert the PCIe riser assembly into the connector on the system board. Carefully press the riser card straight down into the slot until it is fully seated.
    Figure 3. PCIe riser assembly installation
    PCIe riser assembly installation

After you install the PCIe riser assembly, complete the following steps:

  1. Install the top cover onto the server (see Install the top cover).

  2. Install the server into the rack if necessary.

  3. Reconnect power cords and all external cables.