Install the front I/O assembly
Use this information to install the front I/O assembly.


Before installing the front I/O assembly, touch the static-protective package that contains the new front I/O assembly to any unpainted surface on the outside of the server. Then, take the new front I/O assembly out of the package and place it on a static-protective surface.
To install the front I/O assembly, complete the following steps:
Watch the procedure
A video of this procedure is available at YouTube.
Figure 1. Server models with four 3.5-inch drive bays 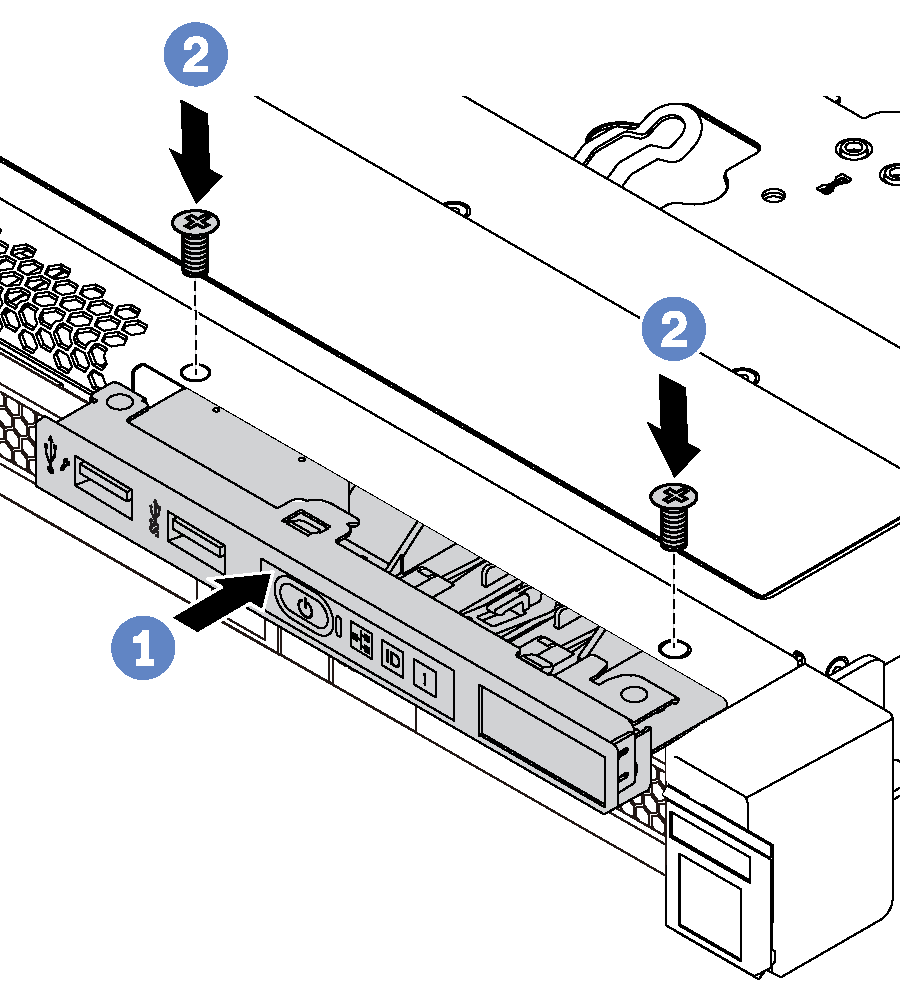 | Figure 2. Server models with eight 2.5-inch drive bays 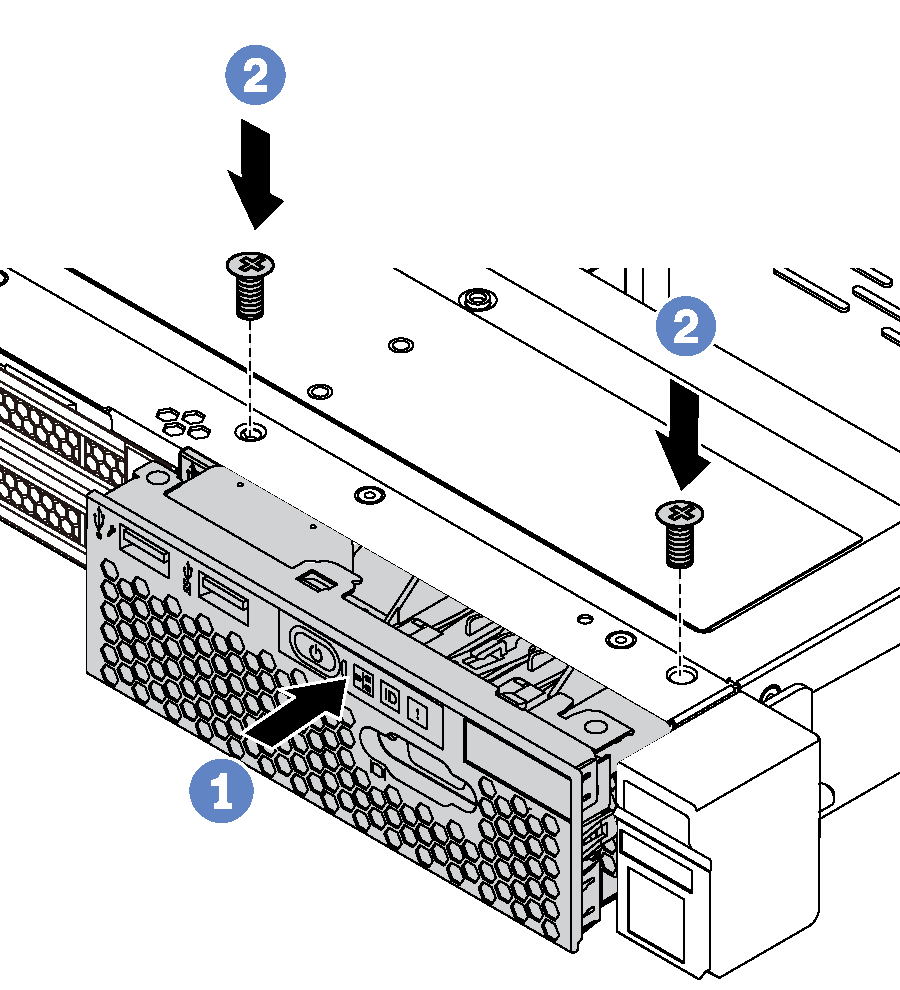 | Figure 3. Server models with ten 2.5-inch drive bays 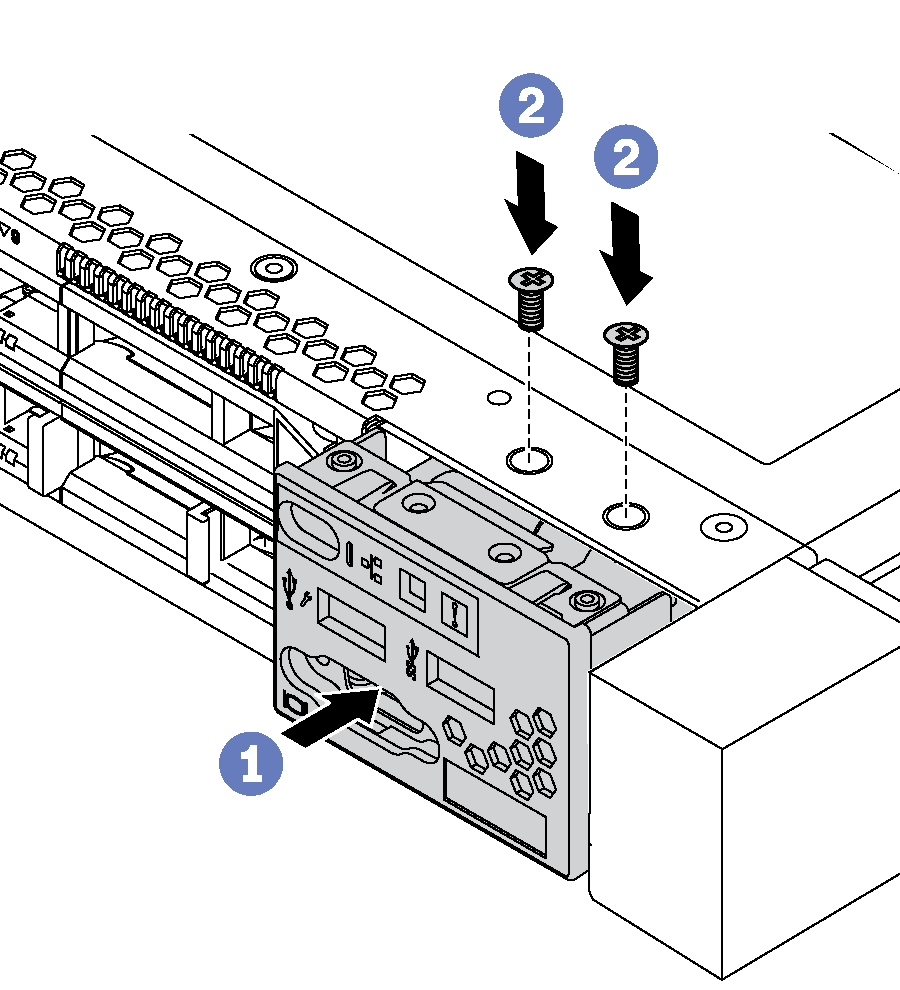 |
- Insert the front I/O assembly into the assembly bay.
- Install the screws to secure the front I/O assembly in place.
After installing the front I/O assembly:
Connect the cables of the front I/O assembly to the system board. For the location of the connectors on the system board, refer to System board components.
Complete the parts replacement. See Complete the parts replacement.
Give documentation feedback