Remove the RAID adapter
Use this information to remove the RAID adapter on the system board.
Note
The following procedure applies to the RAID adapter installed on the system board. For the procedure about removing the RAID adapter installed on the riser assembly, refer to Remove a PCIe adapter.
Before removing the RAID adapter:
Remove the top cover. See Remove the top cover.
Disconnect any cables that might impede your access to the RAID adapter.
Record the cable connections on the RAID adapter and then disconnect all cables from the RAID adapter. For more information about the cable connection, see Internal cable routing.
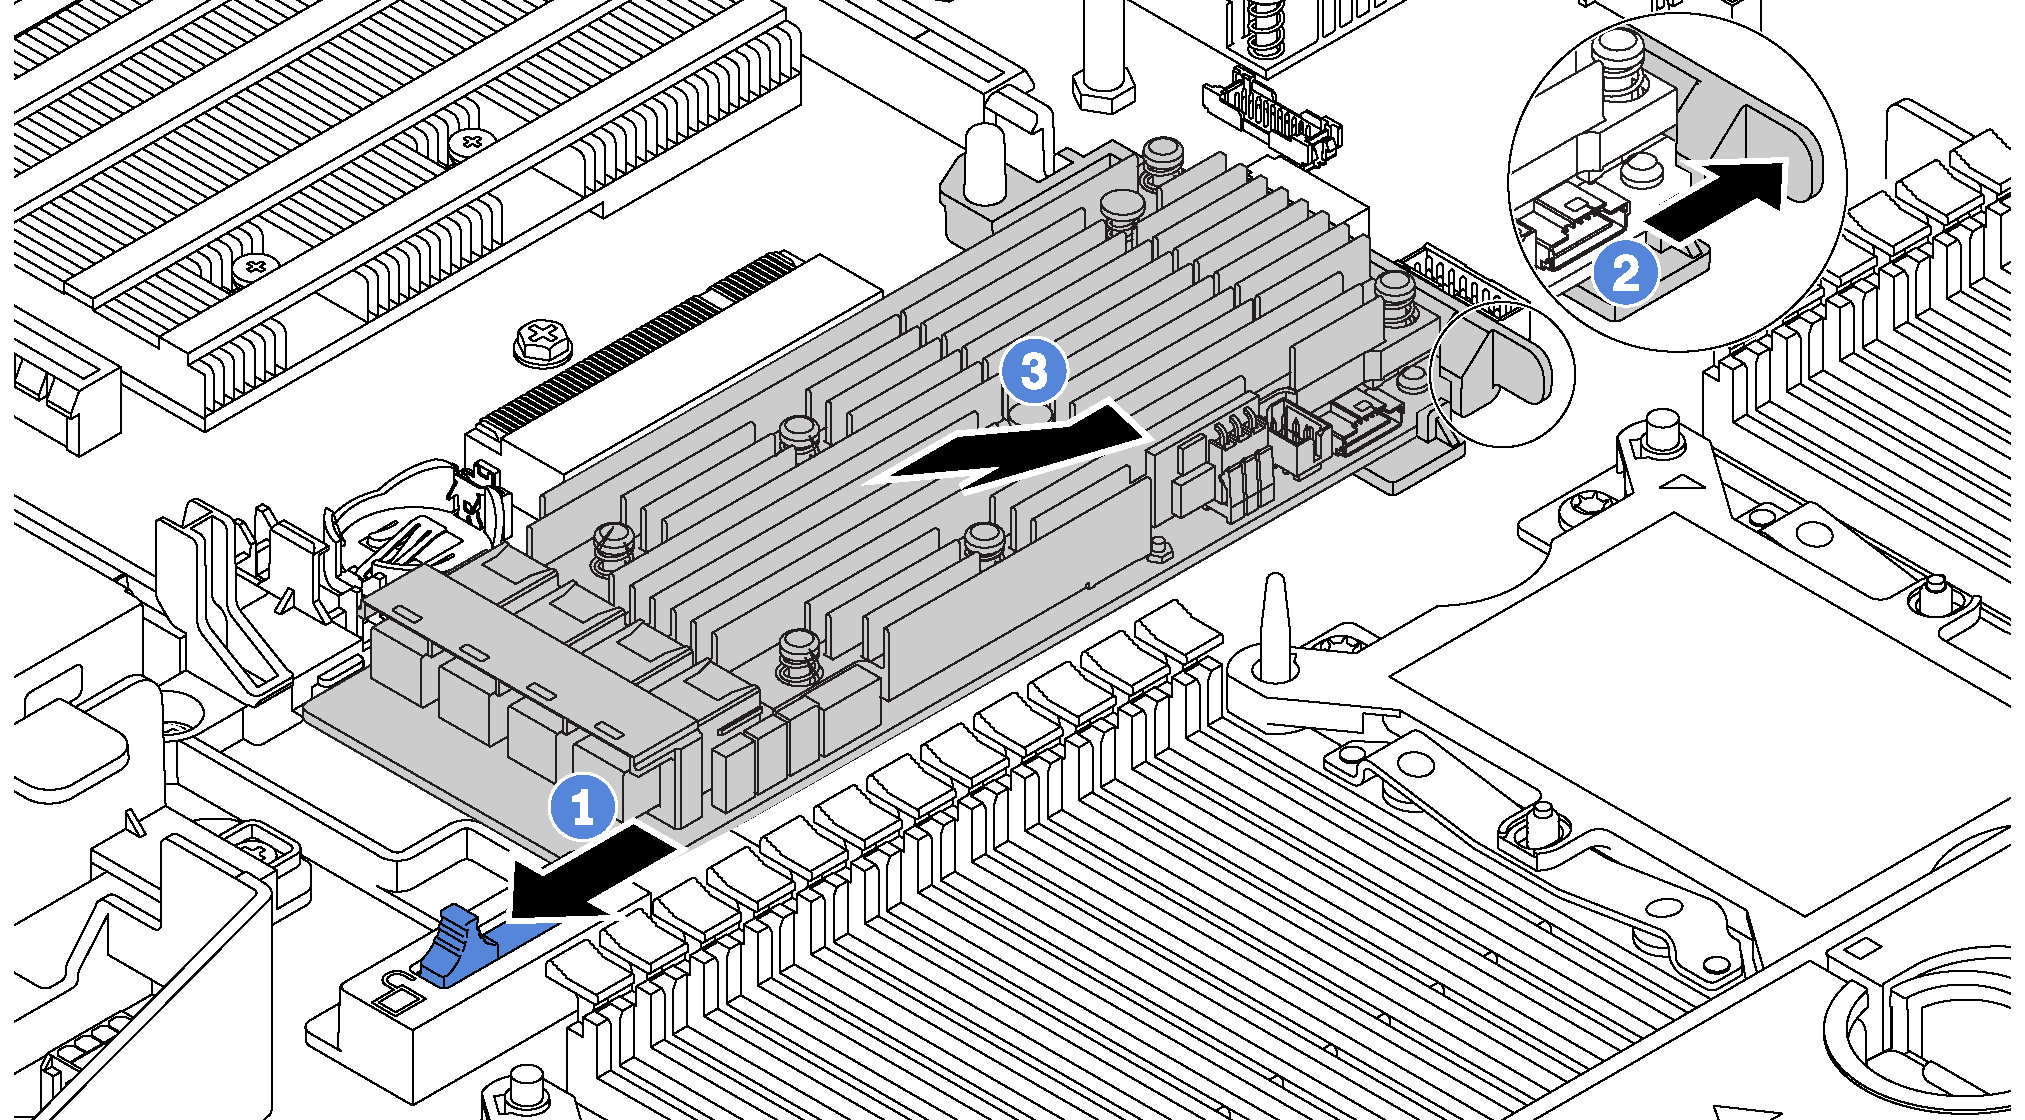
To remove the RAID adapter on the system board, complete the following steps:
Watch the procedure
A video of this procedure is available at YouTube.
Figure 1. RAID adapter removal


- Slide the left-side latch to the unlocked position.
- Push and hold the right-side latch in the direction as shown.
- Grasp the RAID adapter by its edges and carefully remove it from the RAID adapter slot on the system board.
If you are instructed to return the old RAID adapter, follow all packaging instructions and use any packaging materials that are provided.
Give documentation feedback


