Install the rack latches
Use this information to install the rack latches.
About this task
Attention
Read Installation Guidelines to ensure that you work safely.
Power off the server and disconnect all power cords for this task.
NoteIf the rack latches are not assembled with a VGA connector or the front I/O assembly, you can install the rack latches without powering off the server.Prevent exposure to static electricity, which might lead to system halt and loss of data, by keeping static-sensitive components in their static-protective packages until installation, and handling these devices with an electrostatic-discharge wrist strap or other grounding system.
Procedure
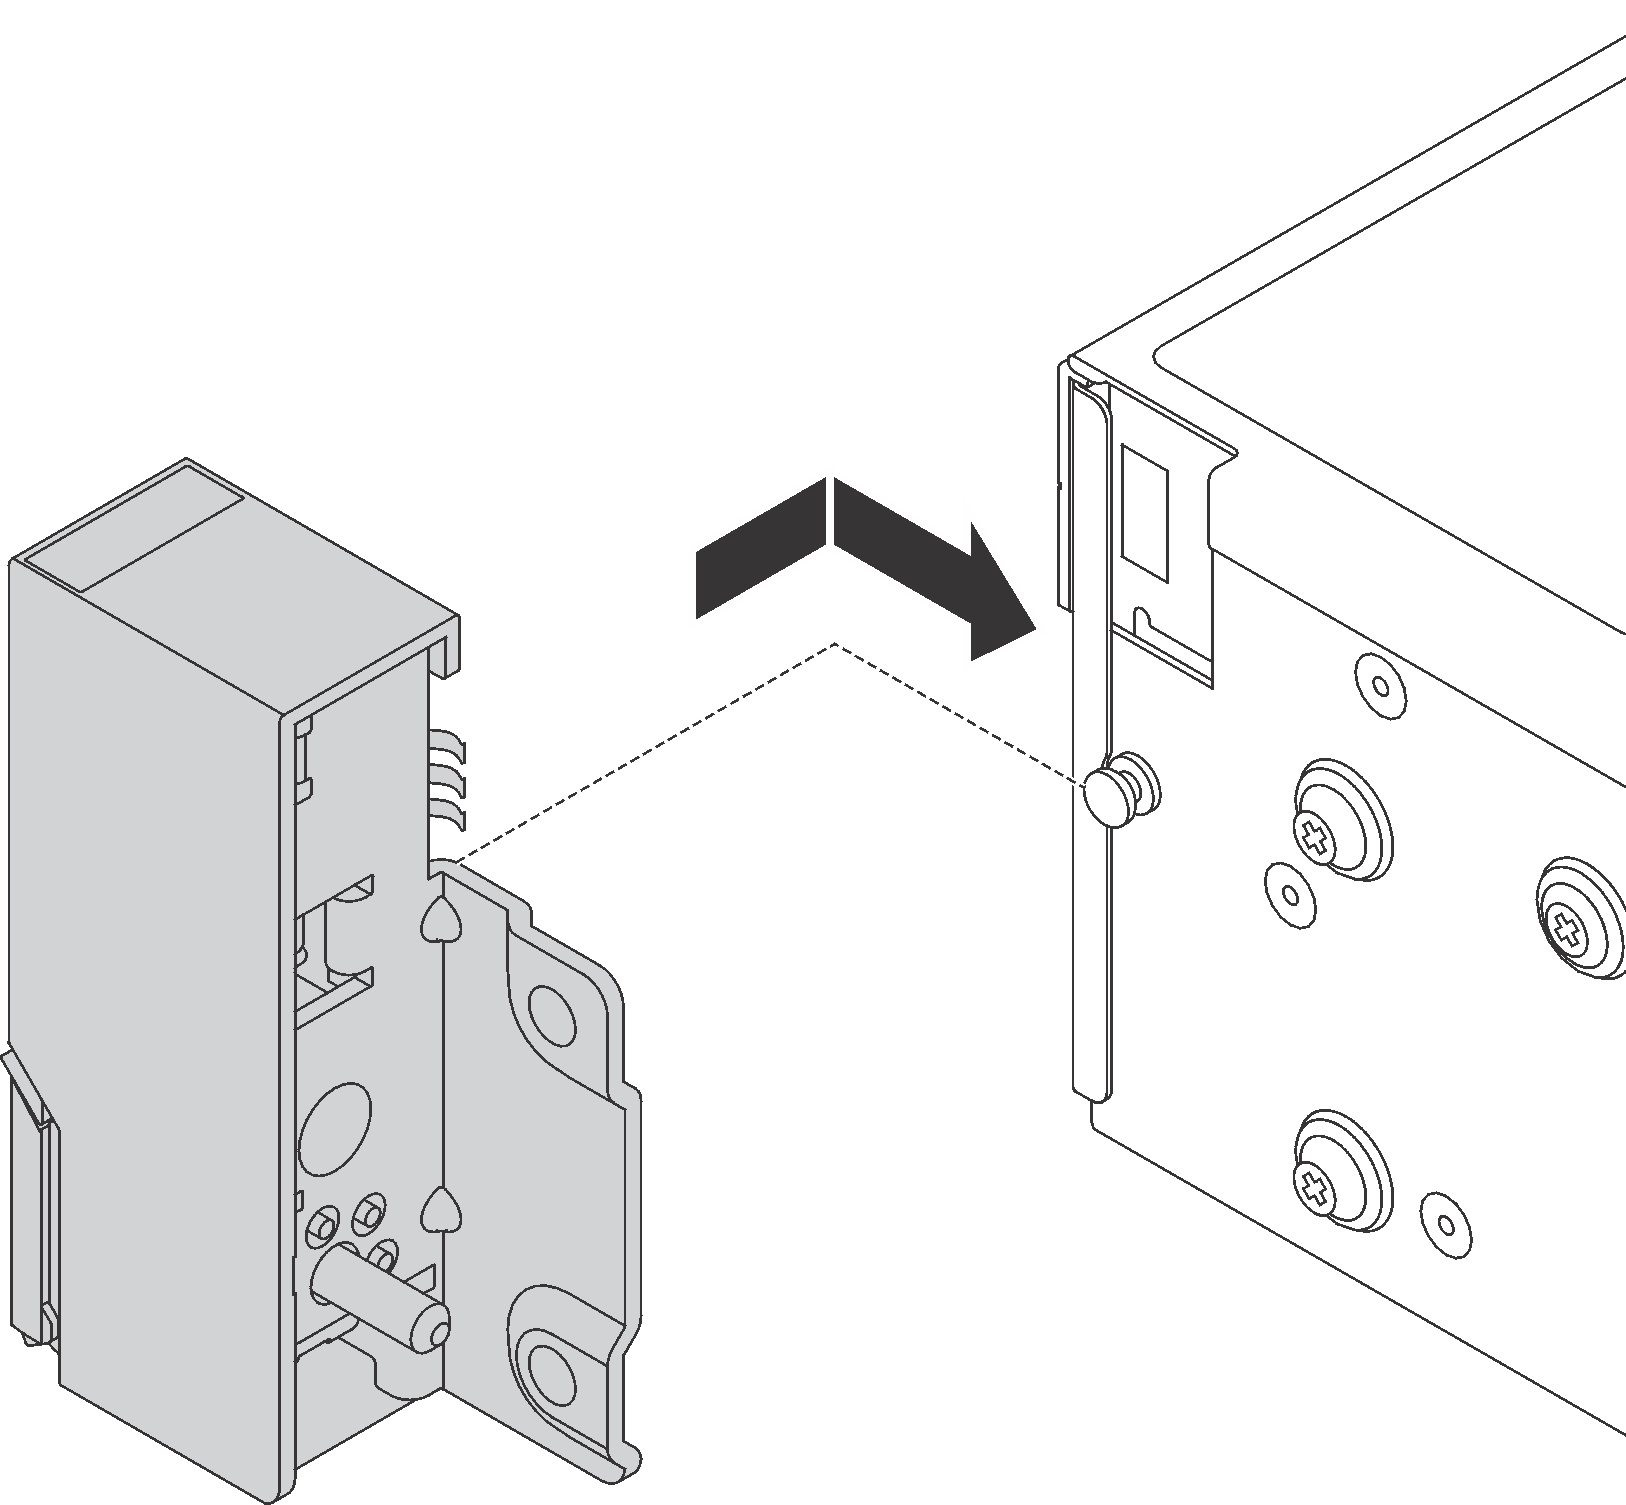
- On each side of the server, align the rack latch with the pin on the chassis. Then, press the rack latch onto the chassis and slightly slide it backward.Figure 1. Rack latch installation
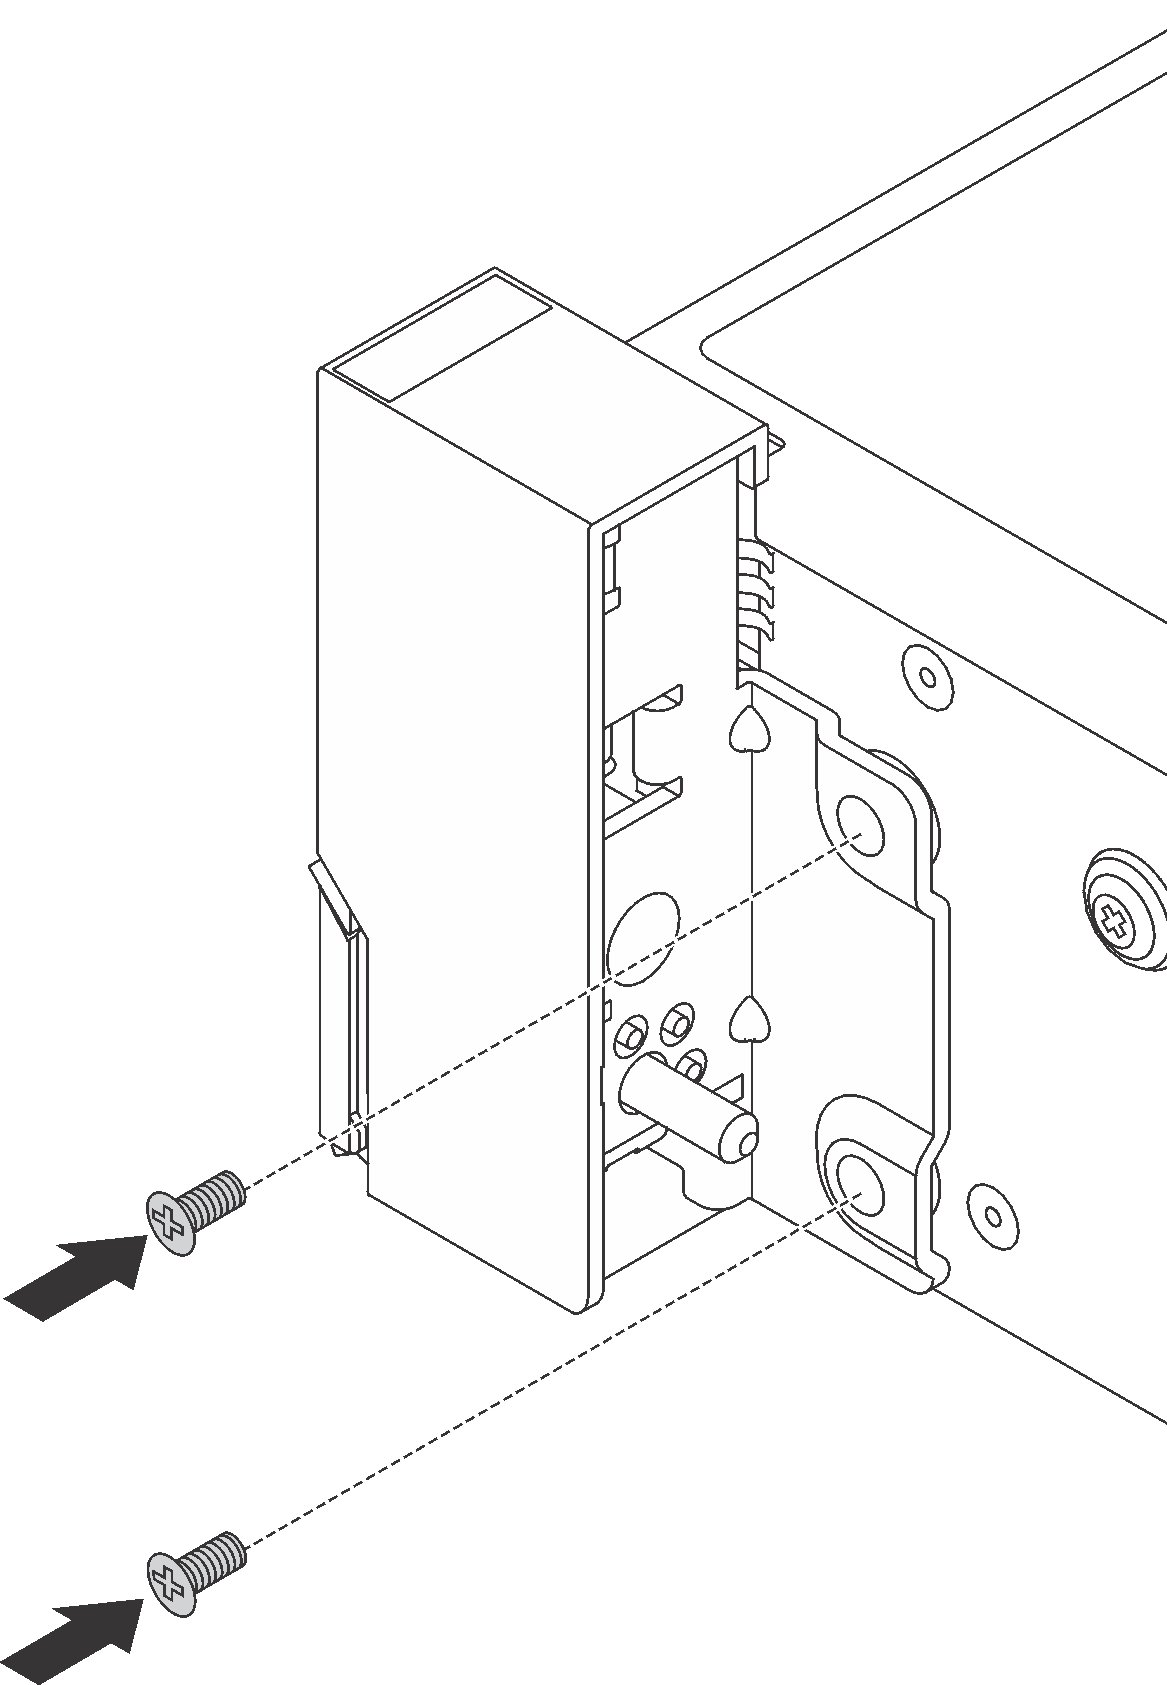
- Install the screws to secure the rack latch on each side of the server.Figure 2. Screws installation
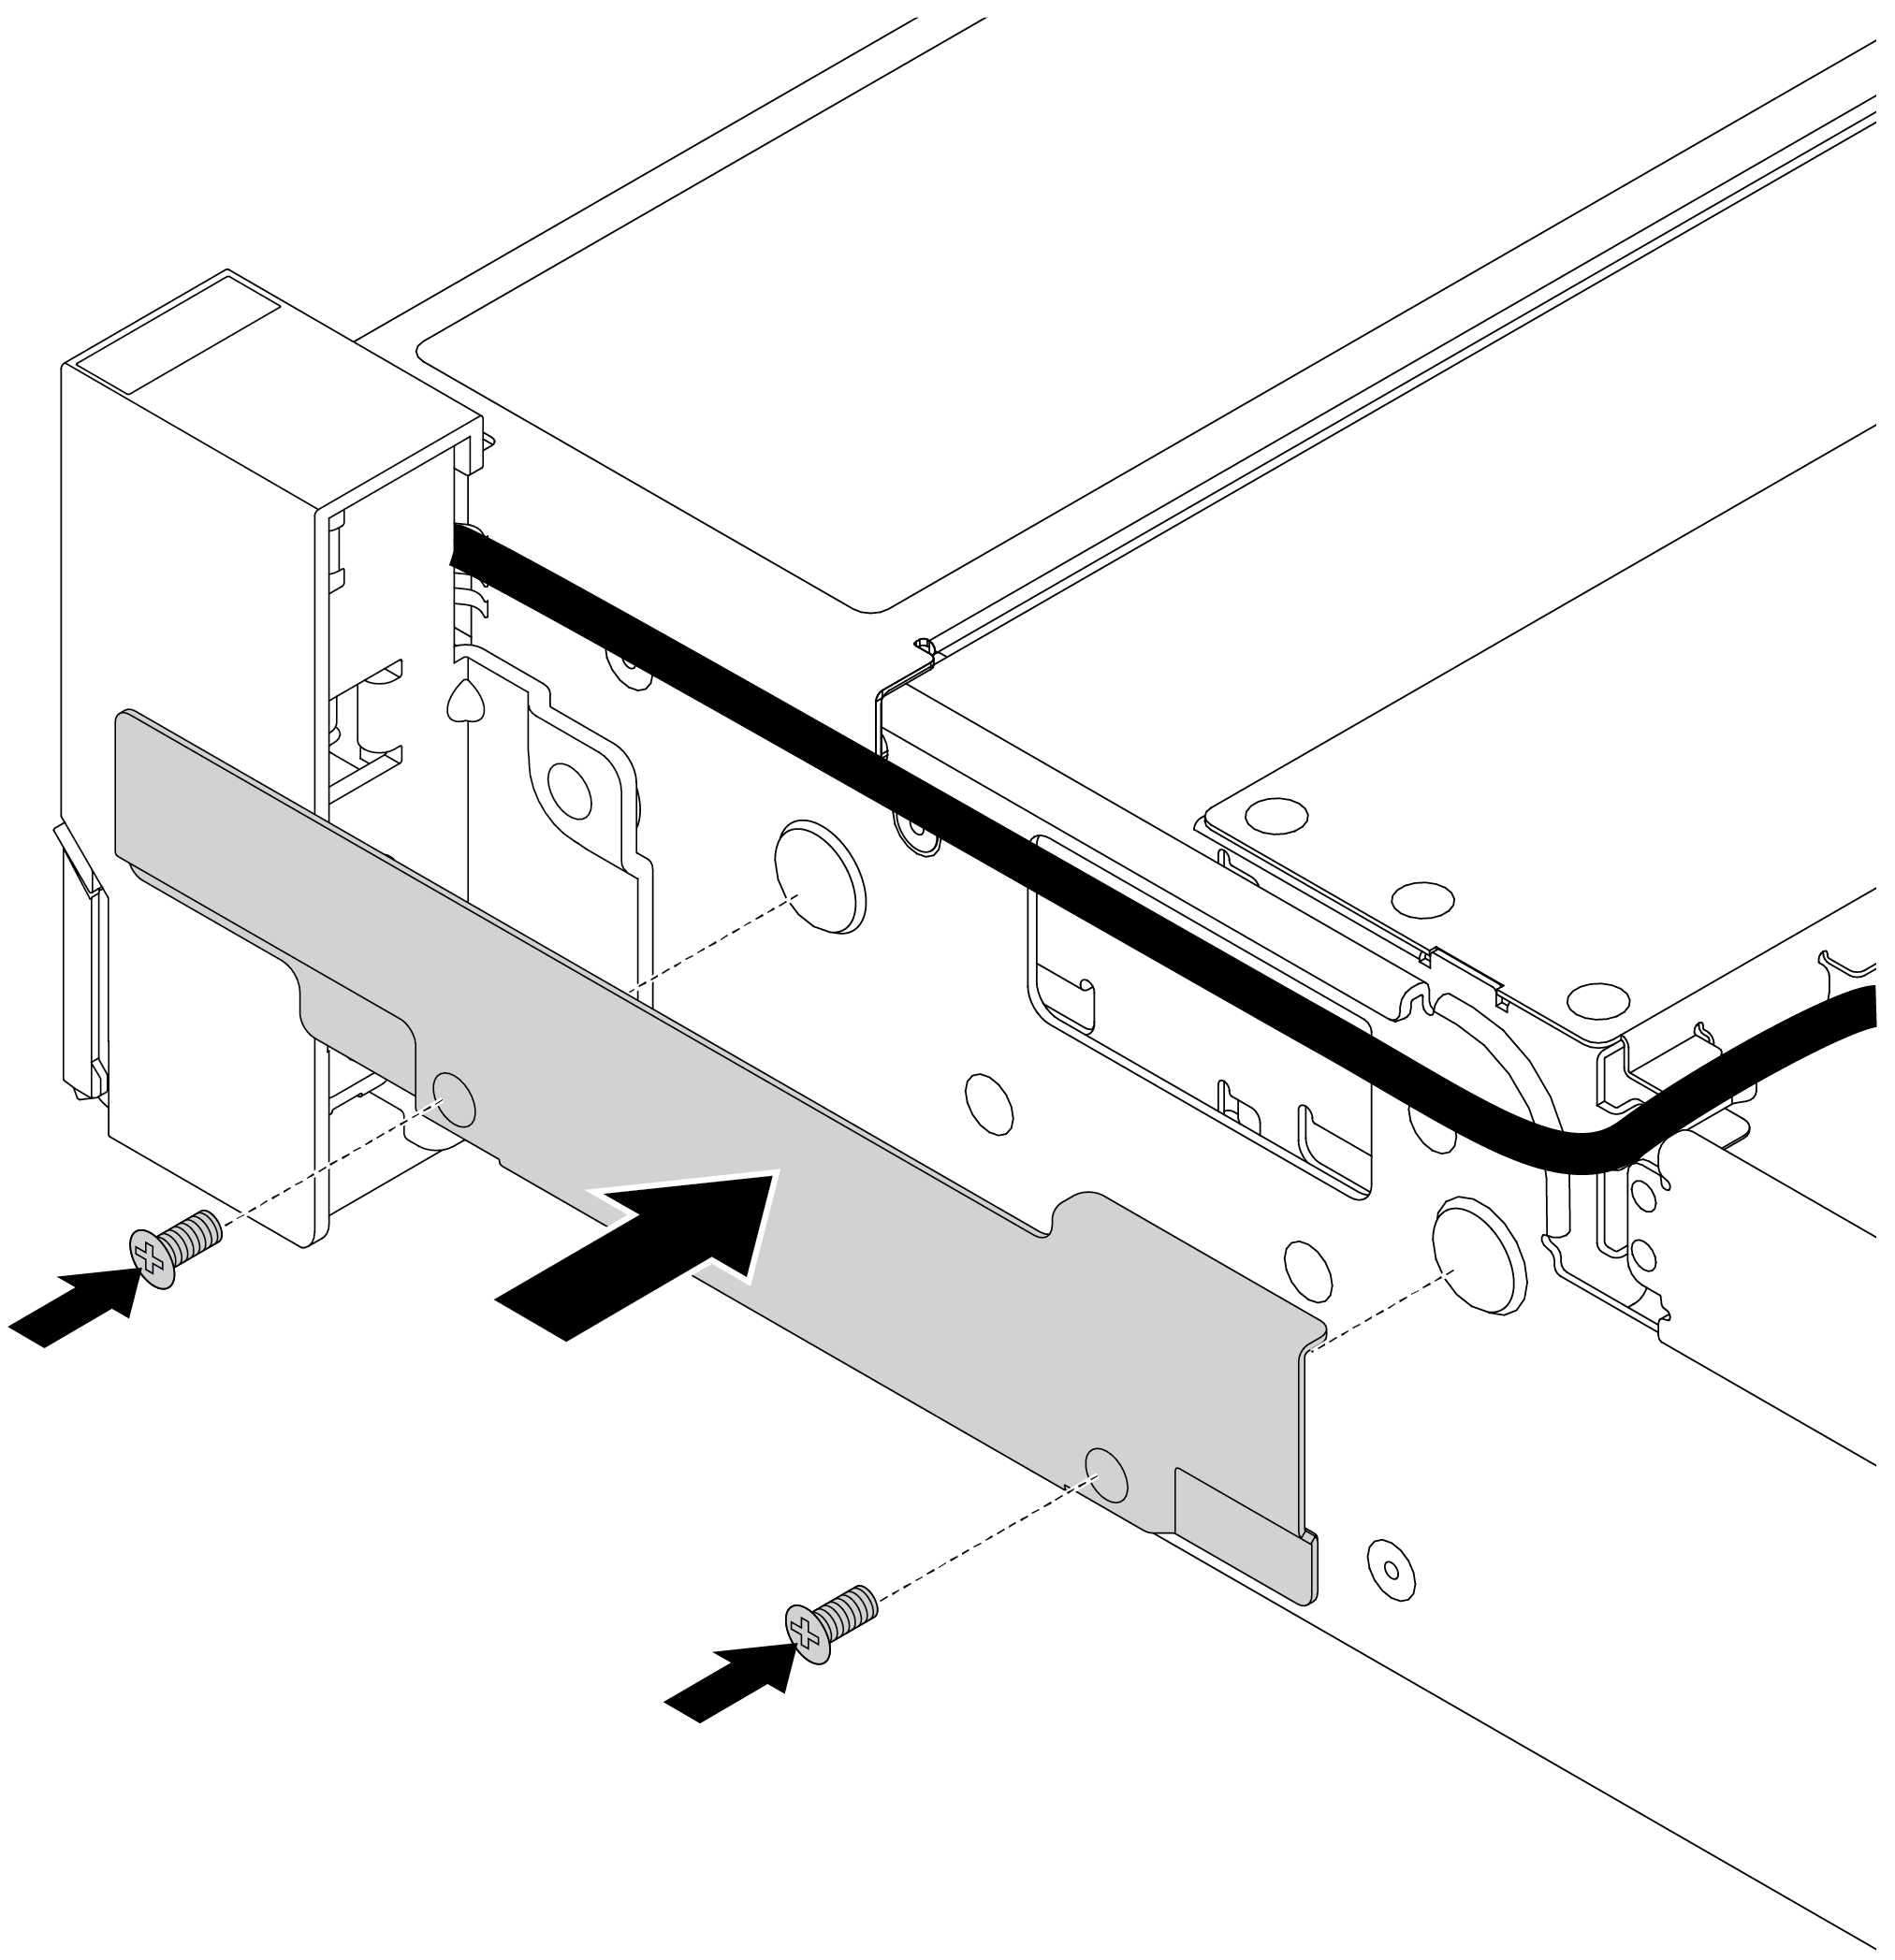
- Route the VGA cable as shown. Then, install the screws to secure the cable retainer.Figure 3. Cable retainer installation
After you finish
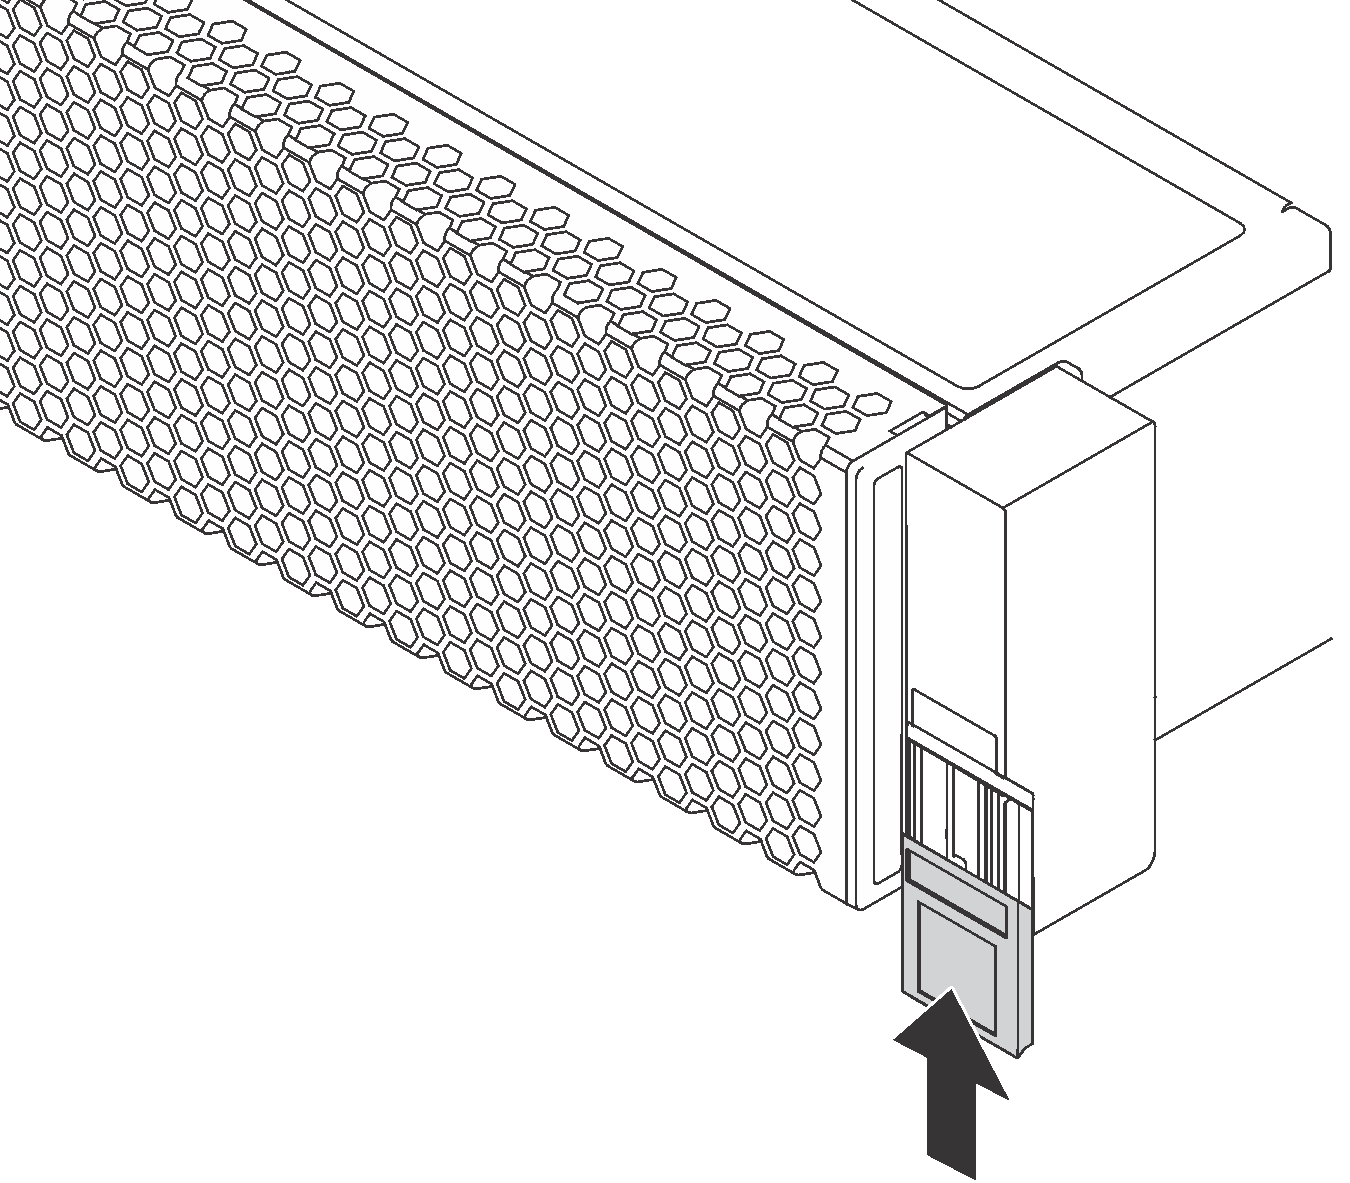
- Install the ID label plate to the right rack latch as shown.Figure 4. ID label plate installation
Complete the parts replacement. See Complete the parts replacement.
Demo video
Give documentation feedback