Install the system battery (CR2032)
Use this information to install the system battery.


When replacing the lithium battery, use only Lenovo specified part number or an equivalent type battery recommended by the manufacturer. If your system has a module containing a lithium battery, replace it only with the same module type made by the same manufacturer. The battery contains lithium and can explode if not properly used, handled, or disposed of.
- Throw or immerse into water
- Heat to more than 100°C (212°F)
- Repair or disassemble
Dispose of the battery as required by local ordinances or regulations.
Lenovo has designed this product with your safety in mind. The lithium system battery must be handled correctly to avoid possible danger. If you replace the system battery, you must adhere to the following instructions.
If you replace the original lithium battery with a heavy-metal battery or a battery with heavy-metal components, be aware of the following environmental consideration. Batteries and accumulators that contain heavy metals must not be disposed of with normal domestic waste. They will be taken back free of charge by the manufacturer, distributor, or representative, to be recycled or disposed of in a proper manner.
After you replace the system battery, you must reconfigure the server and reset the system date and time.
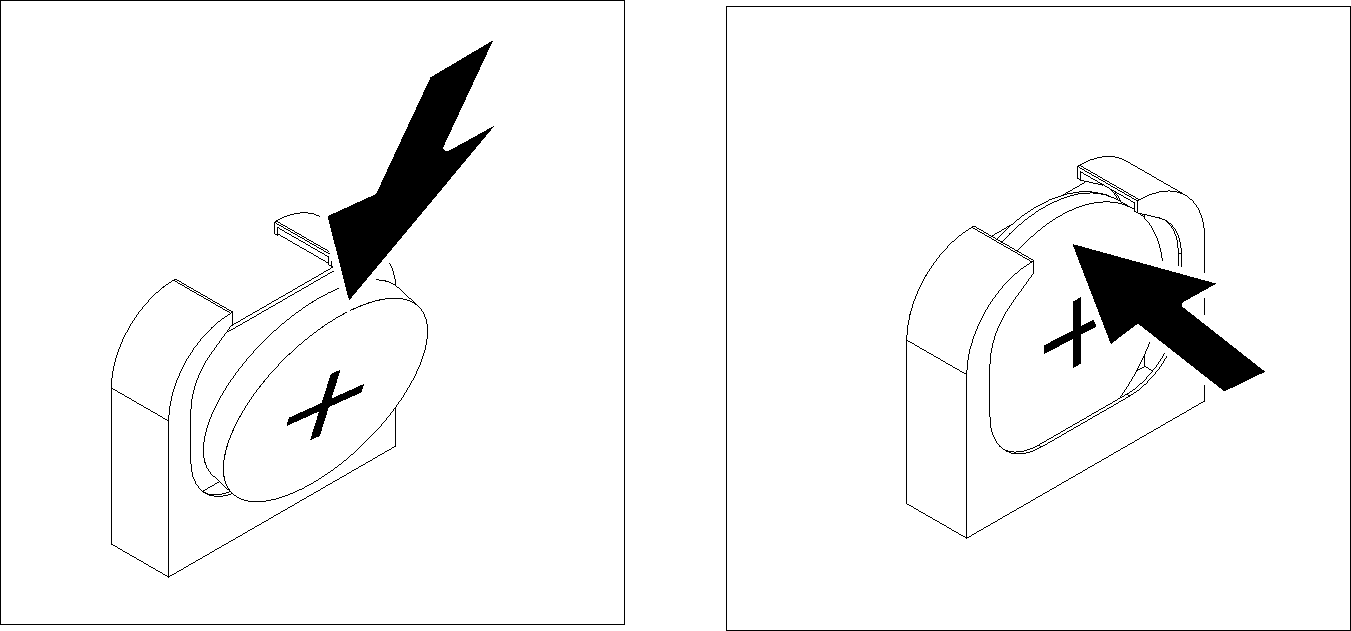
To install the system battery, complete the following steps:
- Install the new system battery as shown. Ensure that the system battery socket holds the battery securely.Figure 1. Installing the system battery
Install the drive cage. See Install the drive cage.
Install the air baffle. See Install the air baffle.
Install the top cover. See Install the top cover.
Push up on the latches on the slide rails and push the server back into the rack.
Tighten the two captive screws located on the front of the server to secure the server in the rack.
NoteAlways secure the system in the rack if your are moving the rack.Connect all cables to the ports on the front of the server, including the management port, if necessary, and all PCIe adapter ports. The management port and PCIe adapter ports are located in the I/O expansion cage.
Connect power cords to both power supplies, which are located at the rear of the server.
Use F1 Setup to set the date, time, and any passwords.
Demo video