
Remove the serial port

Use this information to remove the serial port.

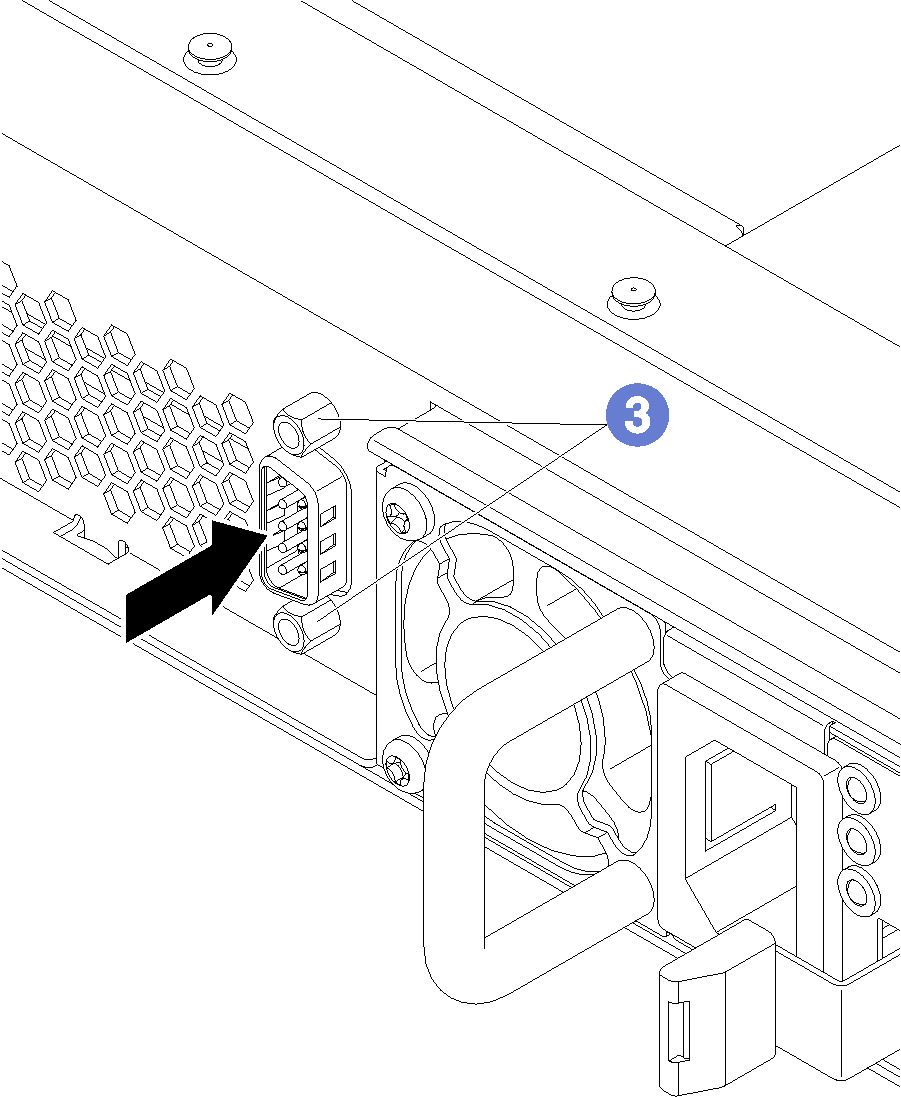
To remove the serial port, complete the following steps:

Figure 1. Removing the serial port
Graphic depicting serial port removal

  1. Power off the server. See Power off the server.
  2. Disconnect power cords from both power supplies, which are located in the rear of the server.
  3. Remove the serial port retention screws on the rear of the server.
  4. Record the location of the cables in the front of the PCIe adapters that are installed in the I/O expansion cage at the front of the server, and disconnect the cables.
  5. Disconnect the management port cable from the management port in the I/O expansion cage, if necessary.
  6. Loosen the two captive screws located on the front of the server. If necessary, use a P2 screwdriver to loosen the screws.
  7. Pull the server forward until the slide rails click into place.
  8. Remove the top cover. See Remove the top cover.
  9. Remove the drive cage. See Remove the drive cage.
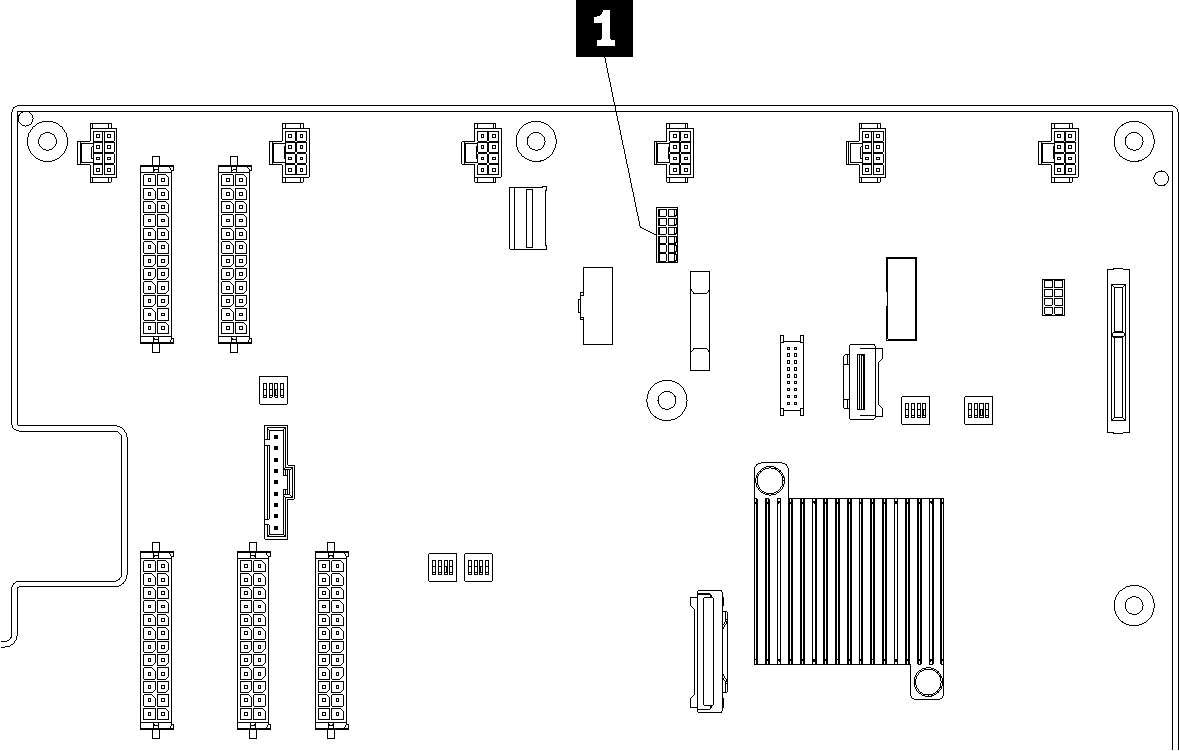
  10. Disconnect the cable of the serial port from the connector 1 on the system board.
    Figure 2. Serial port cable connector on the system board
    Graphic depicting serial port removal

After removing the serial port, install a new serial port.