Install the serial port

Use this information to install the serial port.

Before installing the serial port:
  1. Touch the static-protective package that contains the new serial port to any unpainted surface on the outside of the server. Then, take the new serial port out of the package and place it on a static-protective surface.

To install the serial port, complete the following steps:
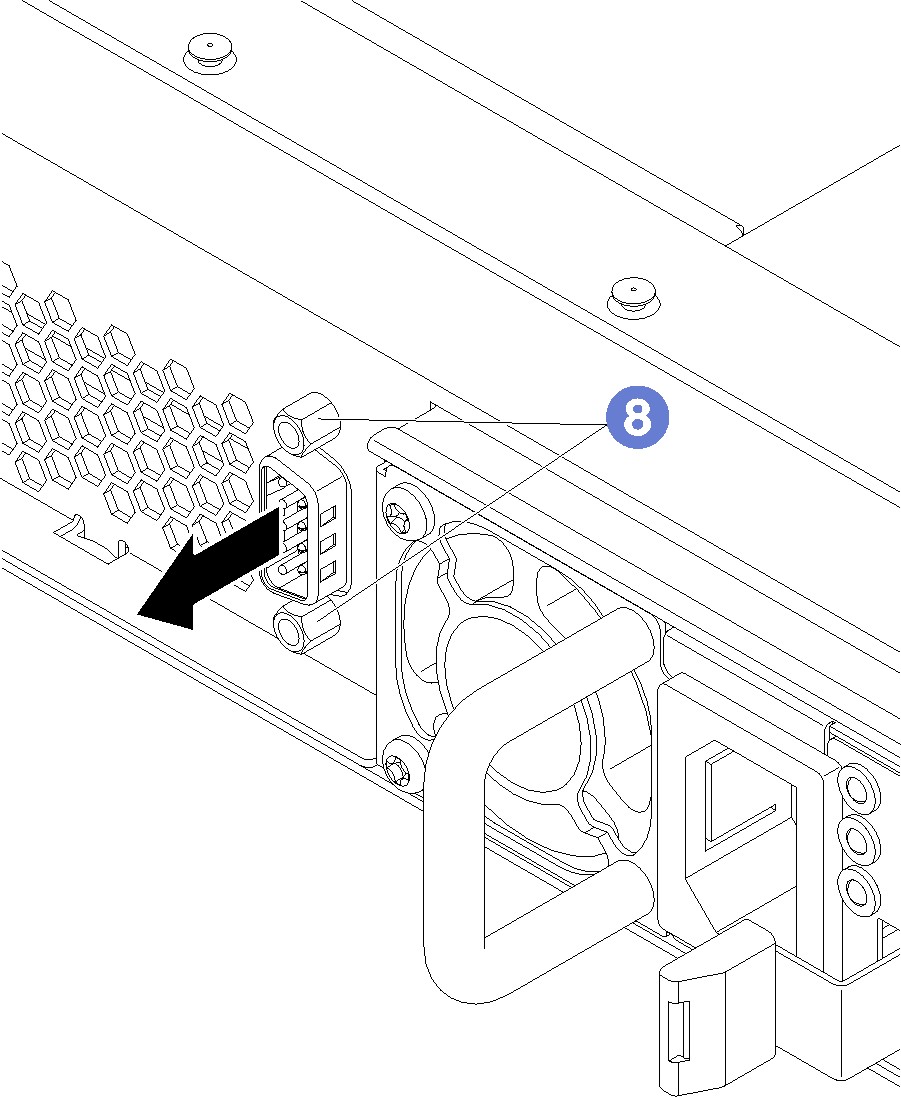
Figure 1. Installing the serial port
Graphic depicting the installation of the serial port

  1. Slide the serial port into the serial port hole in the chassis from inside of the server chassis.
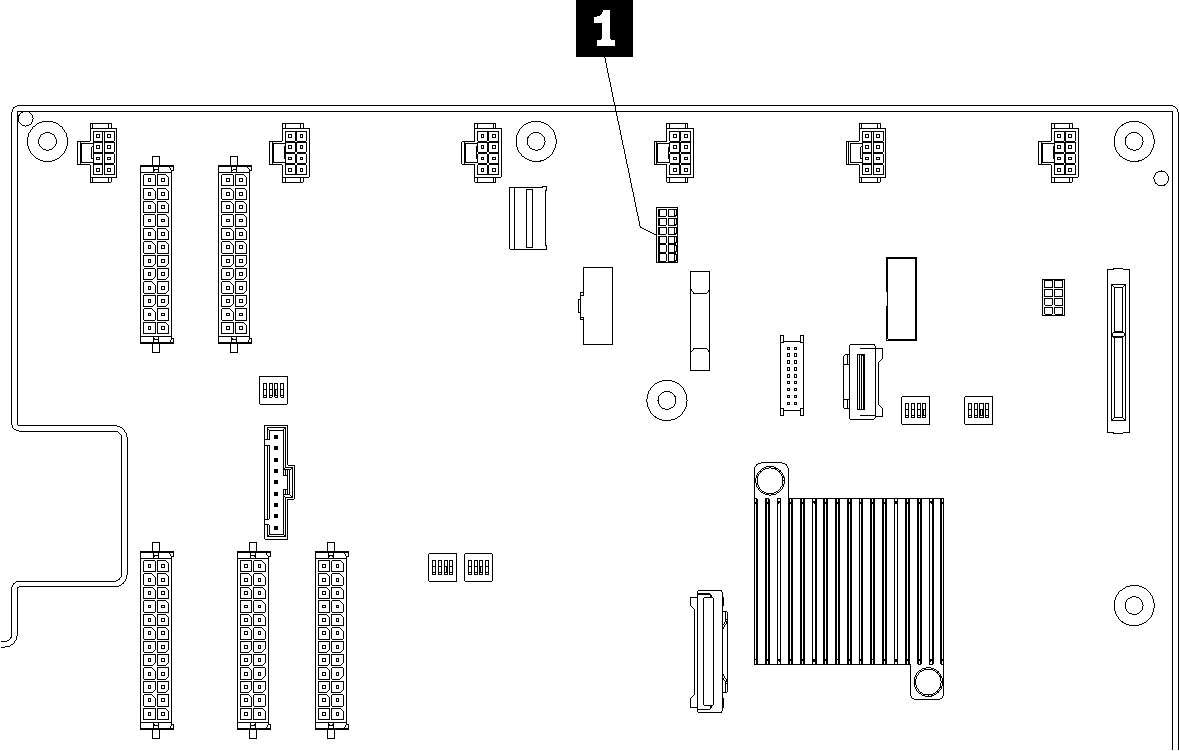
  2. Connect the cable of the serial port to the connector 1 on the system board.
    Figure 2. Serial port cable connector on the system board
    Graphic depicting serial port removal
  3. Install the drive cage. See Install the drive cage.
  4. Install the top cover. See Install the top cover.
  5. Push up on the latches on the slide rails and push the server back into the rack.
  6. Tighten the two captive screws located on the front of the server to secure the server in the rack.
    Note
    Always secure the system in the rack if your are moving the rack.
  7. Connect all cables to the ports on the front of the server, including the management port, if necessary, and all PCIe adapter ports. The management port and PCIe adapter ports are located in the I/O expansion cage.
  8. Install the serial port screws to secure the serial port to the chassis.
  9. Connect power cords to both power supplies, which are located at the rear of the server.
To enable the serial port:
  • For Linux operating system:

    Open the ipmitool and enter the following command to disable the Serial over LAN (SOL) feature:

    ipmitool -I lanplus -H IP -U USERID -P PASSW0RD sol deactivate

    where:
    IP
    The IP address of the XCC.
    USERID and PASSW0RD
    Credentials to access the XCC.
  • For Microsoft Windows operating system:

    1. Open the ipmitool and enter the following command to disable the SOL feature:

      ipmitool -I lanplus -H IP -U USERID -P PASSW0RD sol deactivate

      IP
      The IP address of the XCC.
      USERID and PASSW0RD
      Credentials to access the XCC.
    2. Open Windows PowerShell and enter the following command to disable Emergency Management Services (EMS):

      bcdedit /ems no

    3. Restart the server to ensure that the EMS setting takes effect.