Install the server to rack
Follow instructions in this section to install the server to the rack.
Based on the configuration, see corresponding instructions below for proper installation procedure:
ThinkSystem SR670 V2/SR675 V3 Toolless Slide Rail Kit
About this task
Attention
- Read Installation Guidelines and Safety inspection checklist to ensure that you work safely.
- Power off the server and peripheral devices and disconnect the power cords and all external cables. See Power off the server.
CAUTION
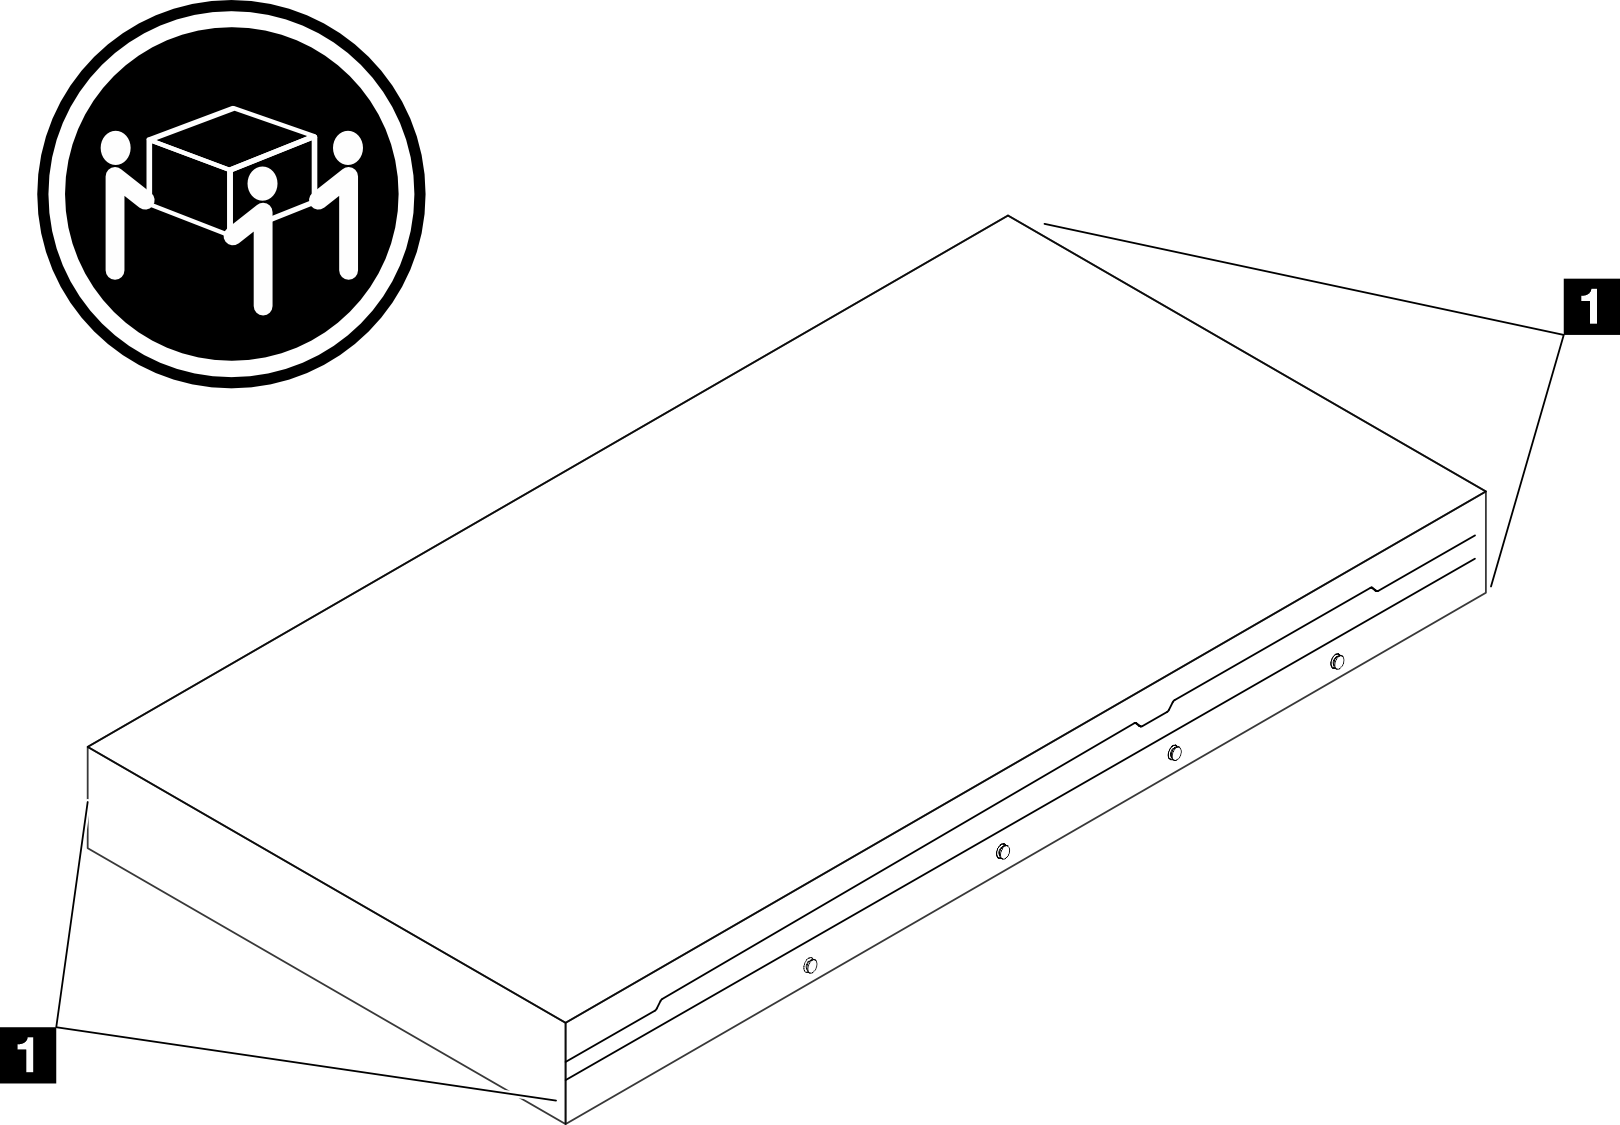
Make sure to have three people operate the server installation procedures to prevent injury.
S036
 |  |
| 18 - 32 kg (39 - 70 lb) | 32 - 55 kg (70 - 121 lb) |
CAUTION
Use safe practices when lifting.
R006
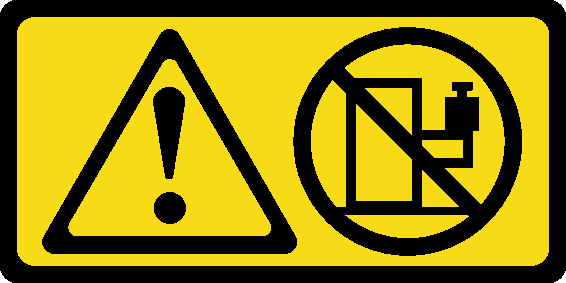
CAUTION
Do not place any object on top of a rack-mounted device unless that rack-mounted device is intended for use as a shelf.
Procedure
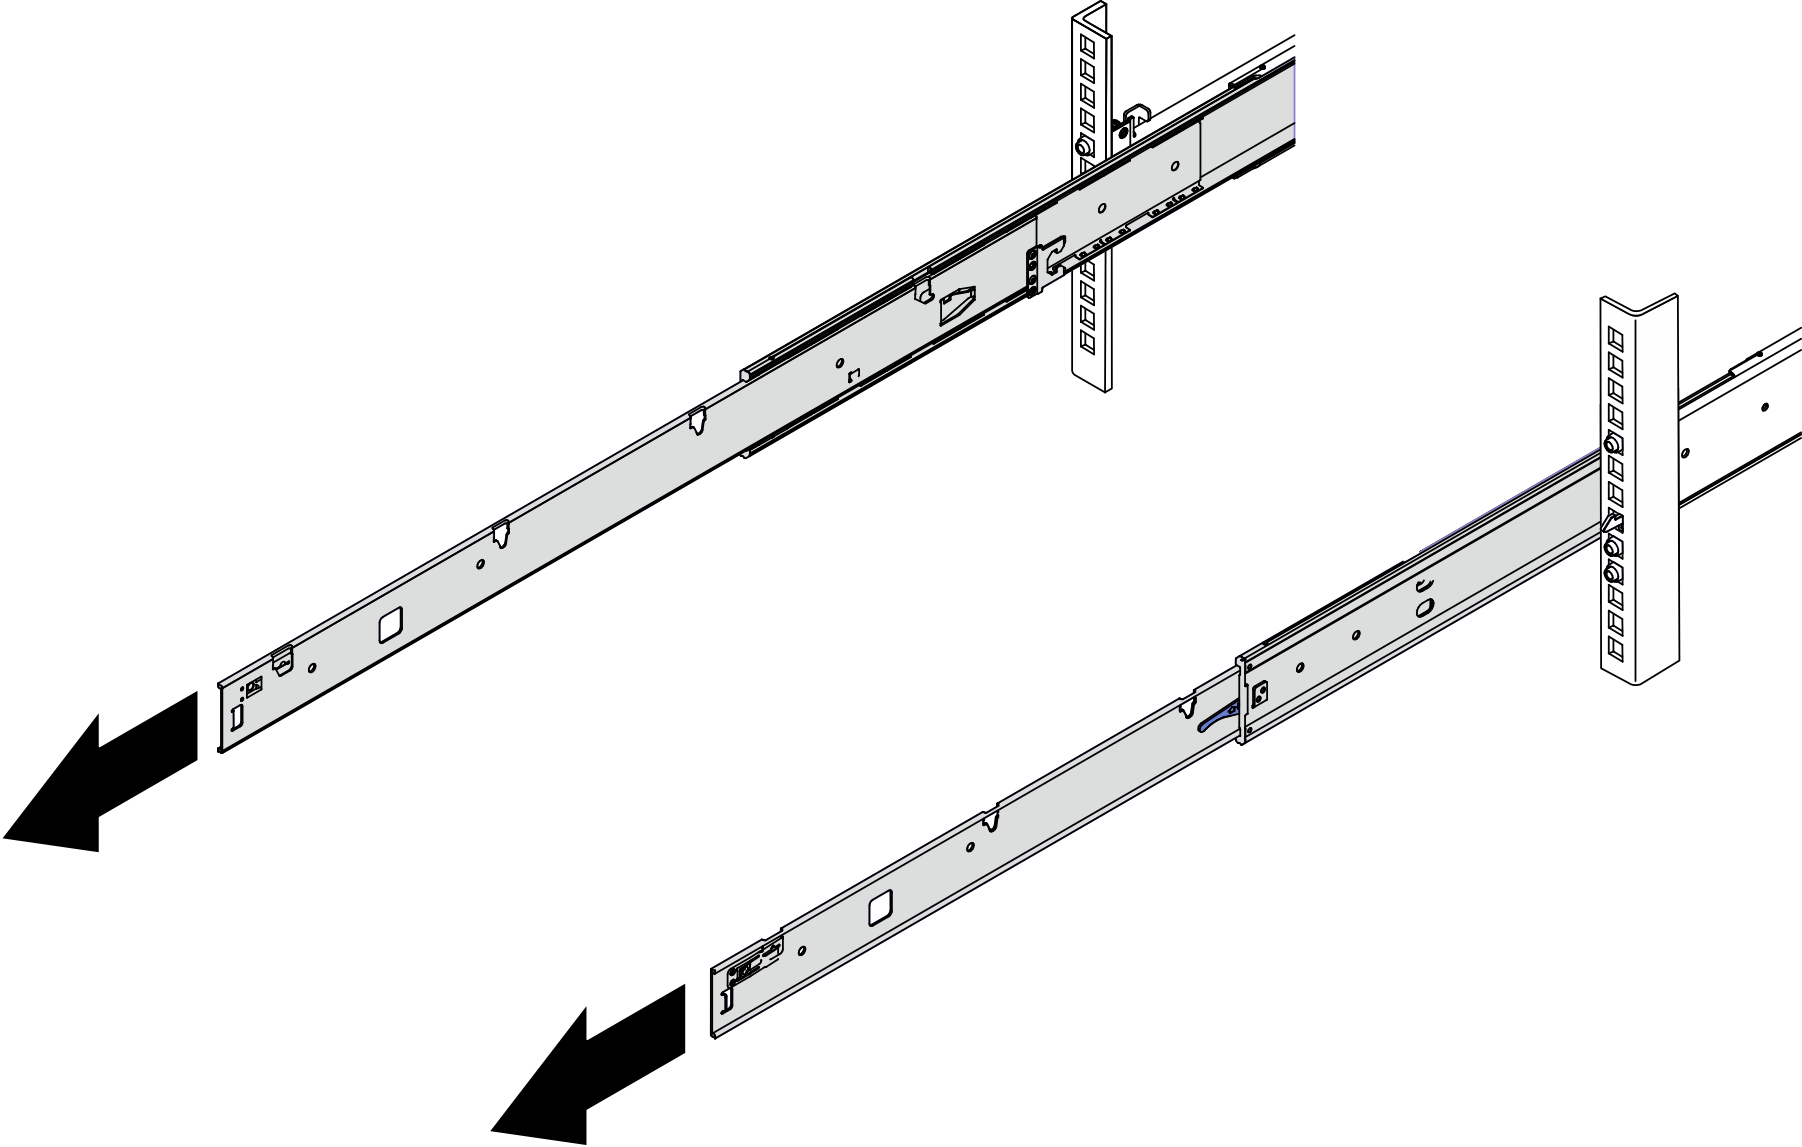
- From the front of the rack, pull the rails all the way out until they stop AttentionYou can only install the server successfully when the rails are fully extended.Figure 1. Pulling out the rails
Rack front
- Carefully lift up the server with three people.CAUTIONMake sure three people are lifting the sever by holding the lift pointsFigure 2. Lifting up the server
Rack front
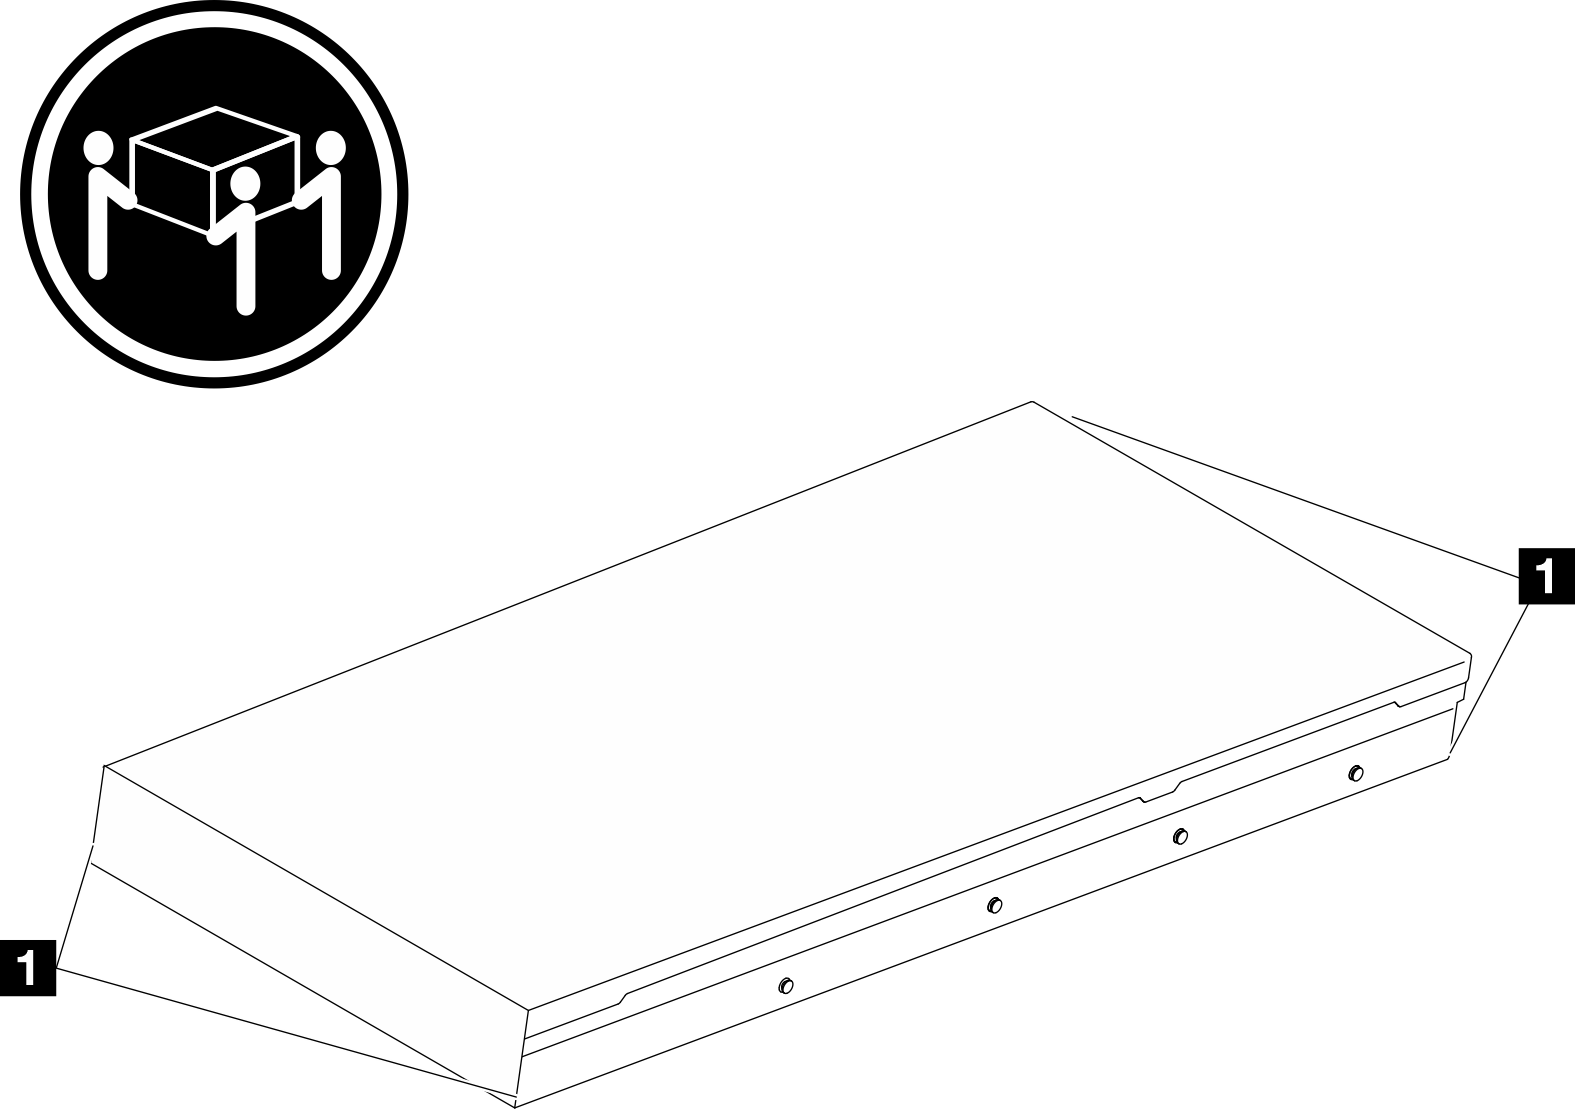
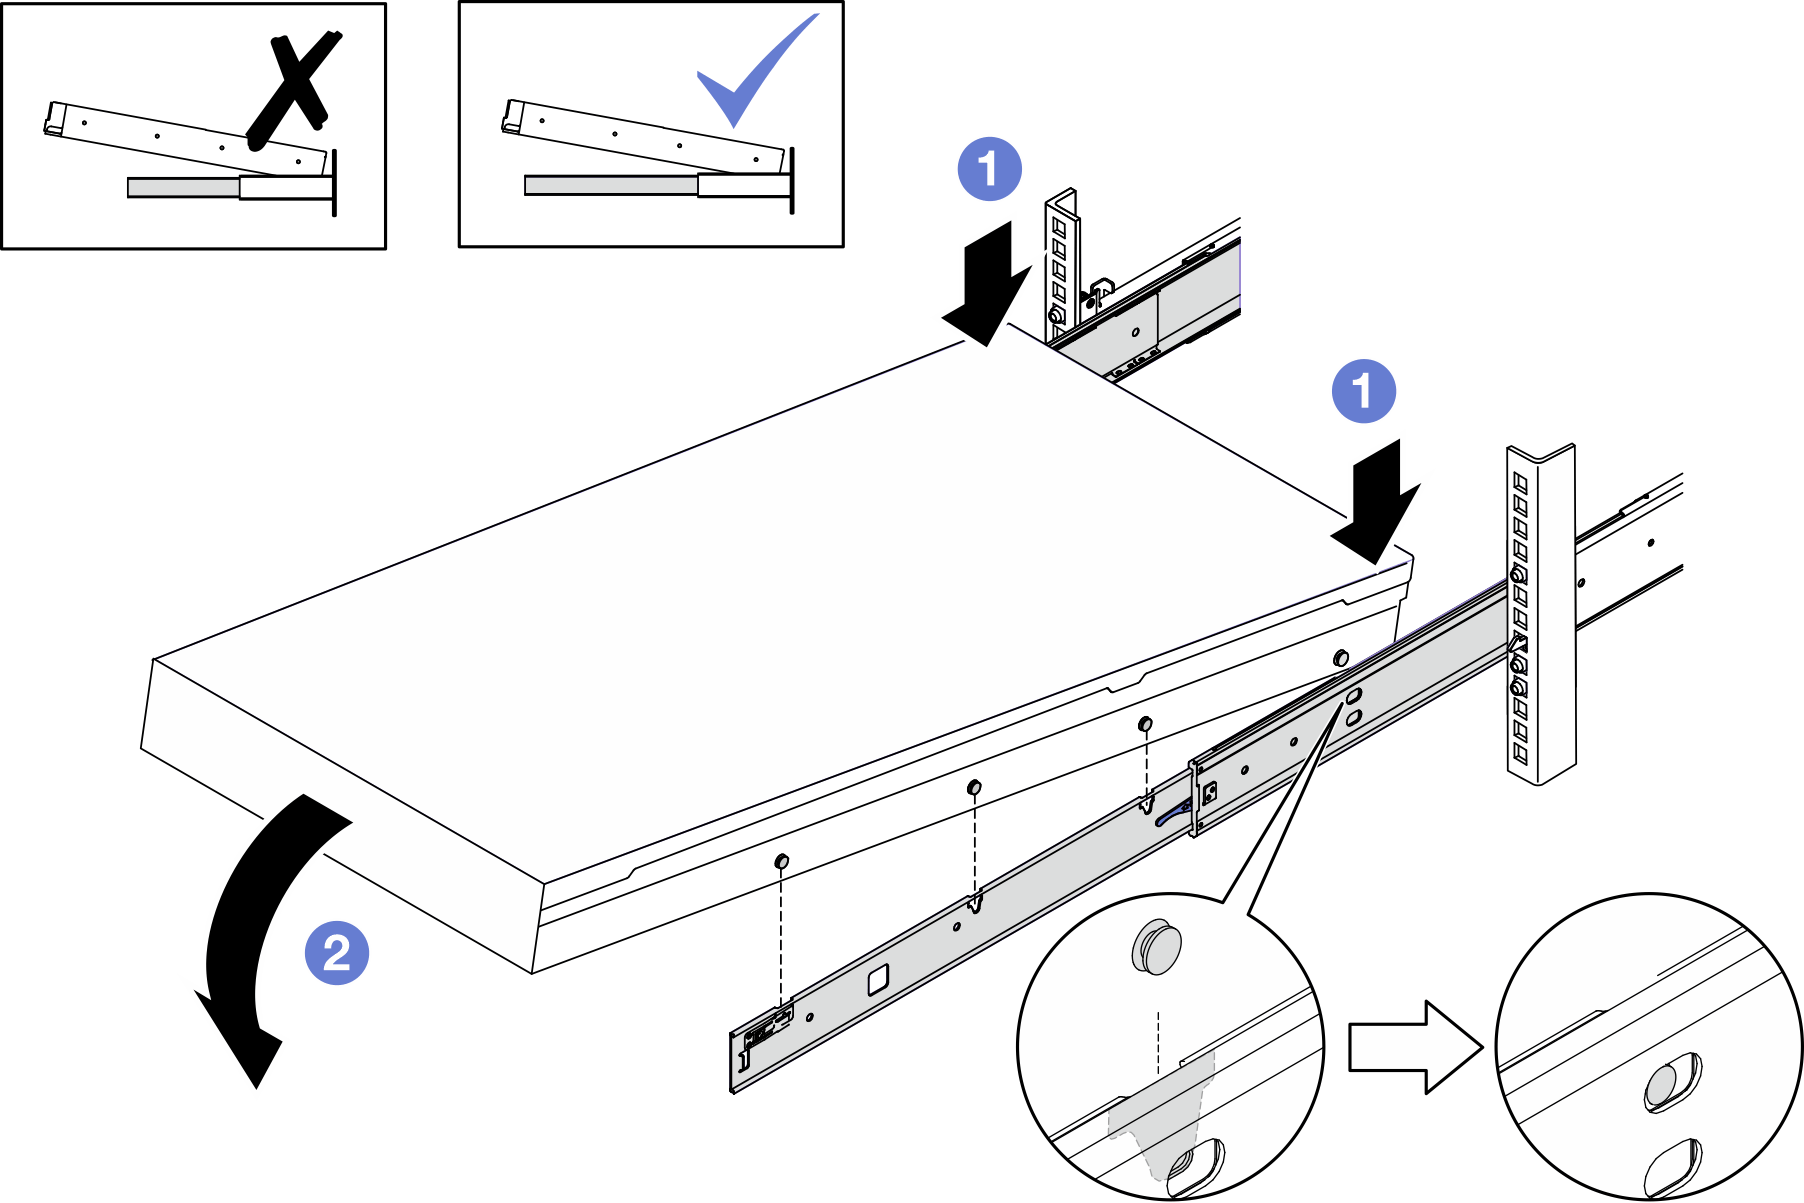
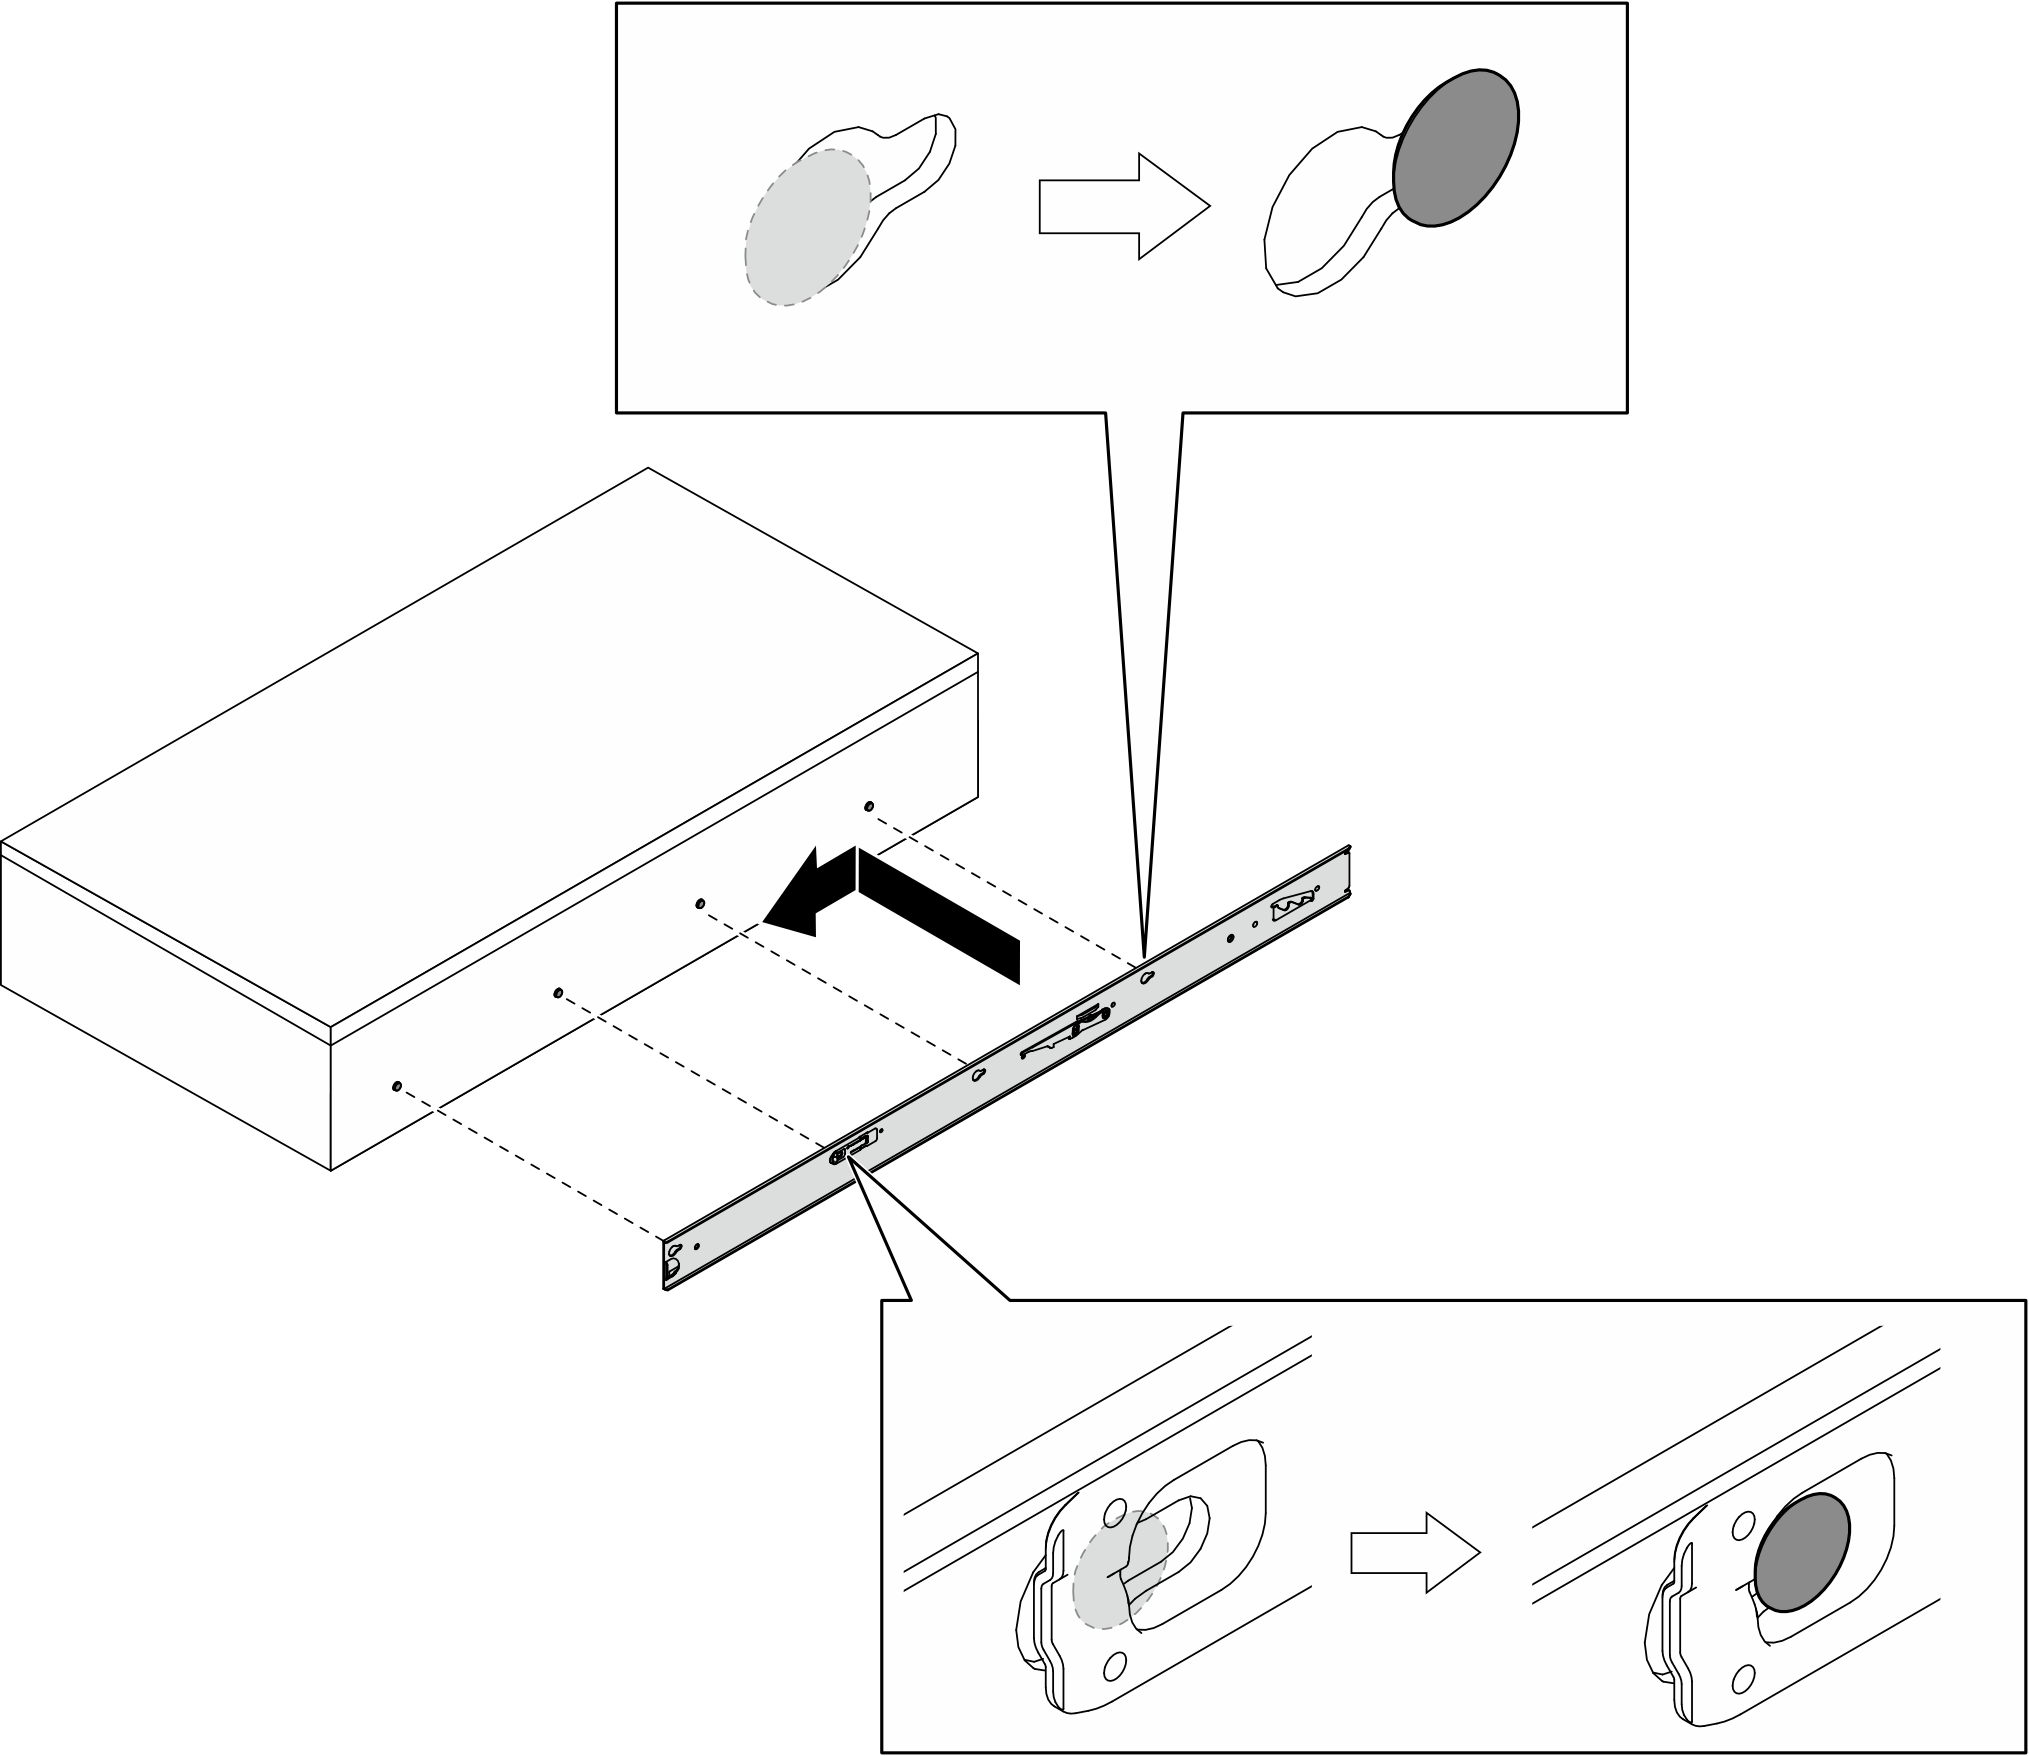
1 Lift point - From the front of the rack, install server into the rails.
 Tilt the server and slowly lower the rear end; then, push the rails toward the server and make sure the farthest nailheads on server’s left and right side go into the slots on the rail.
 Slowly lower the server down and make sure the other 3 nailheads on server’s left and right side slip into corresponding slots.NoteInspect the sides of the rails to make sure the nailheads are placed in the slots.AttentionYou can only install the server successfully when the rails are fully extended.Figure 3. Installing the server into the rails
Rack front
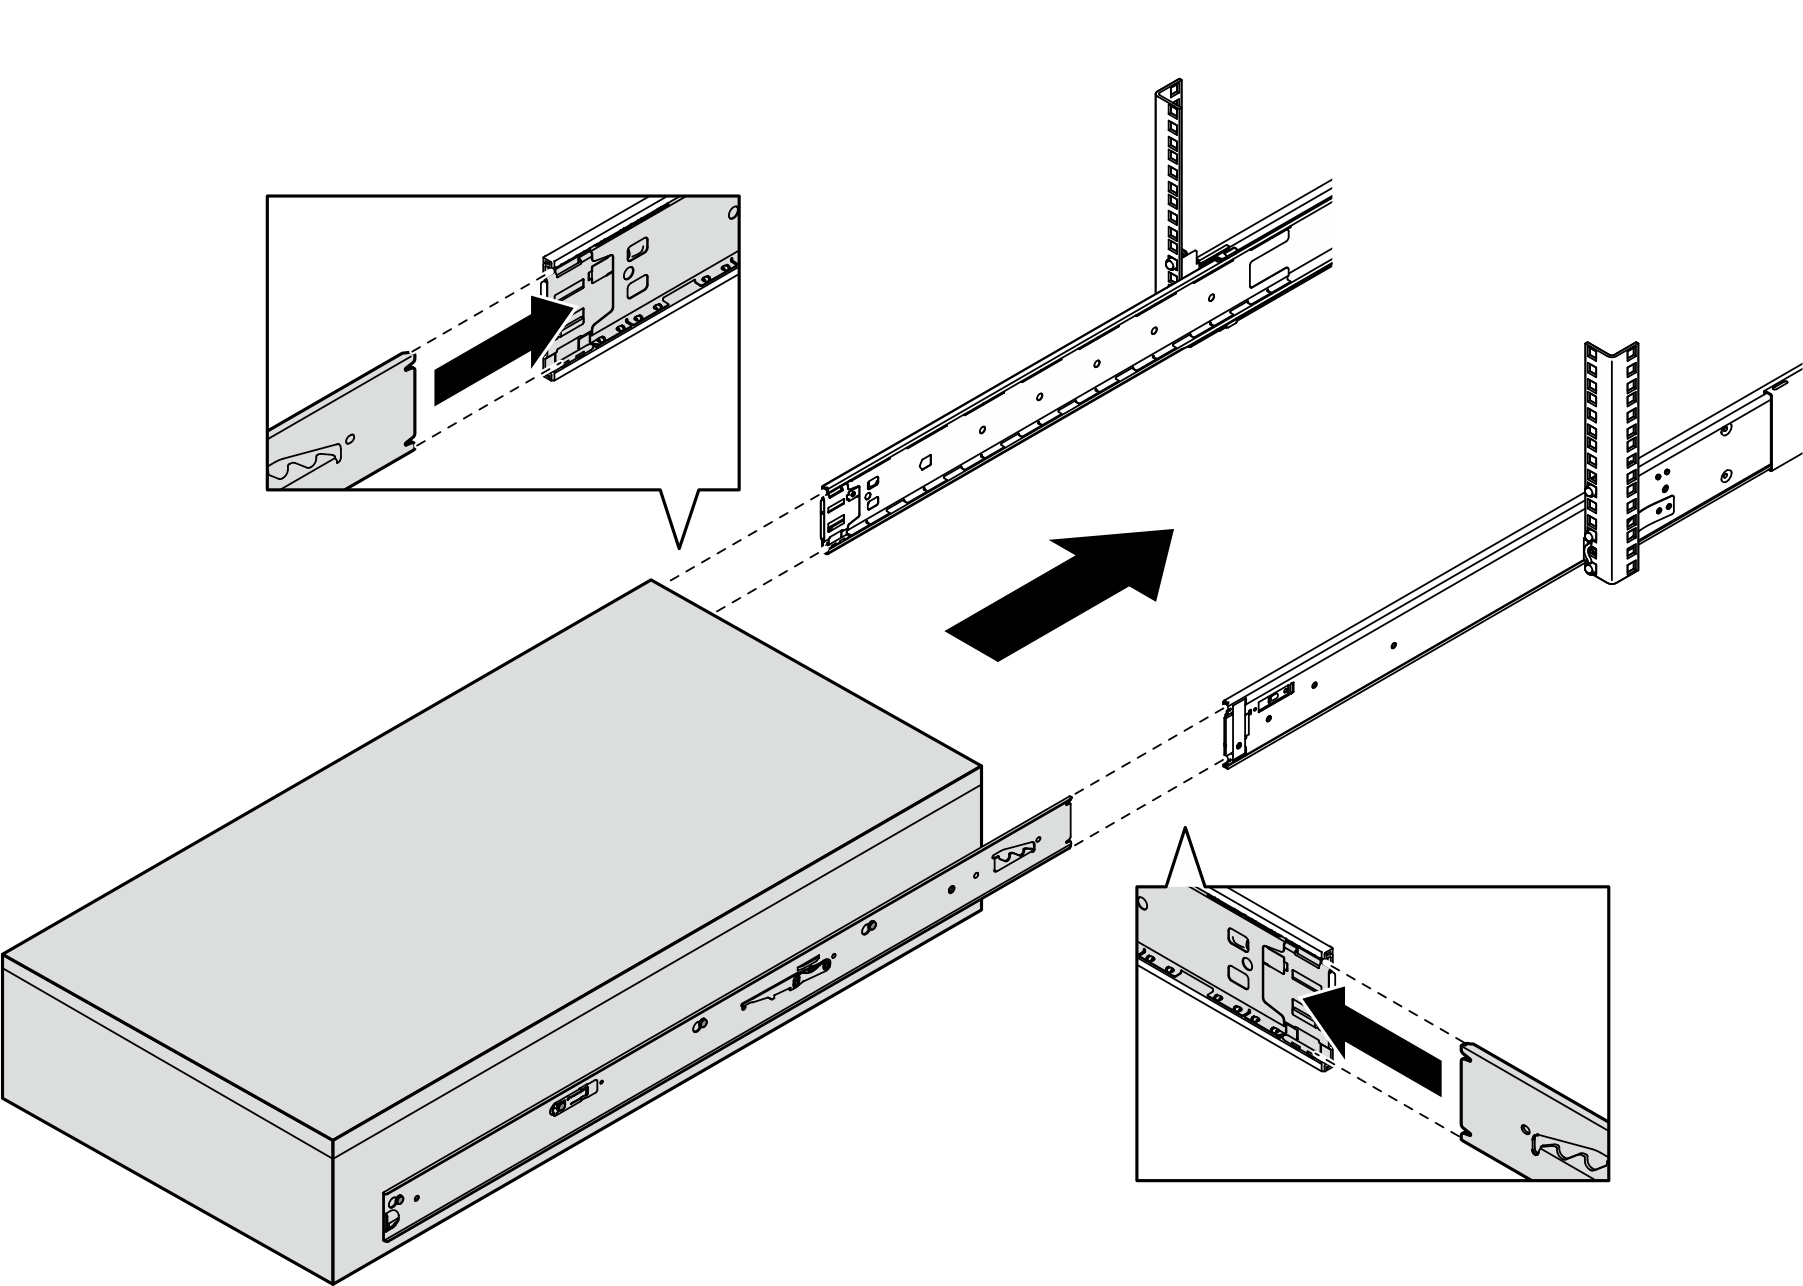
- Slide the server into rack.
- Push up the latches on the rails.
- Push the server all the way into the rack.Figure 4. Installing the server into the rack
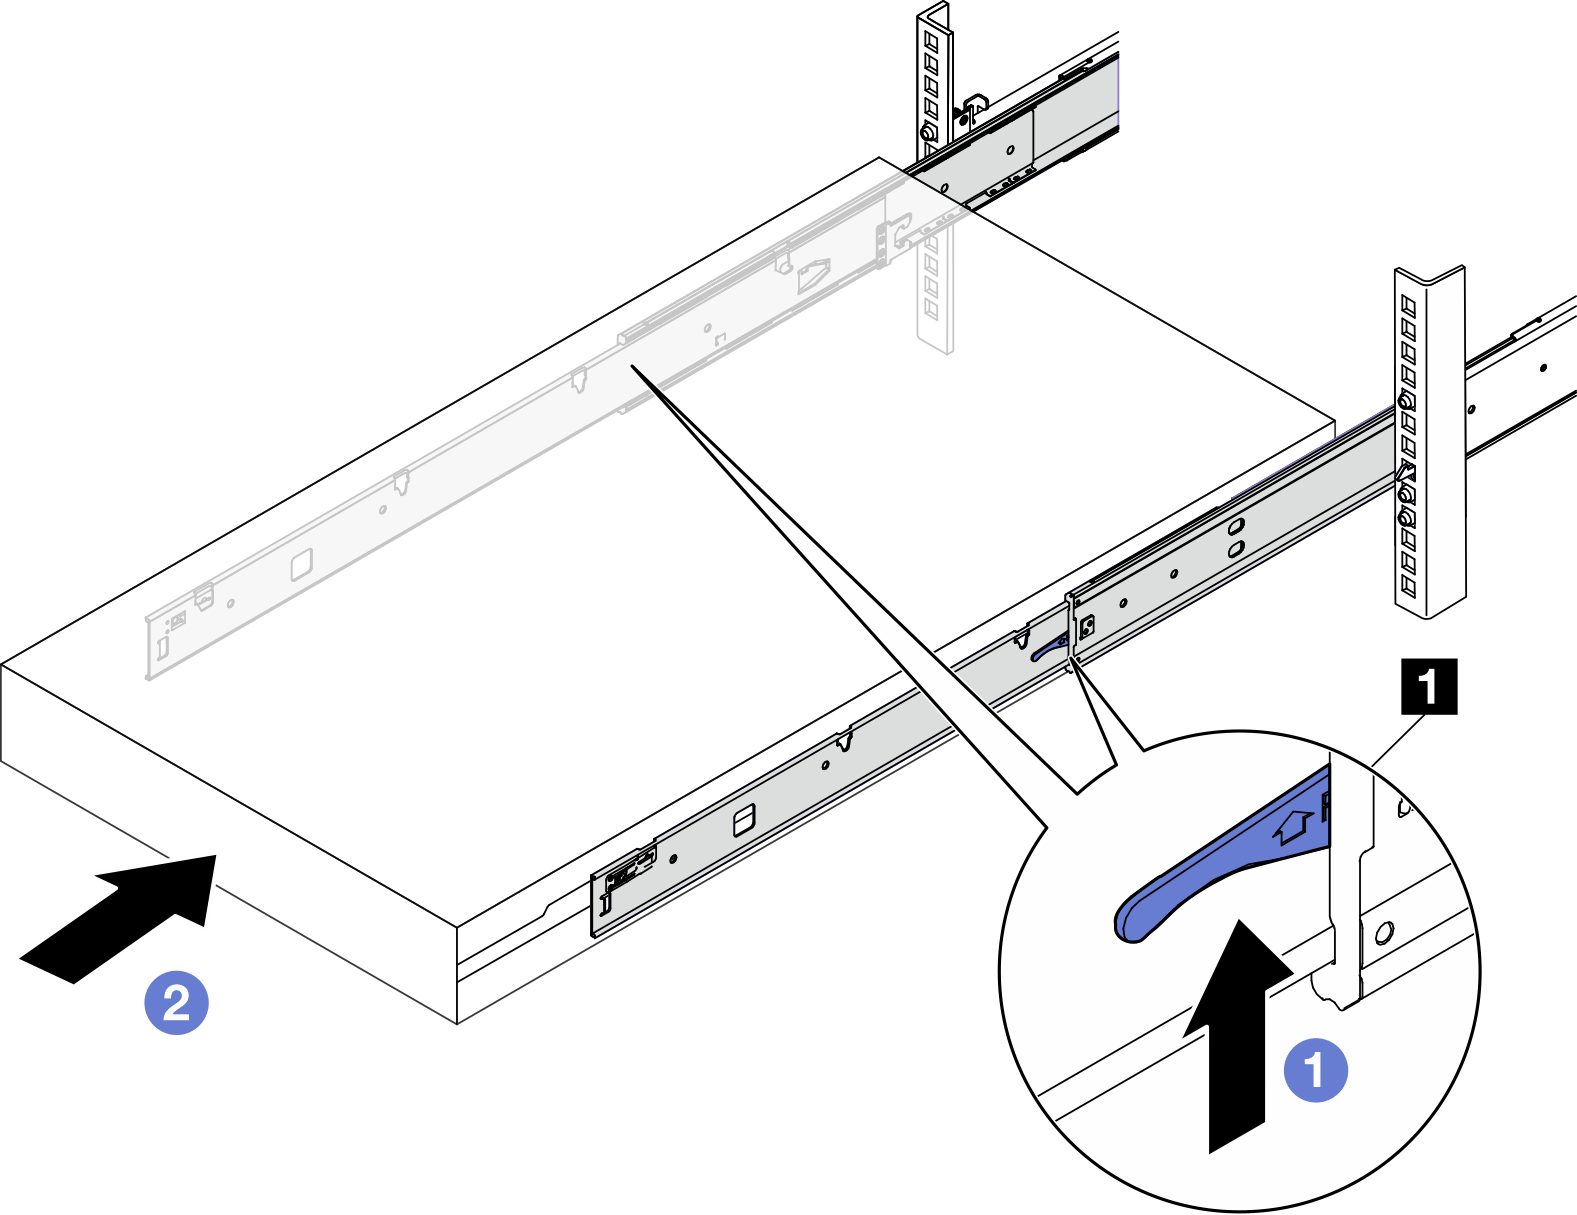
1 Latch
- (Optional) Secure the server to the rack.
- Secure the server to the rear of the rack. Select the first rail you want to secure. Insert a washer and M5 screw; then, fasten the M5 screw. Repeat to secure the other rail.Figure 5. Securing the server to the rear of the rack
Rack rear
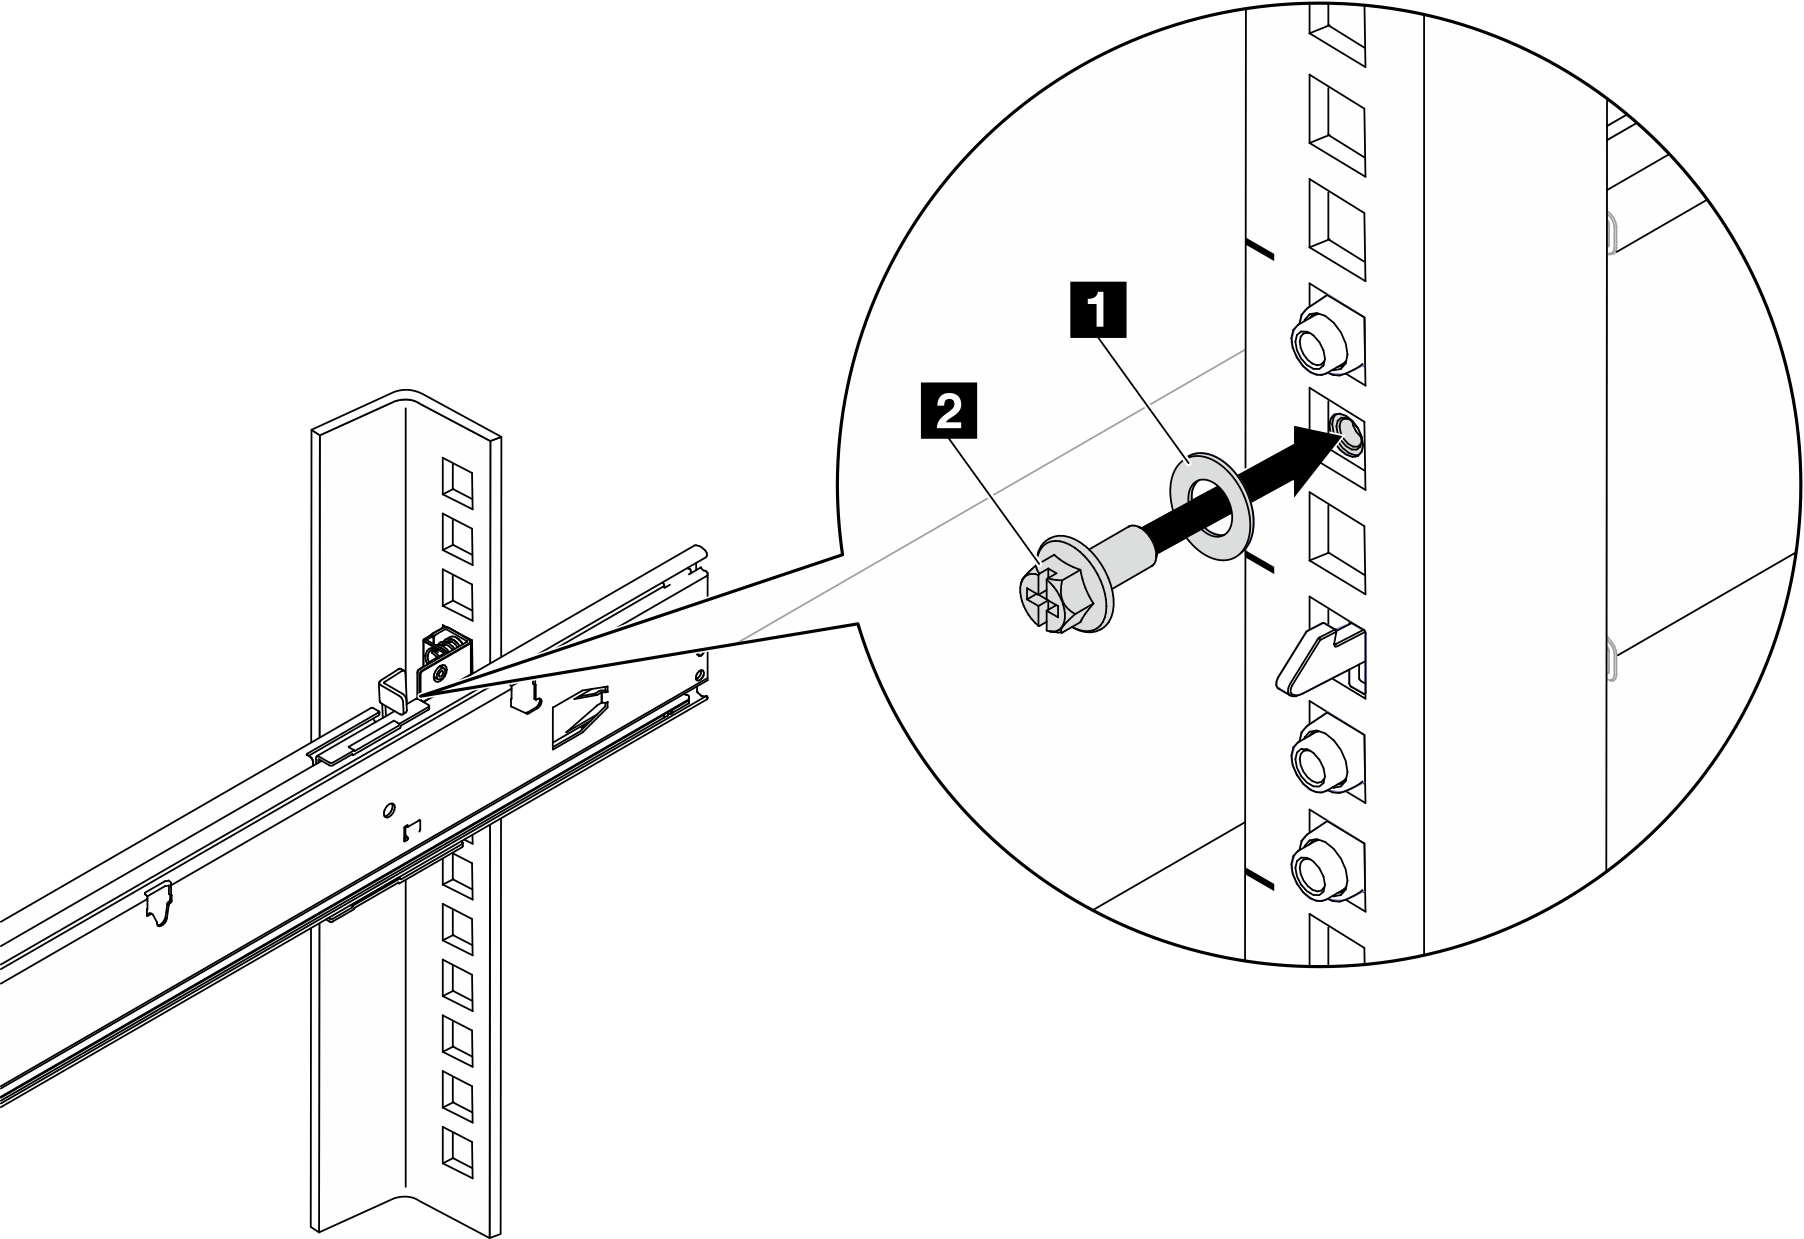
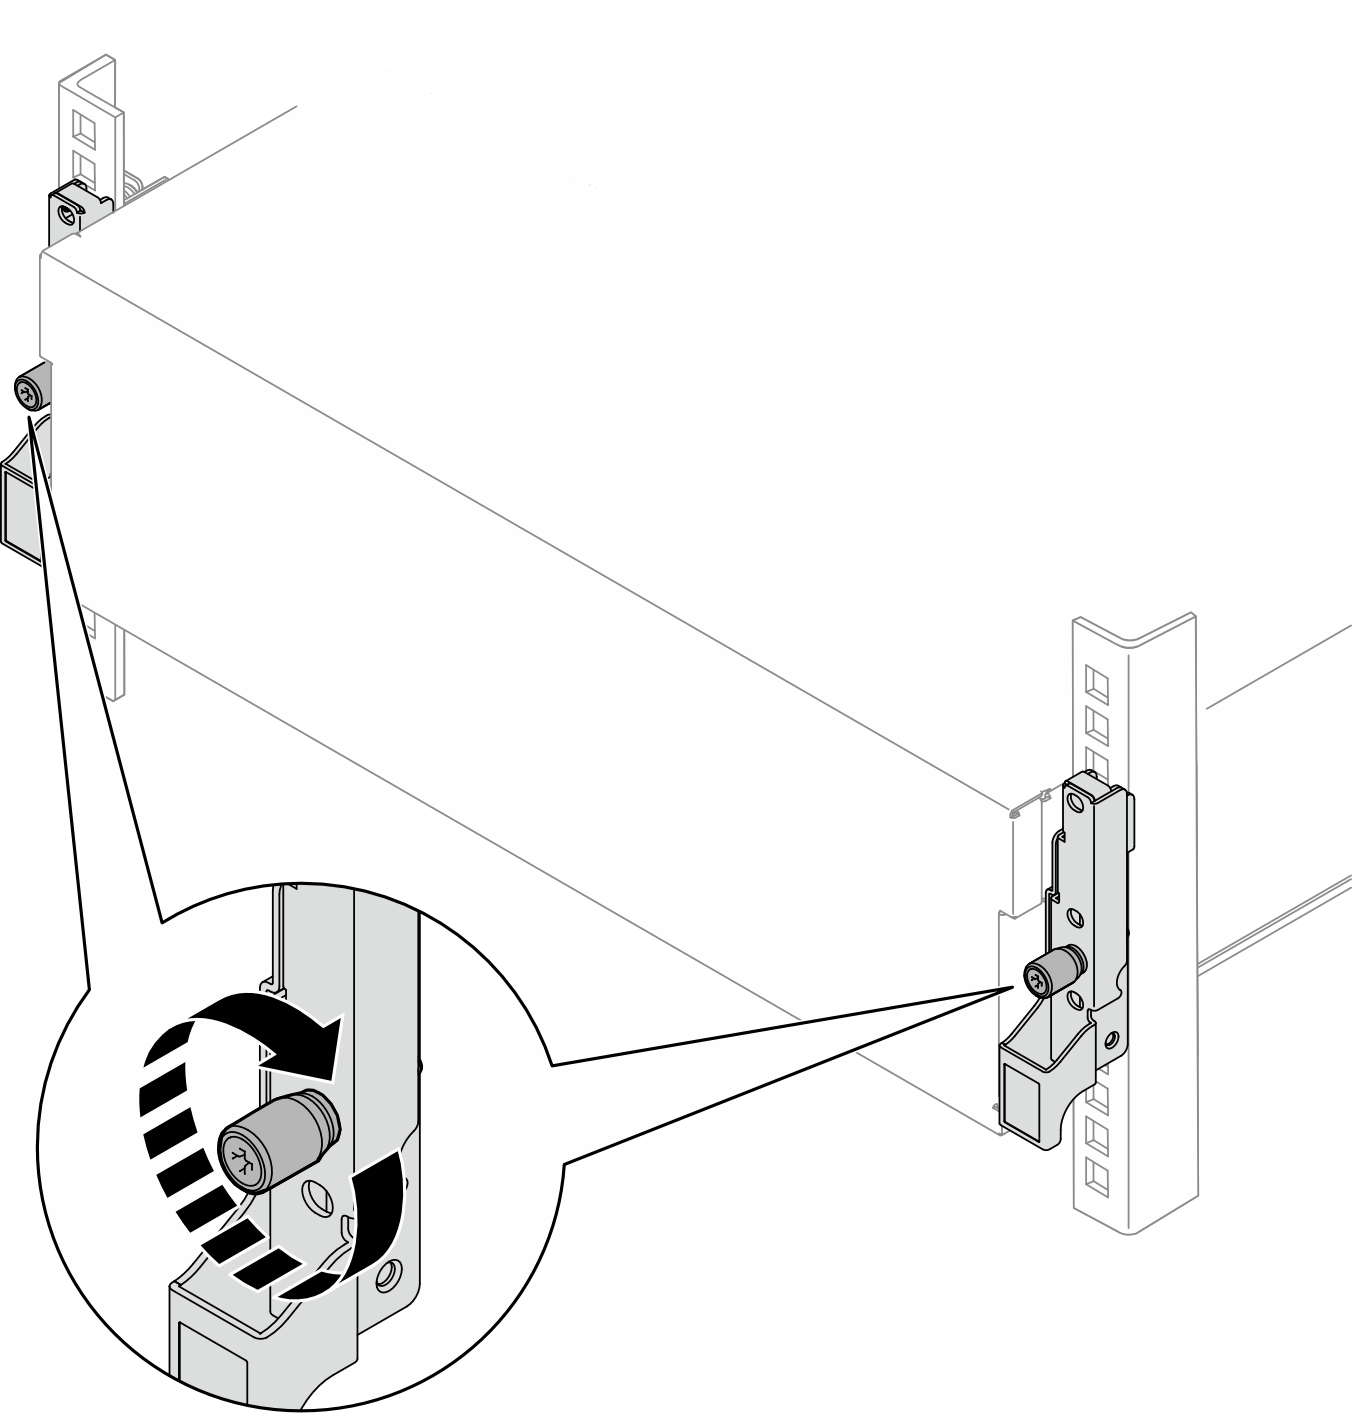
1 Washer 2 M5 screw - Secure the server to the front of the rack. Fasten the two thumbscrews located on the front of the server.Figure 6. Securing the server to the front of the rack
Rack front
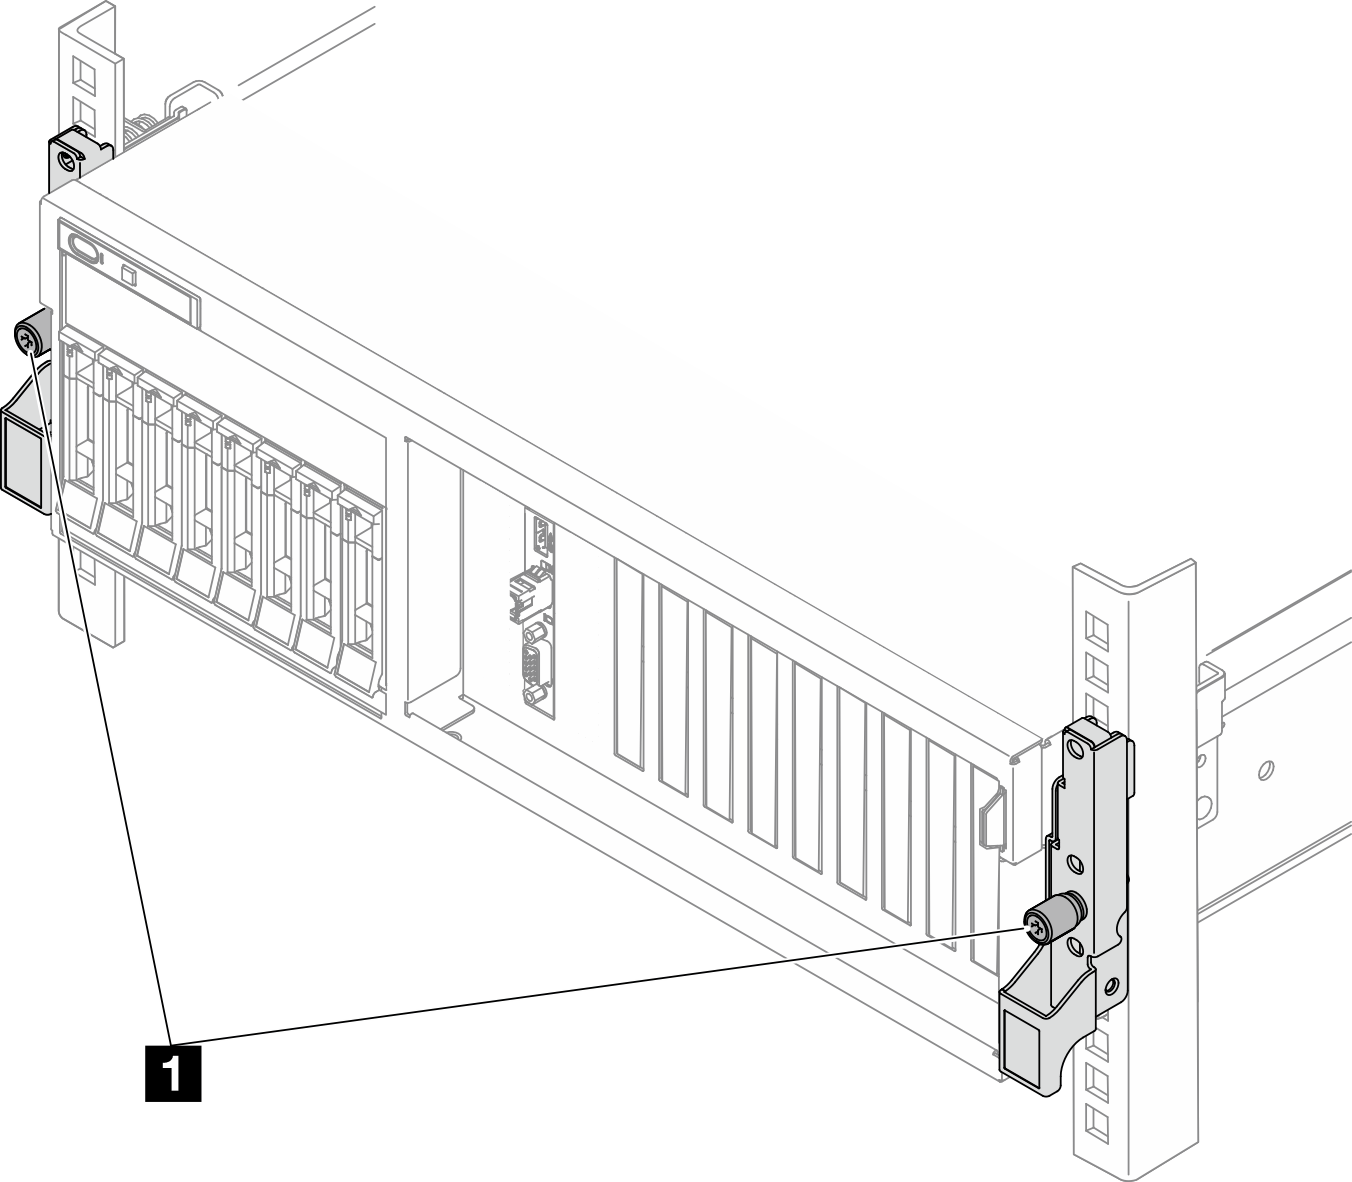
1 Thumbscrew
- Secure the server to the rear of the rack. Select the first rail you want to secure. Insert a washer and M5 screw; then, fasten the M5 screw. Repeat to secure the other rail.
After you finish
- Reconnect the power cords and any cables that you removed.
- Power on the server and any peripheral devices. See Power on the server.
- Update the server configuration. See Complete the parts replacement.
ThinkSystem SR670 V2/SR675 V3 Heavy Systems Toolless Slide Rail Kit
About this task
Attention
- Read Installation Guidelines and Safety inspection checklist to ensure that you work safely.
- Power off the server and peripheral devices and disconnect the power cords and all external cables. See Power off the server.
- Lift the server and place it on a flat and stable surface. Two lifting options are available:
For two-person lift, remove the following components beforehand:
- All the power supply units
- All the storage drives
- Top cover
Otherwise, lift the server with three people or a lifting device.
 CAUTIONMake sure to lift the server by holding the lift points.
1 Lift point - Remove the inner rails from the intermediate rails.

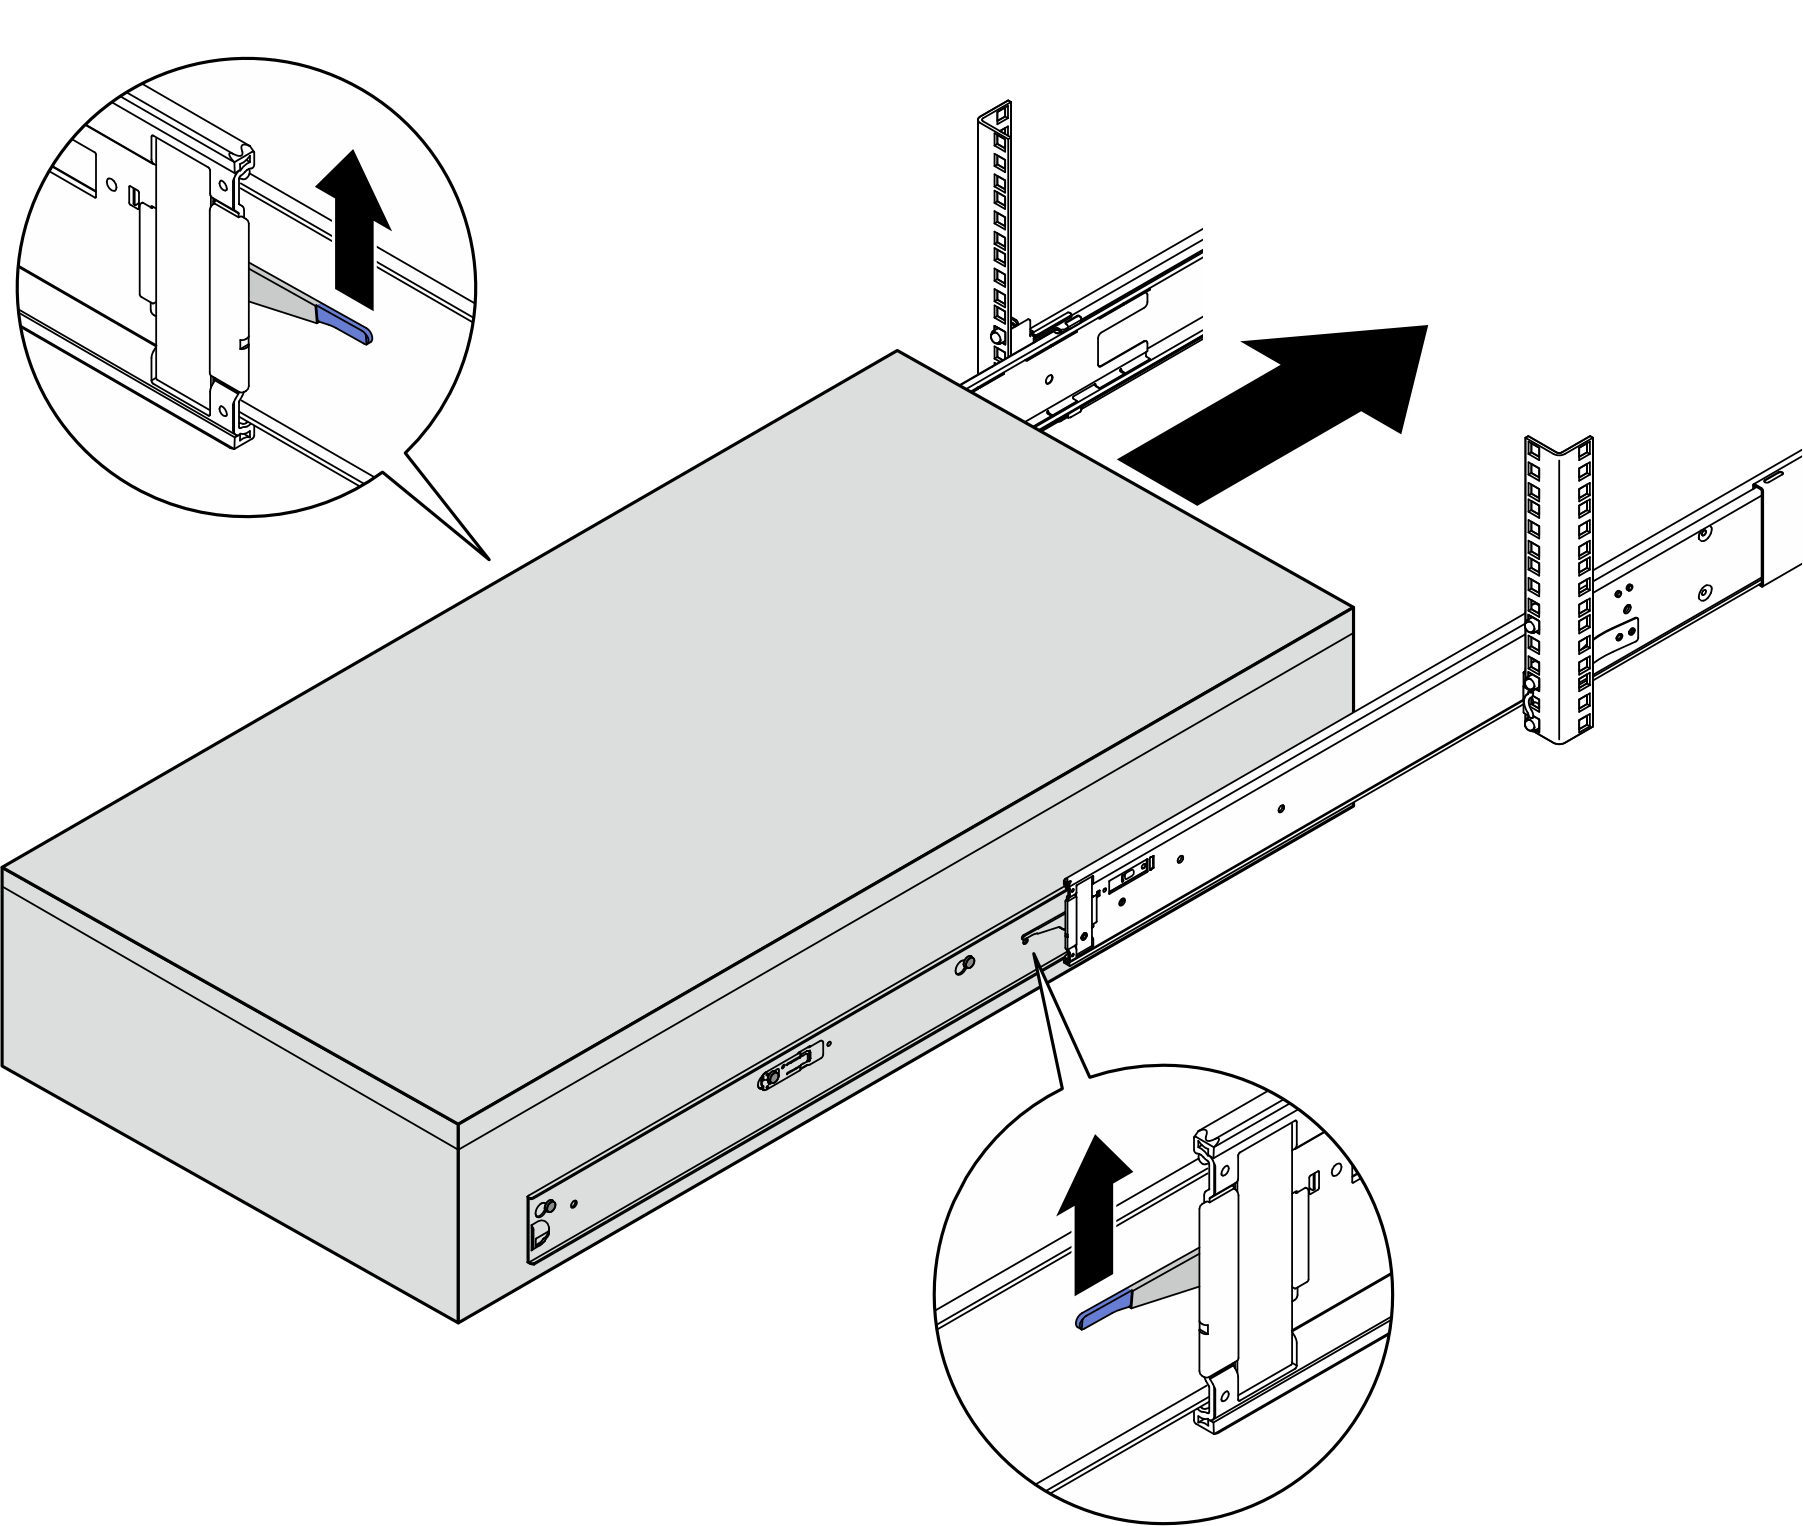
- Pull the inner rails all the way out until they stop.
- Lift the lock latches, and pull the inner rails to disengage them from the intermediate rails.
 Remove the inner rails.
- Align the slots on the inner rail with the corresponding T-pins on the side of the server; then, install and slide the inner rail towards the front of the server until the T-pins lock into place.
 AttentionOnce the inner rail locks into place, you will hear a soft “click” sound.
 - Align both rear ends of the inner rails with the openings in the intermediate rails, and make sure the two pairs of rails mate correctly. Then, carefully slide the server into the rack until the rails snap into place.
 AttentionBefore inner rail is inserted into intermediate rail, ensure that the ball retainer is at the foremost of the intermediate rail.
 - Lift the lock latches to proceed to slide the server in.
 AttentionSlide the server all the way out and all the way back in to make sure the rails are working smoothly.
 - Tighten the thumbscrews to secure the server to the rack.
After you finish
- Reconnect the power cords and any cables that you removed.
- Power on the server and any peripheral devices. See Power on the server.
- Update the server configuration. See Complete the parts replacement.
Give documentation feedback