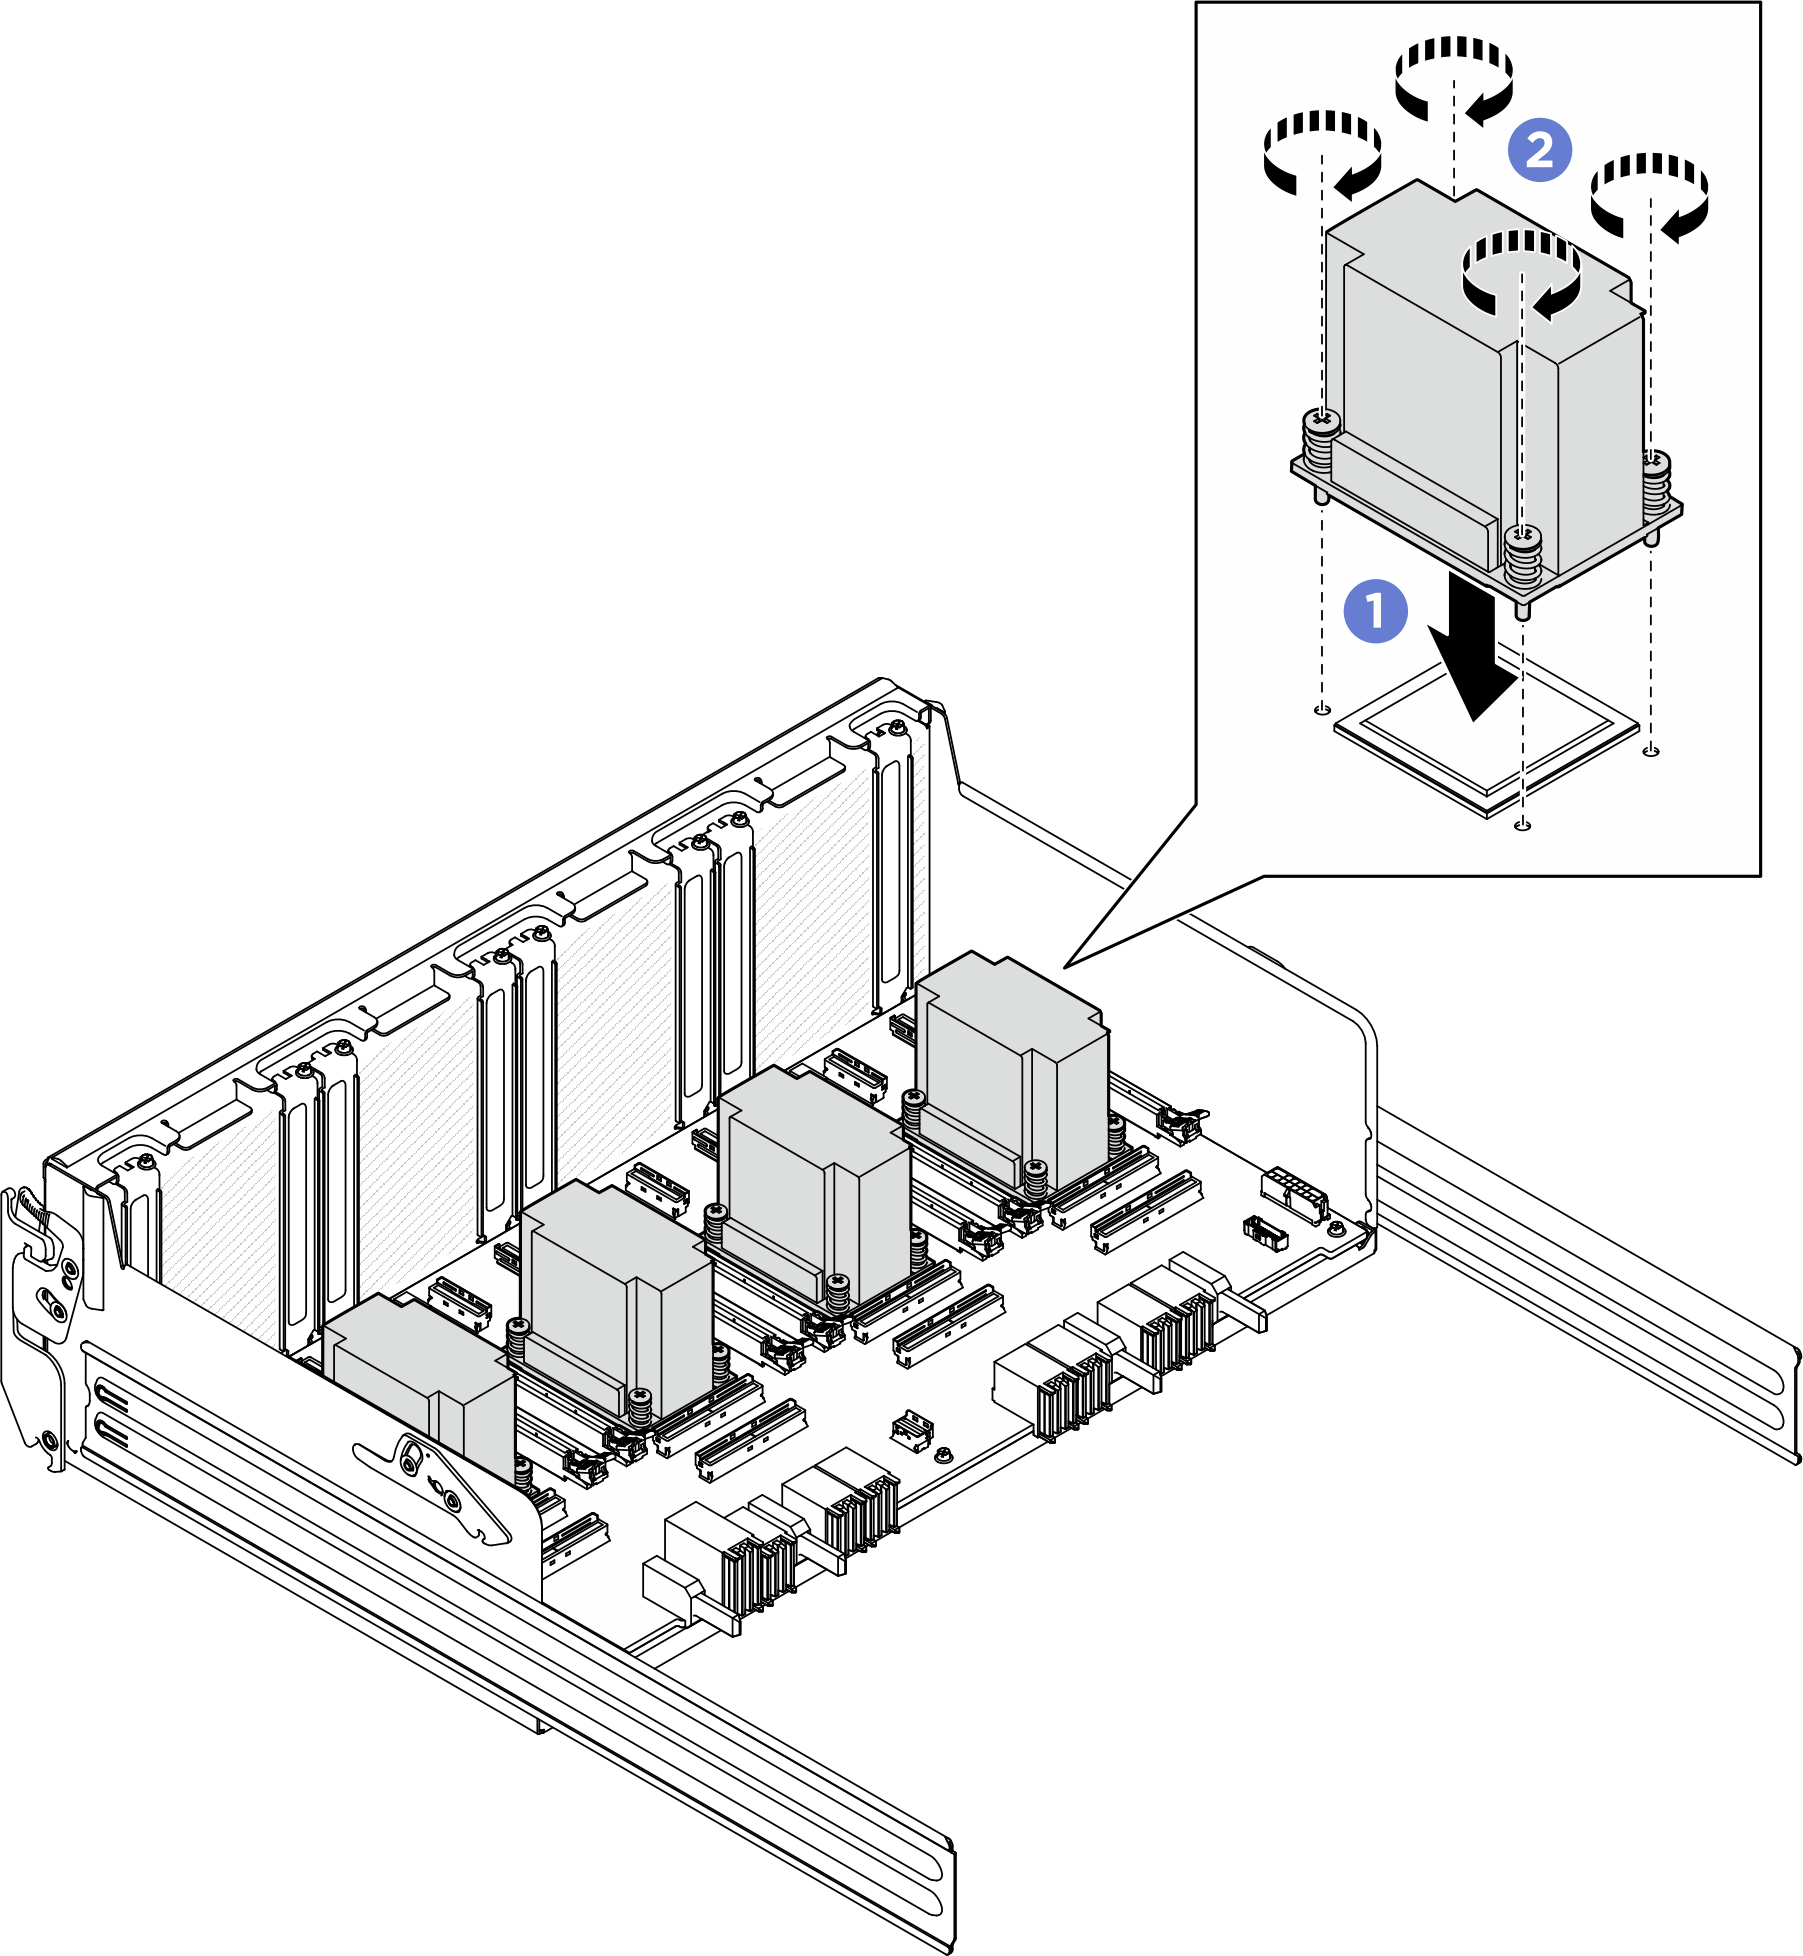
Install a PCIe switch board heat sink
Follow instructions in this section to install a PCIe switch board heat sink. The procedure must be executed by a trained technician.
About this task
Attention
- Read Installation Guidelines and Safety inspection checklist to ensure that you work safely.
- Touch the static-protective package that contains the component to any unpainted metal surface on the server; then, remove it from the package and place it on a static-protective surface.
Note
Before installing the PCIe switch board heat sinks, make sure you have four pieces of thermal grease.
Procedure
After you finish
- Reinstall all the front PCIe adapters. See Install a front PCIe adapter.
- Reinstall the PCIe switch shuttle. See Install the PCIe switch shuttle.
- Complete the parts replacement. See Complete the parts replacement.
Give documentation feedback

 Align the
  Follow the screw sequence specified on the heat-sink label, and turn the four screws clockwise a few turns until the screw threads engage in the