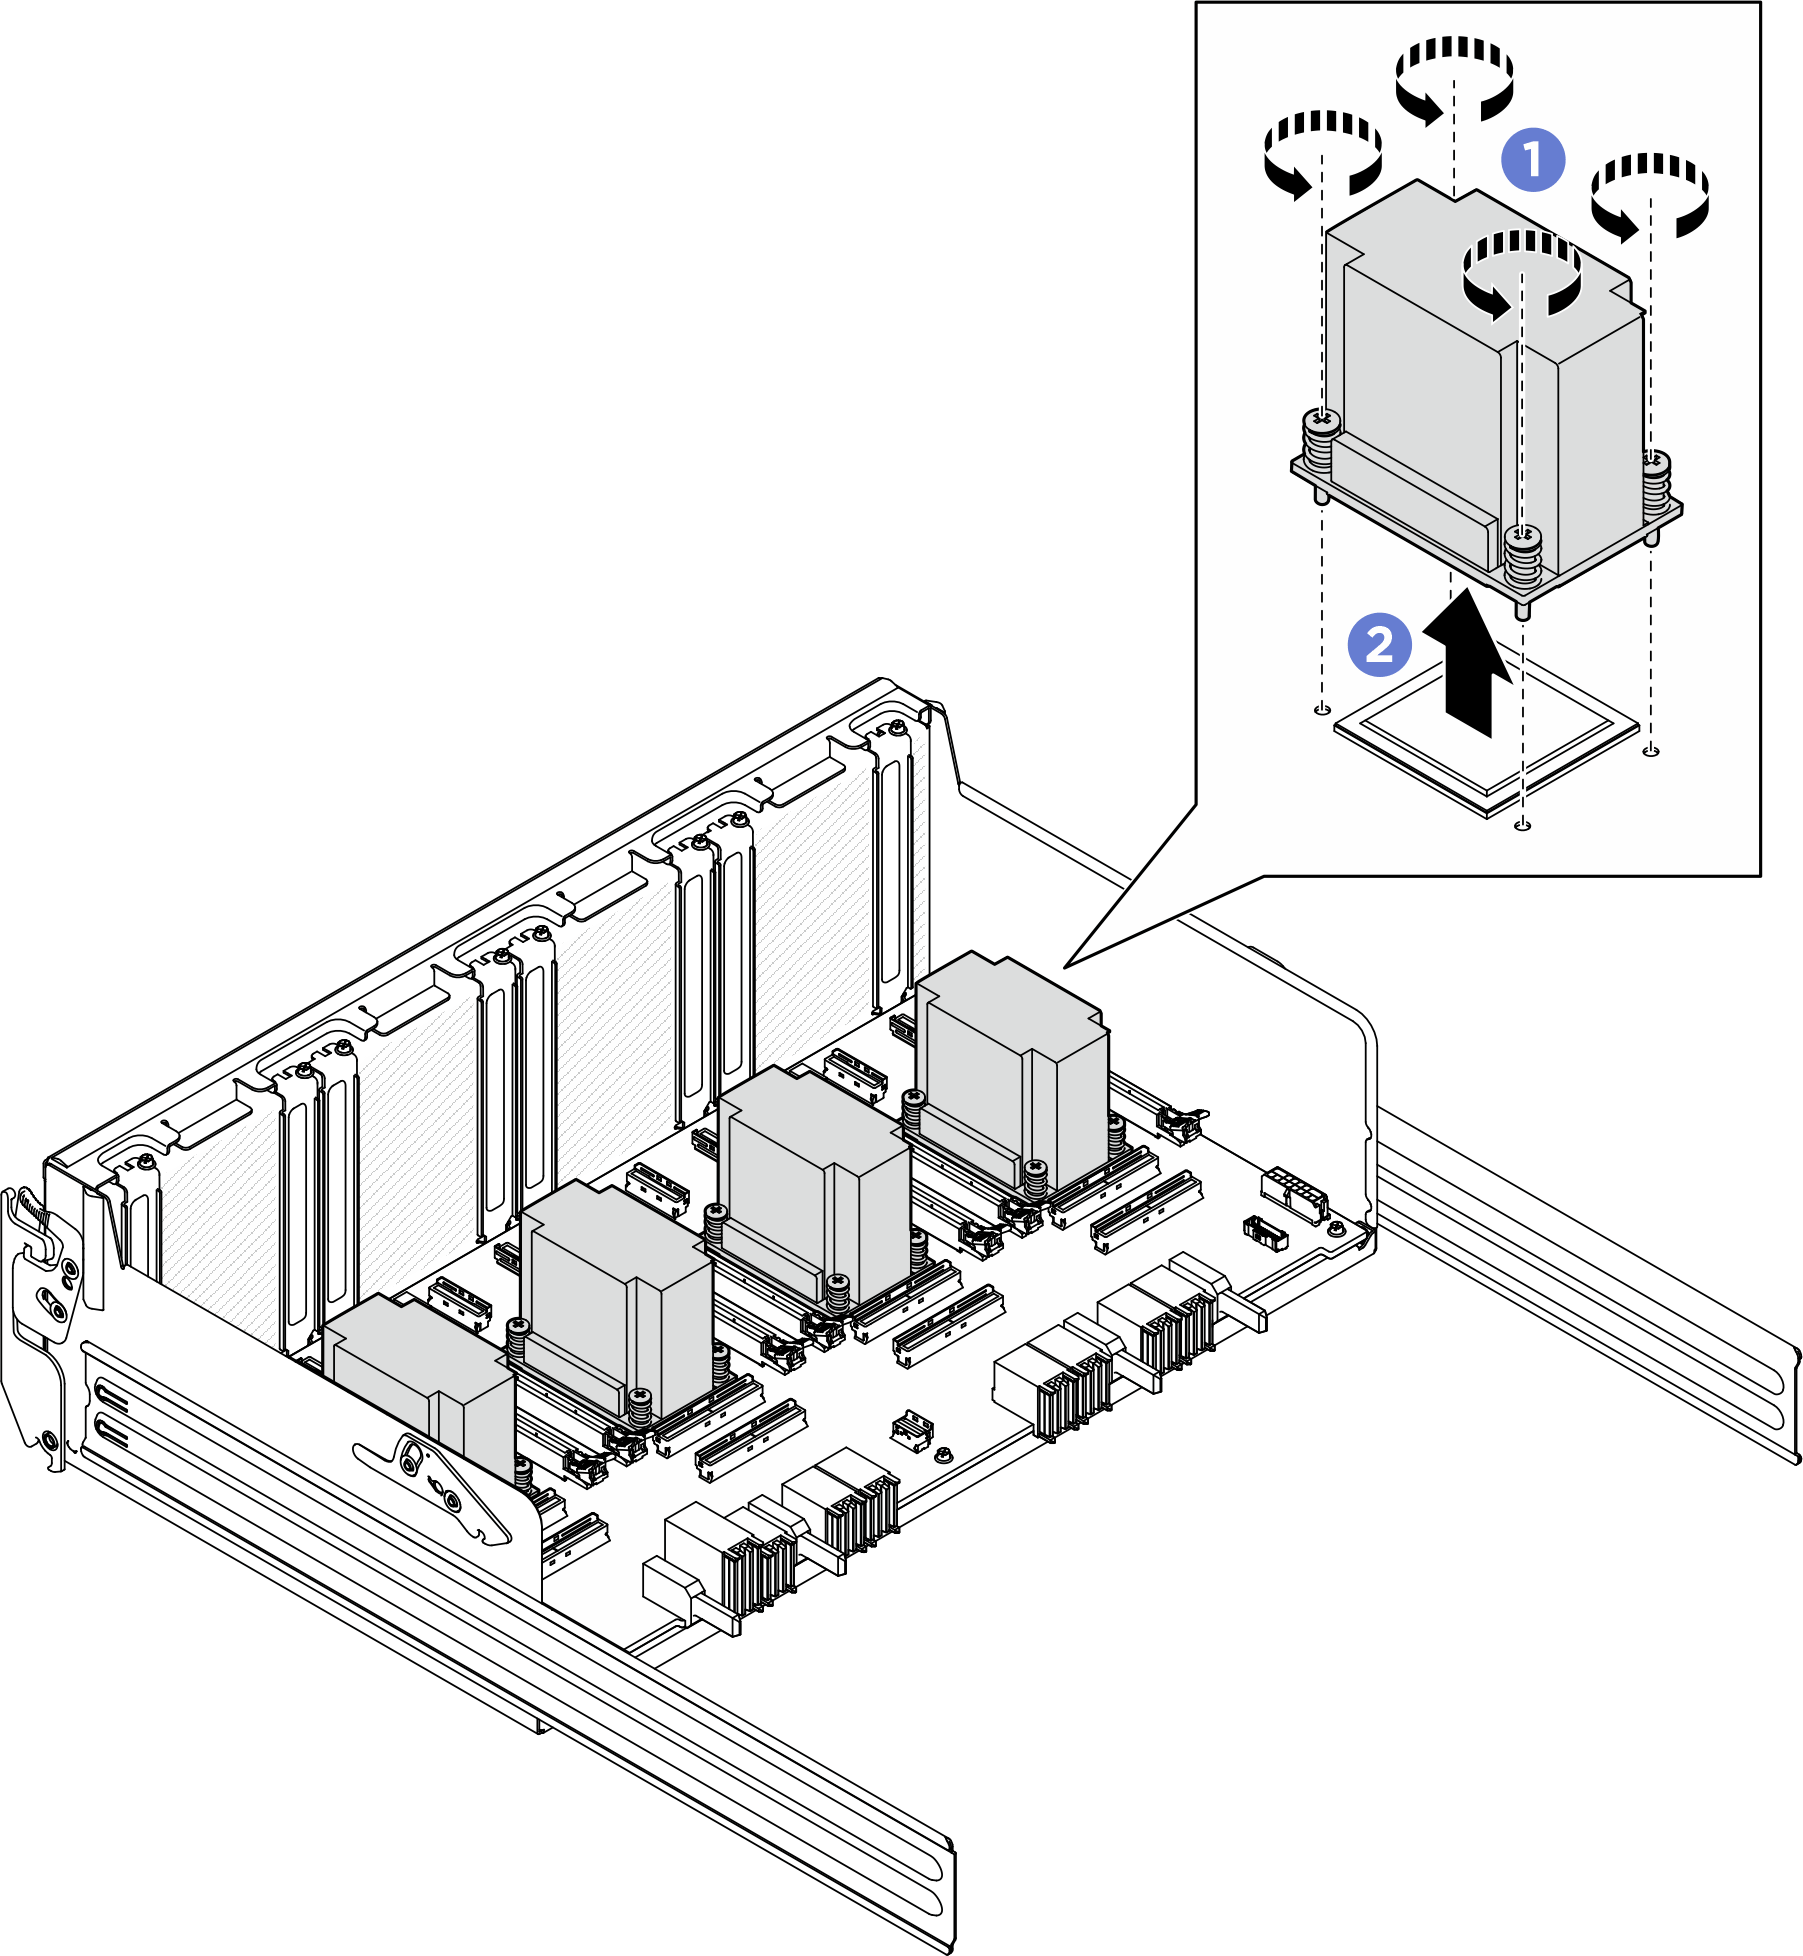
Remove a PCIe switch board heat sink
Follow instructions in this section to remove a PCIe switch board heat sink. The procedure must be executed by a trained technician.
About this task
Attention
- Read Installation Guidelines and Safety inspection checklist to ensure that you work safely.
- Power off the server and peripheral devices and disconnect the power cords and all external cables. See Power off the server.
Note
Make sure you have an alcohol cleaning pad to clean the thermal grease.
Procedure
After you finish
- If you are replacing a PCIe switch board heat sink, install a new one. See Install a PCIe switch board heat sink.
- If you are replacing the PCIe switch board, remove it. See Remove the PCIe switch board.
- If you are instructed to return the component or optional device, follow all packaging instructions, and use any packaging materials for shipping that are supplied to you.
Give documentation feedback
 Fully loosen all the screws on the heat sink in the diagonal pattern.
 Carefully lift the heat sink from the