System installation
Note
To spare space for installation, it is recommended to remove the system that has been installed in the U right above beforehand.
- Remove both power supply units from the system.
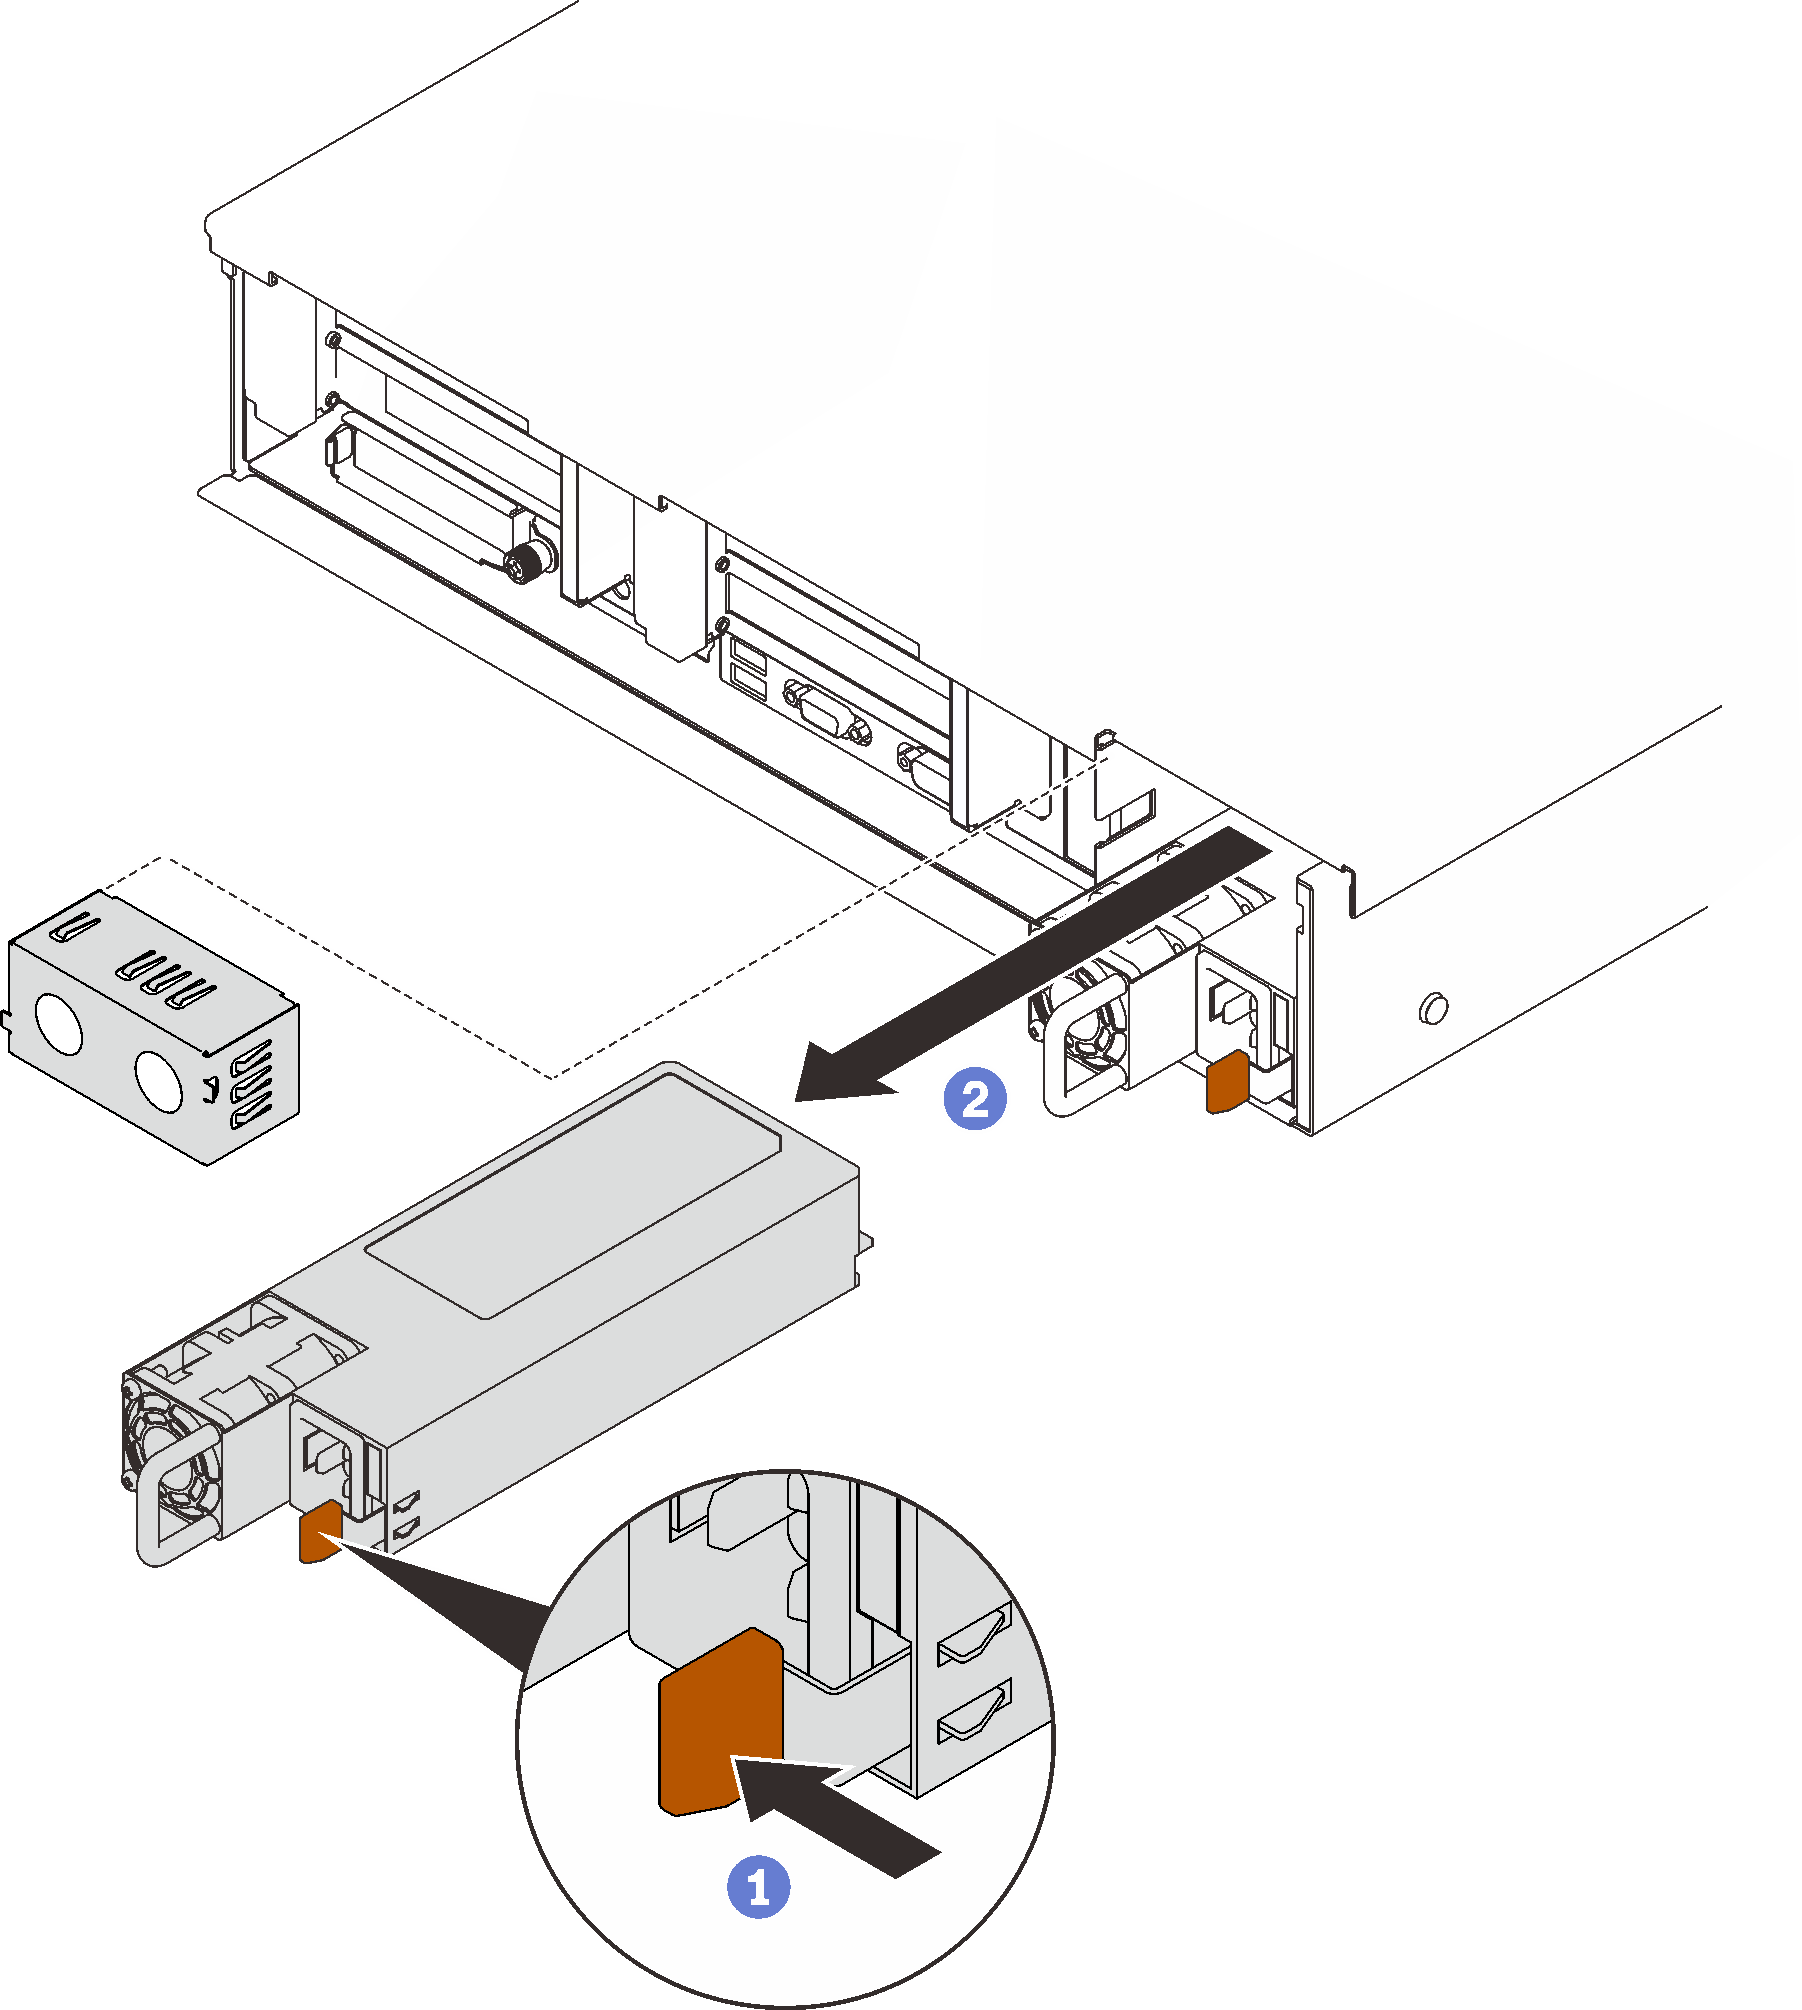
- ① Press and hold on the orange release tab.
- ② Grasp the handle and slide the power supply unit out from the system.
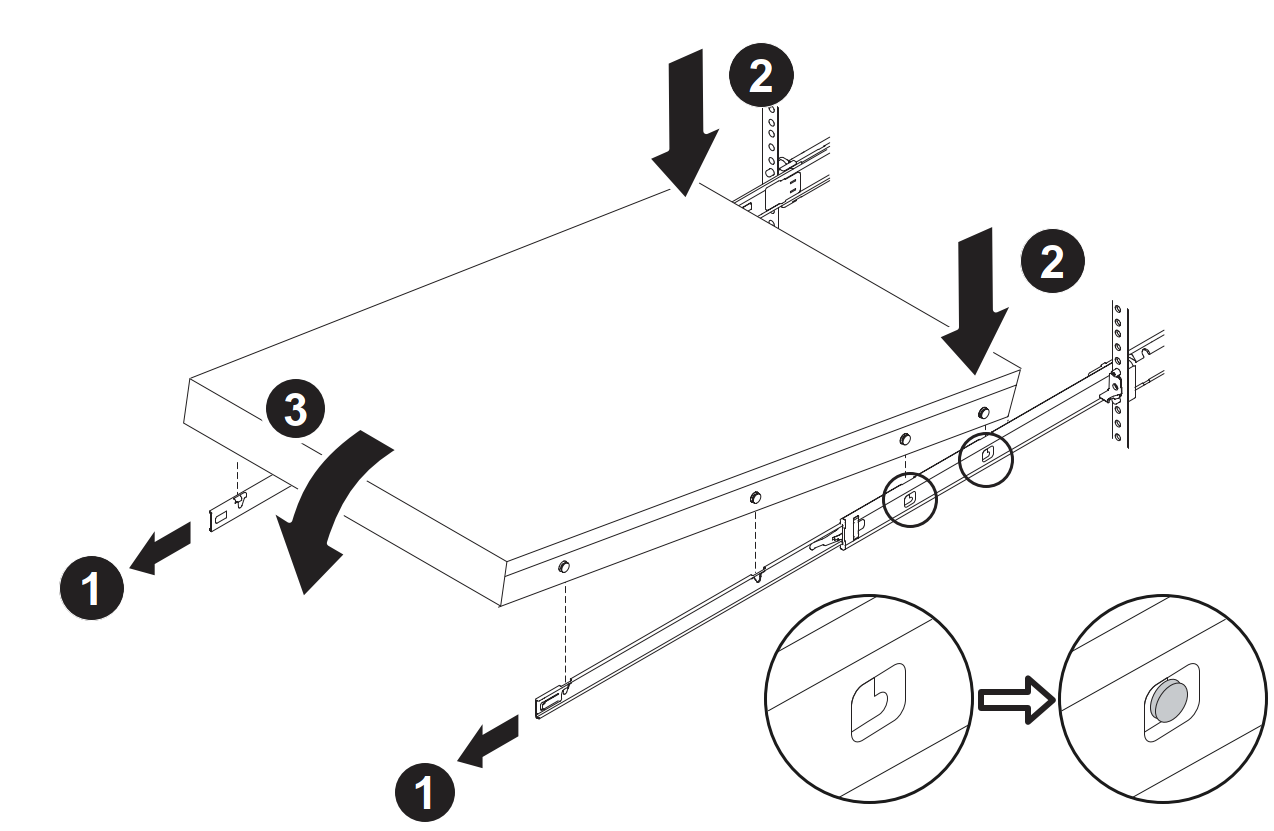
- Install the system onto the inner rails.
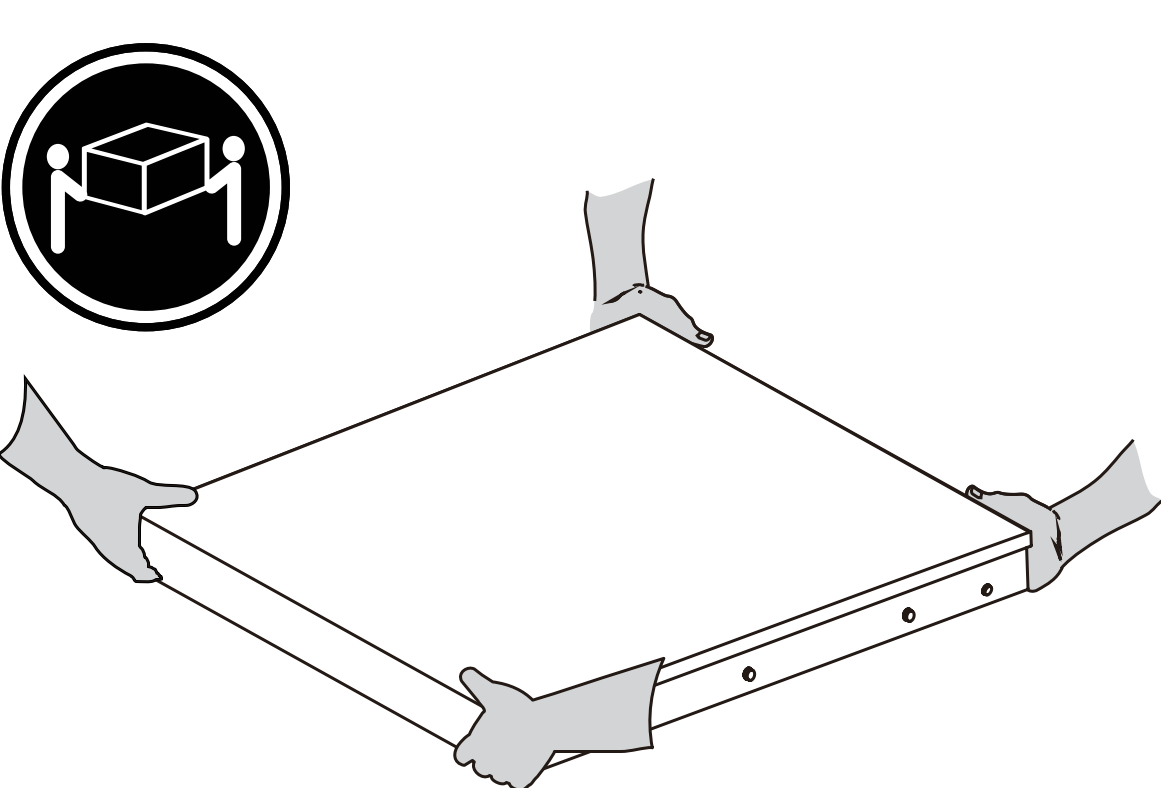
 CAUTIONMake sure two people are lifting the system with hands positioned as illustrated.
- ① Extend the rails until the inner rails click into place twice.
- ② Lift the system and lower the rear end to slide the rear nailheads into the slots on the inner rails.
- ③ Slowly lower the front end of the system until the other nailheads go into corresponding slots.
NoteInspect the side of the rails to make sure the nailheads are placed in the slots. - Slide the system into the rack.
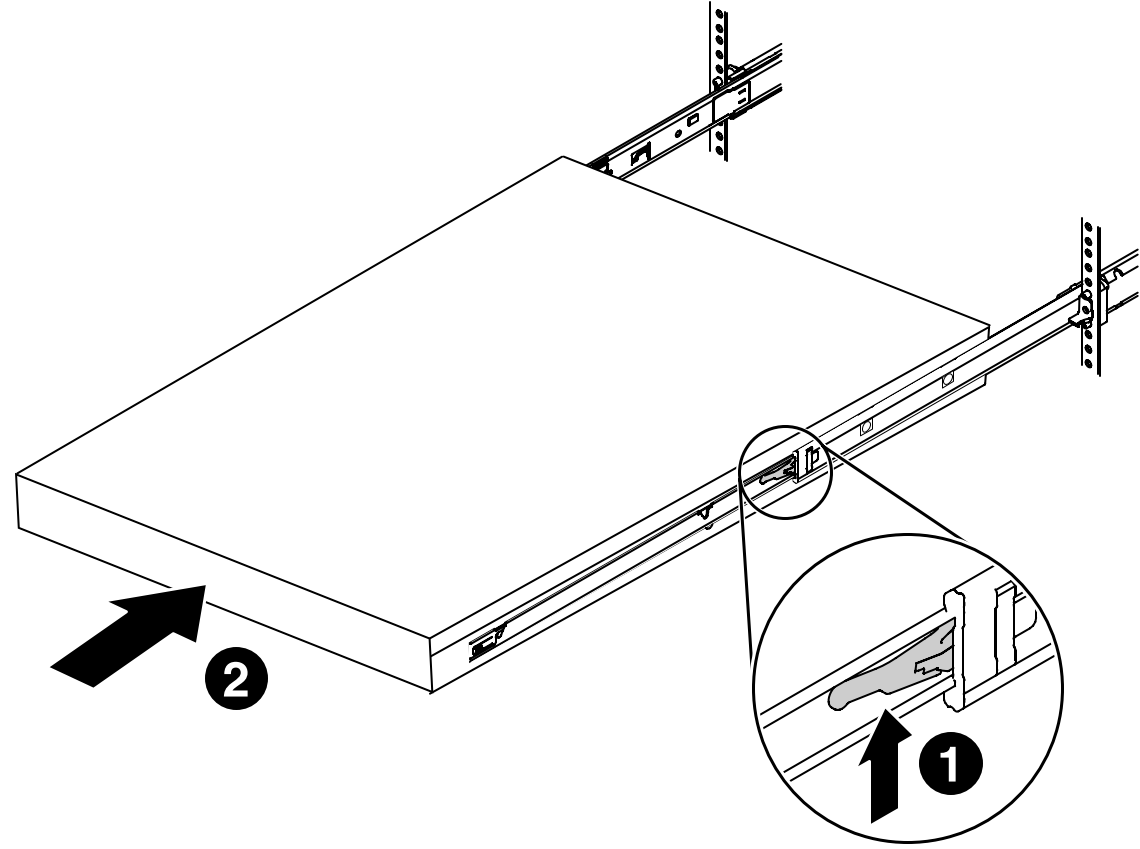
- ① Lift the release latches on both sides of the rails.
- ② Slide the system all the way into the rack until it stops.
Give documentation feedback