Install the rail kit to the rack
See this section to learn how to install the rails to the rack.
Note
(Optional) If the system is being installed into a shallow rack or with a 0U PDU in the rear, the CMA brackets may need to be removed to reduce the length of the rails (see Appendix: Remove the CMA bracket).
- Install the rear mounting pins to the rack.
Rear 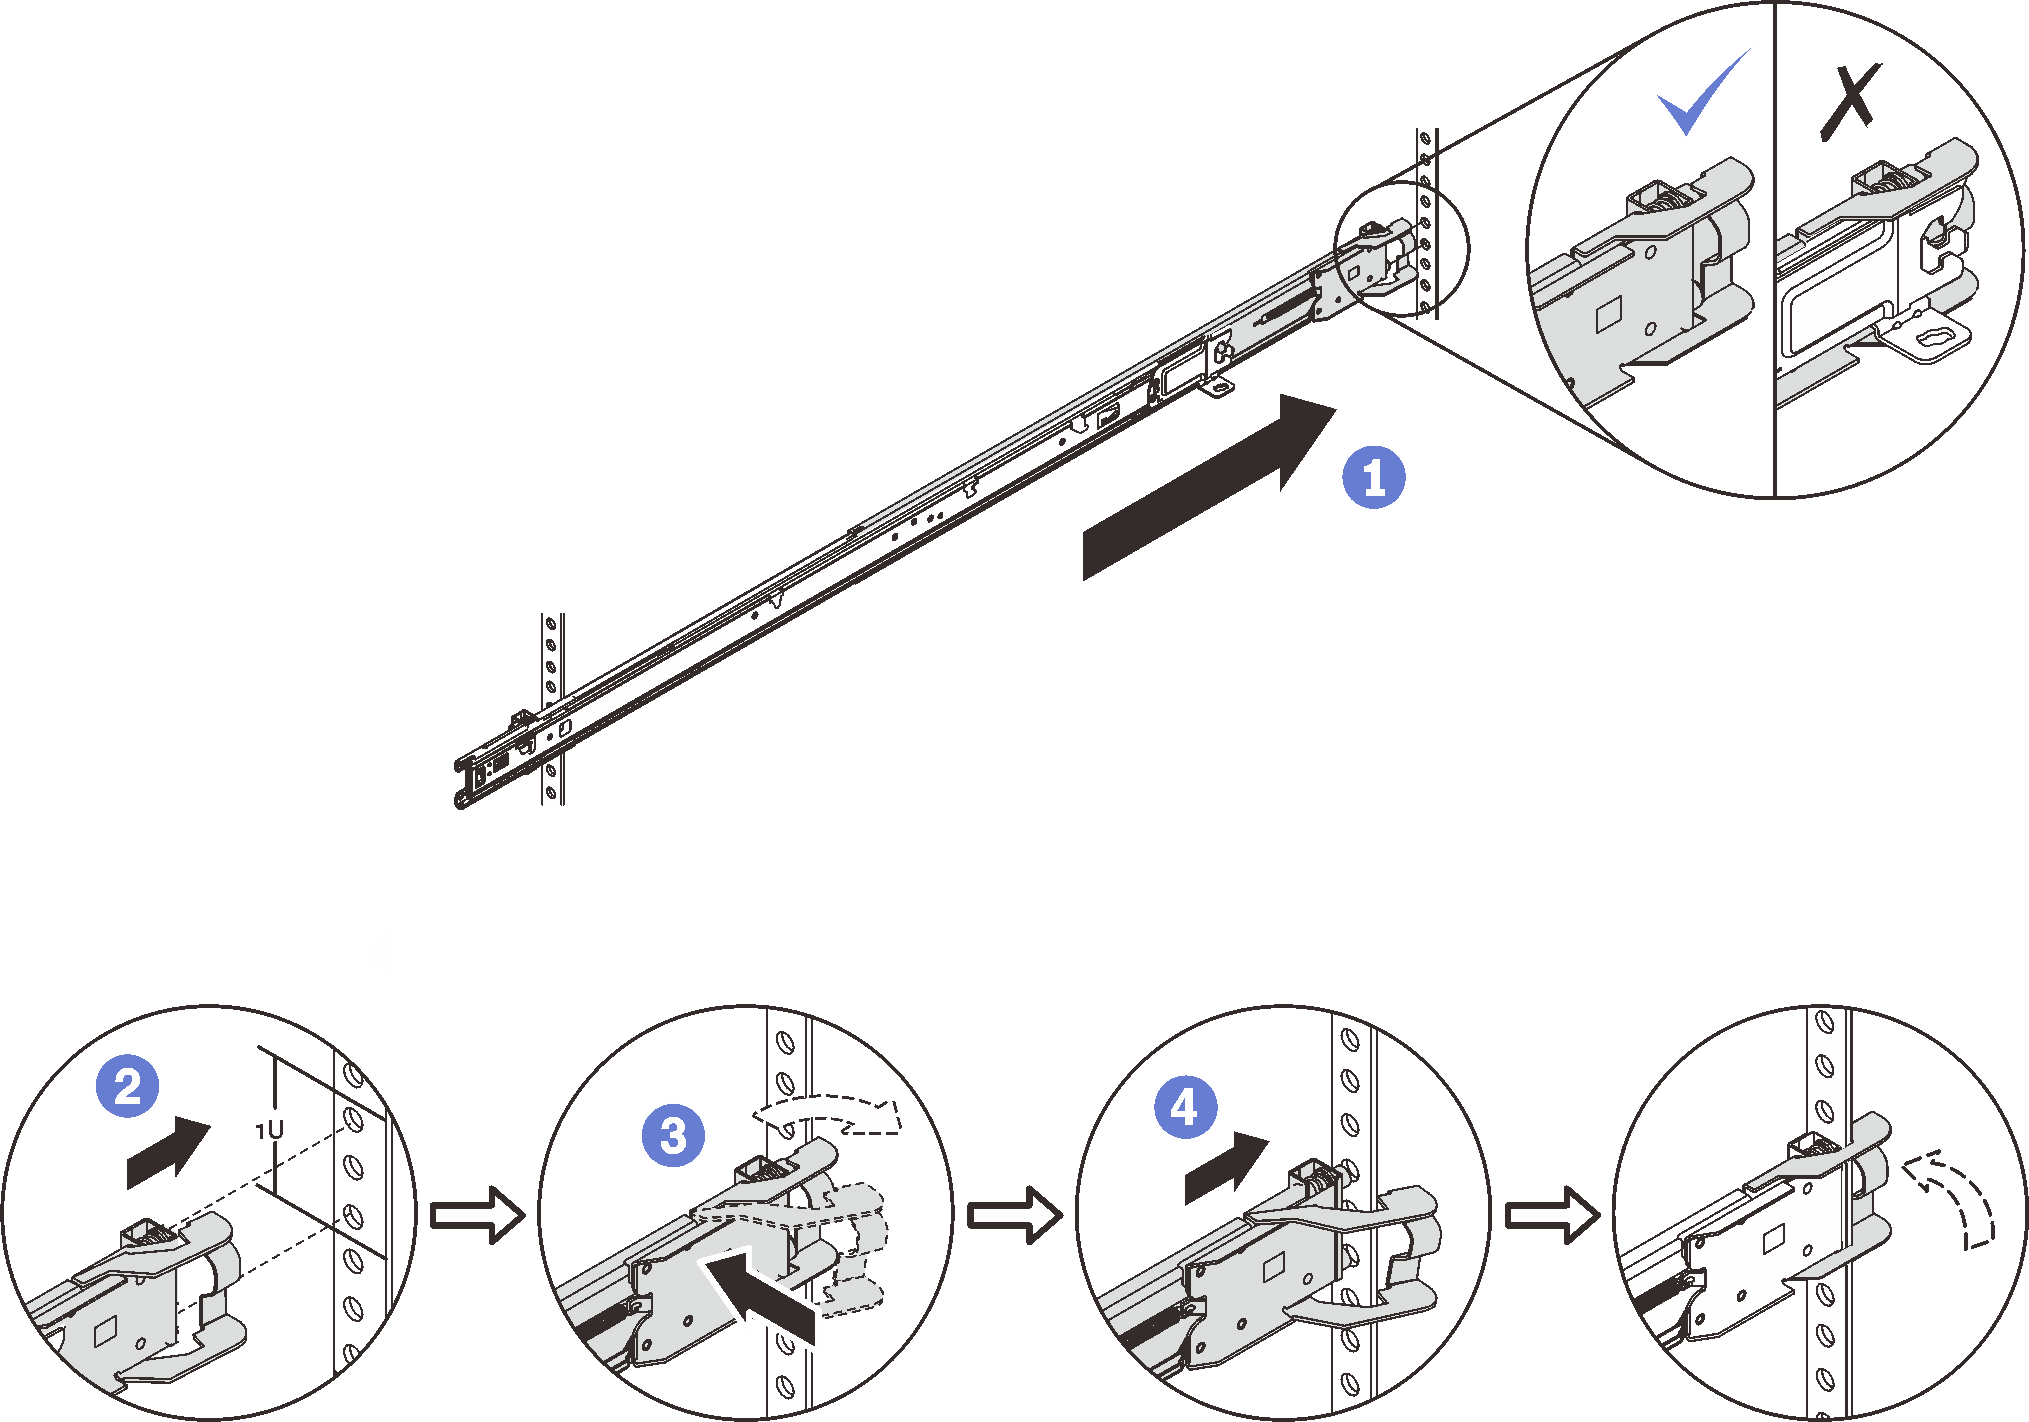
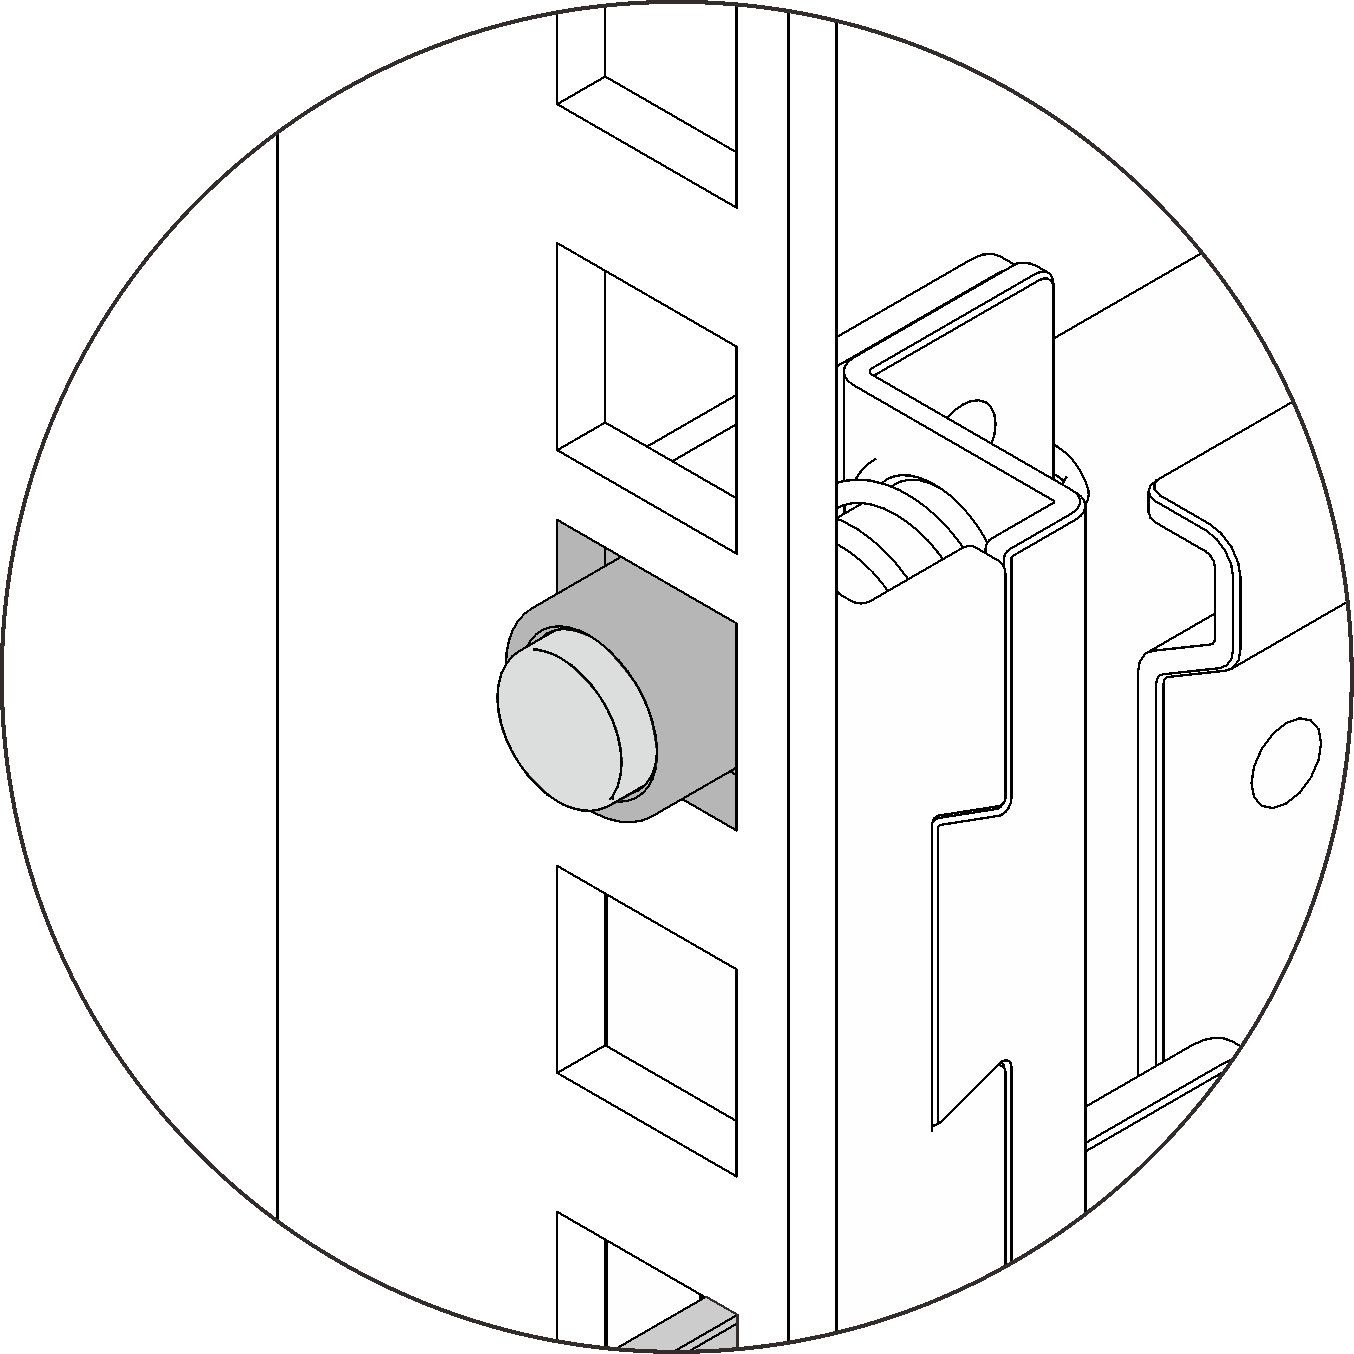
Square hole rack 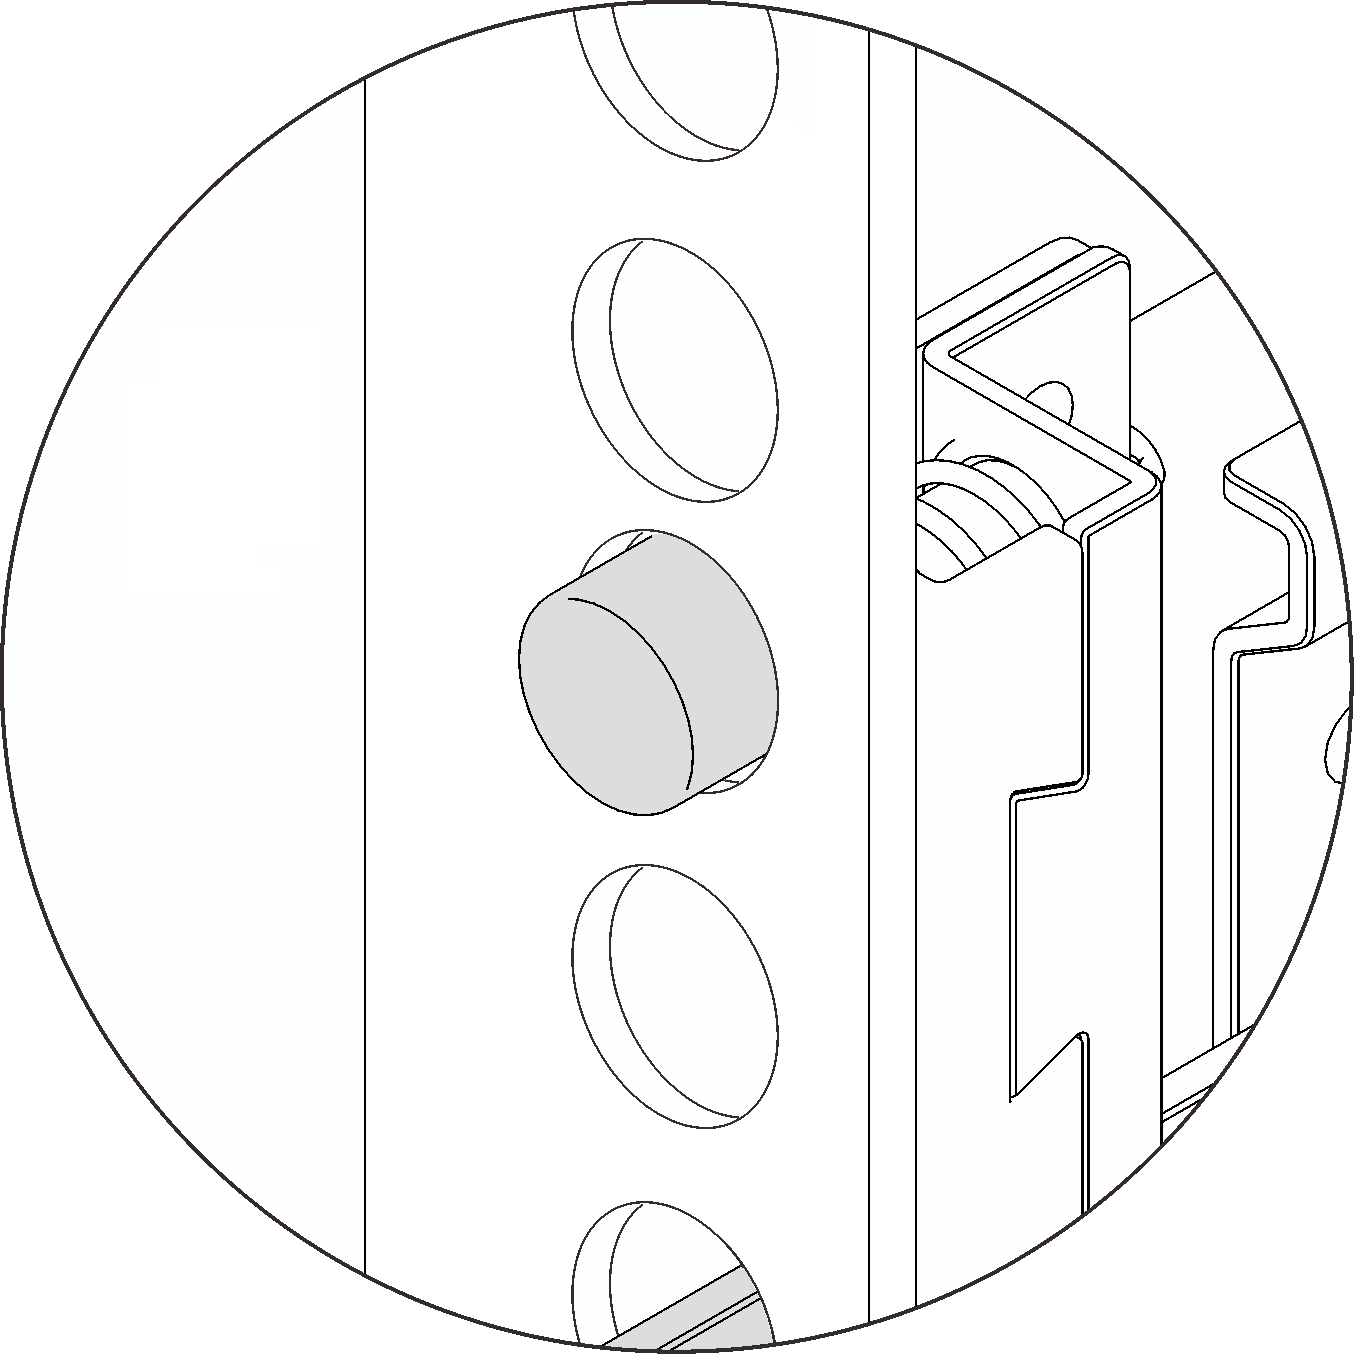
Round hole rack - ① Fully extend the outer rail toward the rear mounting flanges in the rack.
- ② Align the mounting pins with the rack flanges.
- ③ Push the rail forward until the rear latch opens.
- ④ Pull the rail back until the rear latch rotates back to the closed position.
- Install the front mounting pins to the rack.
Front 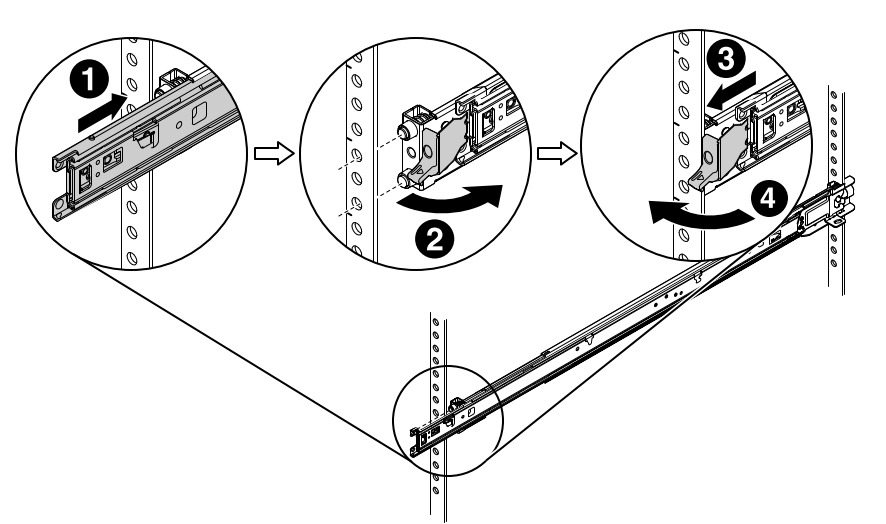
- ① Slide the inner rail all the way in to allow the front latch to open.
- ② Open the front latch and align the mounting pins with corresponding front mounting flanges.
- ③ Pull the rail forward until the pins go through the holes.
- ④ Release the front latch to secure the rail to the rack.
Give documentation feedback