Install an optical drive
Use this information to install an optical drive.


Before installing an optical drive:
Touch the static-protective package that contains the component to any unpainted metal surface on the server; then, remove it from the package and place it on a static-protective surface.
To install an optical drive, complete the following steps:
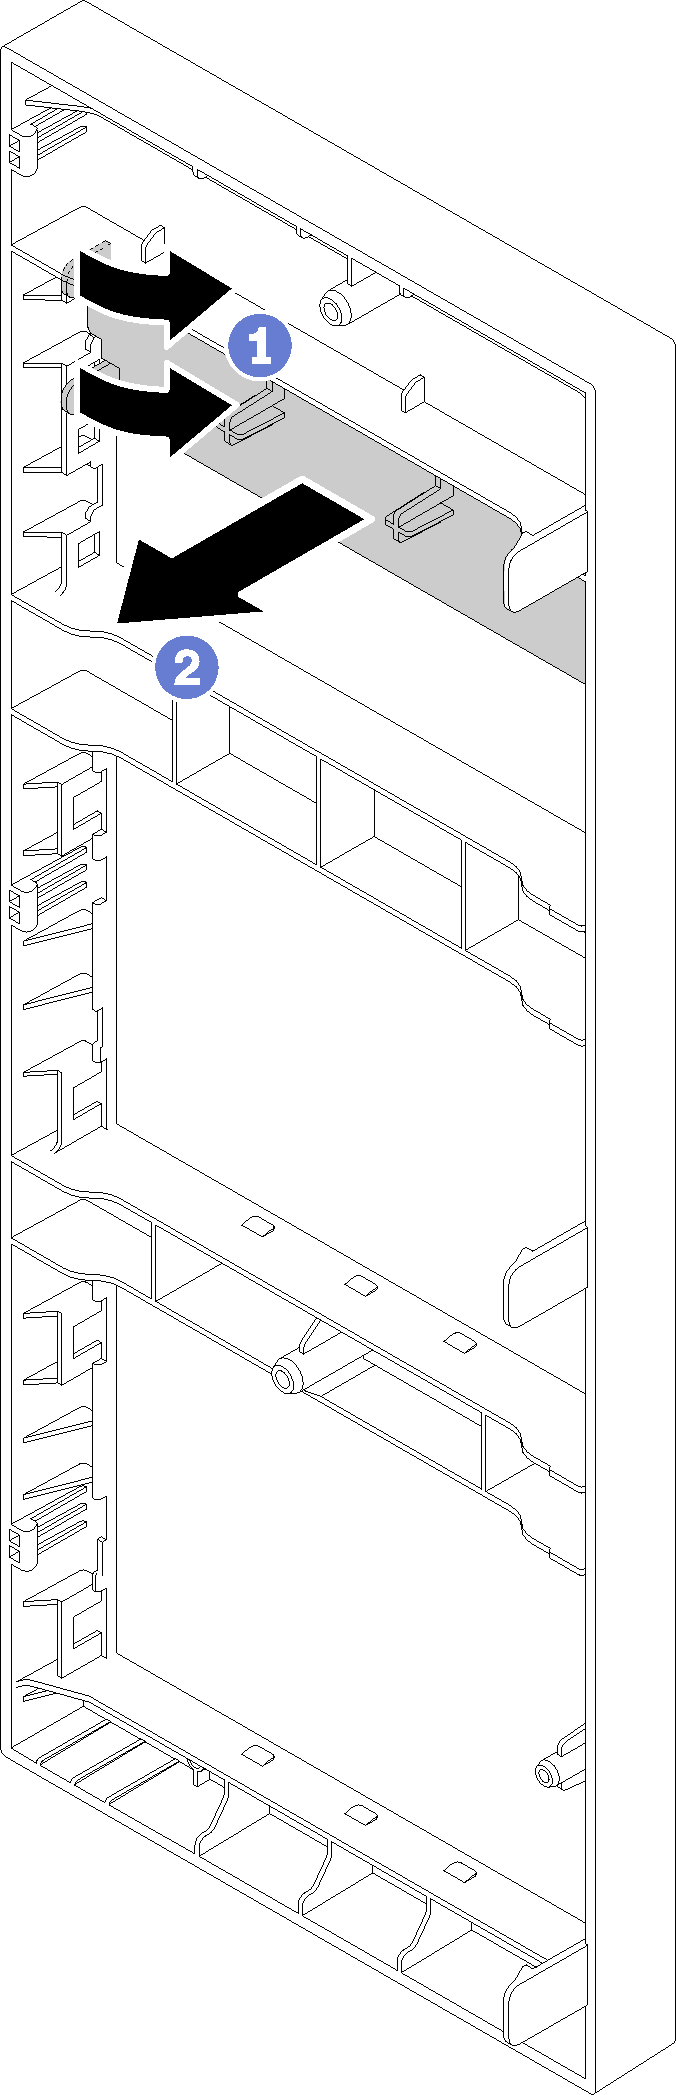
- If necessary, press the tabs on the side of the plastic bay filler of the optical drive bay and push the plastic bay filler as shown to remove it. Figure 1. Plastic bay filler removal in the optical drive bay
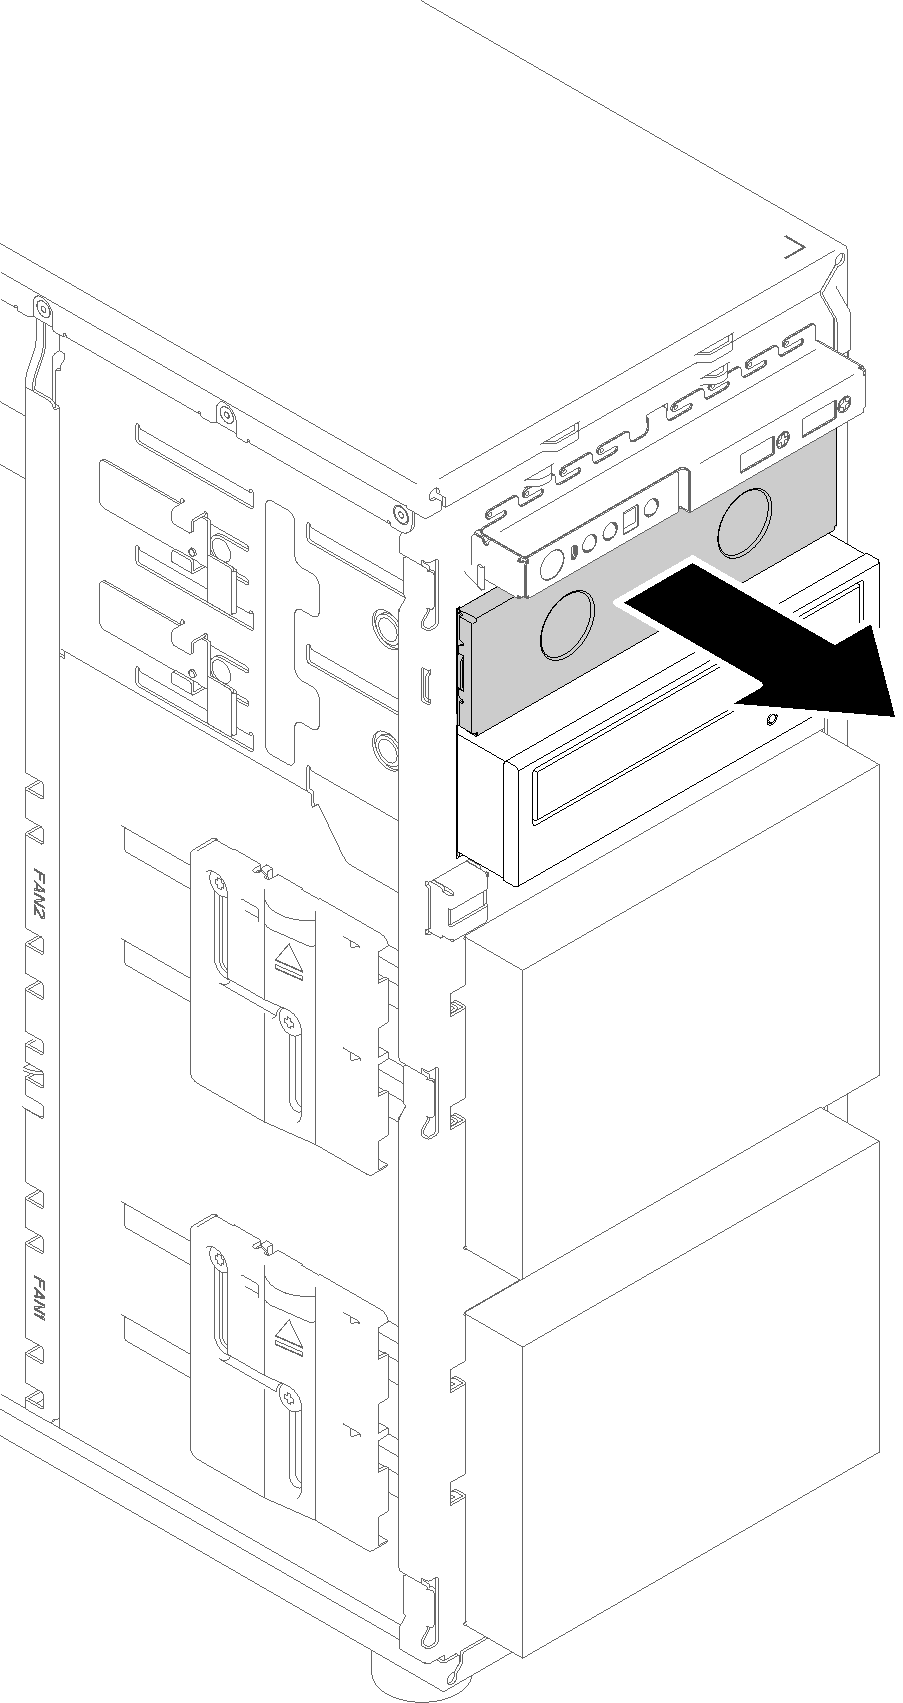
- If necessary, insert two of your fingers into the holes in the EMI shield and carefully pull the EMI shield out of the chassis.Figure 2. EMI shield removal in optical drive bay
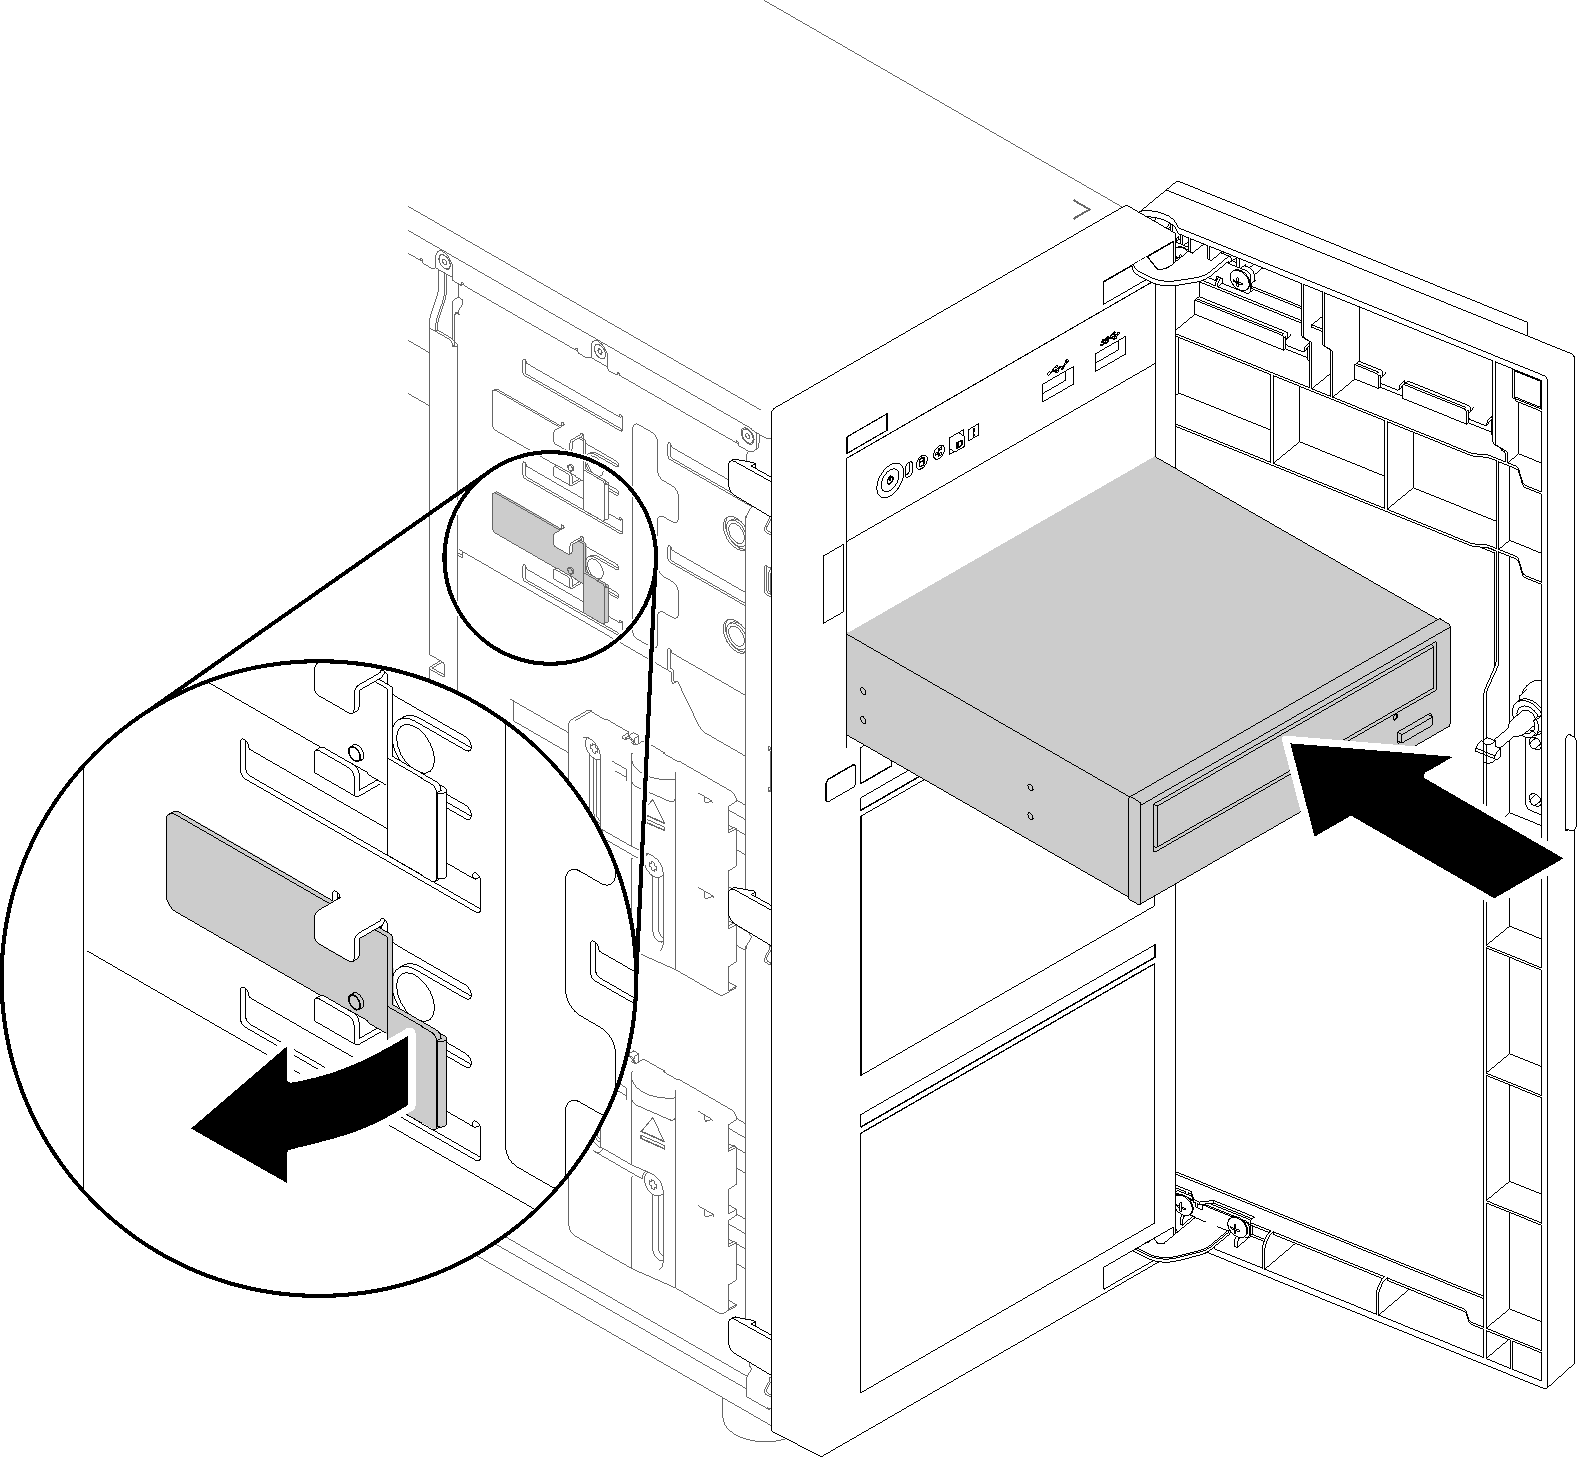
- Gently pull the metal tab on the slide of the chassis and slide the optical drive slightly. Release the tab and keep sliding the optical drive until it snaps into position. Figure 3. Optical drive installation
After installing the optical drive:
Complete the parts replacement. See Complete the parts replacement
Demo video
Give documentation feedback