Install the M.2 drive
Use this information to install the M.2 drive.


Before installing the M.2 drive:
Touch the static-protective package that contains the component to any unpainted metal surface on the server; then, remove it from the package and place it on a static-protective surface.
Obtain a #1 Phillips screwdriver and a 4.5mm hex socket screwdriver
To install the M.2 drive, complete the following steps:
Two different M.2 drive lengths are supported by the server - 42mm and 80mm drives. If necessary, by using a 4.5mm hex socket screwdriver, remove the standoff and screw it to the appropriate mounting point to accommodate the specific drive.
Figure 1. Moving standoff to appropriate mounting point
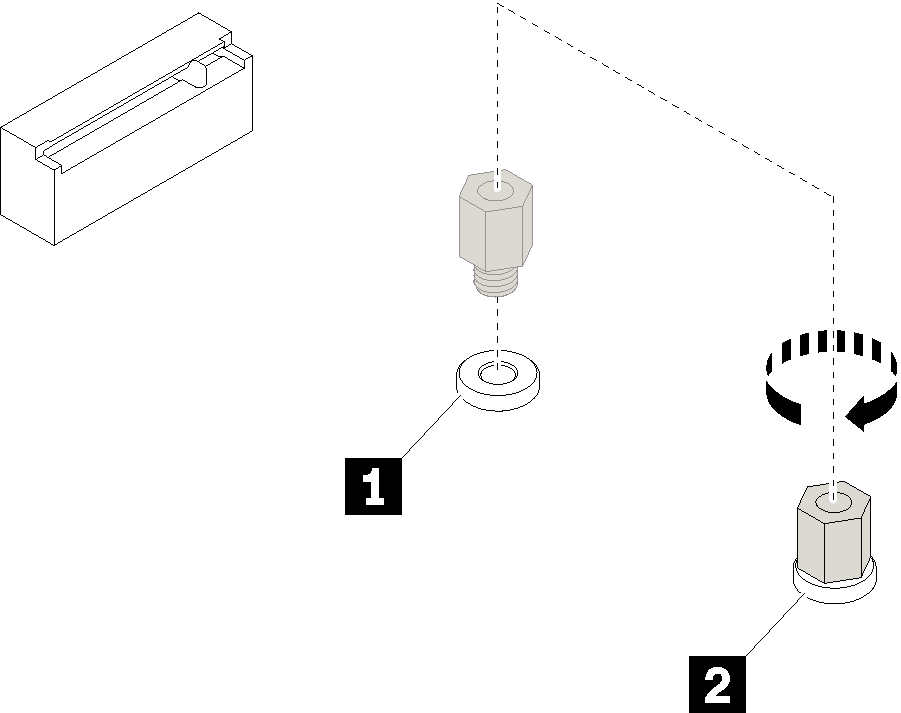
| Callout | Callout |
|---|---|
| 1 Standoff for 42 mm M.2 drive | 2 Standoff for 80 mm M.2 drive |
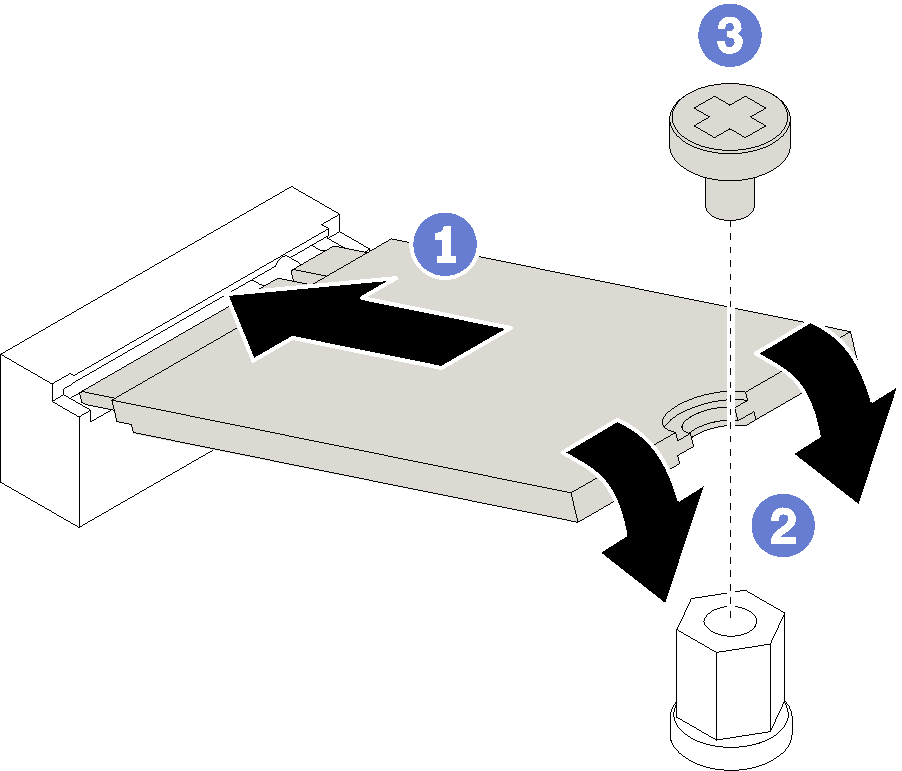
- Using a #1 Phillips screwdriver, tighten the screw that you saved earlier to secure the drive to the system board.Figure 2. M.2 drive installation
After installing the M.2 drive:
Complete the parts replacement. See Complete the parts replacement
Demo video
Give documentation feedback