Initial Setup
To get up and running with your system, you install hardware components, configure host systems, and configure storage.
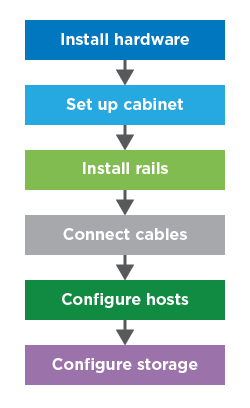
Step 1: Install hardware
To install the system hardware, refer to the Installation and Setup Instructions that comes with your system.
Step 2: Set up a rack
Install your system in a 4-post rack or Lenovo system rack, as applicable. If you are setting up a new rack for the storage array, follow instructions that come with the rack.
Step 3: Install rails
When shipped, each shelf includes rack-mounting hardware. For detailed instructions on installing the rails, refer to the installation manual that comes with the rail kit, or refer to Rail kit installation instructions.
Step 4: Connect cables
The Installation and Setup Instructions include instructions for connecting cables. If you need lists of supported cables and transceivers, best practices for cabling, and detailed information about the host ports for your controller, refer to Cabling your storage system.