Removing a 2-bay compute node
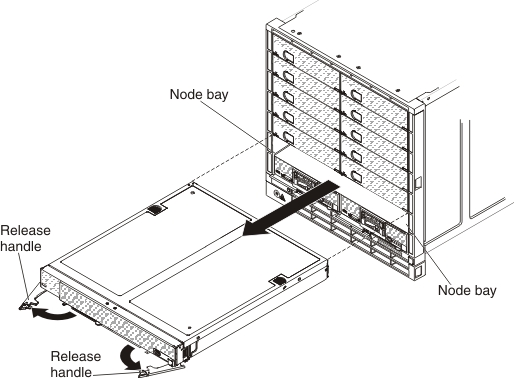
Use these instructions to remove a 2-bay compute node from the Flex System Carrier-Grade chassis.
Attention
To maintain proper system cooling, do not operate the chassis without a compute node or compute node filler installed in each node bay. Install a compute node or filler within 1 minute of the removal of a compute node.
Before you remove a 2-bay compute node, complete the following tasks:
- Remove the airborne contaminant filter assembly bezel (see Removing the airborne contaminant filter assembly).NoteRemove only the airborne contaminant filter assembly bezel. You do not need to remove the filter assembly mounting brackets in order to remove a
compute node. - Make a note of the bay number. Reinstalling a compute node into a different bay from the one from which it was removed can have unintended consequences. Some configuration information and update options are established according to bay number.
- Shut down the compute node operating system; then, shut down the compute node. See the documentation that comes with your compute node for the procedure to shut down the operating system. Compute node documentation is available from the Flex System compute nodes information page.
To remove a 2-bay compute node, complete the following steps:
If you are not immediately replacing the compute node, complete the following steps:
- Install a chassis shelf in the empty node bays (see Replacing a chassis shelf).
- Install a node bay filler in each empty bay.
- Reinstall the airborne contaminant filter assembly bezel (see Replacing the airborne contaminant filter assembly.
Give documentation feedback
