Install the air baffle
Follow instructions in this section to install the air baffle.
About this task
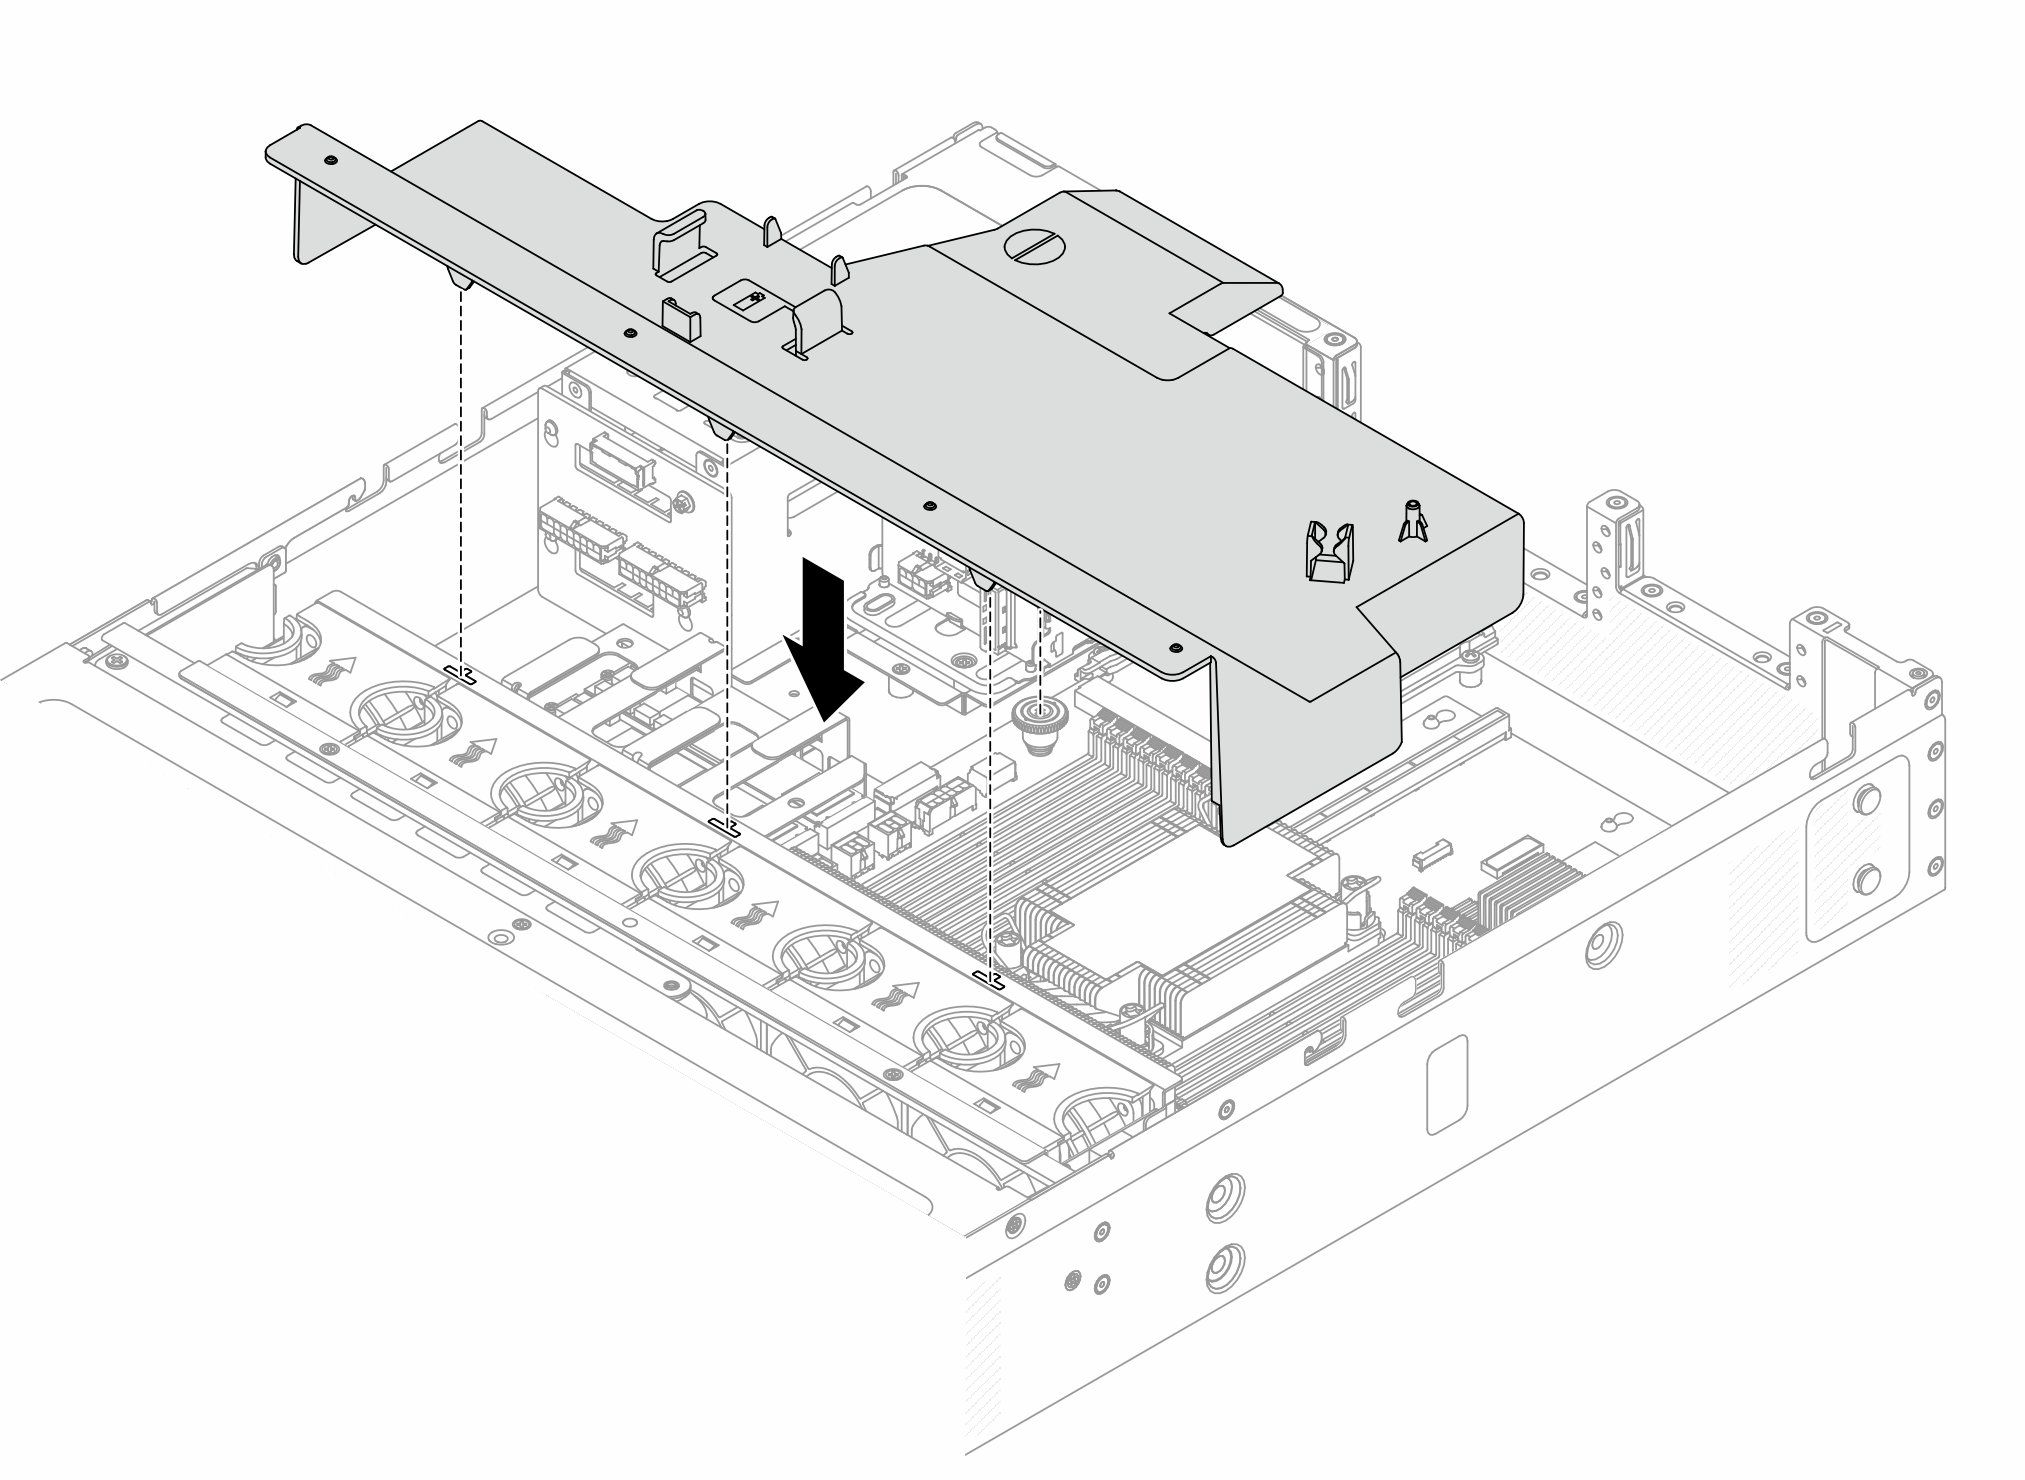
The air baffle you want to install might be different from following illustrations, but the installation method is the same.
Hazardous energy present. Voltages with hazardous energy might cause heating when shorted with metal, which might result in spattered metal, burns, or both.

Read Installation Guidelines and Safety inspection checklist to ensure that you work safely.
Power off the server and peripheral devices and disconnect the power cords and all external cables. See Power off the server.
Prevent exposure to static electricity, which might lead to system halt and loss of data, by keeping static-sensitive components in their static-protective packages until installation, and handling these devices with an electrostatic-discharge wrist strap or other grounding systems.
Procedure
- Align the clips on the air baffle to the sockets on the fan cage.Figure 1. Air baffle installation