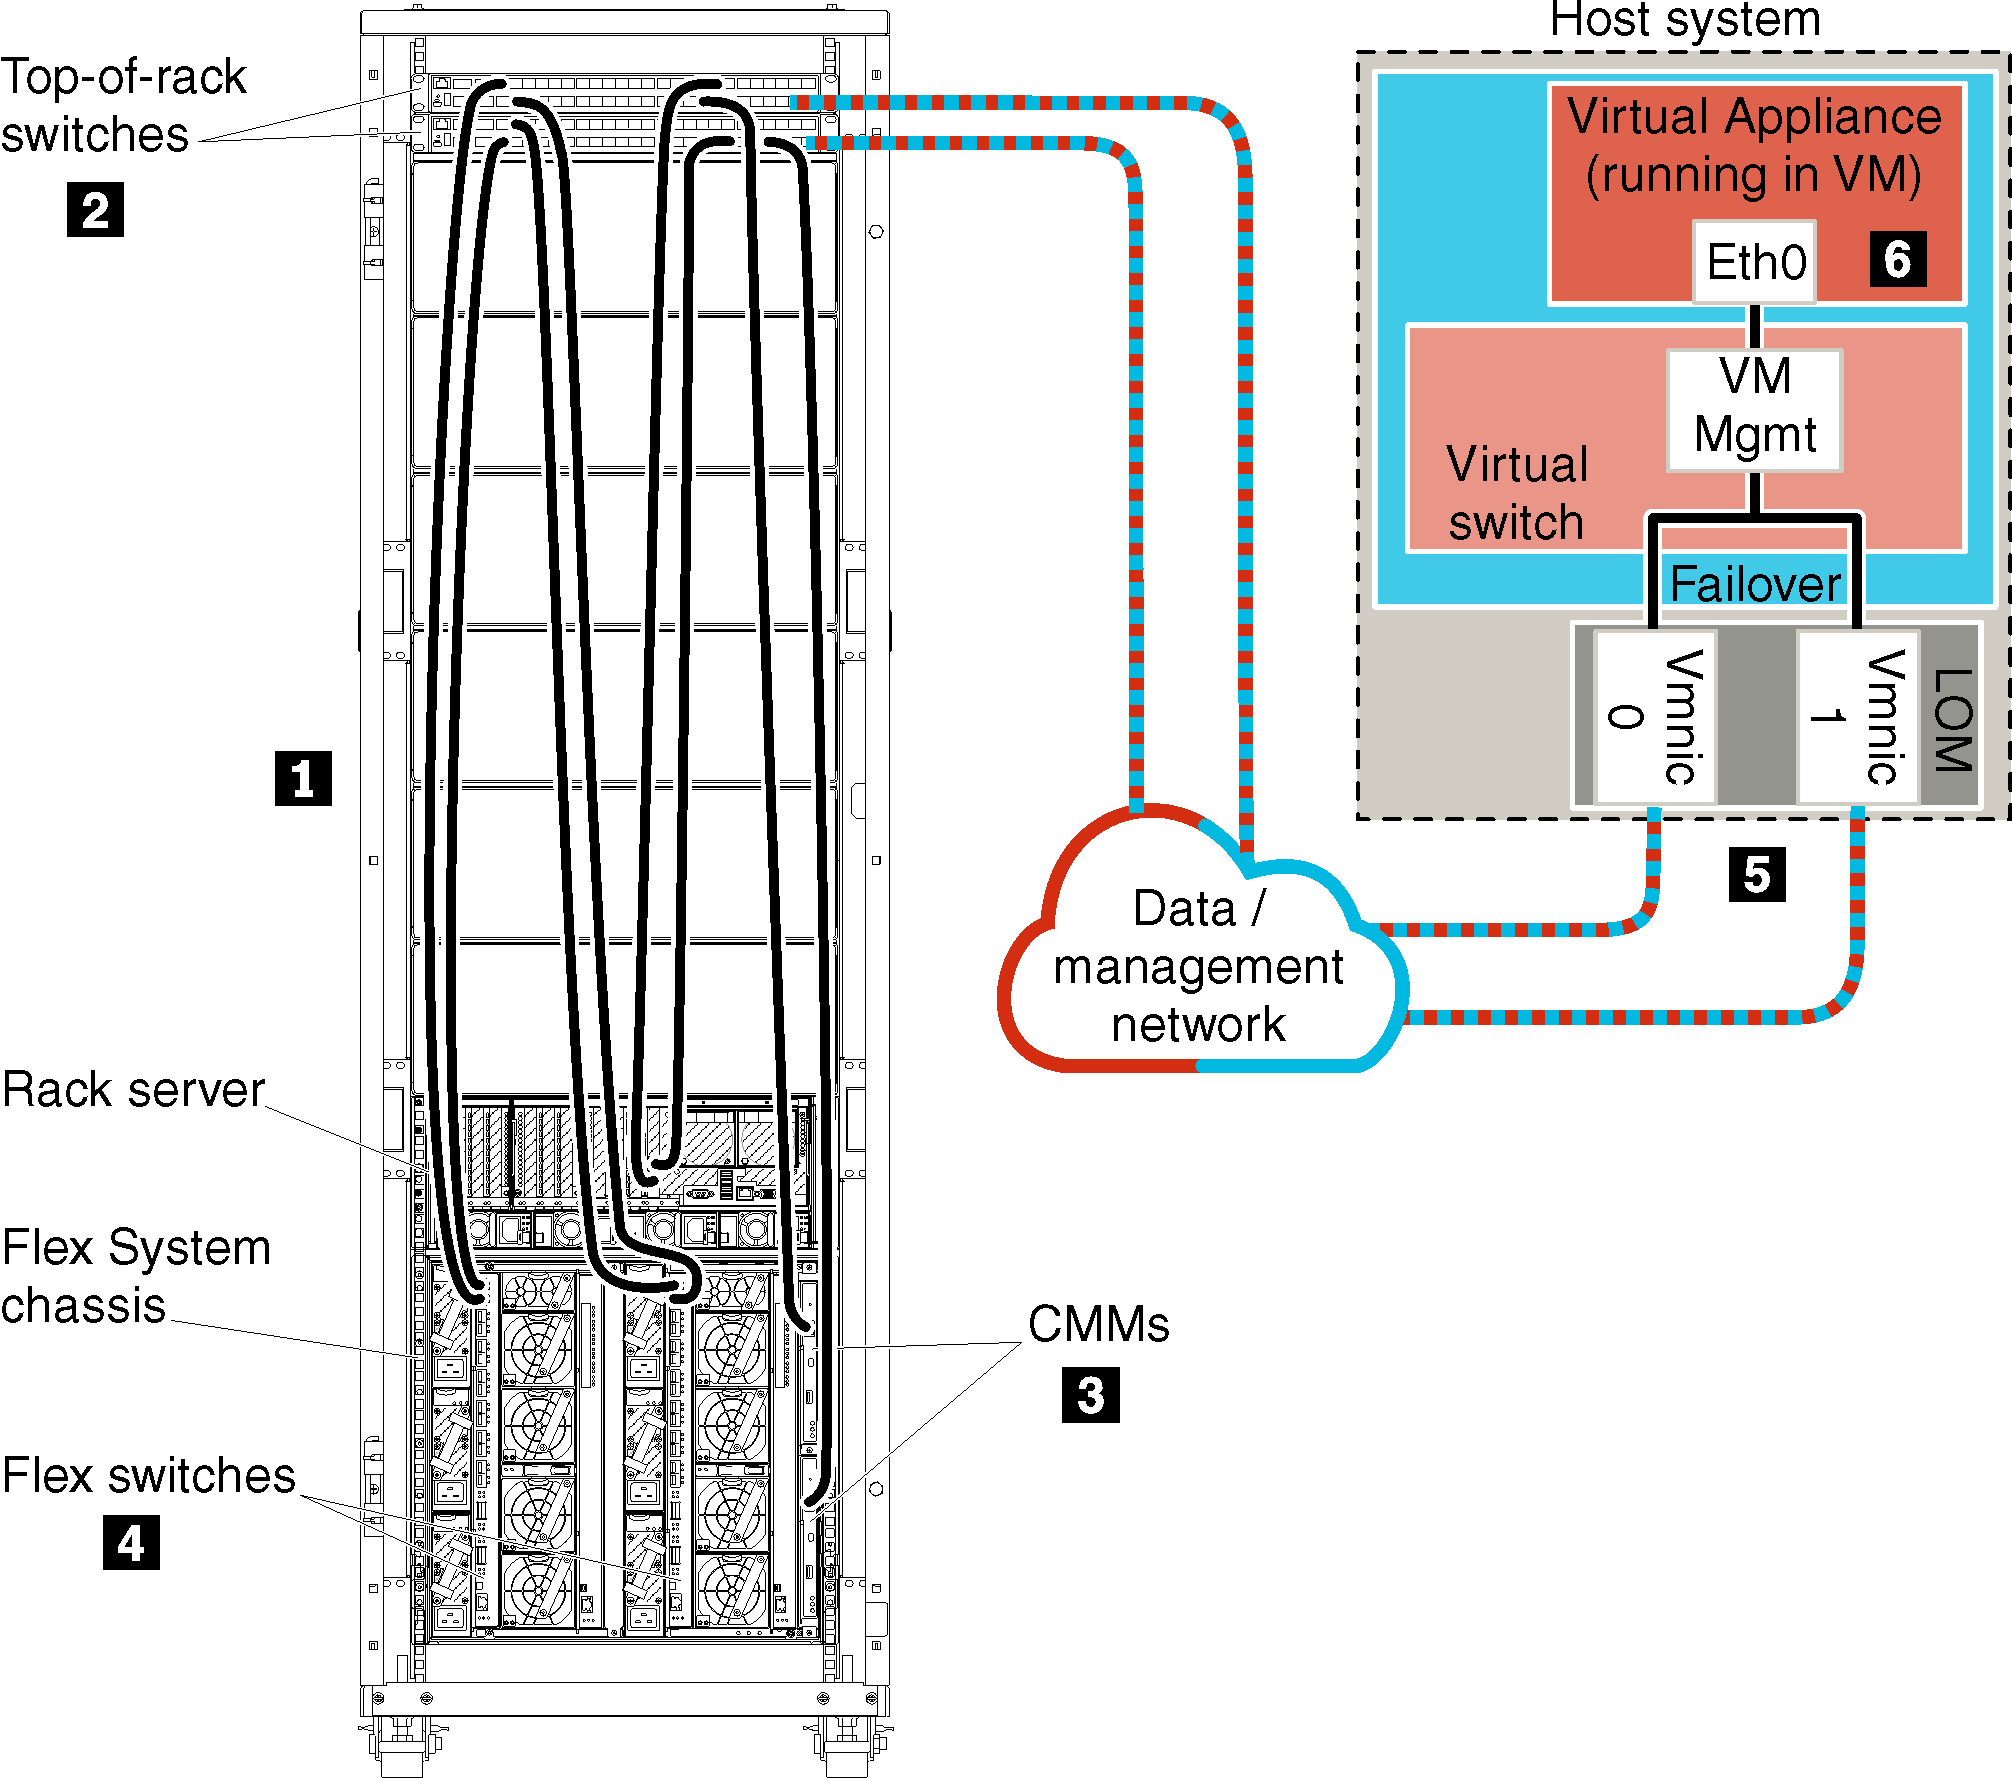
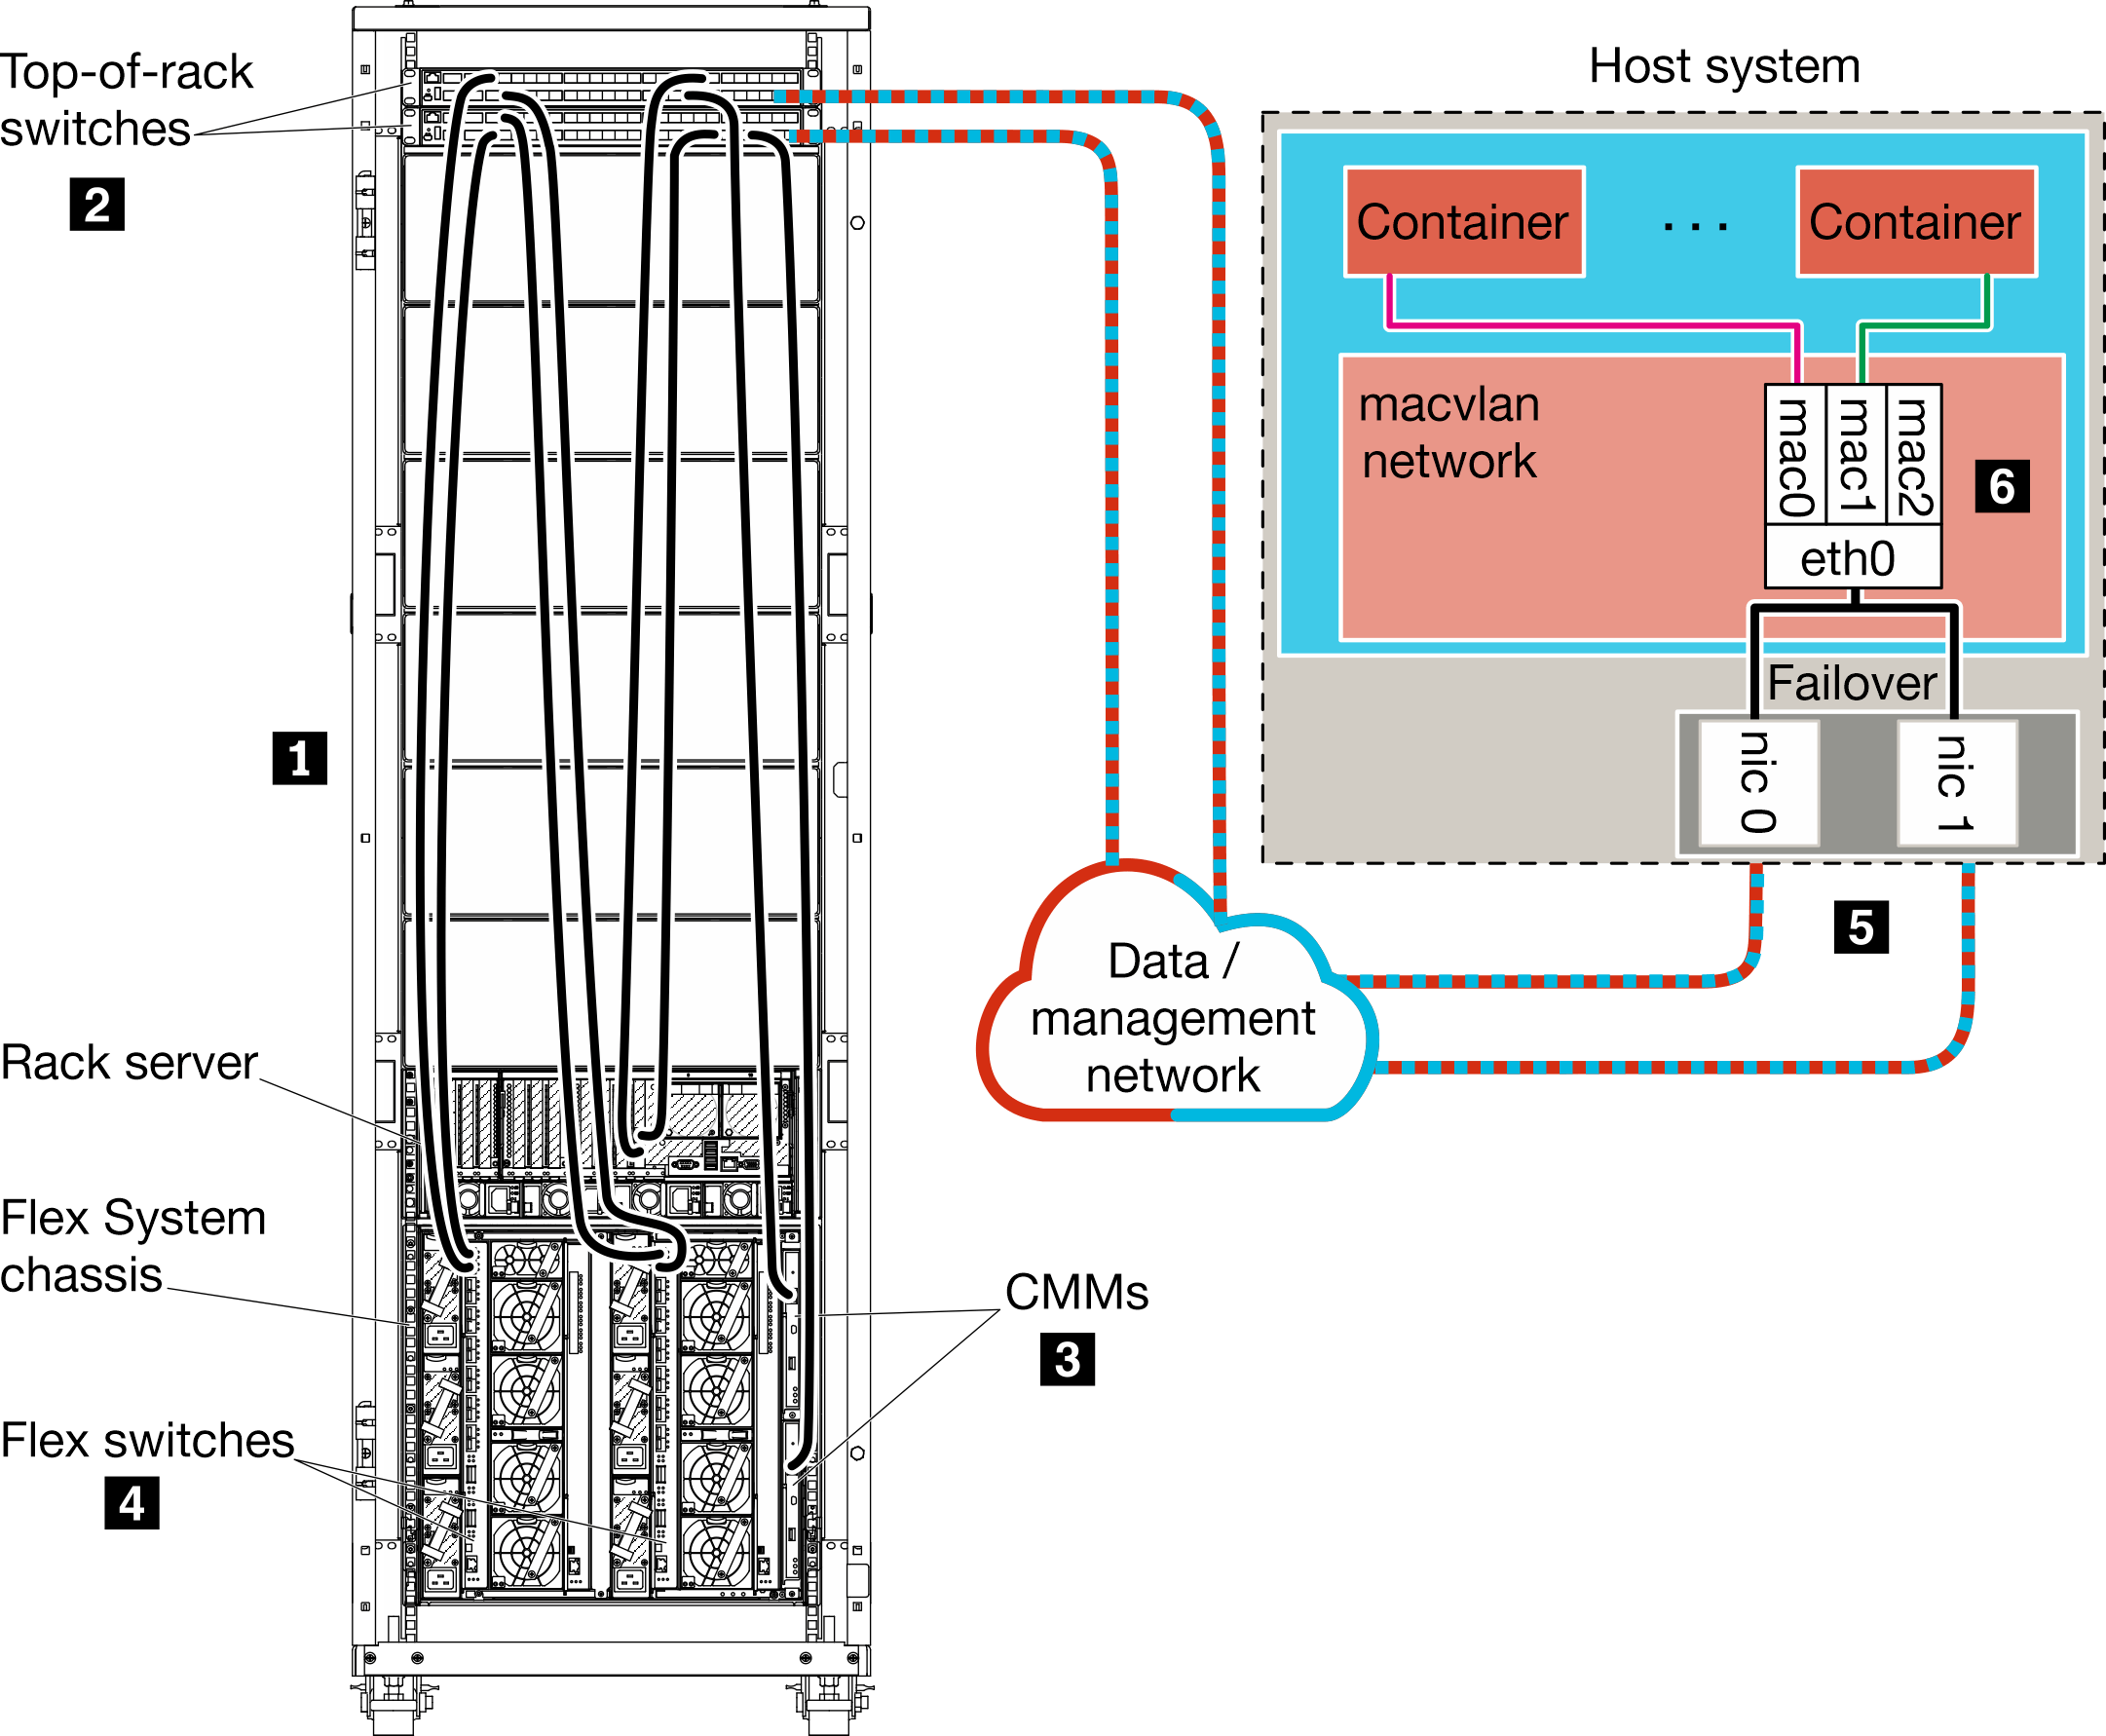
Single data and management network (CentOS, Citrix, Docker, Red Hat KVM, Rocky, Ubuntu, VMware ESXi, or Windows Hyper-V)
In this network topology, both the data network and management network are the same network.
Before you begin
Ensure that all appropriate ports are enabled, including ports that XClarity Administrator requires (see Port availability).
Ensure that the minimum required firmware is installed on each device that you intend to manage using XClarity Administrator. You can find minimum required firmware levels from the XClarity Administrator Support – Compatibility webpage by clicking the Compatibility tab and then clicking the link for the appropriate device types..
About this task
For virtual appliances, all communications between XClarity Administrator and the network occurs over the eth0 network interface on the host. For containers, you can use a custom name; however, this scenario uses eth0.
The following figure illustrates one way to set up your environment if the data network and management network are the same network. The numbers in the figure correspond to the numbered steps in the following sections.


- You must implement either a virtually separate data and management network topology or a single data and management network topology.
- You cannot use XClarity Administrator to apply firmware updates to that managed server. Even when only some of the firmware is applied with immediate activation, XClarity Administrator forces the target server to restart, which would restart XClarity Administrator as well. When applied with deferred activation, only some firmware is applied when the XClarity Administrator host is restarted.
- If you use a server in a Flex System chassis, ensure that the server is set to automatically power on. You can set this option from the CMM web interface by clicking , then selecting the server, and selecting Auto Power for the Auto Power On Mode.
If you intend to install XClarity Administrator to manage existing chassis and rack servers that have already been configured, proceed to Step 5: Install and configure the host.
For additional information about planning for this topology, including information about network settings and Eth1 and Eth0 configuration, see Single data and management network.