Web Certificate
The Web Certificate page displays current certificate information.
There are three buttons for users to Generate CSR (Certificate Signing Request), Import Certificate and Generate Self-signed Certificate.
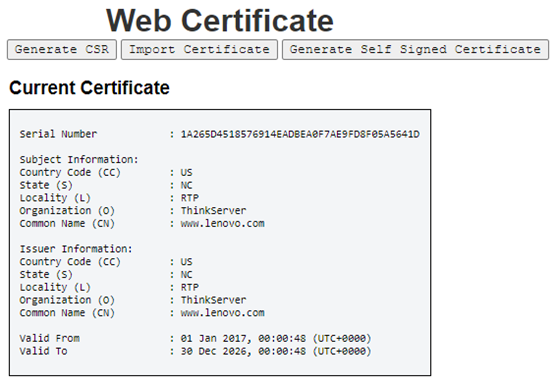
Country Code (CC) = US
State (S) = NC
Locality (L) = RTP
Organization (O) = ThinkServer
Common Name (CN) = www.lenovo.com
Country Code (CC) = US
State (S) = NC
Locality (L) = RTP
Organization (O) = ThinkServer
Common Name (CN) = www.lenovo.com
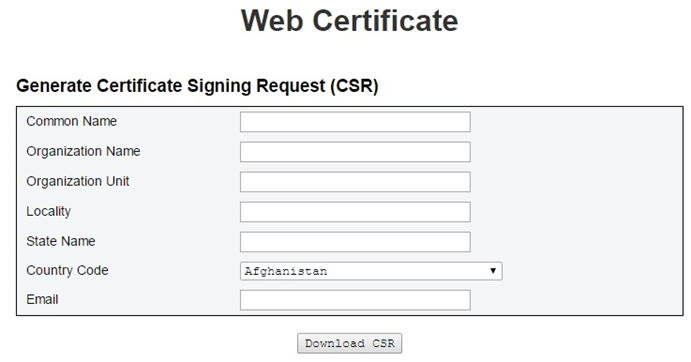
You can click on the Generate CSR button to fill in the certification request information and download the CSR. After completing the download, you can send the CSR to a third-party certificate authority to apply for a digital identity certificate.
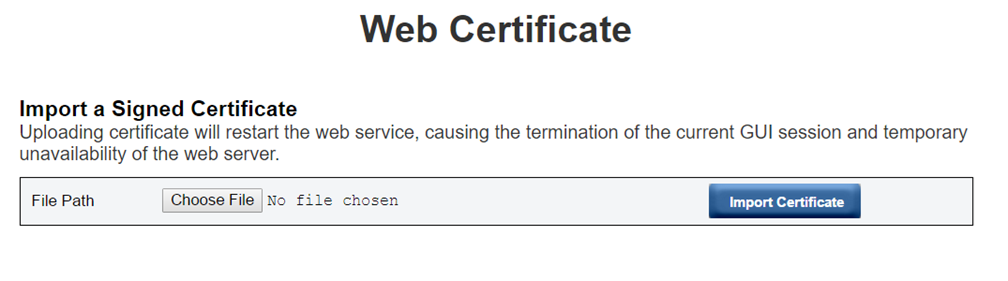
Import a Signed Certificate
Uploading a certificate will restart the web service, leading to the termination of the current WebGUI session and temporary unavailability of the web server.
You can import the certificate when the CA responds with a signed certificate. Importing certificates in PEM format is supported. You can convert your DER certificate to PEM format by “openssl x509 -inform der -in certificate.cer -out certificate.pem”. After the certificate has been imported, it is required to reconnect to the SMM2 web.
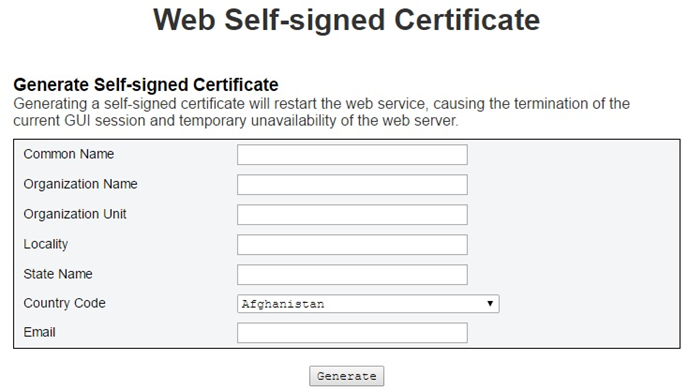
Generate Self-signed Certificate
Generating a self-signed certificate will restart the web service, leading to the termination of the current WebGUI session and temporary unavailability of the web server.
You can also generate a self-signed certificate by filling in the information and clicking on the Generate button on this page.