Remove the chassis from the rack

Follow instructions in this section to remove the chassis from the rack.

About this task

To avoid potential danger, make sure to read and follow the safety information.

R006

No weight on shelf
CAUTION

Do not place any object on top of a rack-mounted device unless that rack-mounted device is intended for use as a shelf.

Attention
CAUTION

Use safe practices when lifting the chassis.

Procedure

  1. Make preparations for this task.
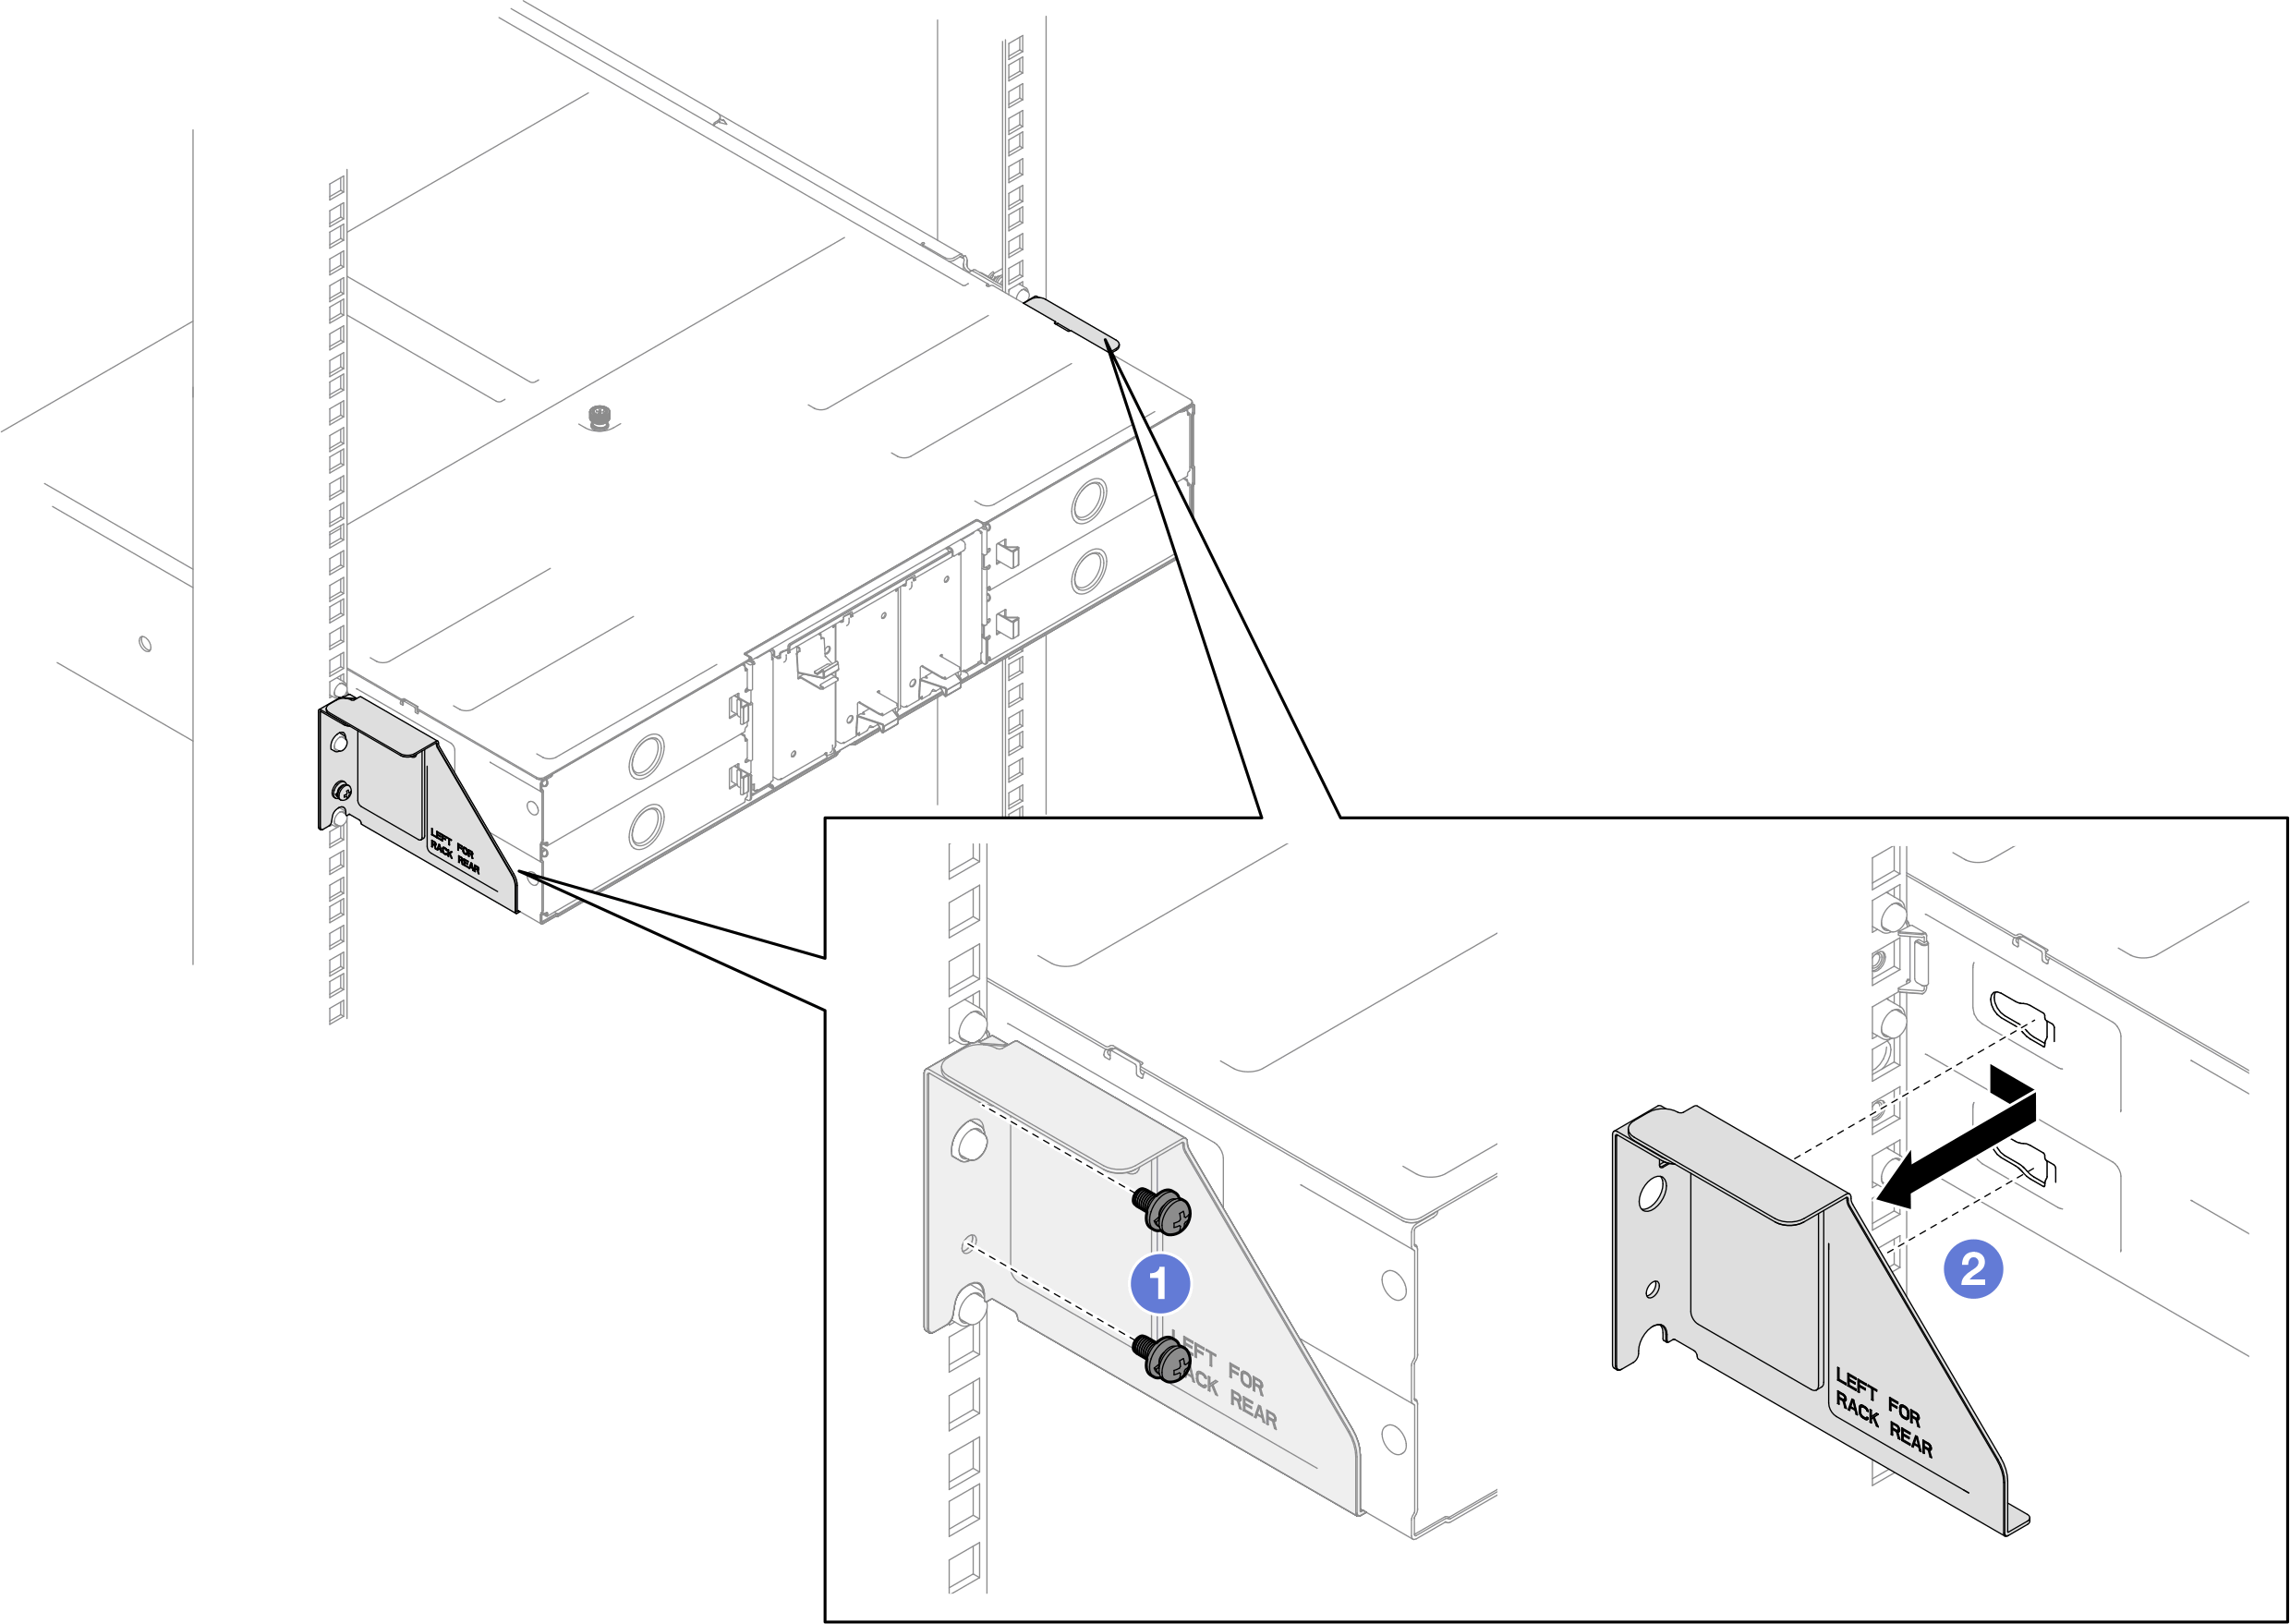
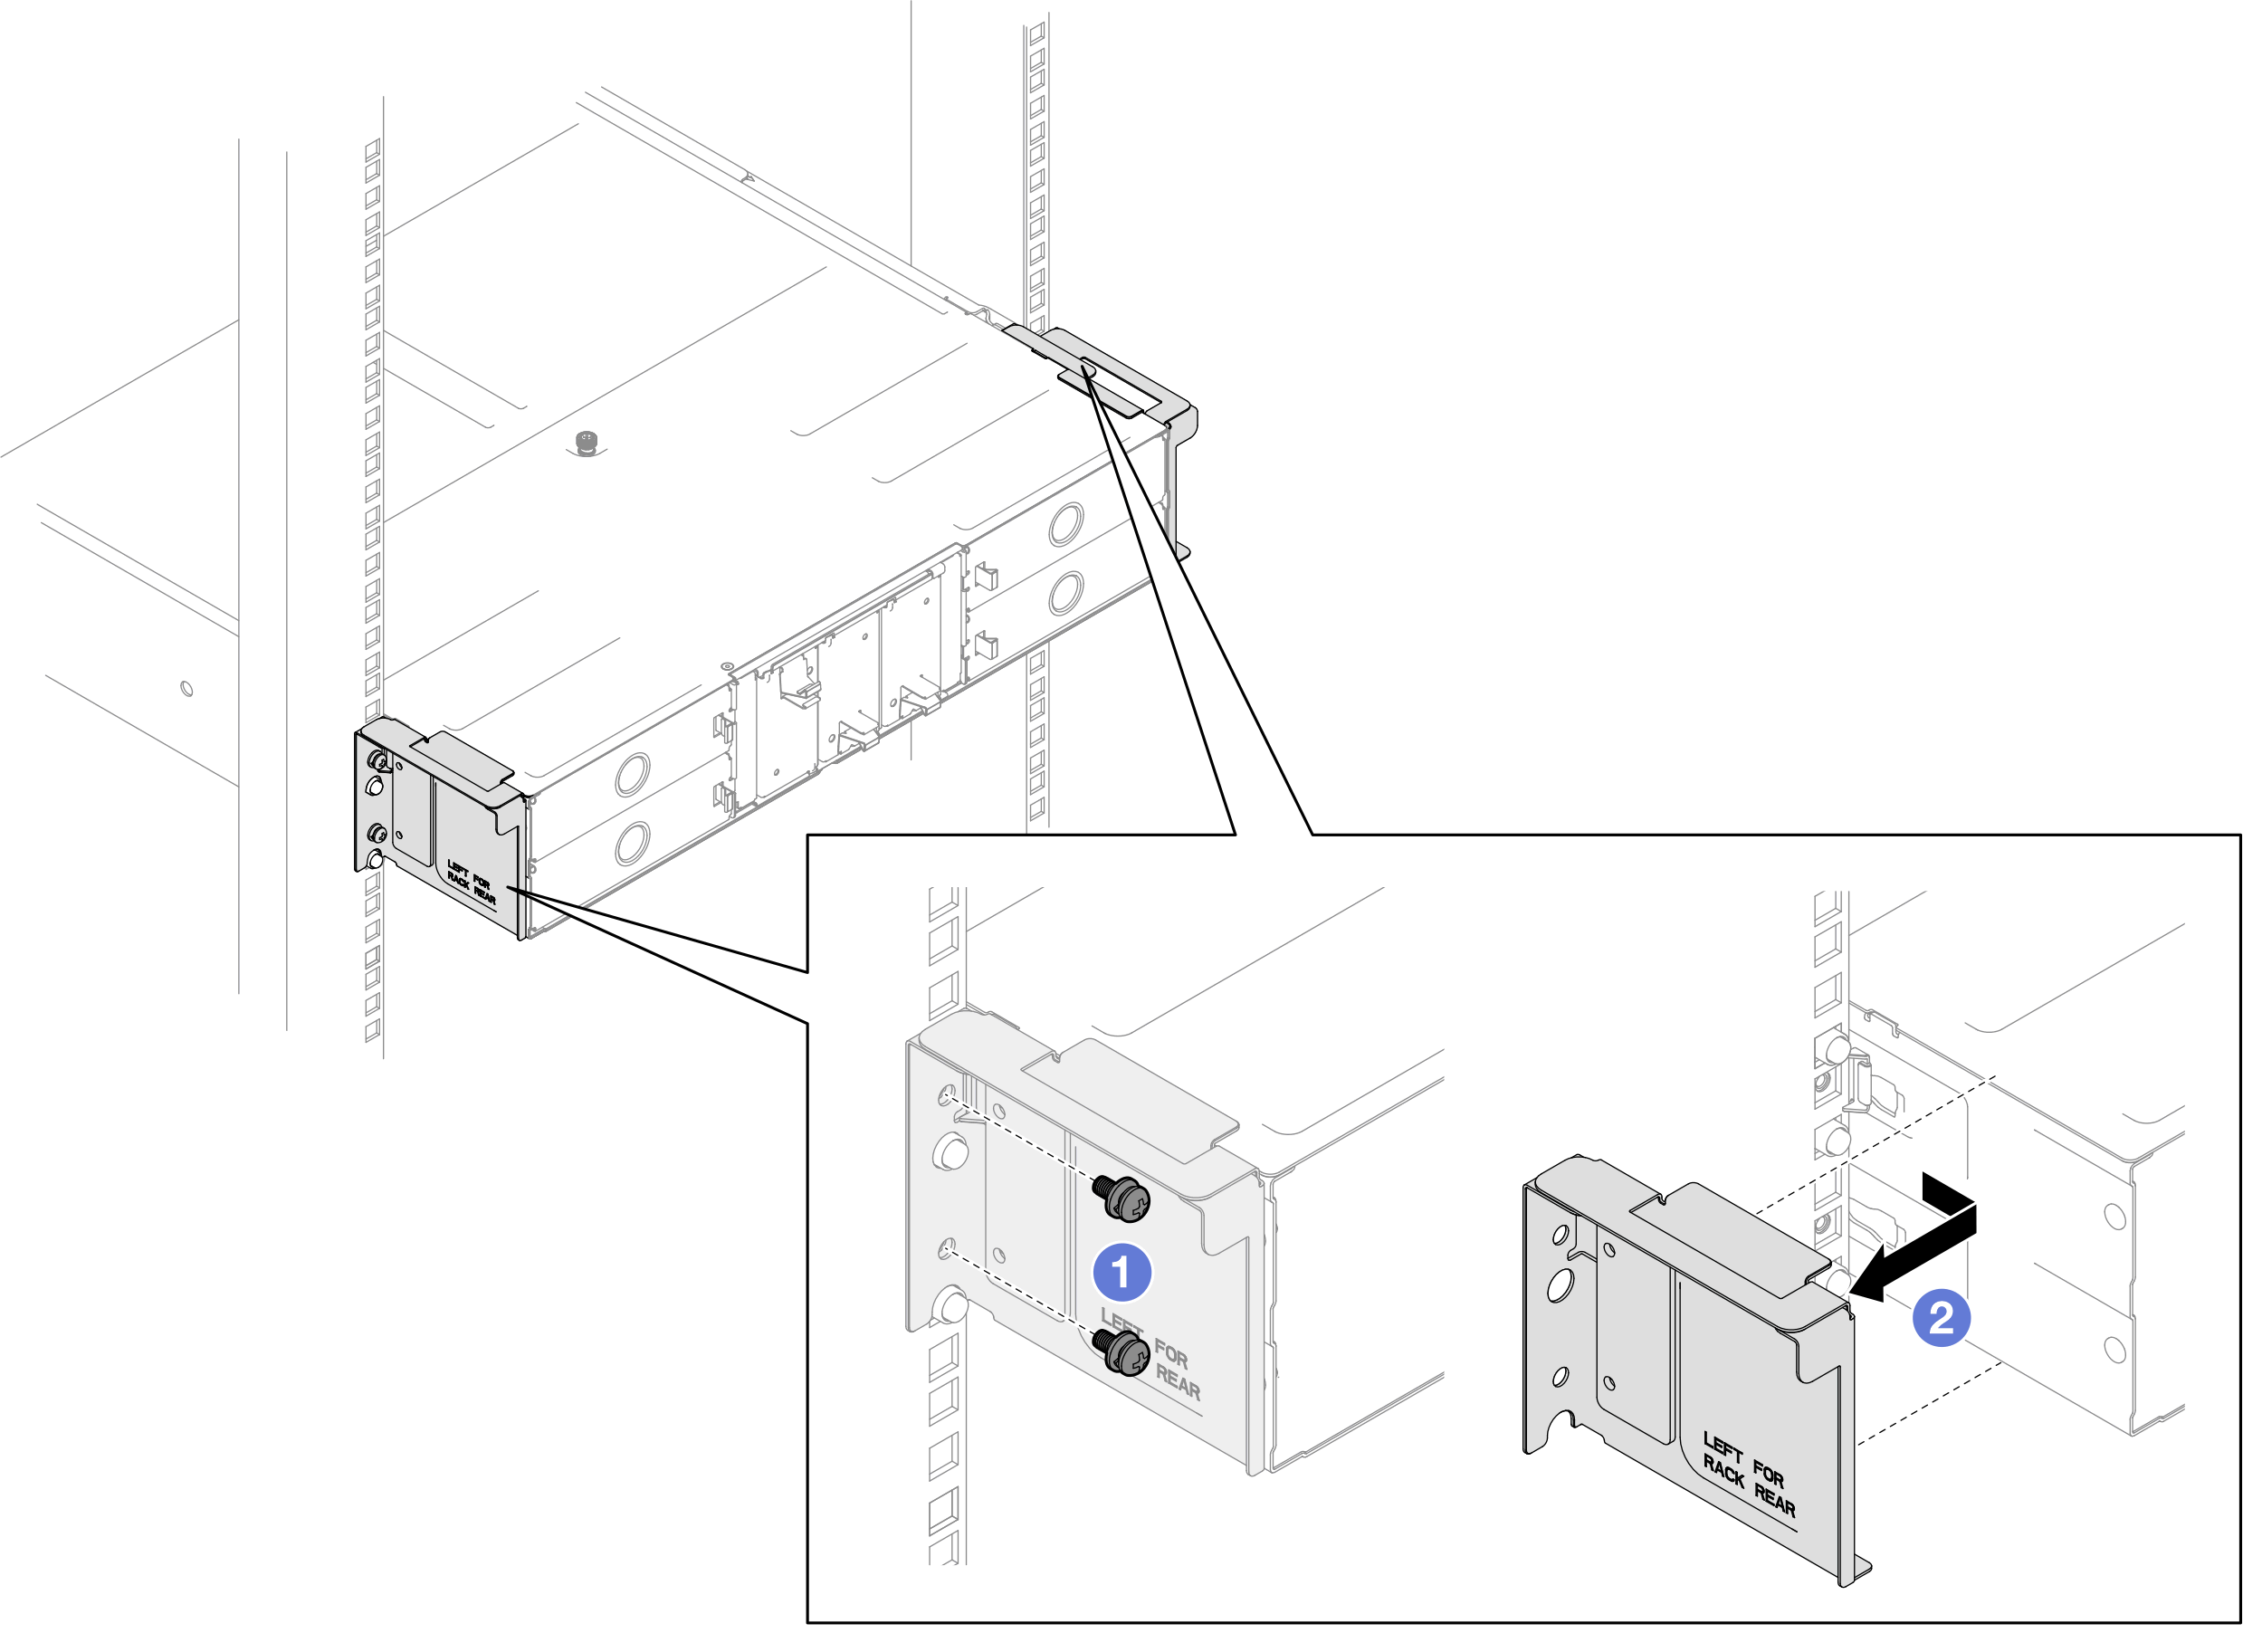
    1. If shipping brackets are installed on the rear of the rack, remove them.
      1. Remove the screws that secure the rear brackets.

      2. Slide the brackets toward the rear of the rack; then, remove the brackets from the rack and the chassis.

      Figure 1. Removal of shipping brackets for 29-inch or 28.31-inch deep racks
      Removal of shipping brackets for 29-inch or 28.31-inch deep racks
      Figure 2. Removal of shipping brackets for 29.5-inch deep racks
      Removal of shipping brackets for 29.5-inch deep racks
    2. If any nodes are installed in the chassis, power off all the nodes and disconnect all external cables from the nodes; then, remove the nodes from the chassis (see Power off the node and Remove a node from the chassis).
    3. If any power supply units are installed in the chassis, remove them (see Remove a hot-swap power supply).
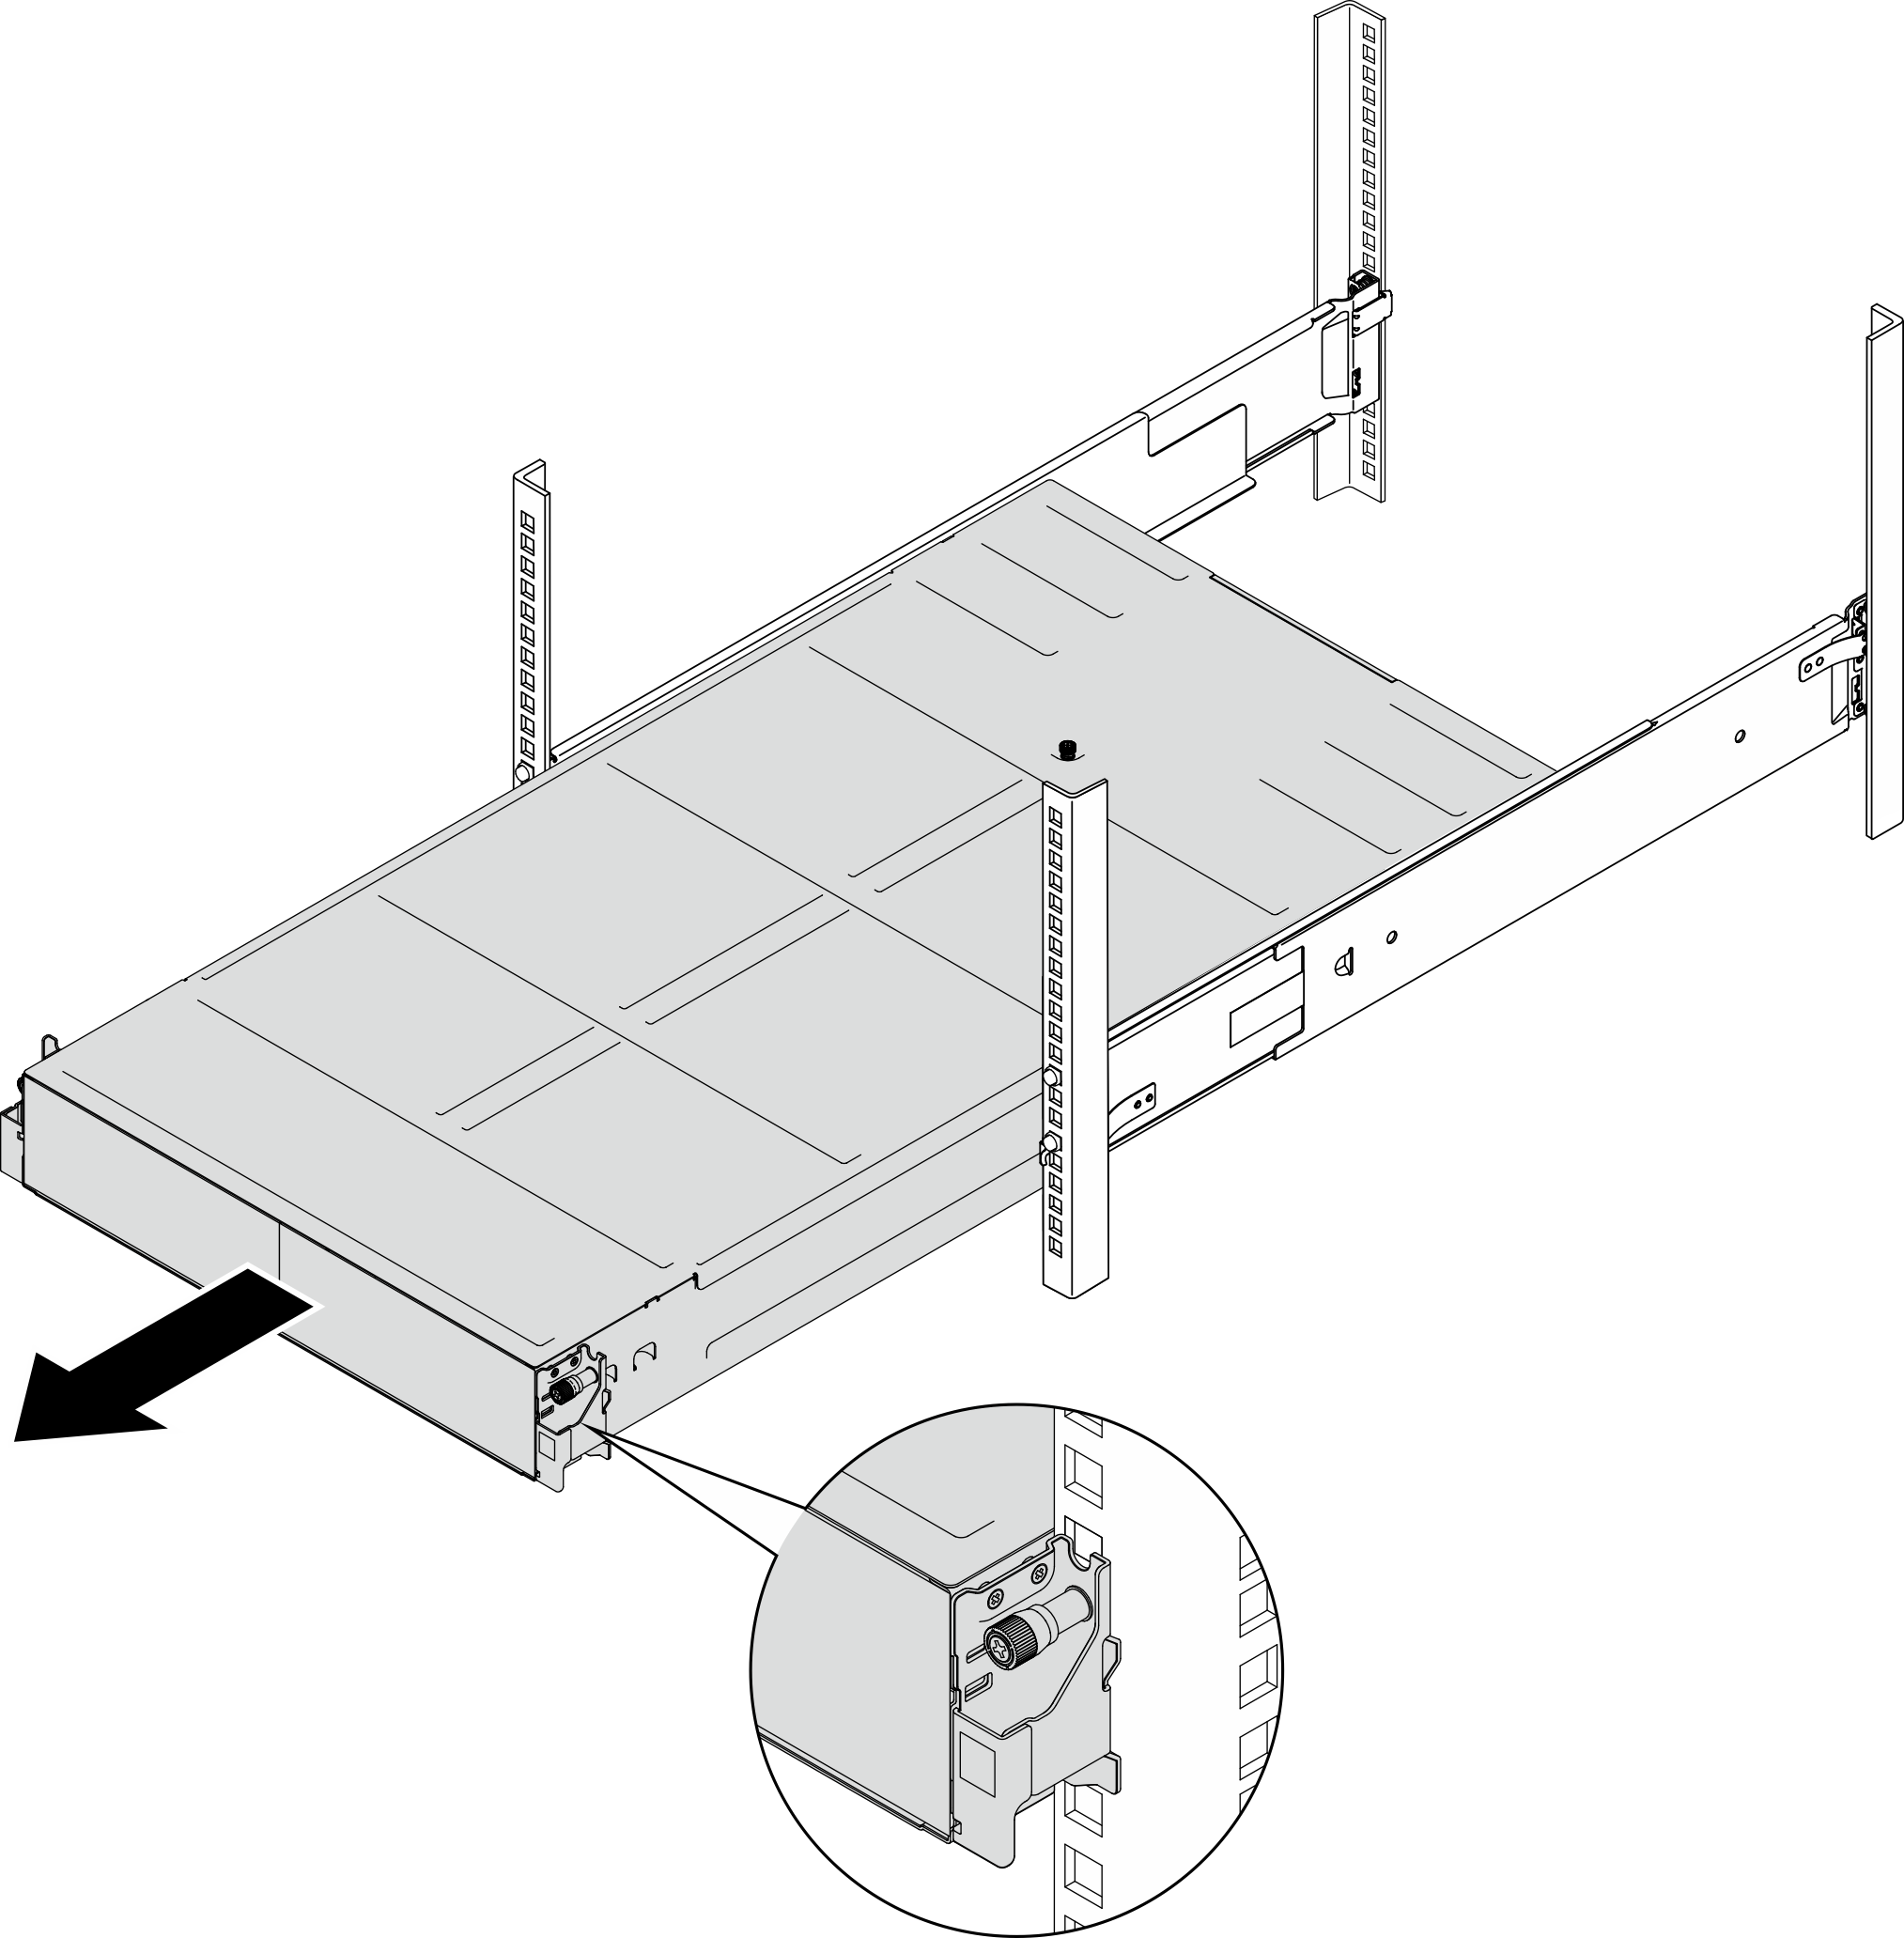
  2. Loosen the captive screws on the front of the chassis.
  3. Carefully pull the chassis out of the rack; then, remove the chassis from the rails.
    Figure 3. Chassis removal
    Chassis removal
  4. Carefully lay the chassis on a flat, static-protective surface.

After you finish

  1. To remove the rails from the rack, follow the instructions below:

    ThinkSystem L Shaped Rail Kit Installation Guide

  2. If you are instructed to return the component or optional device, follow all packaging instructions, and use any packaging materials for shipping that are supplied to you.