Disassemble the compute node for recycle
Follow the instructions in this section to disassemble the compute node before recycling.
Before disassembling the compute node:
Remove the compute node or compute-expansion node assembly from the enclosure (see Remove a compute node from the enclosure or Remove the compute-expansion node assembly from the enclosure).
Complete the following steps to disassemble the compute node for recycle:
- If the RAID adapter is installed:
- Remove the three screws that secure the RAID adapter support bracket, and remove the support bracket.Figure 1. Removing the RAID adapter support bracket
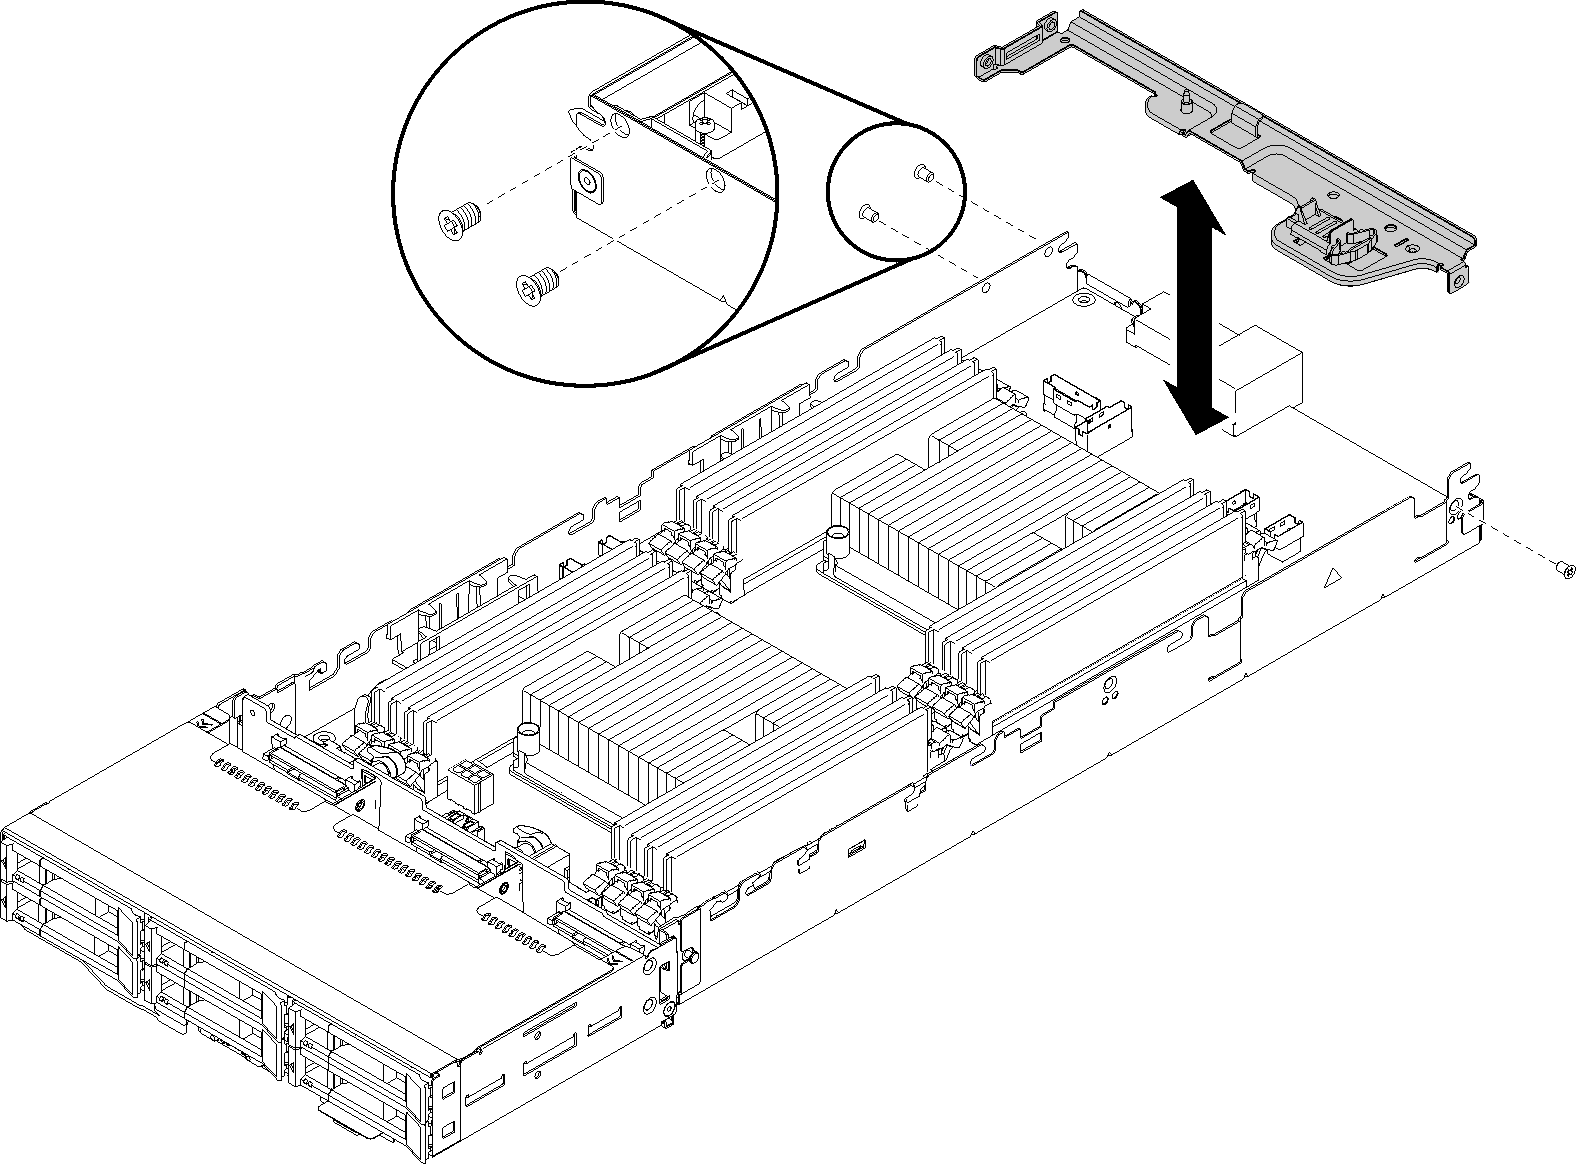
- Remove the three screws that secure the RAID adapter support bracket, and remove the support bracket.
- Complete the following steps to remove the three cable management baskets.
① Press and hold on the latch in the middle of the cable management basket with a tool with flat tip.
② Slide the basket towards the rear of the node, and remove it.
Figure 2. Removing the cable management basket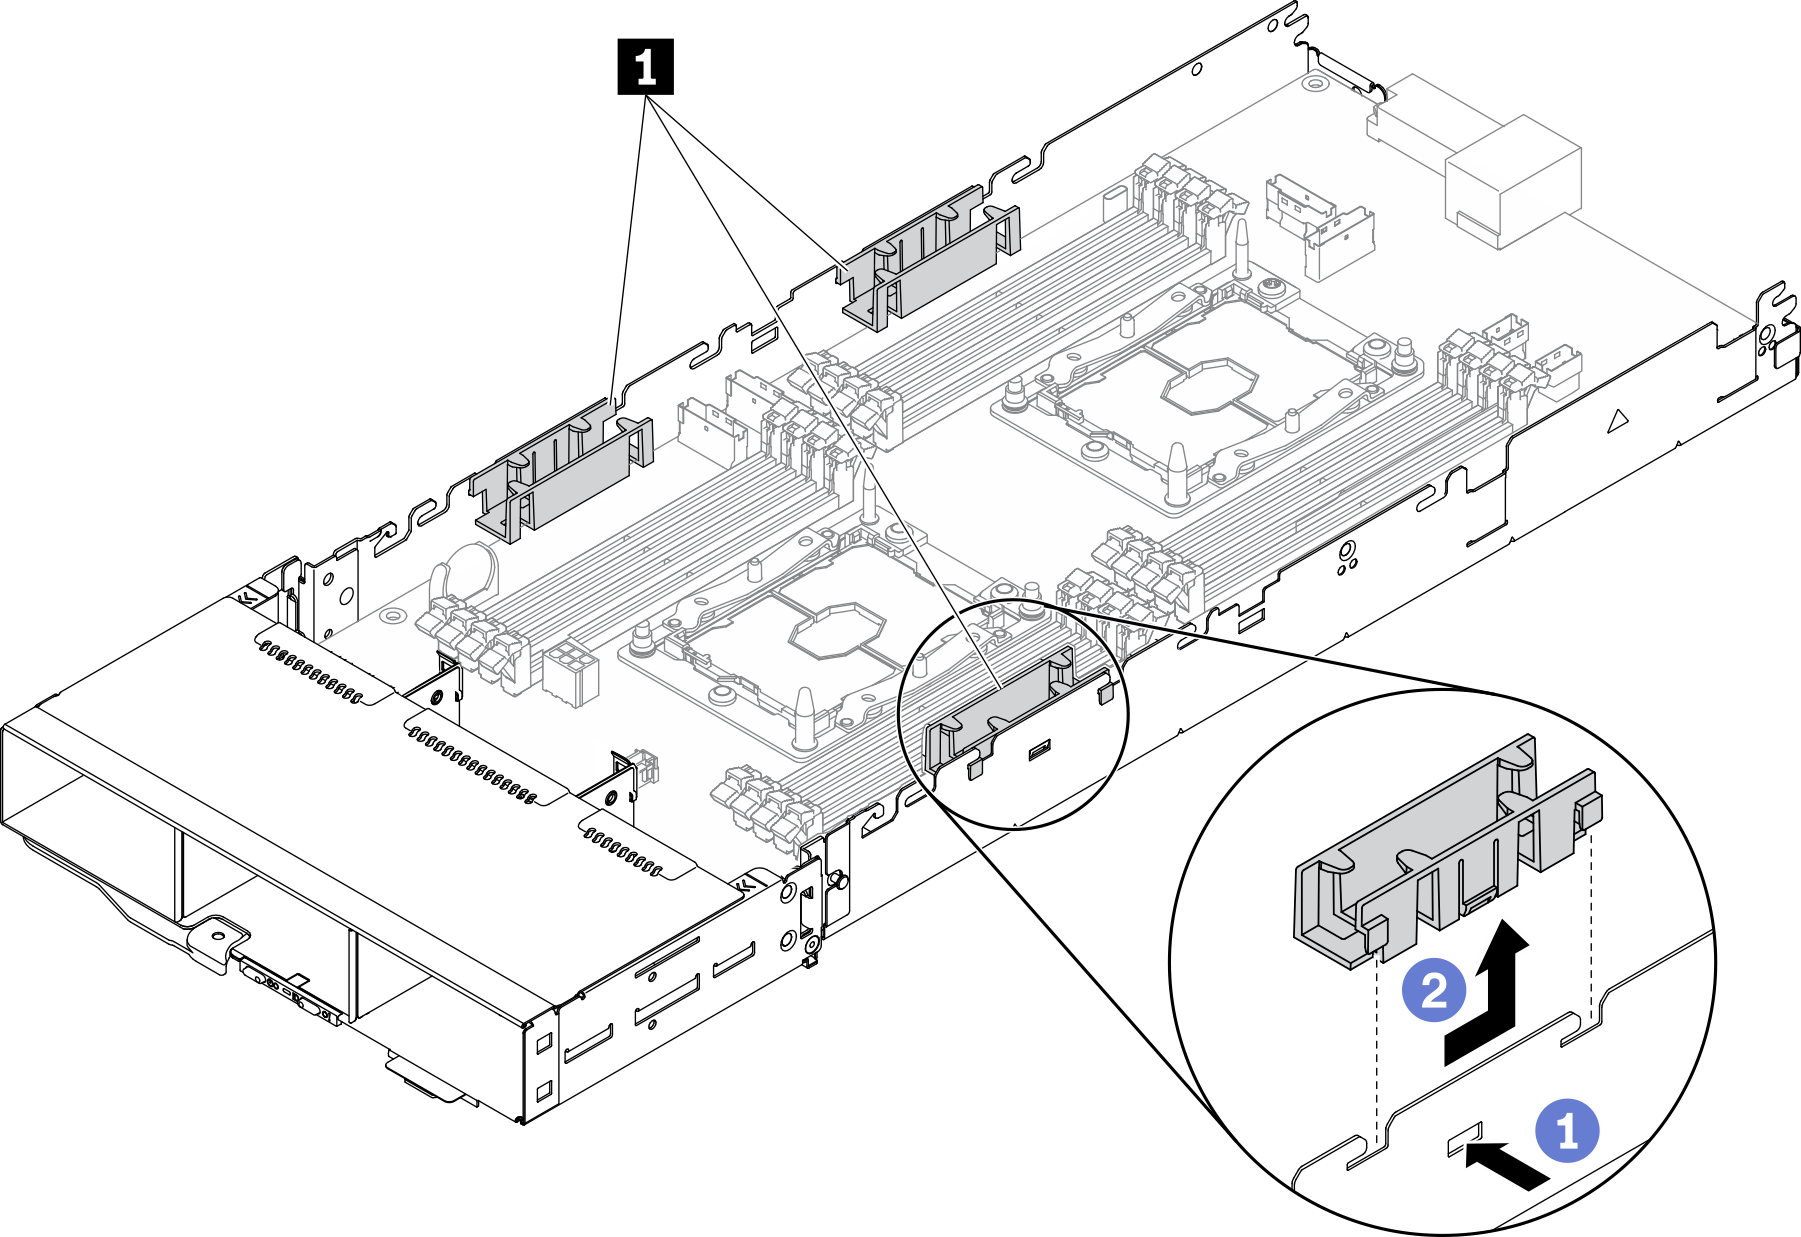
- Remove the eight screws that secure the system board to the compute node, and remove the system board.Figure 3. Disassembling the compute node
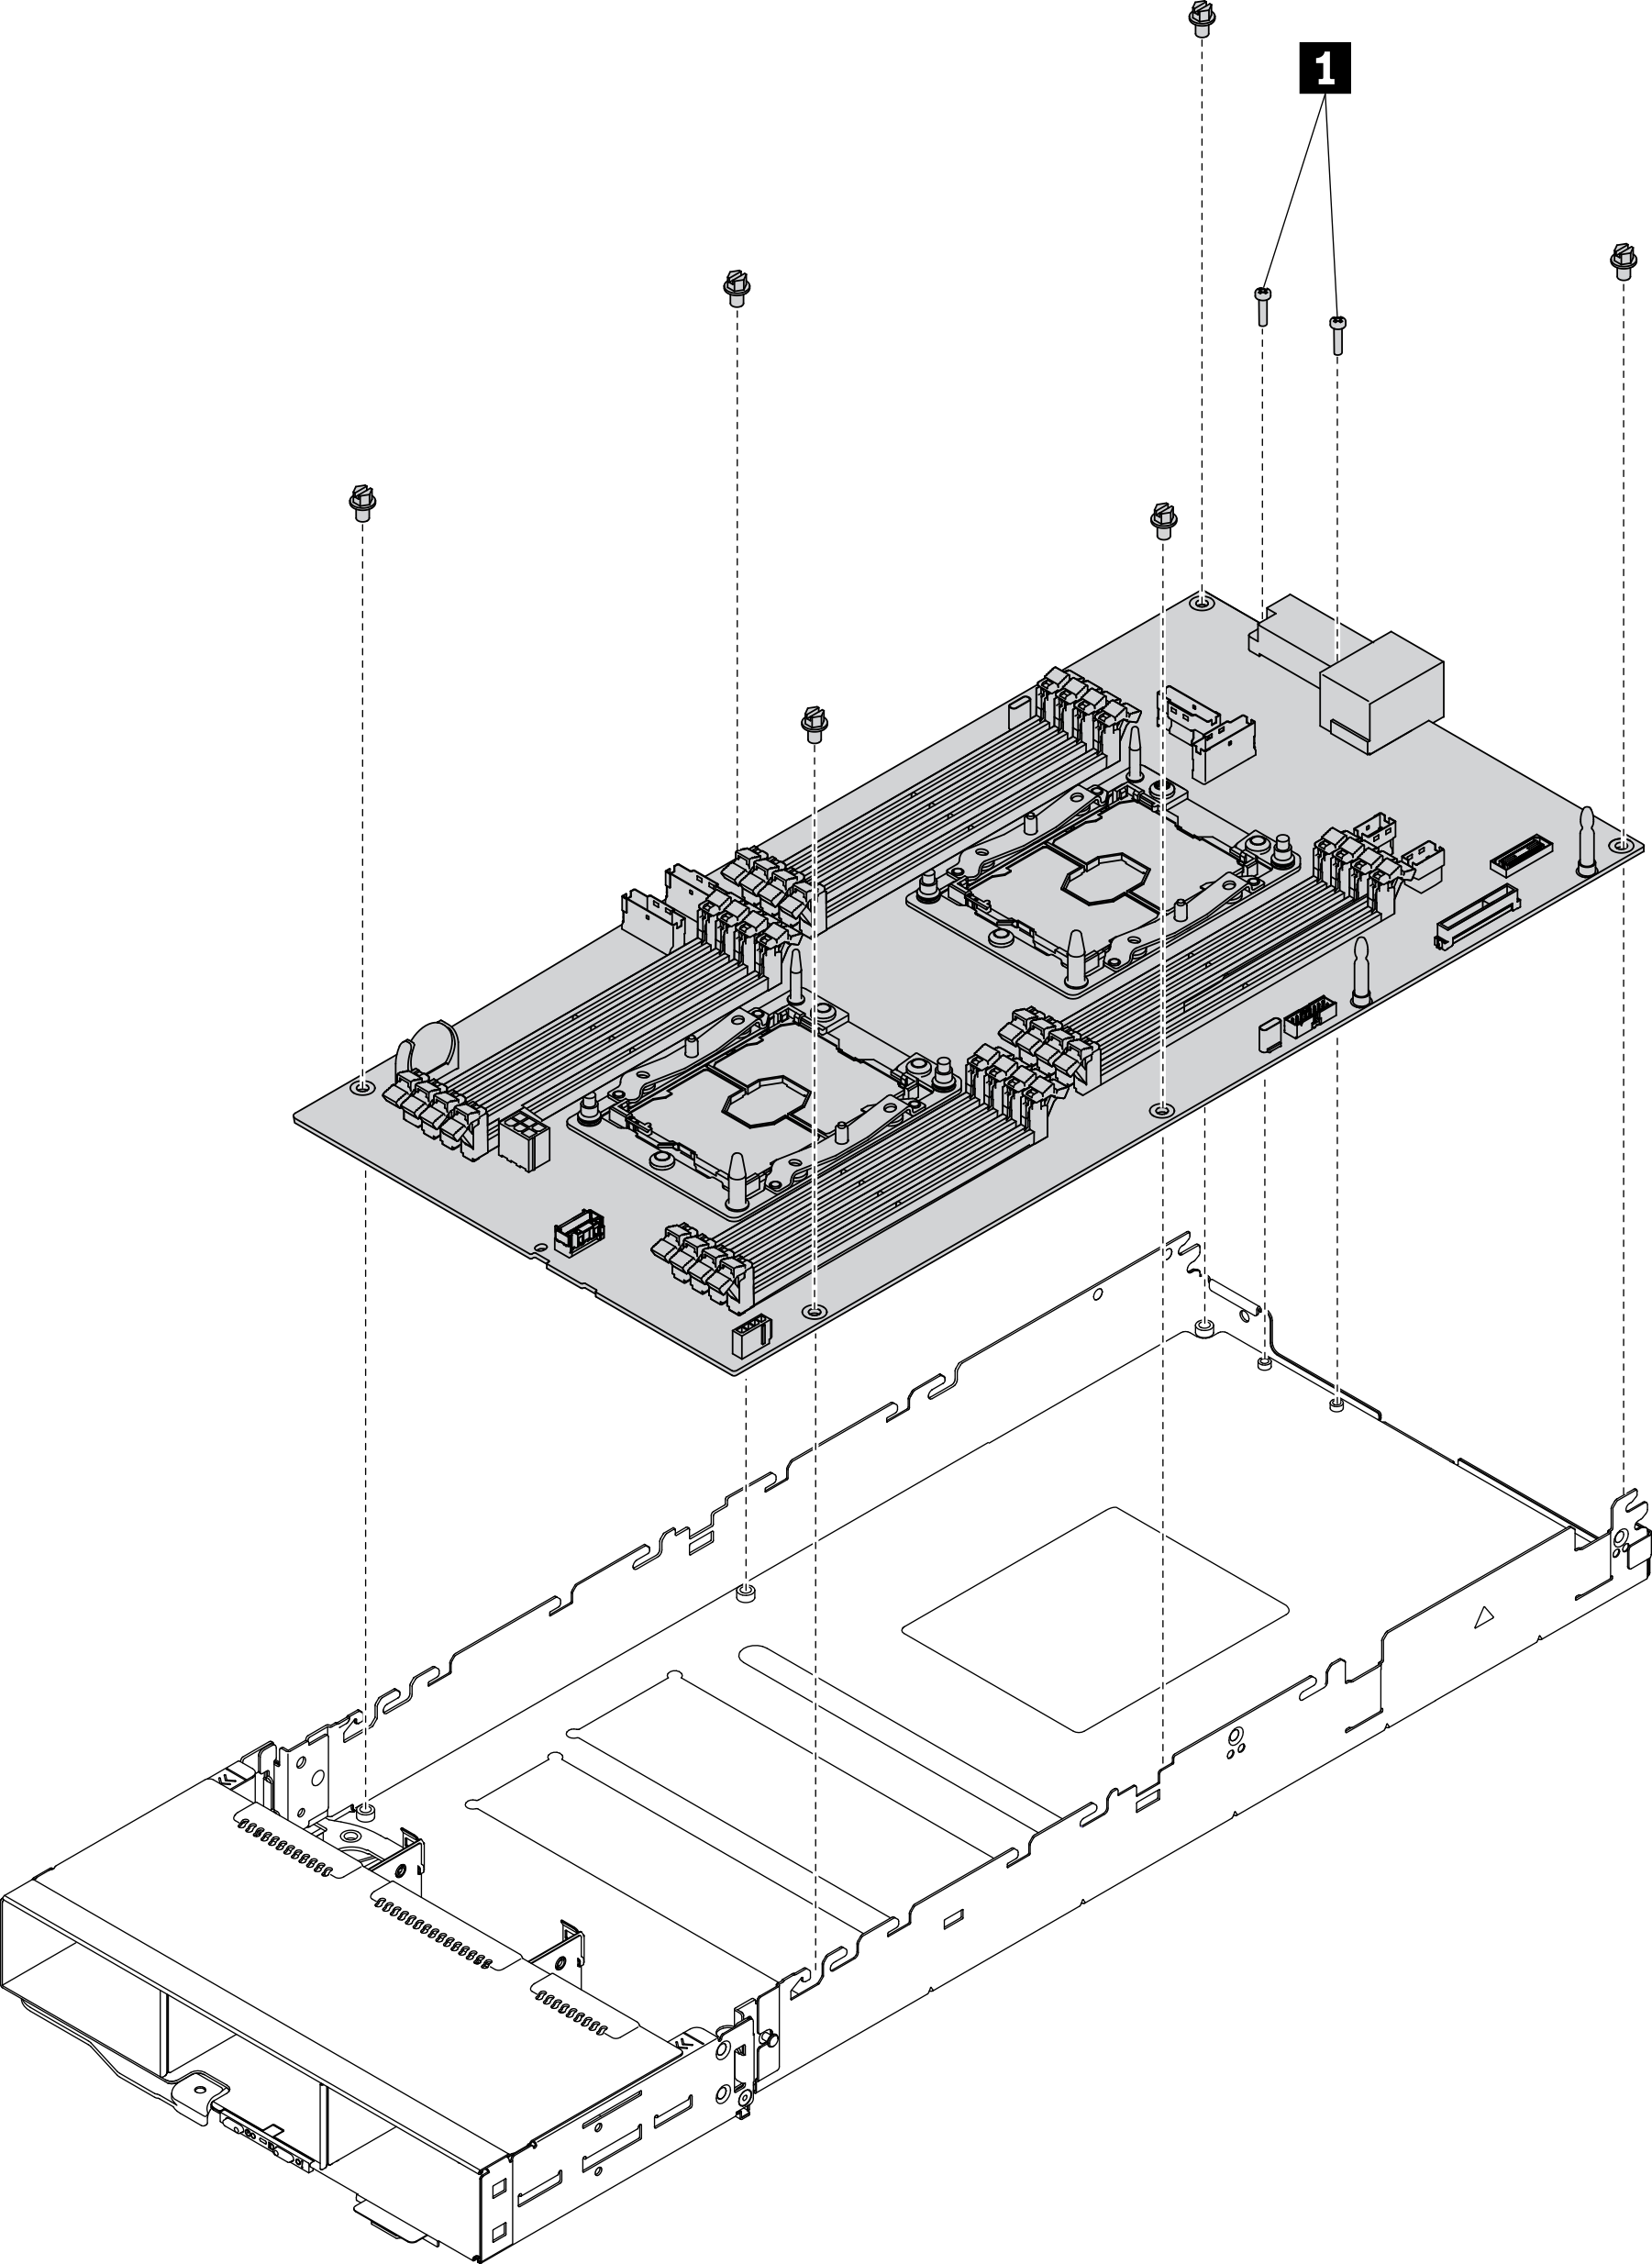
1 Screws that secure the system board connector to the compute tray
After disassembling the compute node, comply with local regulations when recycling it.
Give documentation feedback