Install the M.2 backplane
Use this information to install the M.2 backplane.
Before you install the M.2 backplane:
- Read the following section(s) to ensure that you work safely.
Turn off the corresponding compute node that you are going to perform the task on.
Remove the compute node (see Remove a compute node from the enclosure).
Remove the compute node cover (see Remove the compute node cover).
Complete the following steps to install the M.2 backplane.
Figure 1. M.2 backplane installation
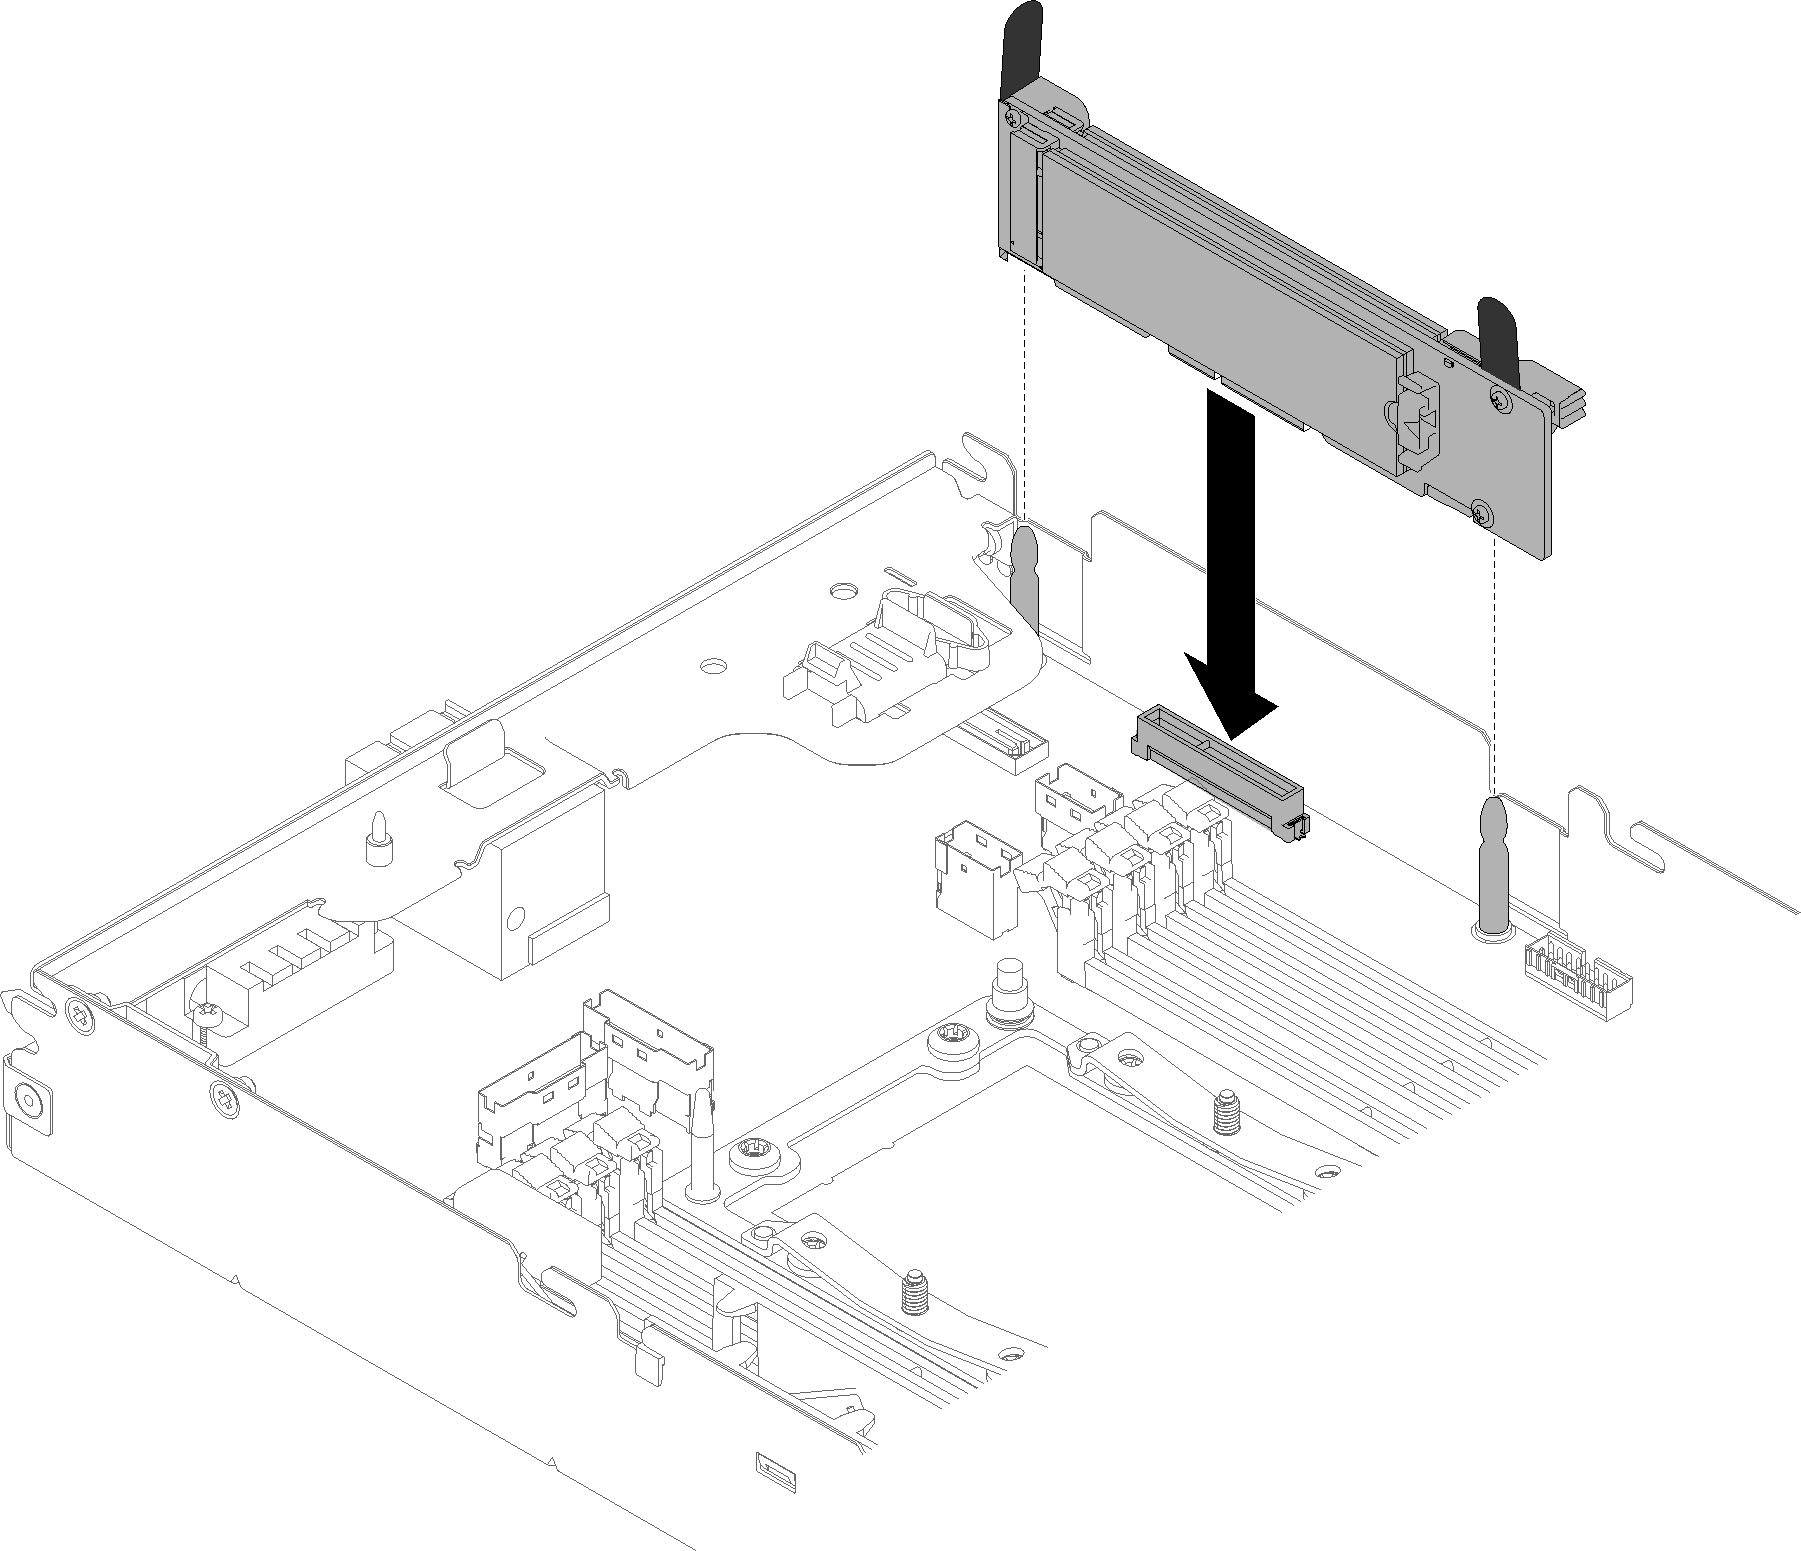
Align the openings located at the bottom of the blue plastic supports at each end of the M.2 backplane with the guide pins on the system board; then, insert the backplane in the system board connector. Press down on the M.2 backplane to fully seat it.
After you install the M.2 backplane, complete the following steps:
If the air baffle is removed, reinstall it (see Install the air baffle).
Reinstall the compute node cover (see Install the compute node cover).
Reinstall the compute node (see Install a compute node in the enclosure).
Check the power LED to make sure it transitions between fast blink and slow blink to indicate the node is ready to be powered on.
Demo video
Give documentation feedback