Remove the compute-expansion node assembly from the enclosure
Use this procedure to remove the compute-expansion node assembly from the enclosure.
Attention
Unauthorized personnel should not remove or install the nodes. Only trained or service-related personnel are admitted to perform such actions.
Before you remove the PCIe expansion node assembly from the enclosure:
- Read the following section(s) to ensure that you work safely.
- When you remove the compute-expansion node assembly, note the node bay numbers and make sure to reinstall it back to the original bays. Installing it into different node bays from the original can lead to unexpected consequences, as some configuration information and update options are established according to node bay number. If you reinstall the compute-expansion node assembly into different node bays, you might have to reconfigure the reinstalled compute node. One way to track the node assembly is via the serial number of the compute node.NoteThe serial number is located on the pull-out tab of each compute node.
Complete the following steps to remove the PCIe expansion node assembly from the enclosure.
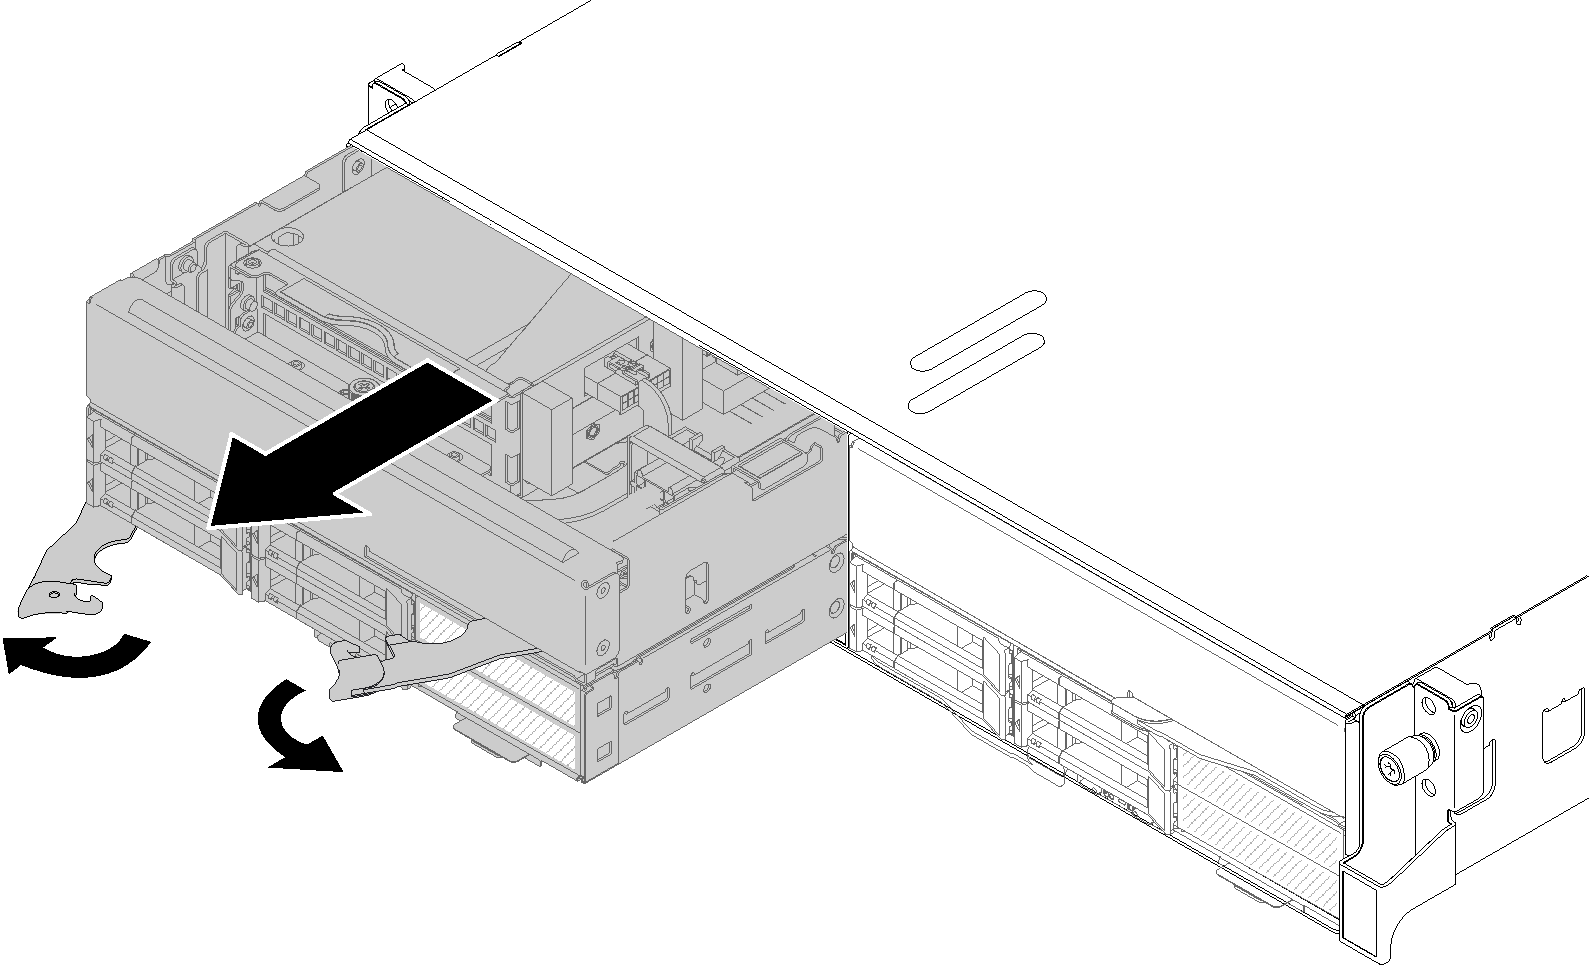
- Release and rotate the two front handles as shown in the illustration.Figure 1. Compute-expansion node assembly removal
 AttentionTo maintain proper system cooling, do not operate the enclosure without a compute node or node bay filler installed in each node bay.
If you are instructed to return the component or optional device, follow all packaging instructions, and use any packaging materials for shipping that are supplied to you.
Give documentation feedback