Install the chassis midplane
Follow instructions in this section to install the chassis midplane.
About this task
To avoid potential danger, make sure to read and follow the safety information.
Read Installation Guidelines and Safety inspection checklist to make sure that you work safely.
Prevent exposure to static electricity, which might lead to system halt and loss of data, by keeping static-sensitive components in their static-protective packages until installation, and handling these devices with an electrostatic-discharge wrist strap or other grounding system.
The firmware of the chassis midplane can be updated via Lenovo XClarity Controller (XCC) and Lenovo XClarity Essentials OneCLI (LXCE OneCLI). Only the caretaker node can perform this update.
By default, the caretaker node is automatically selected by the PSoC firmware on the chassis midplane. To change the chassis caretaker preference, see Configuring the D3 Chassis.
Go to Update the firmware for more information on firmware updating tools.
Procedure
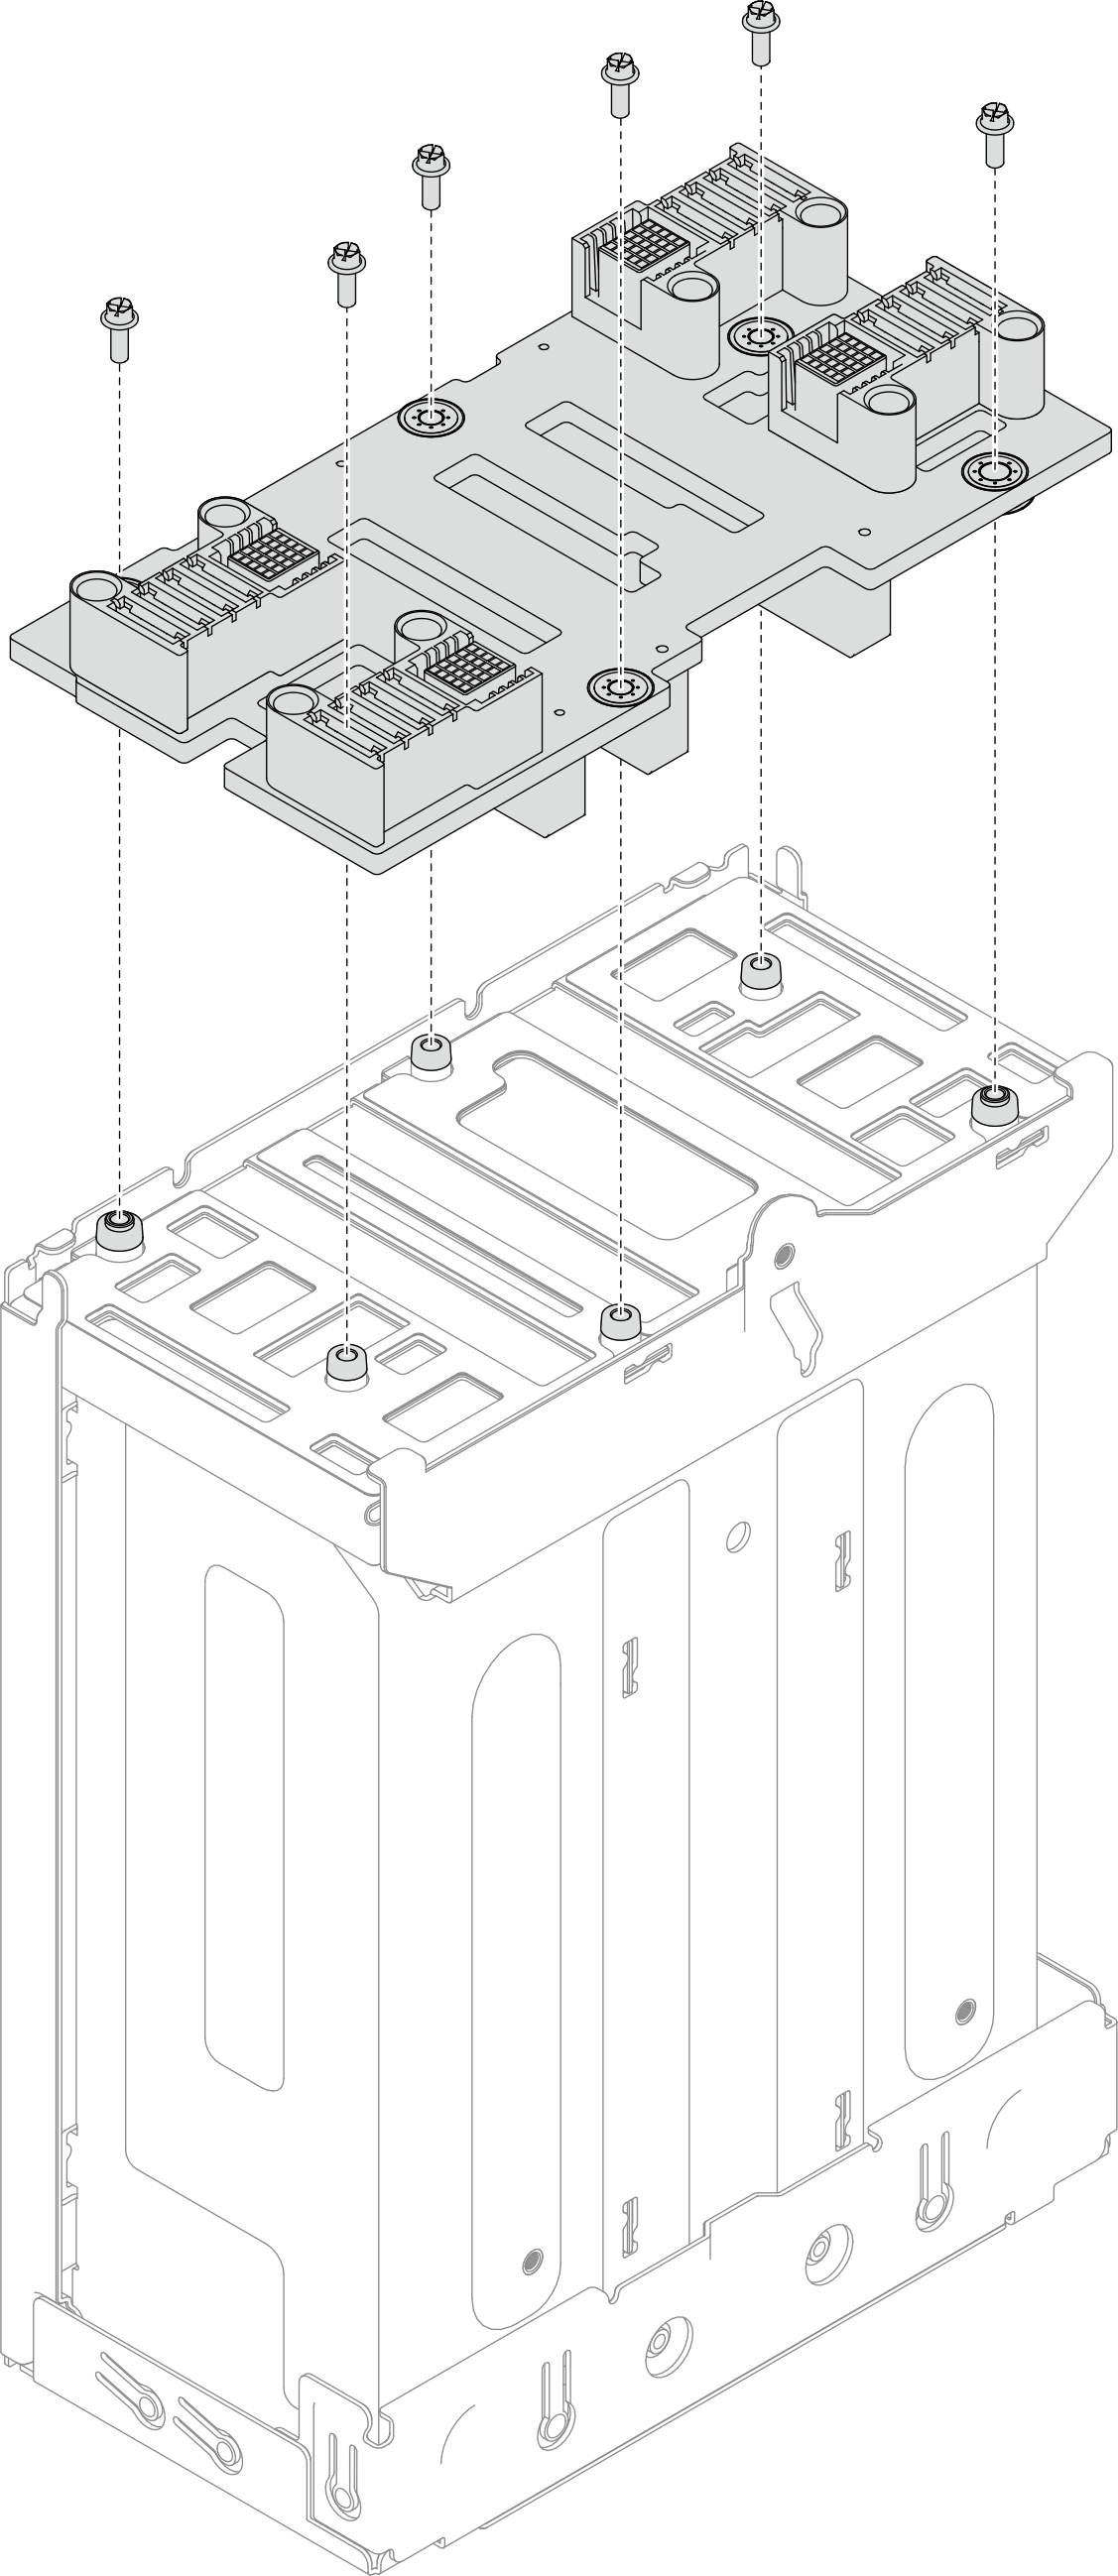
- Tighten the six screws to secure the chassis midplane to the PSU cage.Figure 1. Installation of the chassis midplane
After you finish
- Reinstall the PSU cage to the chassis (see Install a PSU cage).
- Install the chassis to the rack (see Install the chassis to the rack).
- Reinstall the nodes into the chassis (see Install a node to the chassis).
- Reinstall each PSU slot with a PSU or PSU filler (see Install a hot-swap power supply and Installation of a PSU filler).
- Proceed to complete the parts replacement (see Complete the parts replacement).
Demo video