Remove a drive backplane
Use this information to remove a drive backplane.
About this task
Attention
Read the Installation Guidelines to ensure that you work safely.
Procedure
- Based on your configuration, follow the corresponding procedures to remove two 7mm 2.5-inch SATA/NVMe or one 15mm 2.5-inch NVMe solid-state drive backplane from the drive cage.
Remove two backplanes for the configuration with two 7mm 2.5-inch SATA/NVMe solid-state drives:
- Remove the upper backplane:
 Remove the three screws from the upper backplane.
  Slightly tilt and disengage the backplane; then, pull it out of the drive cage at an angle (approximately 30 degrees).Figure 1. 7mm drive upper backplane removal
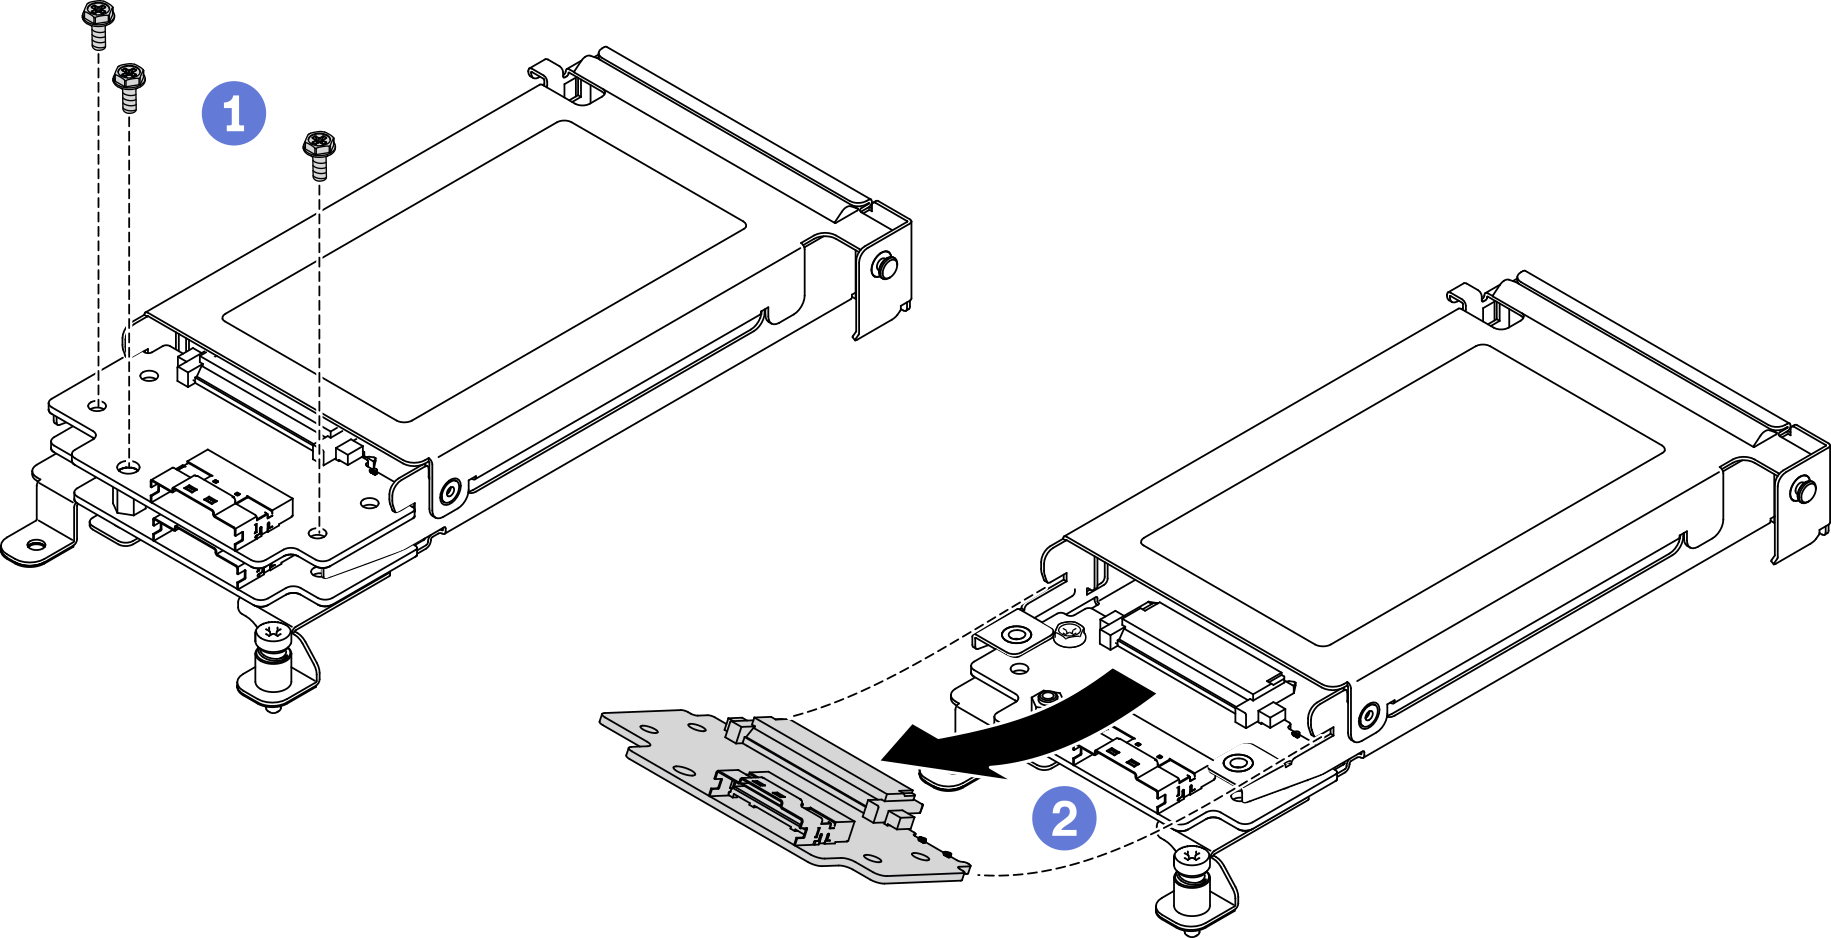
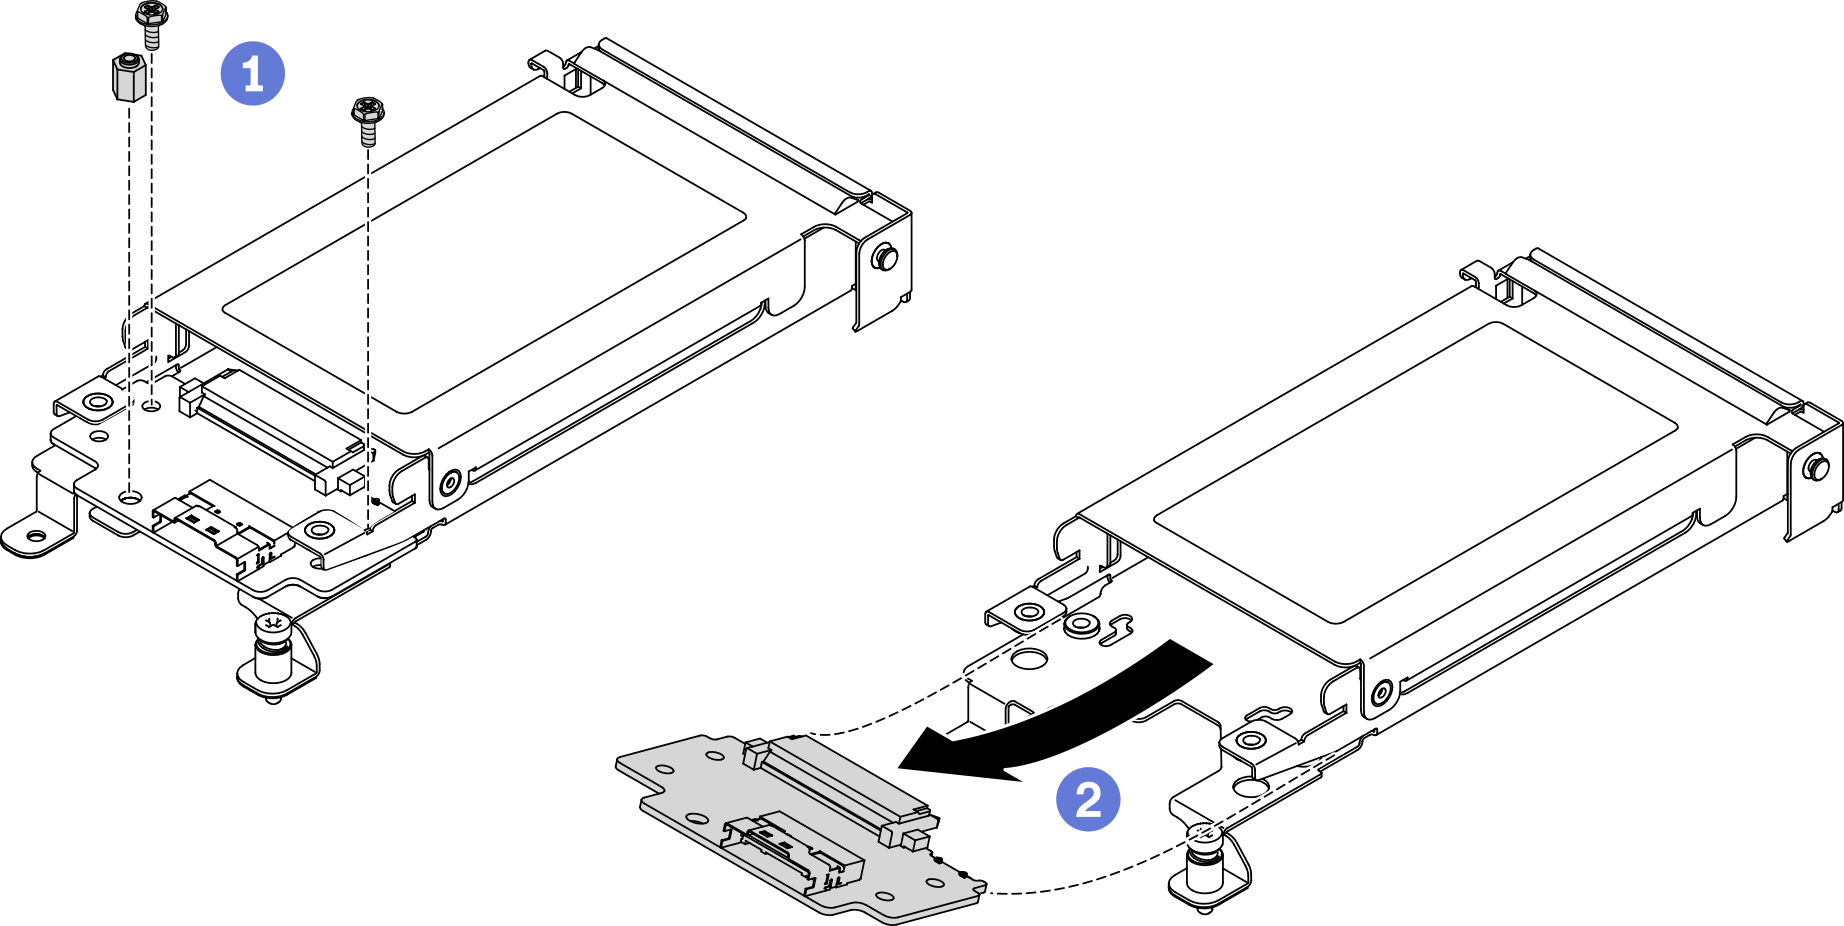
- Remove the lower backplane: Remove the two screws and one standoff from the lower backplane. Slightly tilt and disengage the backplane; then, pull it out of the drive cage at an angle (approximately 20 degrees).Figure 2. 7mm drive lower backplane removal
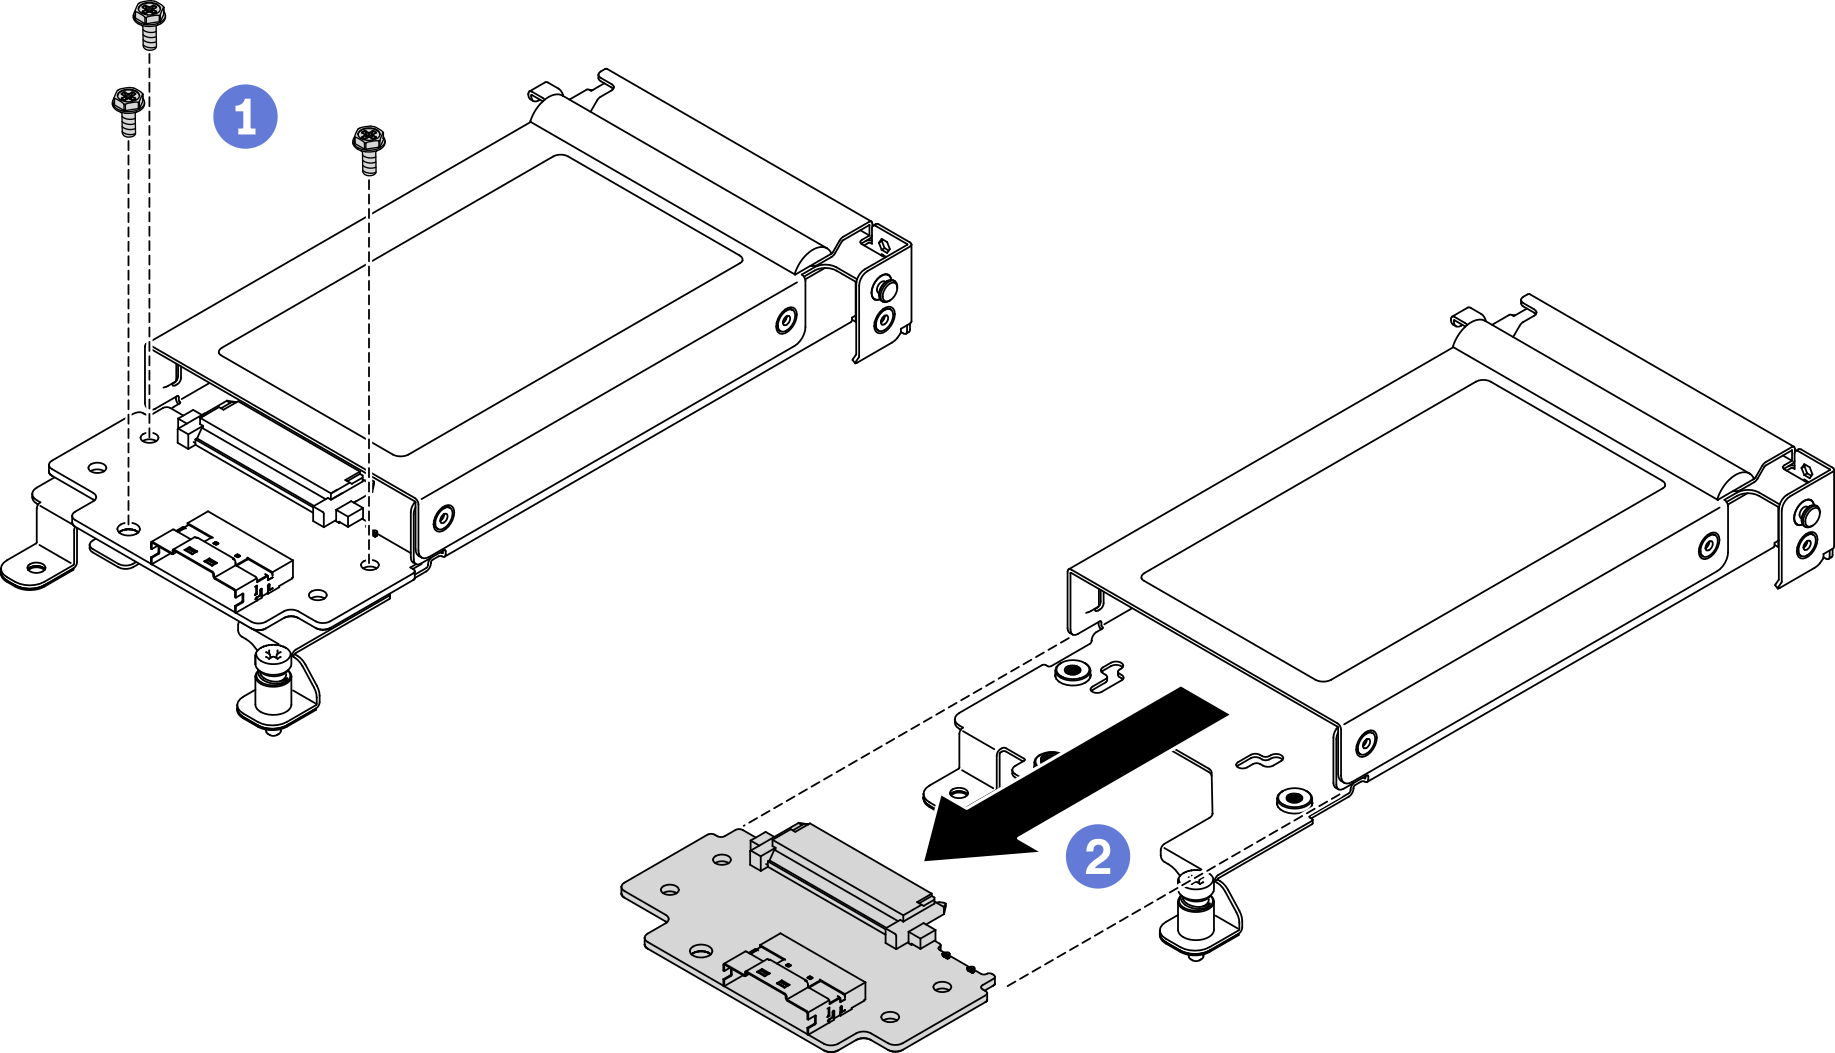
Remove one backplane for the configuration with a 15mm 2.5-inch NVMe solid-state drive:
- Remove the three screws from the backplane.
- Disengage the backplane and pull it out of the drive cage.Figure 3. 15mm drive backplane removal
- Remove the upper backplane:
After you finish
If you are instructed to return the component or optional device, follow all of the packaging instructions, and use any packaging materials for shipping that are supplied to you.
Demo video
Give documentation feedback