Install a DWC tray in the enclosure

Use this information to install a DWC tray in the enclosure.

About this task

Attention
Note
For your safety, use the lift tool to install the tray into the rack.

Procedure

Note
The following illustration might differ slightly from your hardware, but the installation method is the same.

  1. Select the tray bay to install the tray.
    Attention
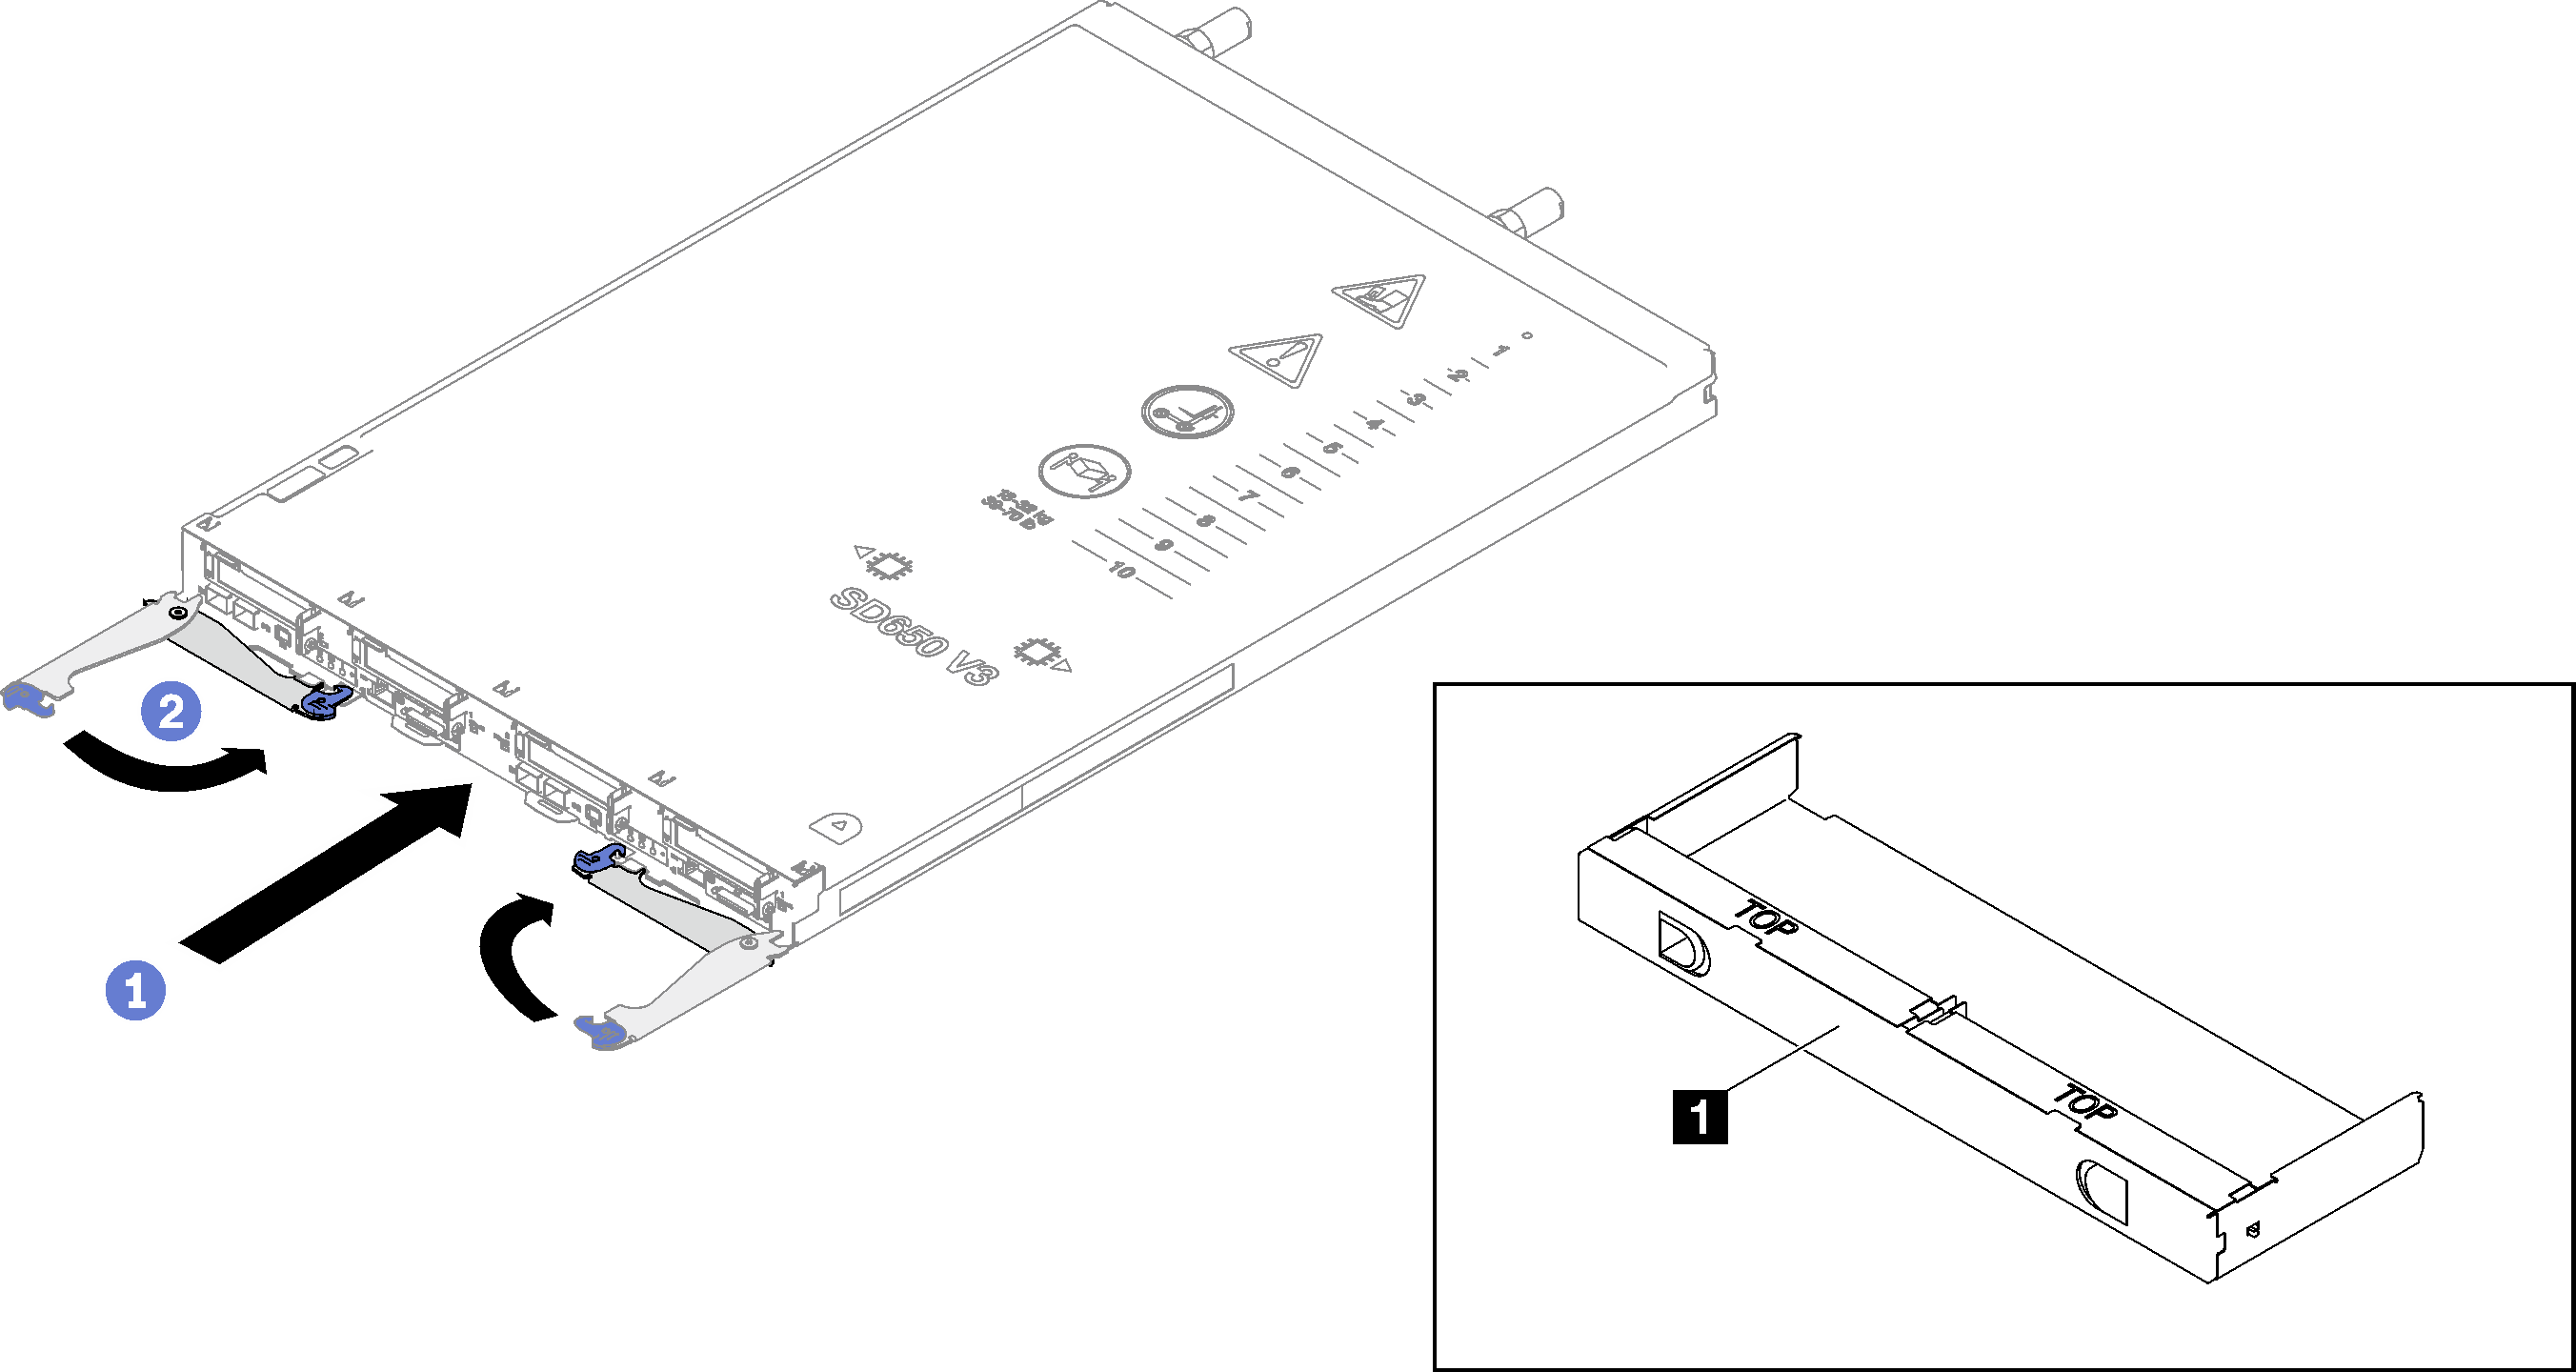
    • To maintain proper system cooling, do not operate the enclosure without a DWC tray or tray bay filler installed in each tray bay. See the picture below for reference.

    • Start with slot 1 when installing trays into the DW612S enclosure.

    • If you are reinstalling a DWC tray that you removed, you must install it in the same tray bay from which you removed it. Some DWC tray configuration information and update options are established according to tray bay number. Reinstalling a DWC tray into a different tray bay can have unintended consequences. If you reinstall the DWC tray into a different tray bay, you might have to reconfigure the DWC nodes in the tray.
  2. Install the tray.
    1. Make sure that the front cam handles on the DWC tray are in the open position; then, insert the DWC tray into the tray bay until it stops.
    2. Rotate the front cam handles on the front of the DWC tray to the closed position to secure the tray in the enclosure.
    Note
    Depending on the model, your solution might look slightly different from the illustration.
    Figure 1. Tray installation
    Tray installation
    1 Tray bay filler
    Note
    After the DWC tray is installed, the XCC in the DWC tray initializes. This process takes approximately 110 seconds. The power LED flashes rapidly, and the power button on the DWC tray does not respond until this process is complete.
  3. Connect all required external cables to the enclosure.
    Note
    Use extra force to connect QSFP cables to the solution.
  4. Press the power buttons to turn on both nodes in the DWC tray.
    Attention

    Shared I/O configuration requires specific power on and power off sequence for the two nodes, see below:

    • Power on sequence: first, power on the node with main adapter (right node); then, power on the node with auxiliary adapter (left node).

    • Power off sequence: first, power off the node with auxiliary adapter (left node); then, power off the node with main adapter (right node).

  5. Make sure that the power LED on the front operator panel is lit continuously, indicating that the each node is receiving power and is turned on.
  6. If you have other trays to install, do so now.

After you finish

  • If this is the initial installation of the DWC tray in the enclosure, you must configure the DWC tray through the Setup Utility and install the DWC tray operating system.

  • If you have changed the configuration of the DWC tray or if you are installing a different DWC tray from the one that you removed, you must configure the DWC tray through the Setup Utility, and you might have to install the DWC tray operating system.

Demo video

Watch the procedure on YouTube