Rear view
This section contains information about the LEDs and connectors on the rear of the server.
Rear view with DC PIB module
Components
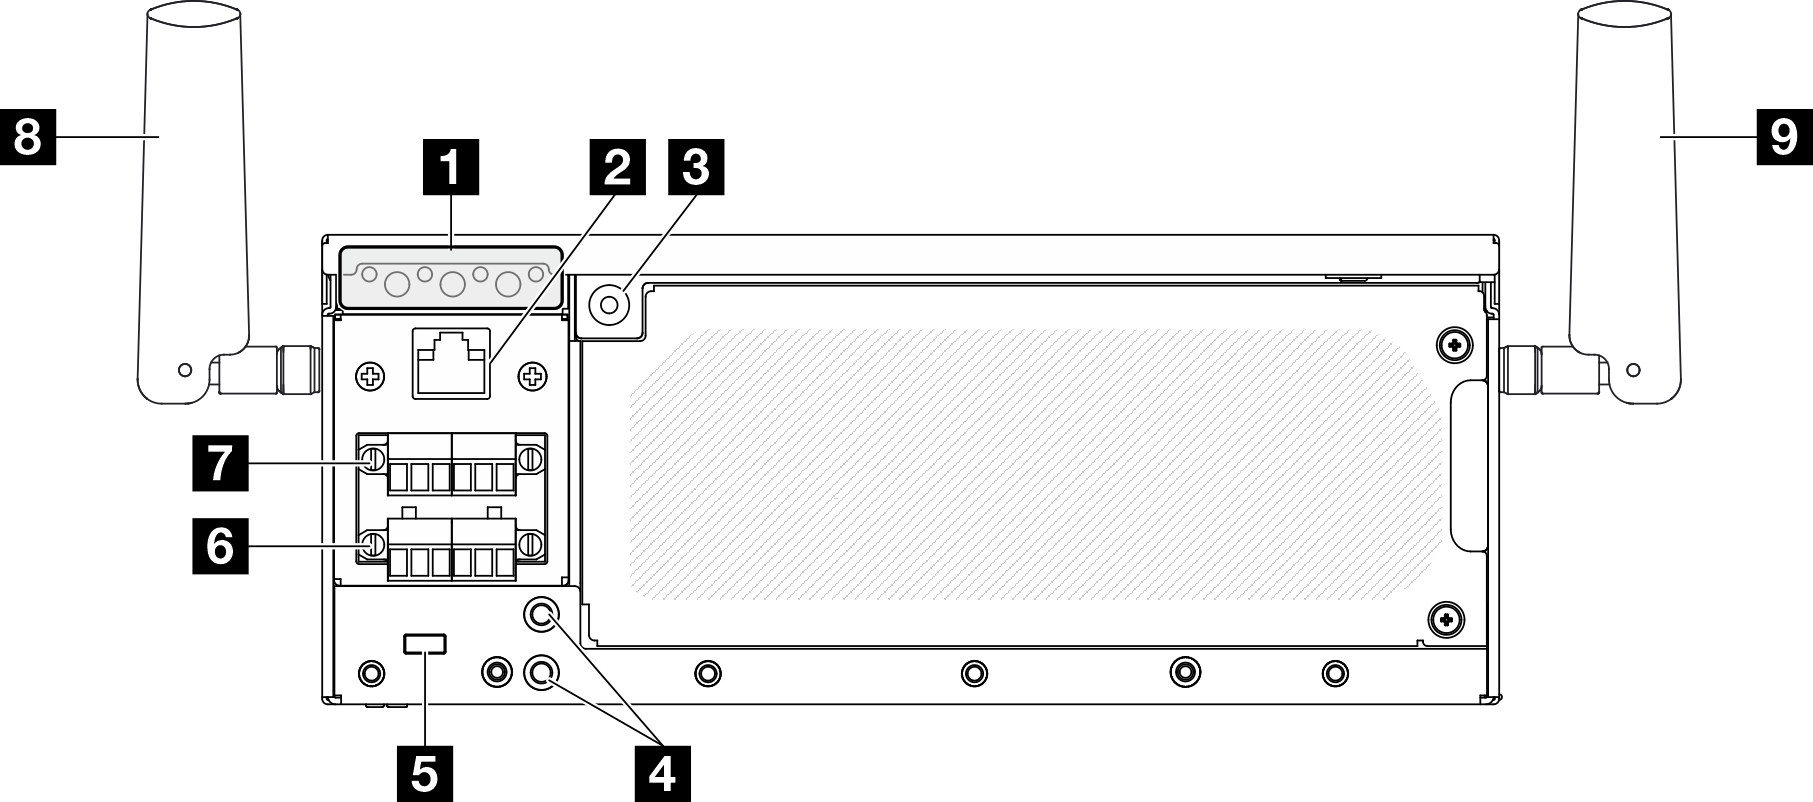
| 1 Rear operator panel | 6 Power connector 1 |
| 2 RJ-45 RS-232 serial console connector for OS/BIOS or XCC | 7 Power connector 2 |
| 3 PMB status LED | 8 x86 WLAN antennas |
| 4 Threaded studs for grounding | 9 XCC WLAN antennas |
| 5 Lock hole for Kensington lock |
1 Rear operator panel
See Rear operator panel LEDs for more information.
2 RJ-45 RS-232 serial console connector for OS/BIOS or XCC
Connect an external RJ-45 serial COMM console cable to this RS-232 serial console with RJ-45 connector.
3 PMB status LED
See PMB status LED for more information.
4 Threaded studs for grounding
Connect the grounding wires to these lugs.
5 Lock hole for Kensington lock
Install Kensington lock in this lock hole to secure the server.
6 7 Power connectors
Connect DC power source to these connectors. Make sure the power source is connected properly.
To connect DC power source with ThinkEdge SE360 V2 DC Terminal Block Cable, see DC terminal block cable for more information.
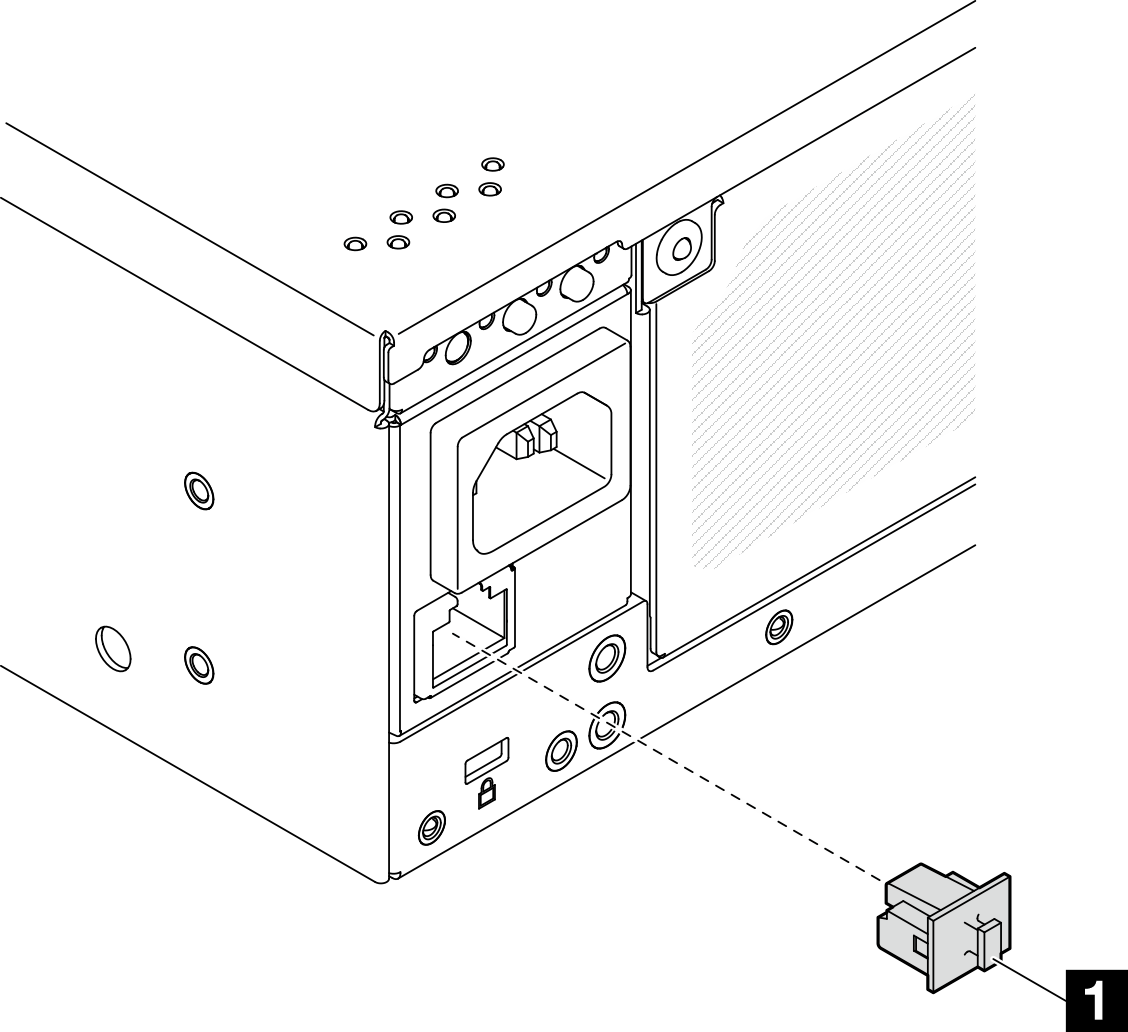
Loosen the two captive screws that secure the header; then, remove the header from the power connector.
Figure 2. Removing the header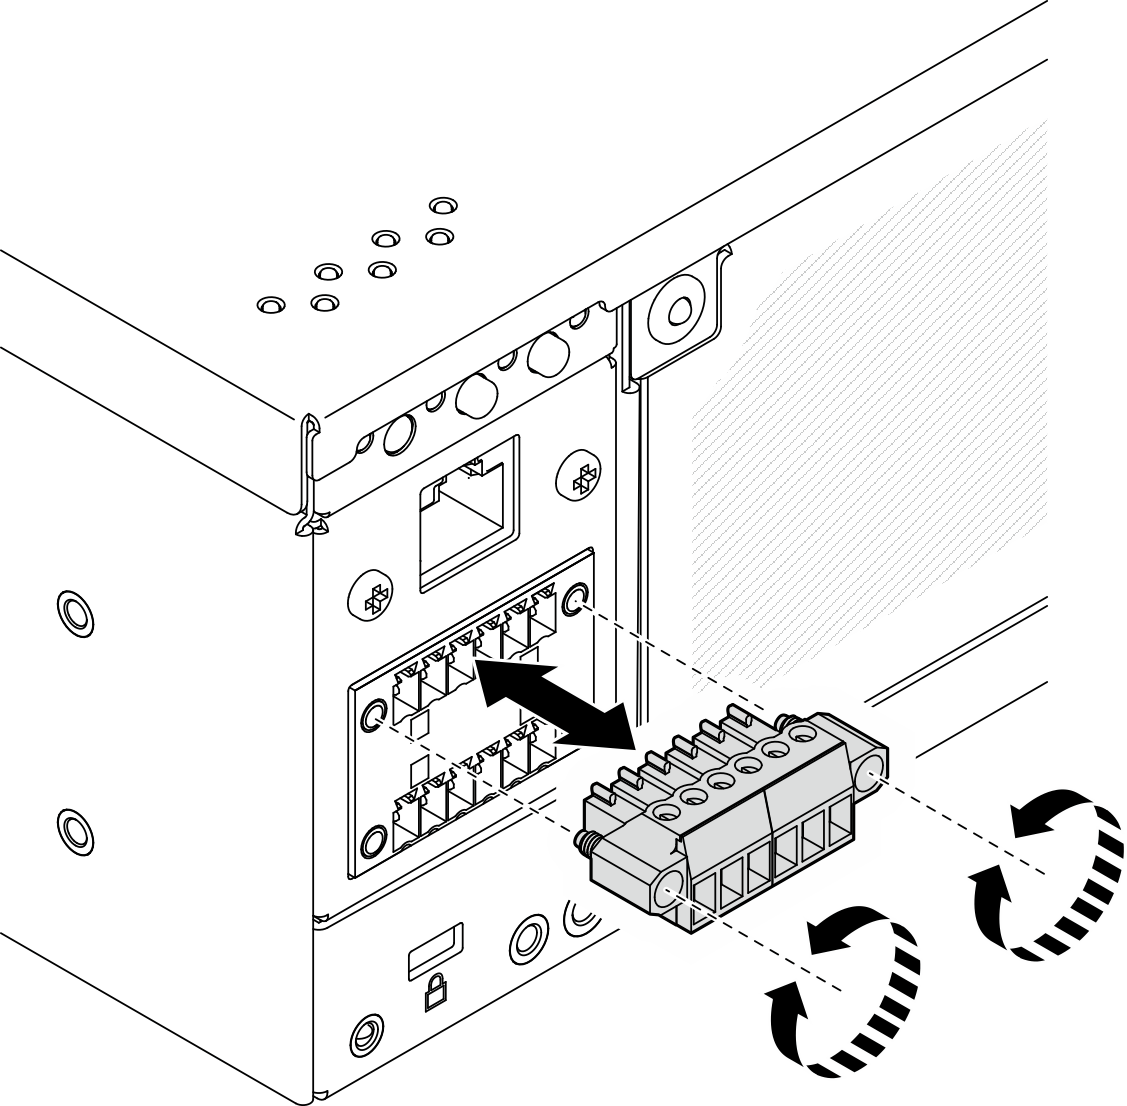
Store the header for future use.
NoteInstall the header when the power connector is not used. The connector could be damaged without proper protection.
8 x86 WLAN antennas
WLAN antennas are optional parts, available for the models with wireless module. Two antennas for x86 WLAN can be installed in ThinkEdge SE360 V2. The models without wireless module come with SMA fillers.
9 XCC WLAN antennas
WLAN antennas are optional parts, available for the models with wireless module. Two antennas for XCC WLAN can be installed in ThinkEdge SE360 V2. The models without wireless module come with SMA fillers.
Rear view with AC PIB module
Components
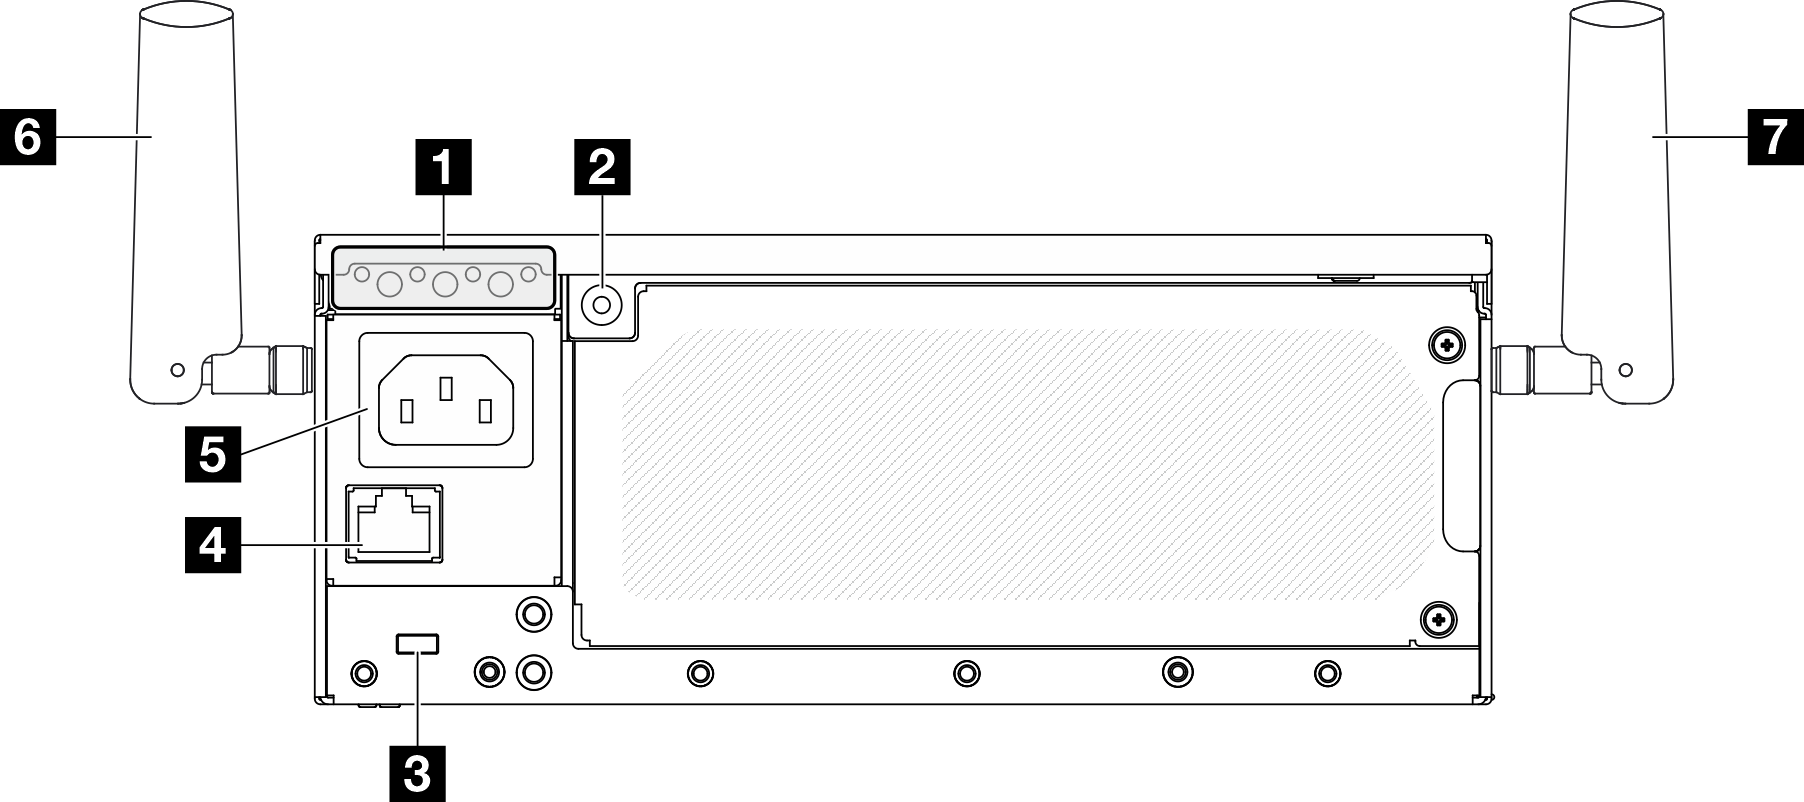
| 1 Rear operator panel | 5 Power connector |
| 2 PMB status LED | 6 x86 WLAN antennas |
| 3 Lock hole for Kensington lock | 7 XCC WLAN antennas |
| 4 RJ-45 RS-232 serial console connector for OS/BIOS or XCC |
1 Rear operator panel
See Rear operator panel LEDs for more information.
2 PMB status LED
See PMB status LED for more information.
3 Lock hole for Kensington lock
Install Kensington lock in this lock hole to secure the server.
4 RJ-45 RS-232 serial console connector for OS/BIOS or XCC
Connect an external RJ-45 serial COMM console cable to this RS-232 serial console with RJ-45 connector.
5 Power connector
Connect AC power source to this connector. Make sure the power source is connected properly.
6 x86 WLAN antennas
WLAN antennas are optional parts, available for the models with wireless module. Two antennas for x86 WLAN can be installed in ThinkEdge SE360 V2. The models without wireless module come with SMA fillers.
7 XCC WLAN antennas
WLAN antennas are optional parts, available for the models with wireless module. Two antennas for XCC WLAN can be installed in ThinkEdge SE360 V2. The models without wireless module come with SMA fillers.
Rear I/O filler
Install the I/O fillers when the connectors are not used. The connectors could be damaged without proper protection of the fillers.
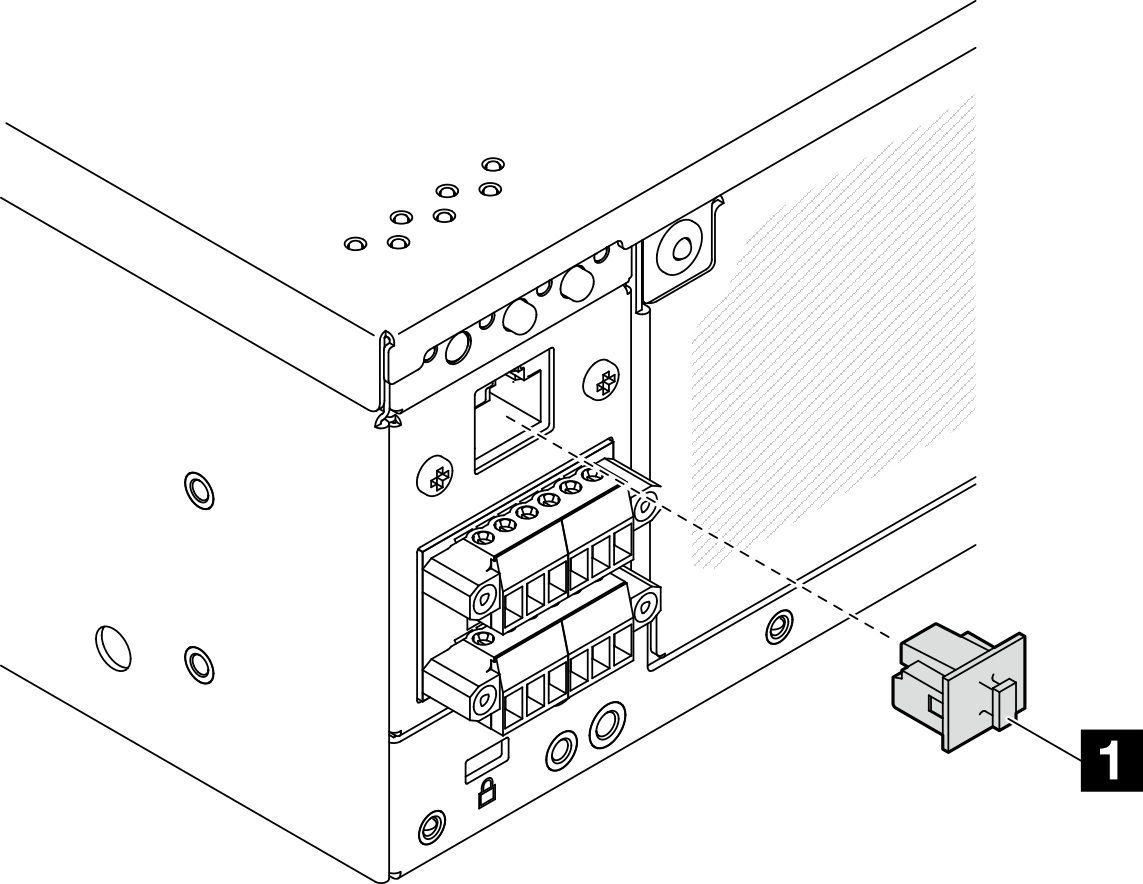
| 1 RJ-45 filler (x1) |