Install the drive cage
Use this information to install the drive cage.
About this task
Attention
Read Safety inspection checklist and Installation Guidelines to ensure that you work safely.
Procedure
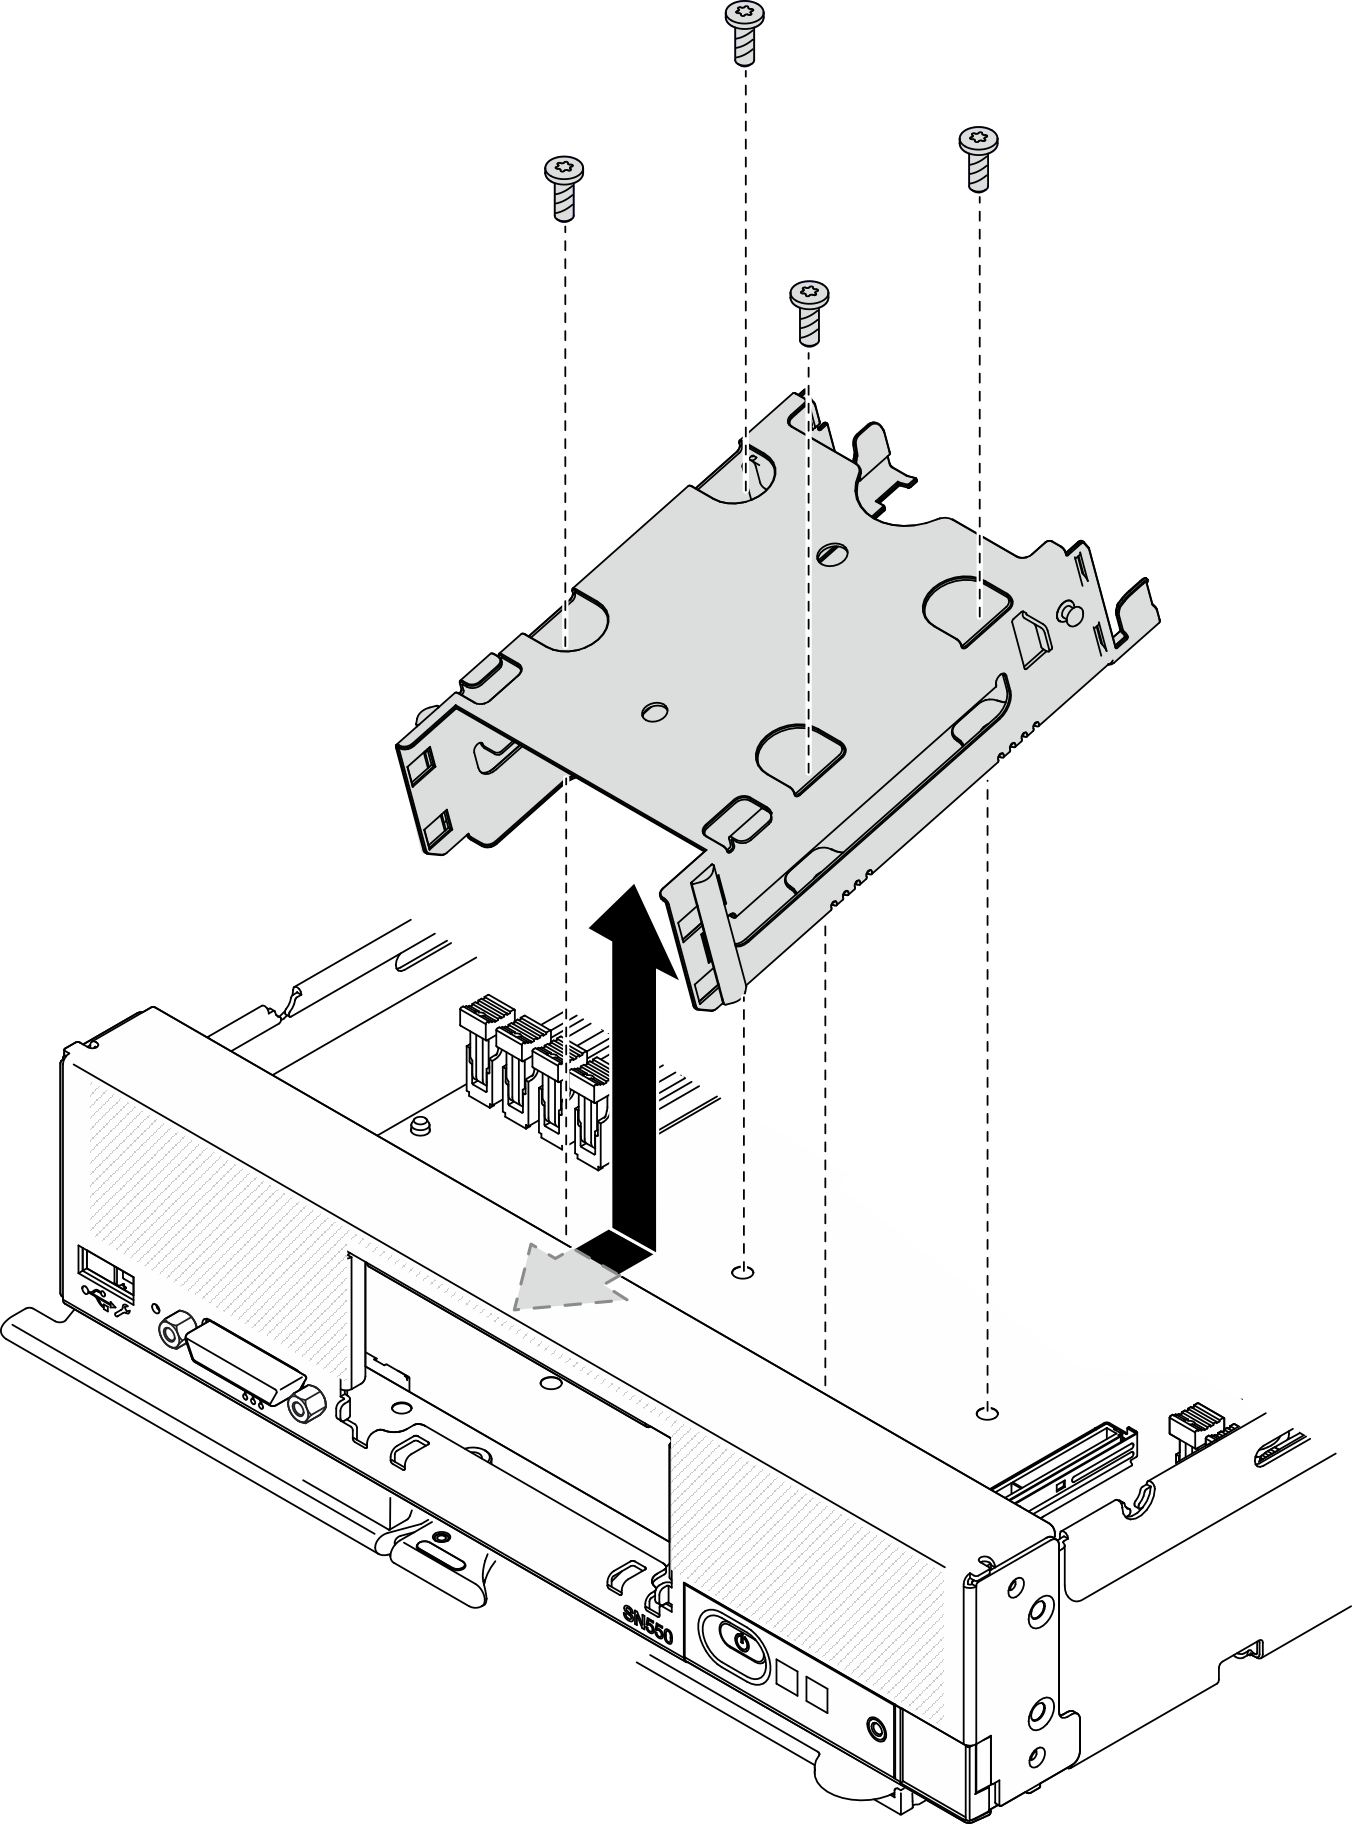
- Using a T10 Torx screwdriver, insert the four screws and secure the cage in the compute node. Figure 1. Installing the drive cage
After you finish
If applicable, reinstall the EDSFF drive cage. See Install the EDSFF drive cage.
Reinstall the front bezel. See Install the front bezel.
Reinstall the drive backplane. See:
If applicable, reinstall the RAID adapter. See Install the RAID adapter.
Reinstall the hot-swap drives or drive bay fillers. See:
Proceed to complete the parts replacement. See Complete the parts replacement.
Give documentation feedback