Install an EDSFF hot-swap drive
Use this information to install an EDSFF drive backplane option.
About this task
Read Safety inspection checklist and Installation Guidelines to ensure that you work safely.
Install EDSFF drives in drive bays marked as NVMe.
EDSFF drive support guide regarding processor:
EDSFF drive feature requires installing two processors in the compute node.
EDSFF drive feature is not supported when the processor TDP is higher than 220 watts.
EDSFF drive feature is not supported when Intel Xeon Gold 6334 8c 165W 3.6GHz processor is installed in the compute node.
When pushing the EDSFF drives into the drive bay, touch only the EDSFF drive handle and carefully avoid touching other parts of the EDSFF drive. Touching parts of the EDSFF drive other than its handle when installed may cause damages to the drive.

| 1 EDSFF drive handle |
Procedure
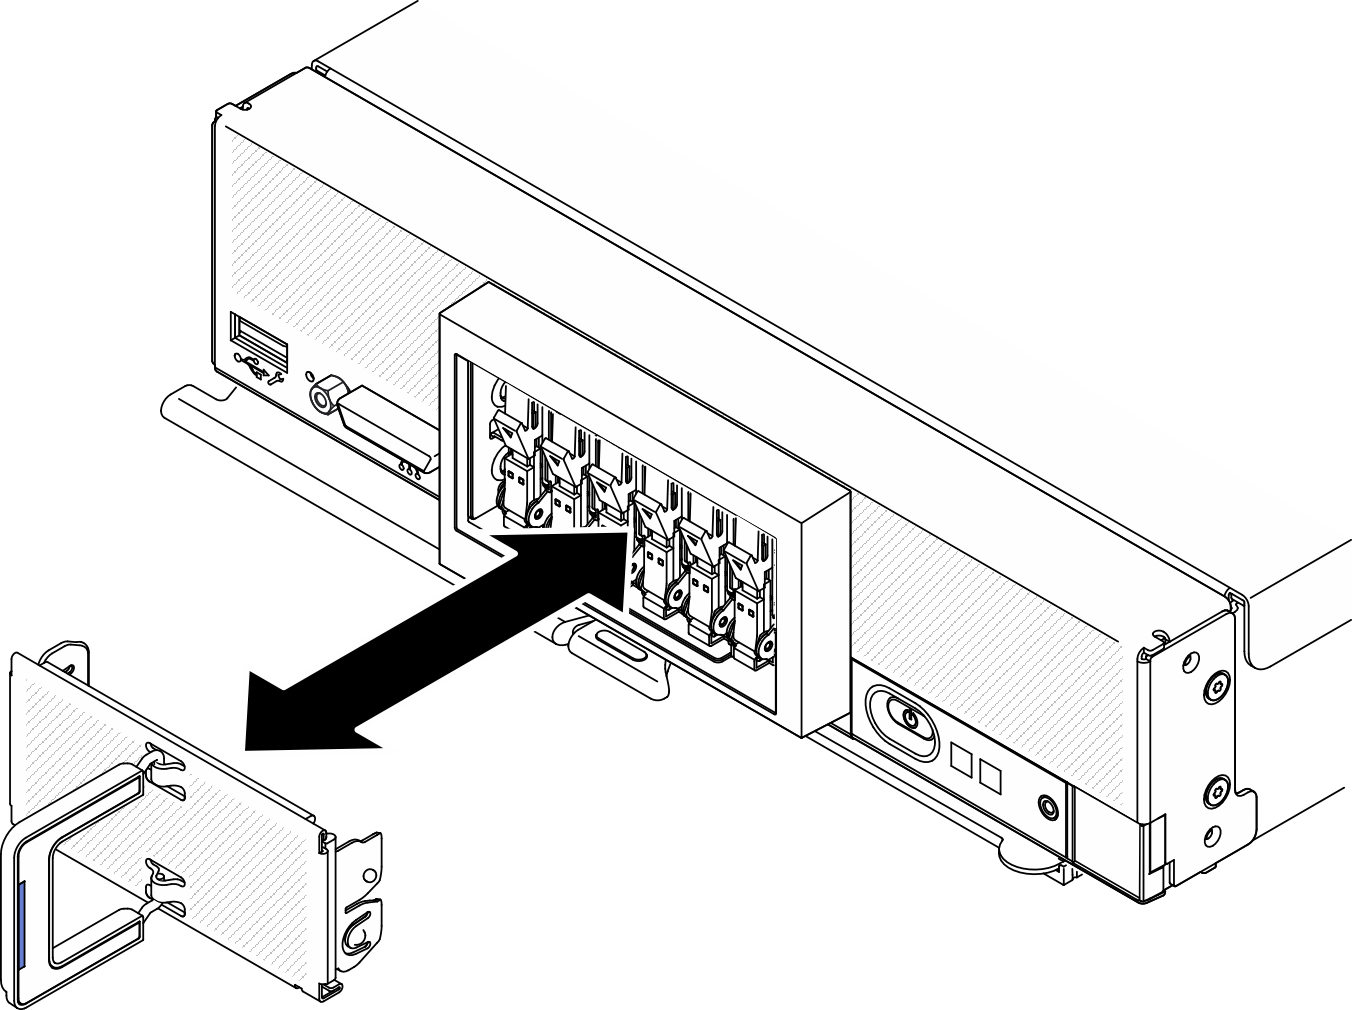
- Hold the handle of the EDSFF drive cage bezel and pull it out of the compute node to access the EDSFF drives.Figure 2. EDSFF drive cage bezel removal
- Install the EDSFF hot swap drive.
 Keep the handle on the drive in open position and insert the drive into the drive bay; then, hold the drive handle only to push the drive until it stops.
 Slightly press down the handle; then, rotate the handle to lock the drive in place.Attention
When pushing the EDSFF drives into the drive bay, touch only the EDSFF drive handle and carefully avoid touching other parts of the EDSFF drive. Touching parts of the EDSFF drive other than its handle when installed may cause damages to the drive.
Figure 3. EDSFF hot-swap drive installation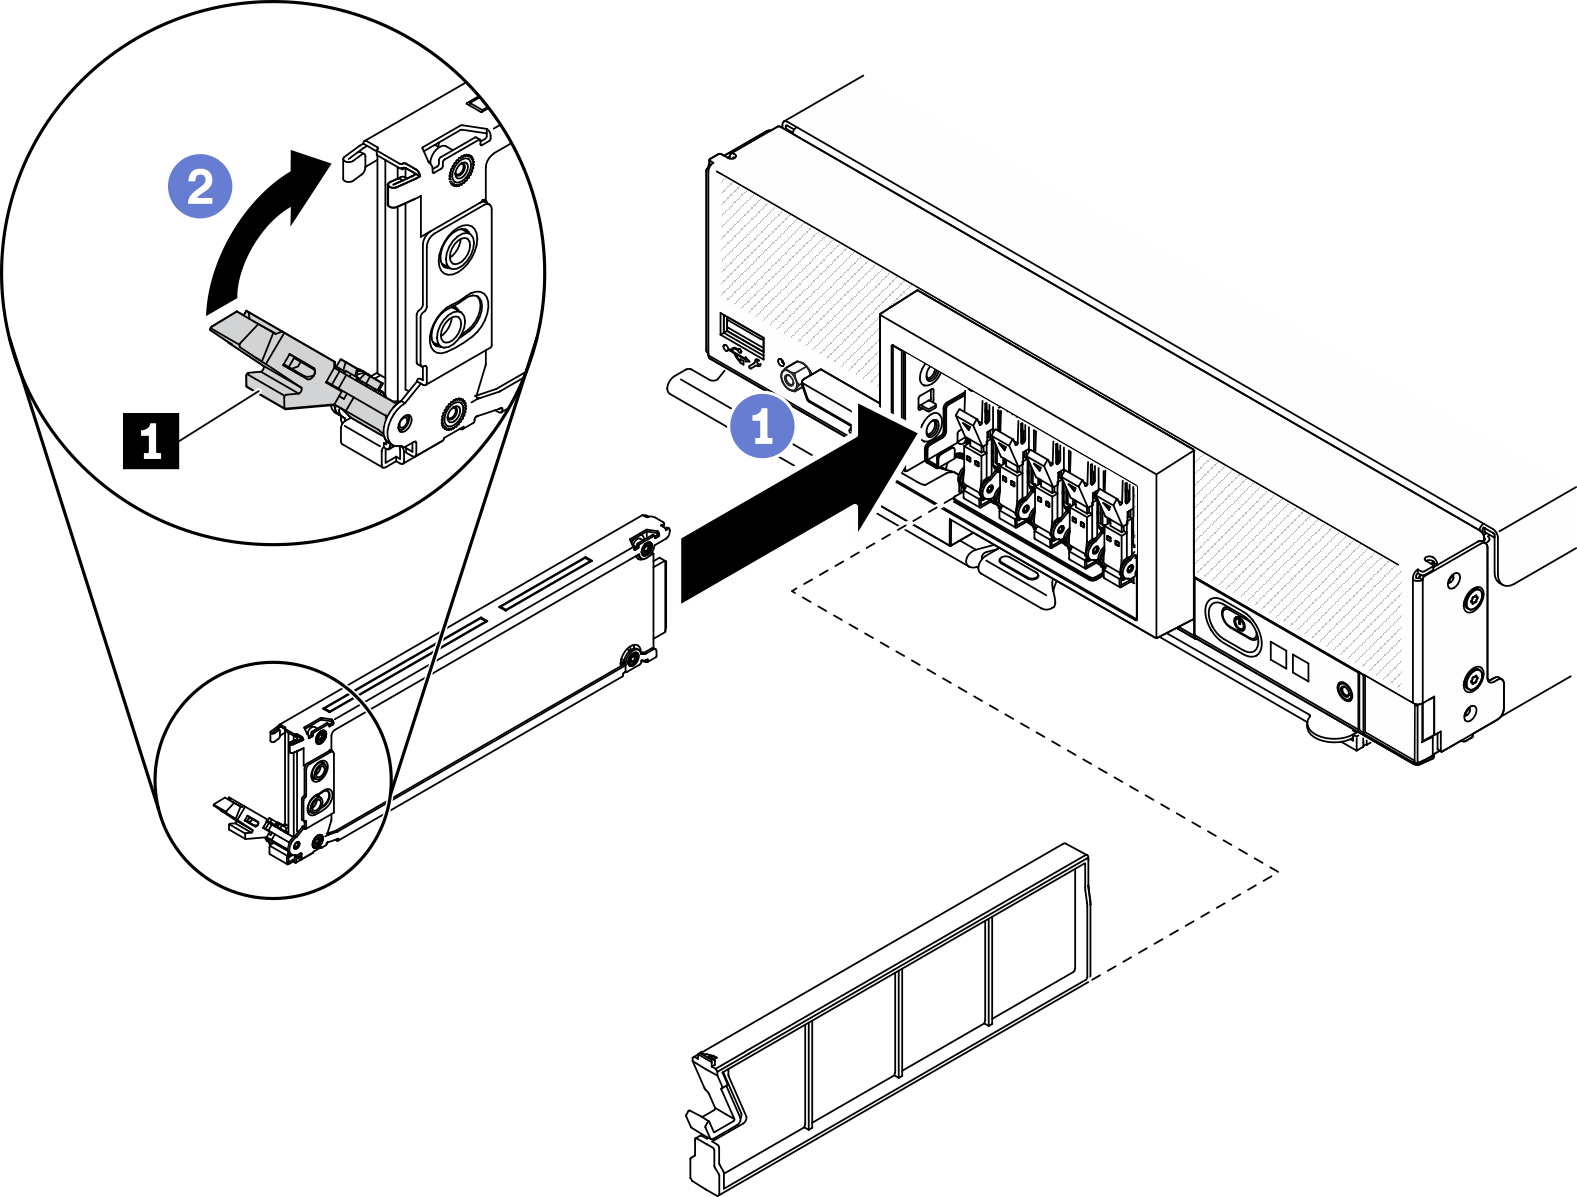
1 EDSFF drive handle
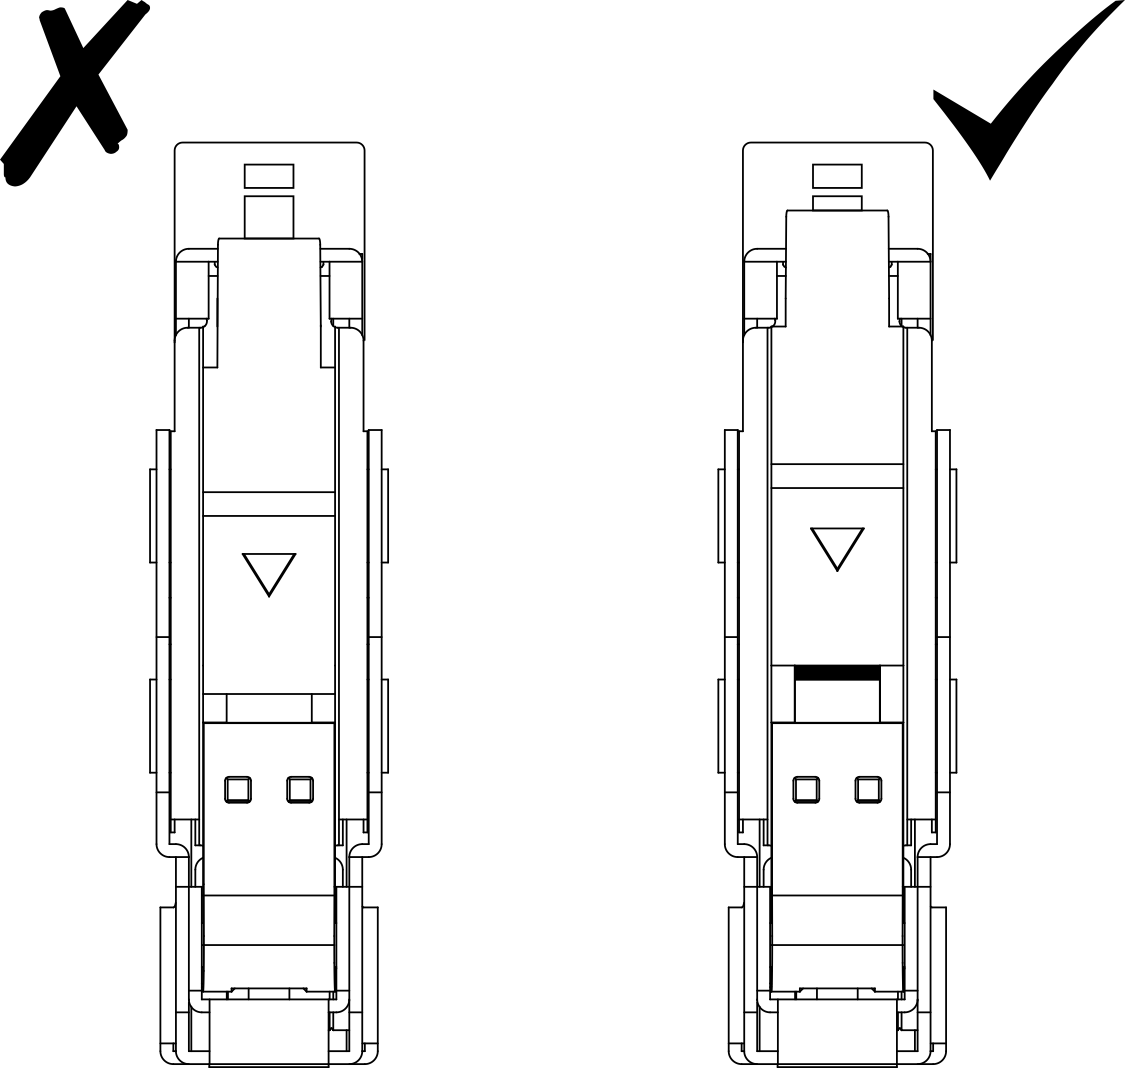
- Make sure the black bar under the latch is visible when seen from the front. If not, the EDSFF drive latch is not hooked correctly. Adjust the EDSFF drive handle and latch until the black bar is visible.Figure 4. EDSFF drive latch adjustment
- Keep the blue strip on the handle of EDSFF drive cage bezel on the left side; then, install the bezel back to the compute node.Figure 5. EDSFF drive cage bezel installation
If the compute node is operating (power on), check the drive status LEDs to make sure that the drive is operating correctly. See Compute node controls, connectors, and LEDs.
Demo video