Install the adapter-retention assembly
Use this information to install the adapter-retention assembly.
Before you install the adapter-retention assembly, complete the following steps:
Read Installation Guidelines to ensure that you work safely.
The adapter-retention assembly consists of 12 separate parts. You can replace only the parts that you choose and save the unused parts for future use.
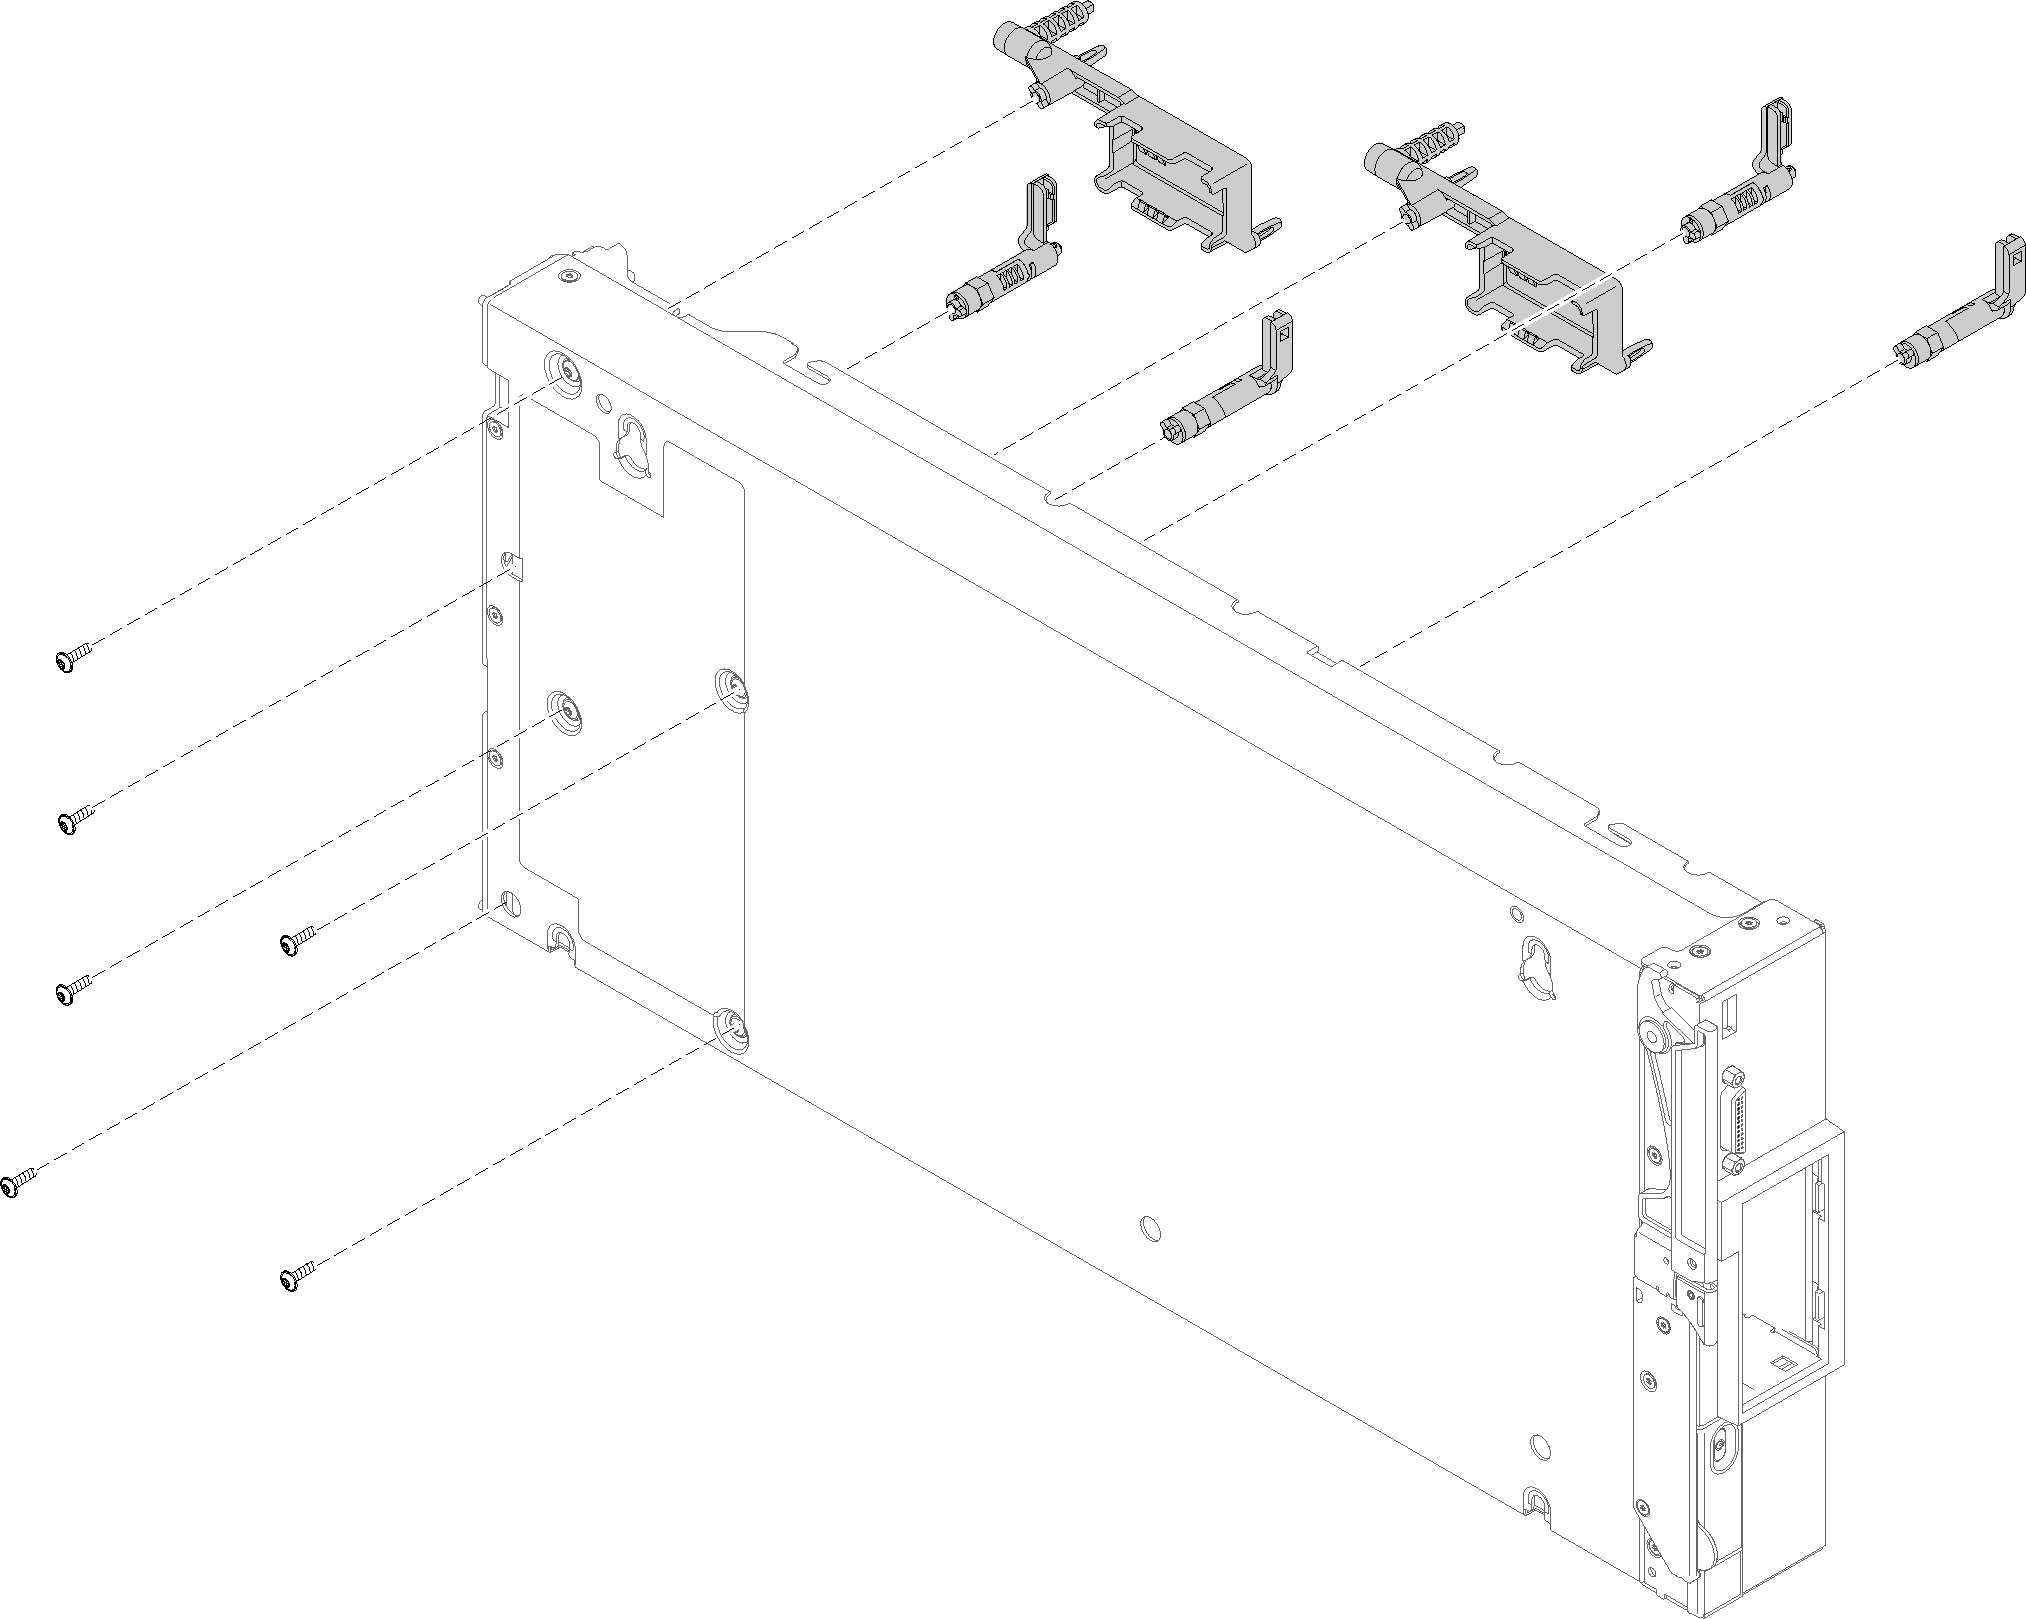
To install the adapter-retention assembly, complete the following steps:
Figure 1. Adapter-retention assembly installation
After you install the adapter-retention assembly, complete the following steps:
Install the I/O expansion adapters, if you removed them (see Install an I/O expansion adapter).
Install the air baffle (see Install the air baffle).
Install the compute node cover (see Install the compute node cover ).
Install the compute node into the chassis (see Install the compute node in the chassis ).
Power on the compute node.
Demo video
Give documentation feedback