Install the system board
Use this information to install the system board.
Read Safety and Installation Guidelines to ensure that you work safely.
Touch the static-protective package that contains the component to any unpainted metal surface on the server; then, remove it from the package and place it on a static-protective surface.
To install the system board, complete the following steps:
- Insert the system board into the chassis with an angle as shown, so serial and VGA port can be inserted in the slots on the rear chassis.
- Place the system board flat into the chassis, screw slots on the system board will match the screw slots on the chassis.
Figure 1. System board installation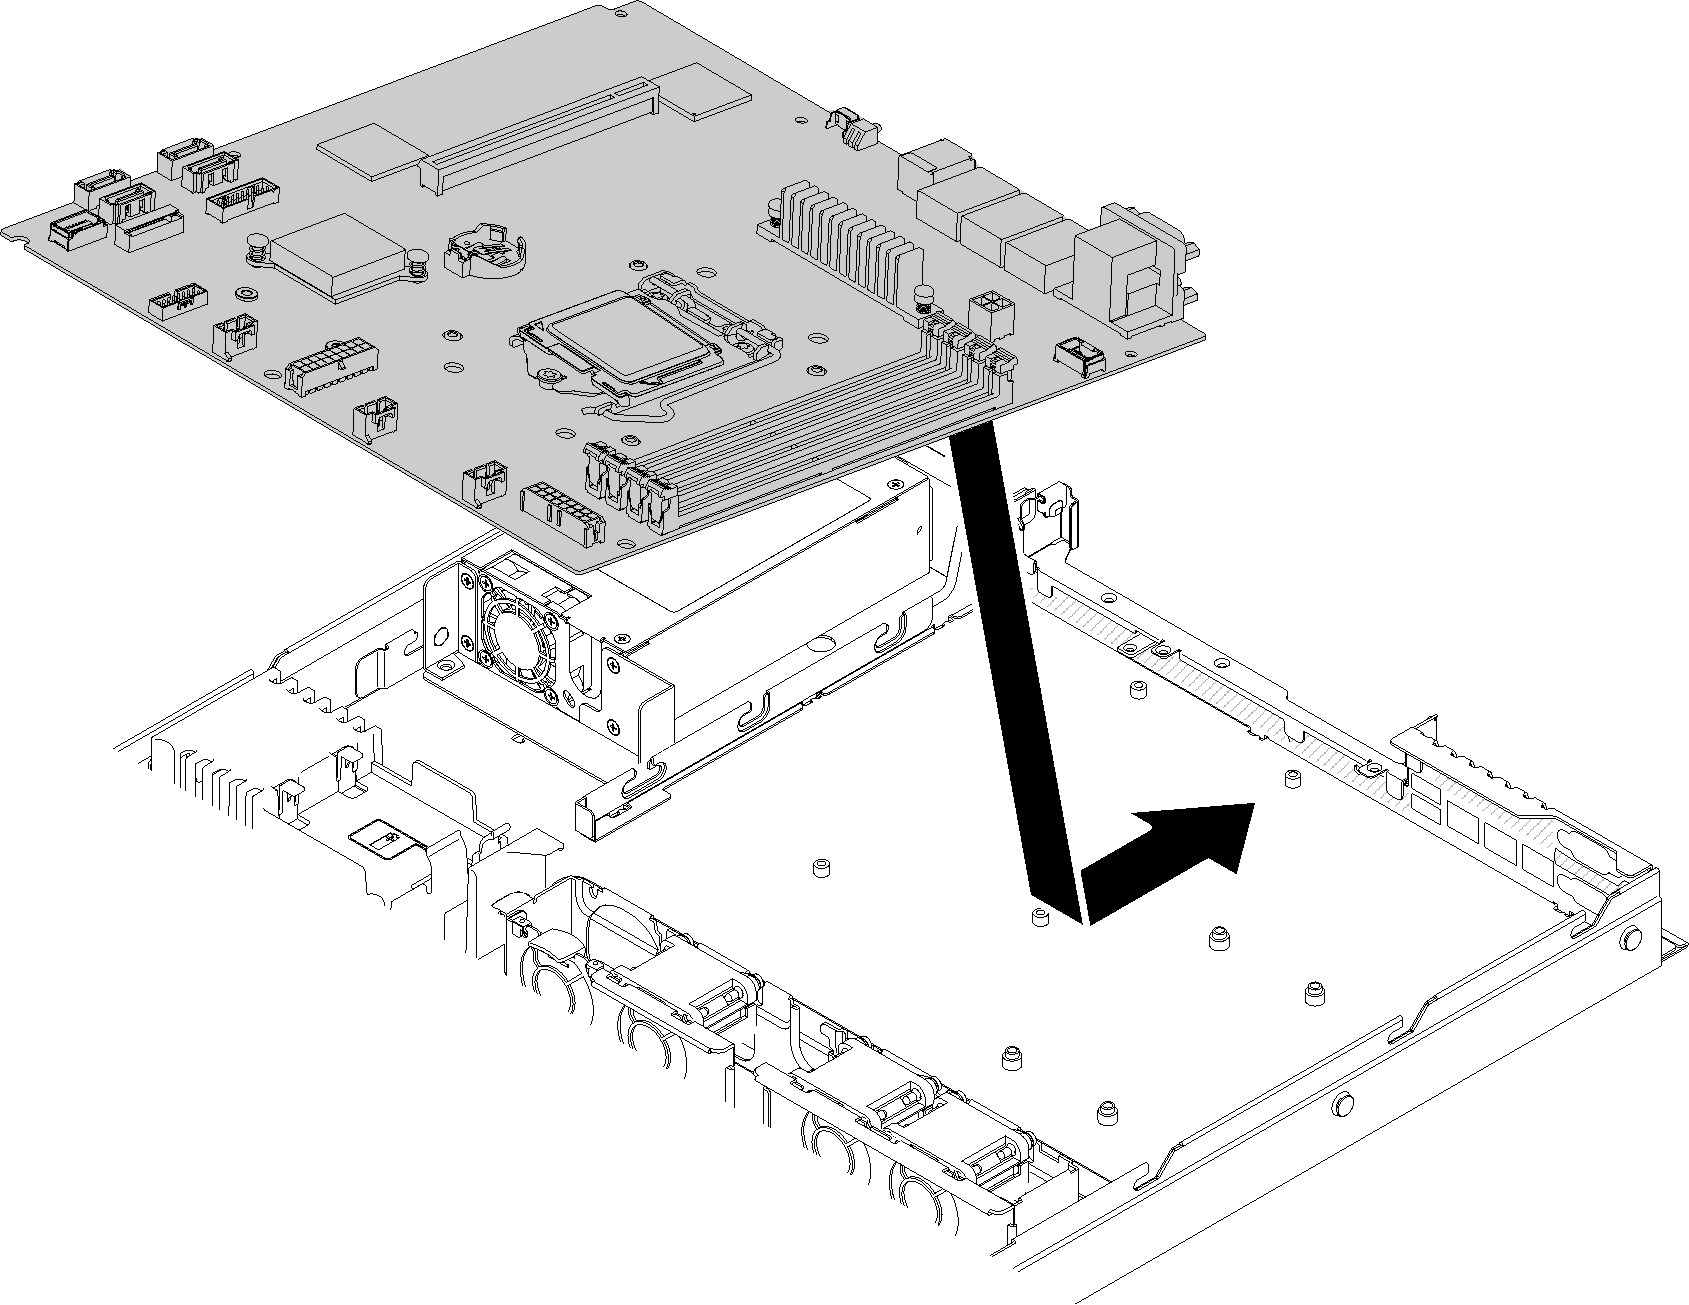
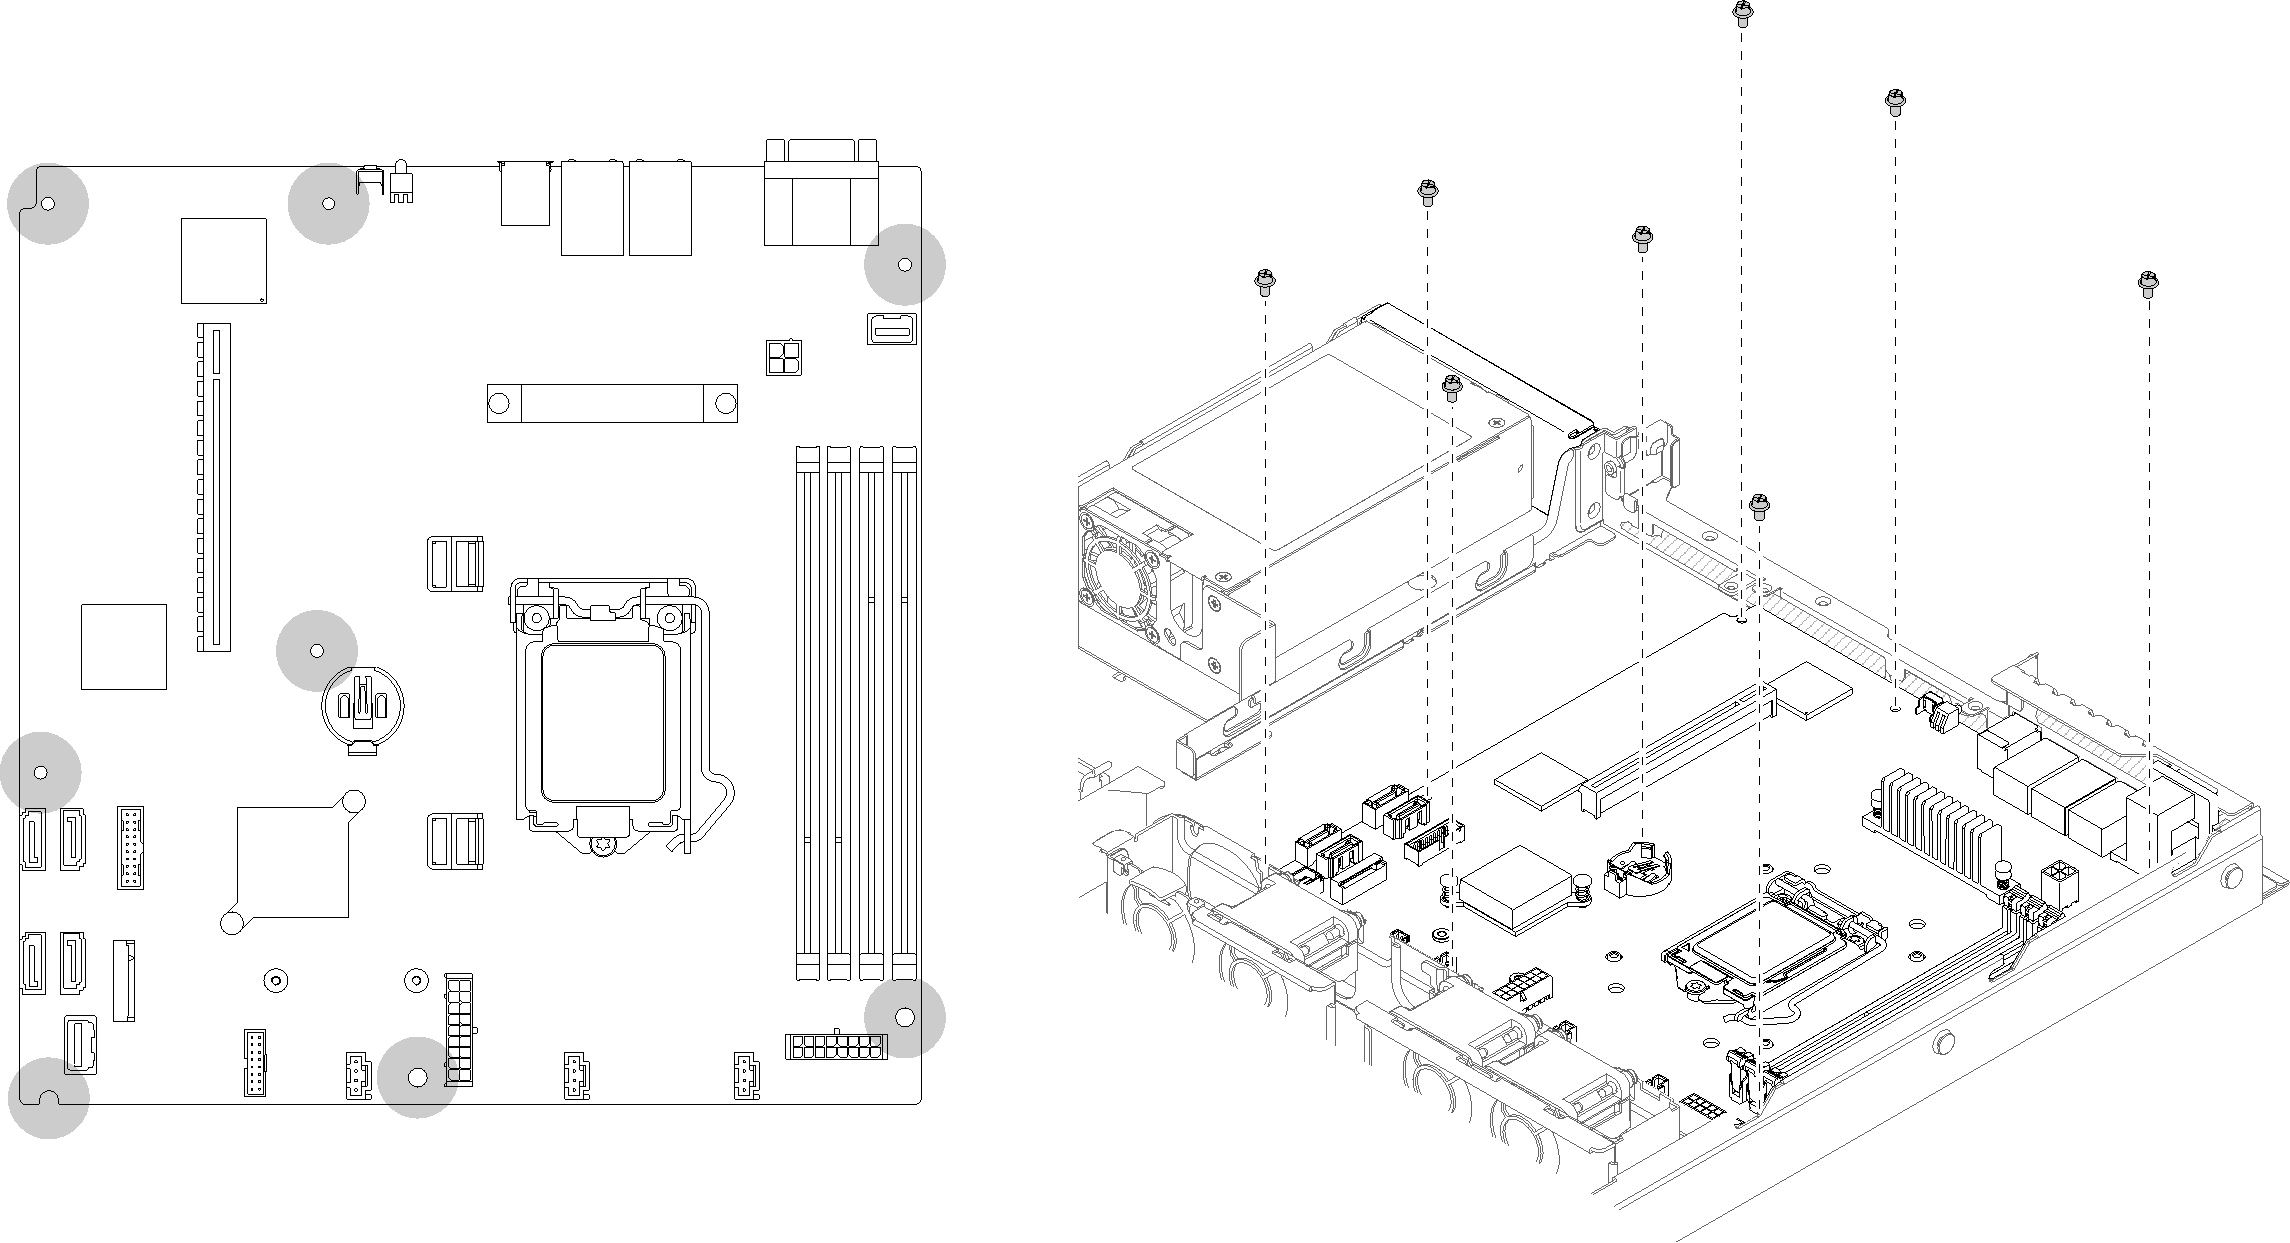
- Install all eight screws to secure the system board to the chassis. Figure 2. System-board screws location
After you install the system board, complete the following steps:
Install the top cover onto the server (see Install the top cover).
Install the server into the rack if necessary.
Reconnect power cords and all external cables.
Update the machine type and serial number with new vital product data (VPD). Use the Lenovo XClarity Provisioning Manager to update the machine type and serial number. See Update the machine type and serial number.
Enable TPM. See Enable TPM.
Optionally, enable UEFI Secure Boot. See Enable UEFI Secure Boot.