Install a super capacitor module on the middle 2.5-inch drive cage
Use this information to install a super capacitor module the middle 2.5-inch drive cage.
About this task
Read Installation Guidelines to ensure that you work safely.
Prevent exposure to static electricity, which might lead to system halt and loss of data, by keeping static-sensitive components in their static-protective packages until installation, and handling these devices with an electrostatic-discharge wrist strap or other grounding system.
Procedure
- Open the drive cage handle.Figure 1. Opening the handle of the middle drive cage

Pull out the blue plunger.
Slide the metal cover out of the drive cage.
- Remove the metal cover.Figure 2. Removing the metal cover
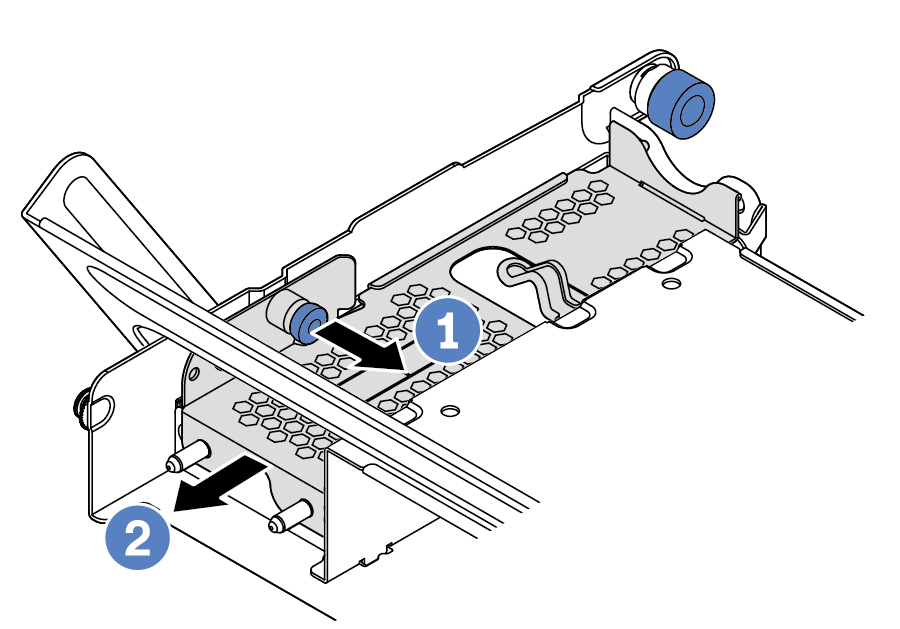
Pull out the blue plunger.
Slide the metal cover out of the drive cage.
- Install the super capacitor module.Figure 3. Installing the super capacitor module
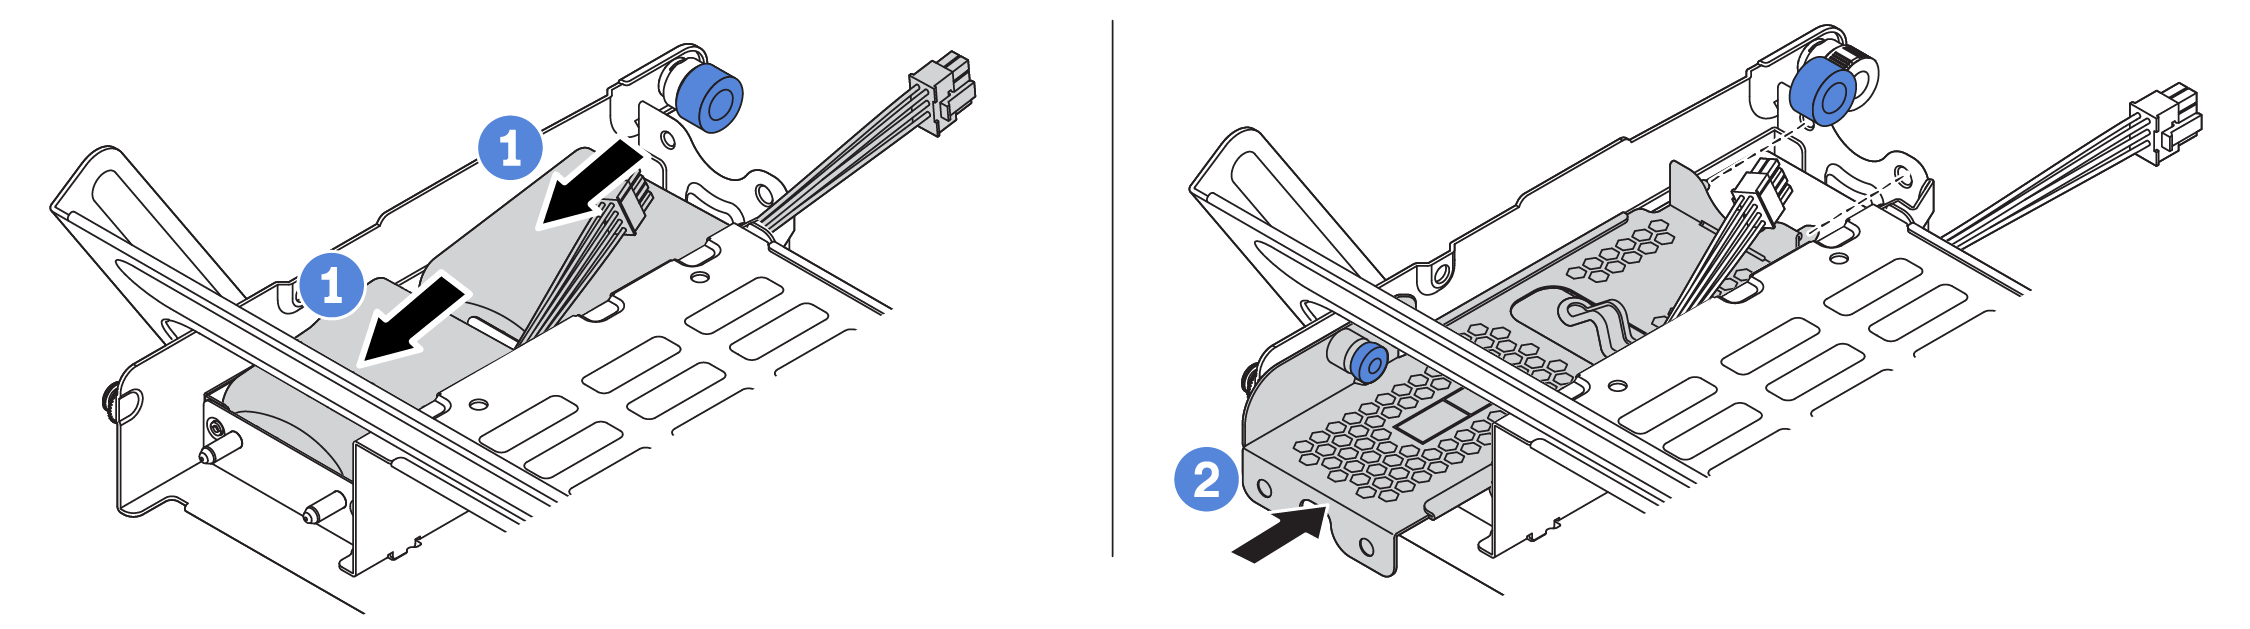
Put a super capacitor module into the holder, and press it down to secure it into the holder.
Align the pins on the metal cover with the holes in the super capacitor holder, pull out the blue latch on the cover, and slide the cover into the holder until the pins pass through the holes. Then, release the blue latch to lock the cover into place.