Install the 2.5-/3.5-inch drive backplane
Follow instructions in this section to install the 2.5-inch or 3.5-inch drive backplane.
About this task
Read Installation Guidelines and Safety inspection checklist to ensure that you work safely.
Touch the static-protective package that contains the component to any unpainted metal surface on the server; then, remove it from the package and place it on a static-protective surface.
Procedure
Install the 2.5-inch drive backplane:
 Align the tabs on the bottom of the 2.5-inch drive backplane with the slots on the drive cage, and insert them into the slots.
 Push the top of the backplane toward the drive cage until it clicks in place.Figure 1. Installing the 2.5-inch drive backplane
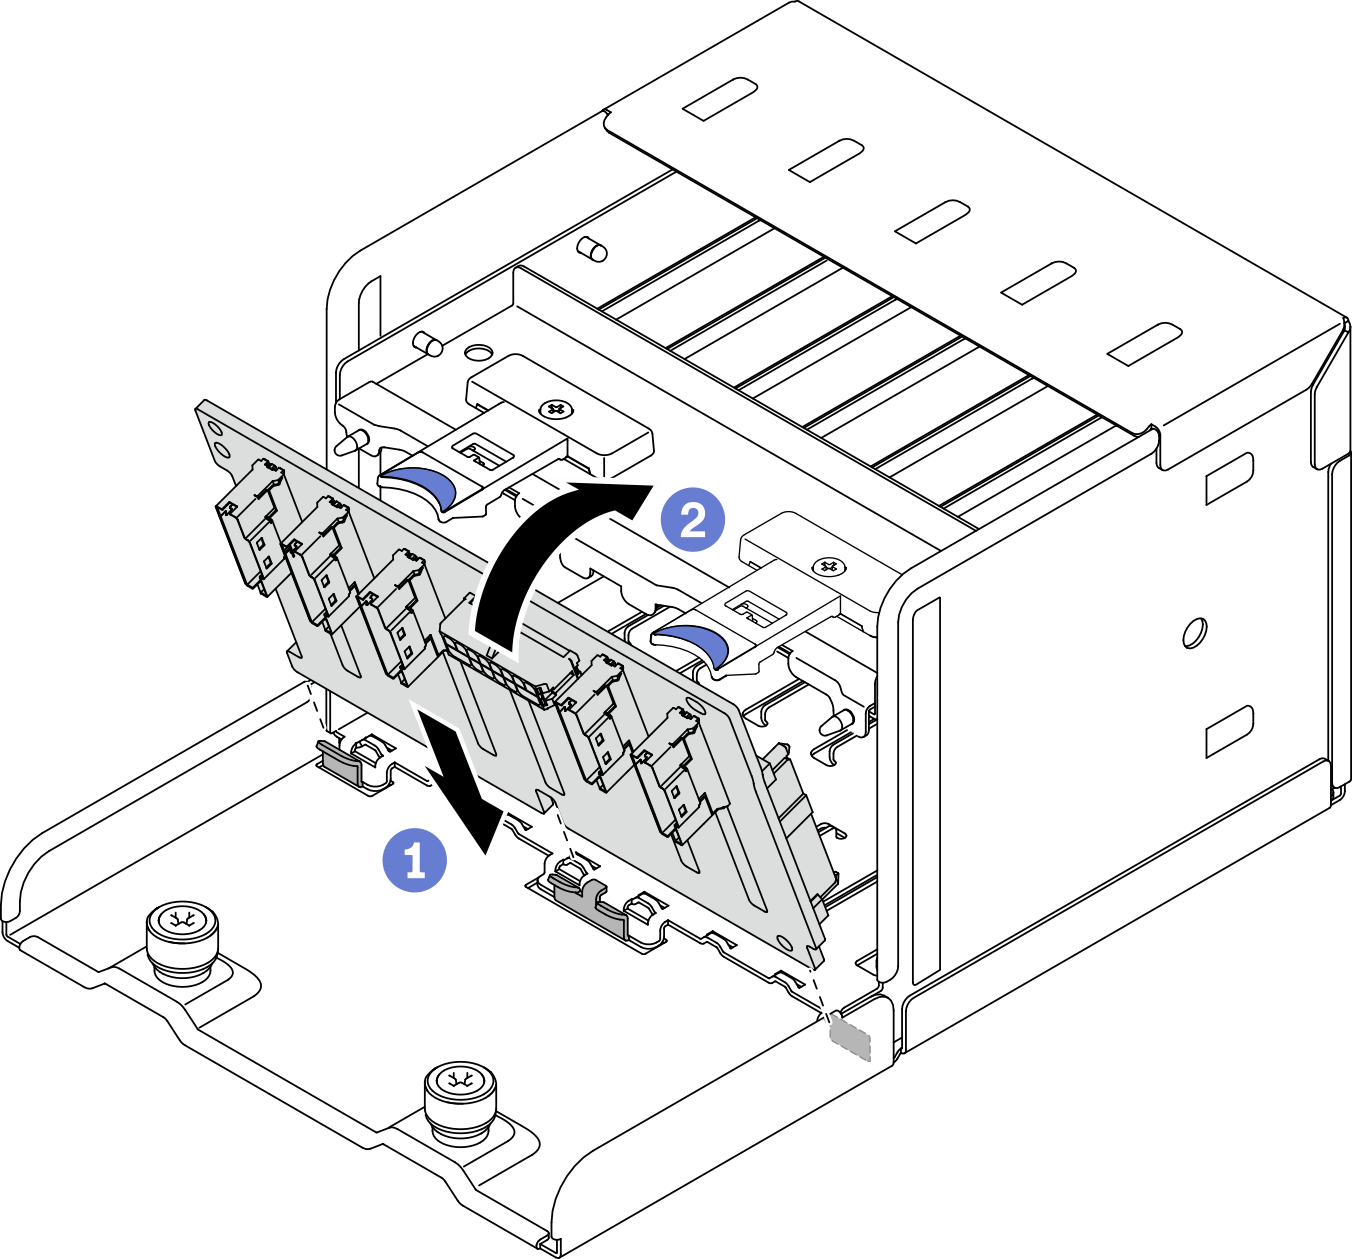
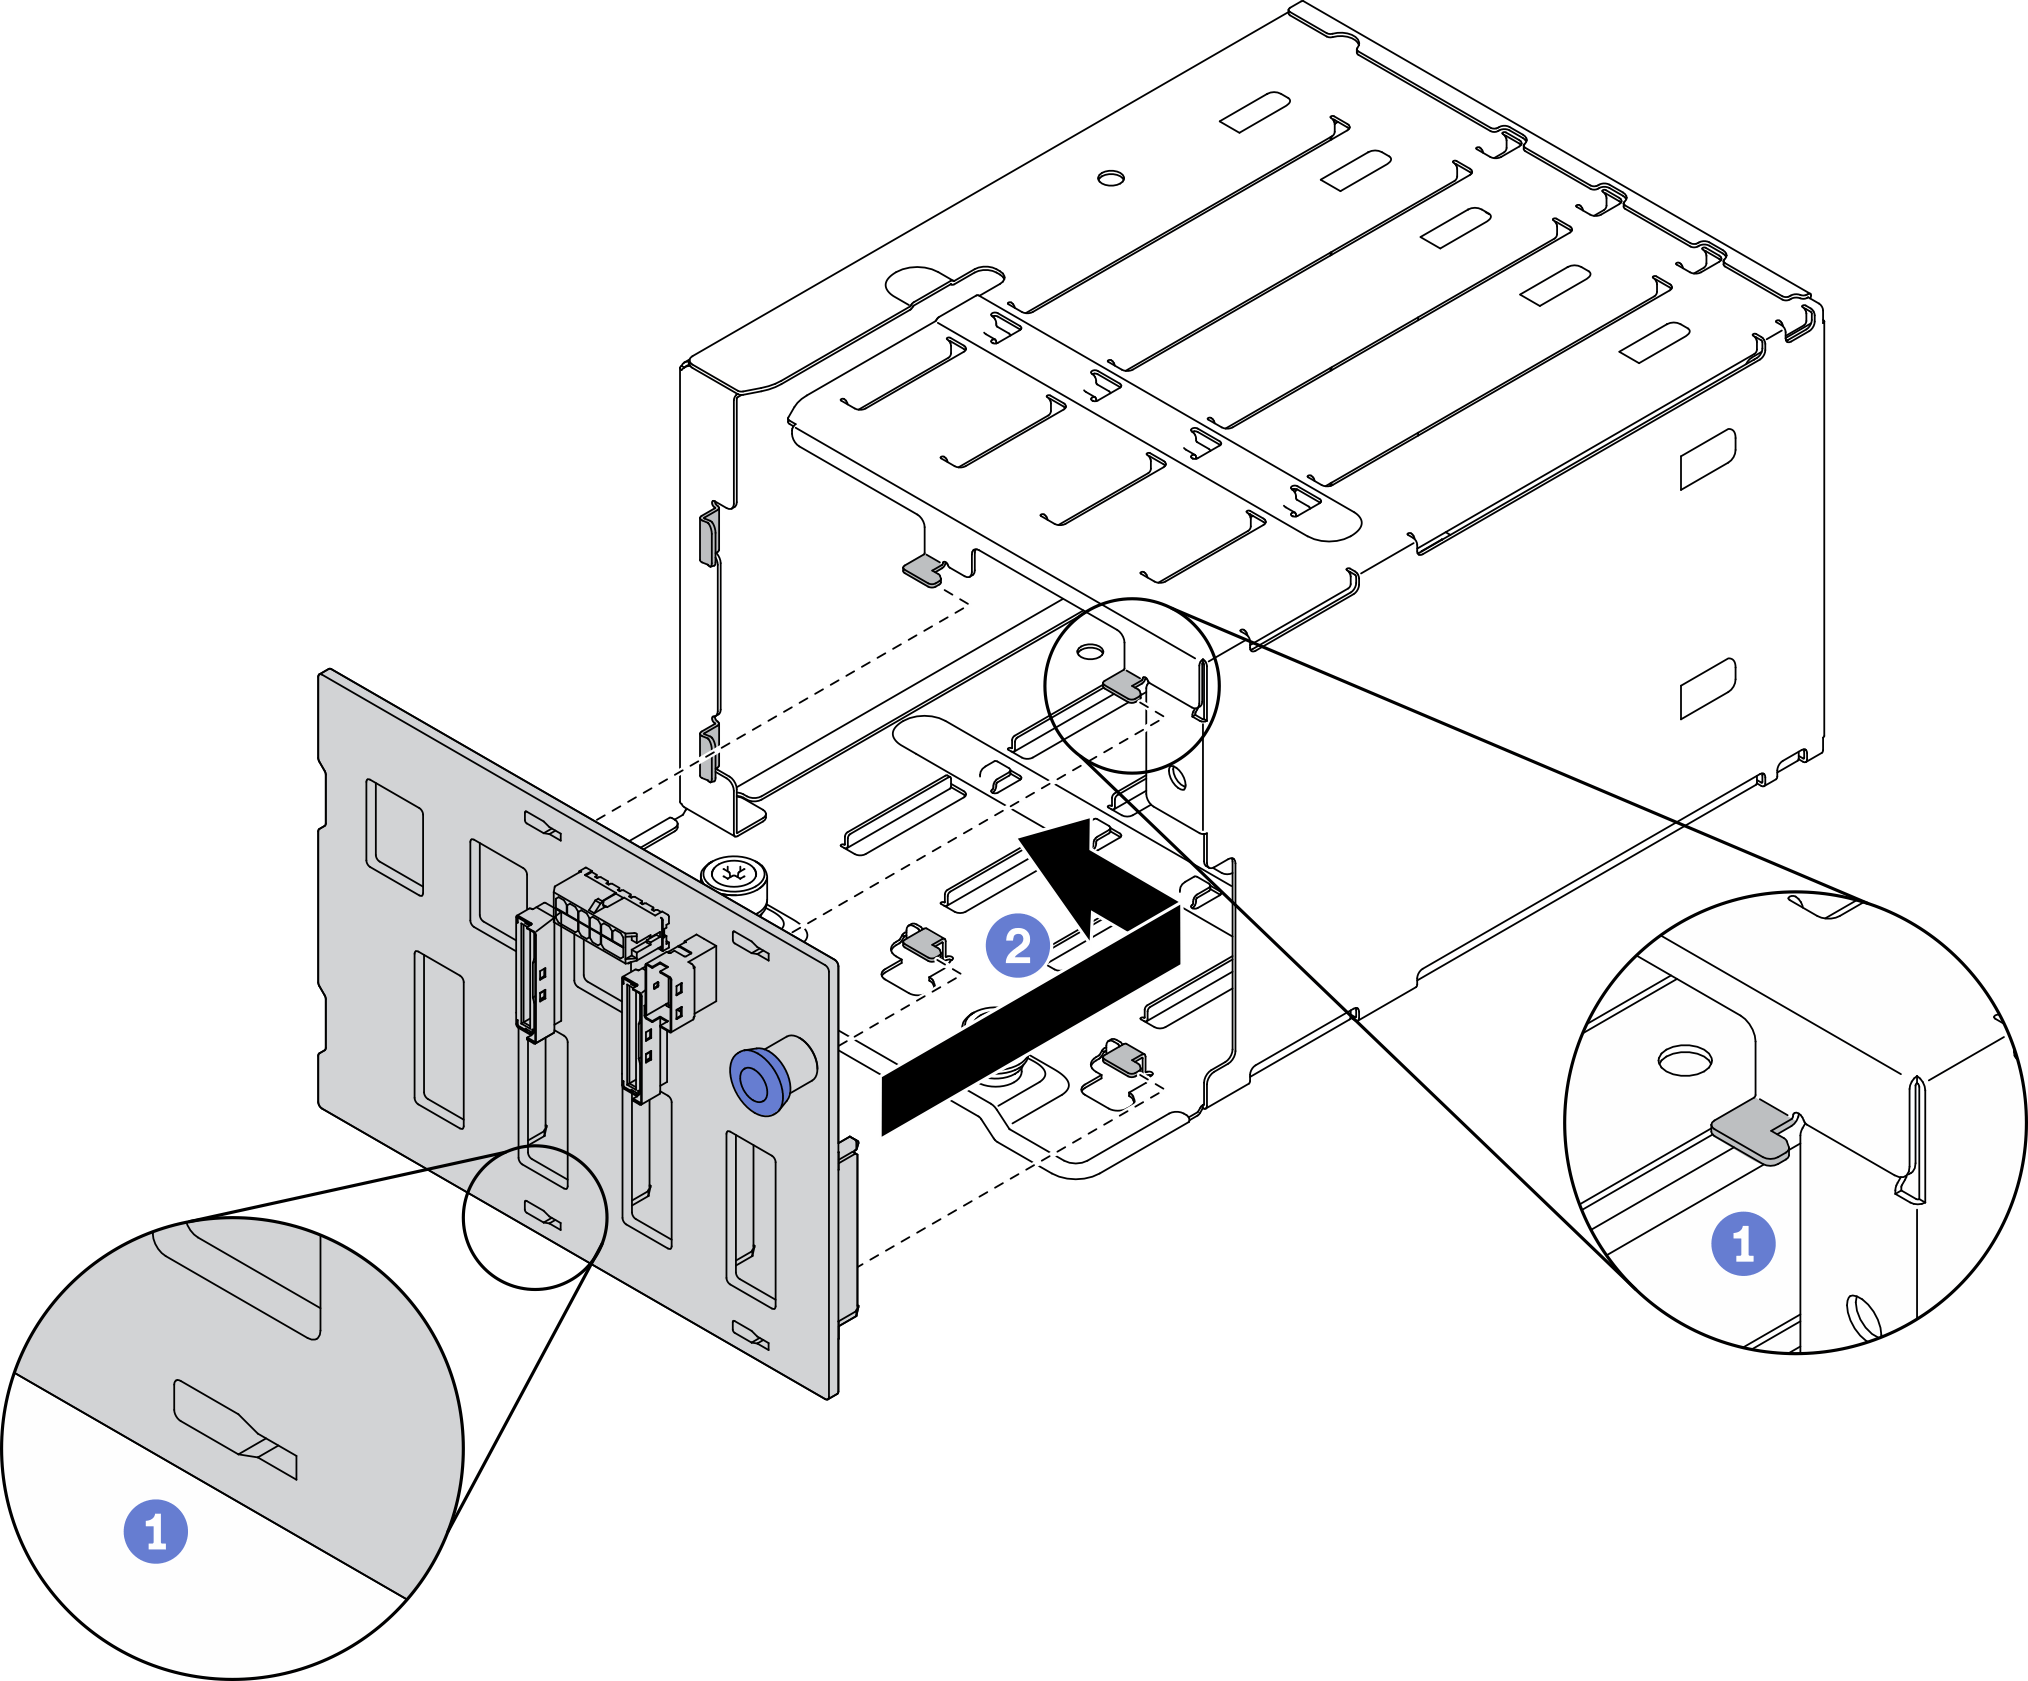
Install the 3.5-inch drive backplane:
- Align the four tabs on the drive cage with the slots on the 3.5-inch drive backplane; then, insert the tabs into the corresponding slots.
- Slide the backplane toward the left as illustrated until it is seated in the drive cage.Figure 2. Installing the 3.5-inch drive backplane
Connect the required cables.
Complete the parts replacement. See Complete the parts replacement.
If you have installed 2.5-inch drive backplane with U.3 NVMe drives for Trimode. Enable U.3 x1 mode for the selected drive slots on the backplane through the XCC web GUI. See U.3 NVMe drive can be detected in NVMe connection, but cannot be detected in Tri-mode.
Demo video