Install a GPU adapter link bridge
Follow instructions in this section to install a GPU adapter link bridge.
About this task
Attention
Read Installation Guidelines and Safety inspection checklist to ensure that you work safely.
Touch the static-protective package that contains the component to any unpainted metal surface on the server; then, remove it from the package and place it on a static-protective surface.
Depending on the specific type, your GPU adapter might look slightly different from the illustrations in this section.
Follow the additional instructions in any documentation that comes with your GPU adapter.
Procedure
Note
Install the GPU adapter link bridge to connect the GPU pairs listed below:
GPU 1 and GPU 2
GPU 3 and GPU 4
GPU 5 and GPU 6
GPU 7 and GPU 8
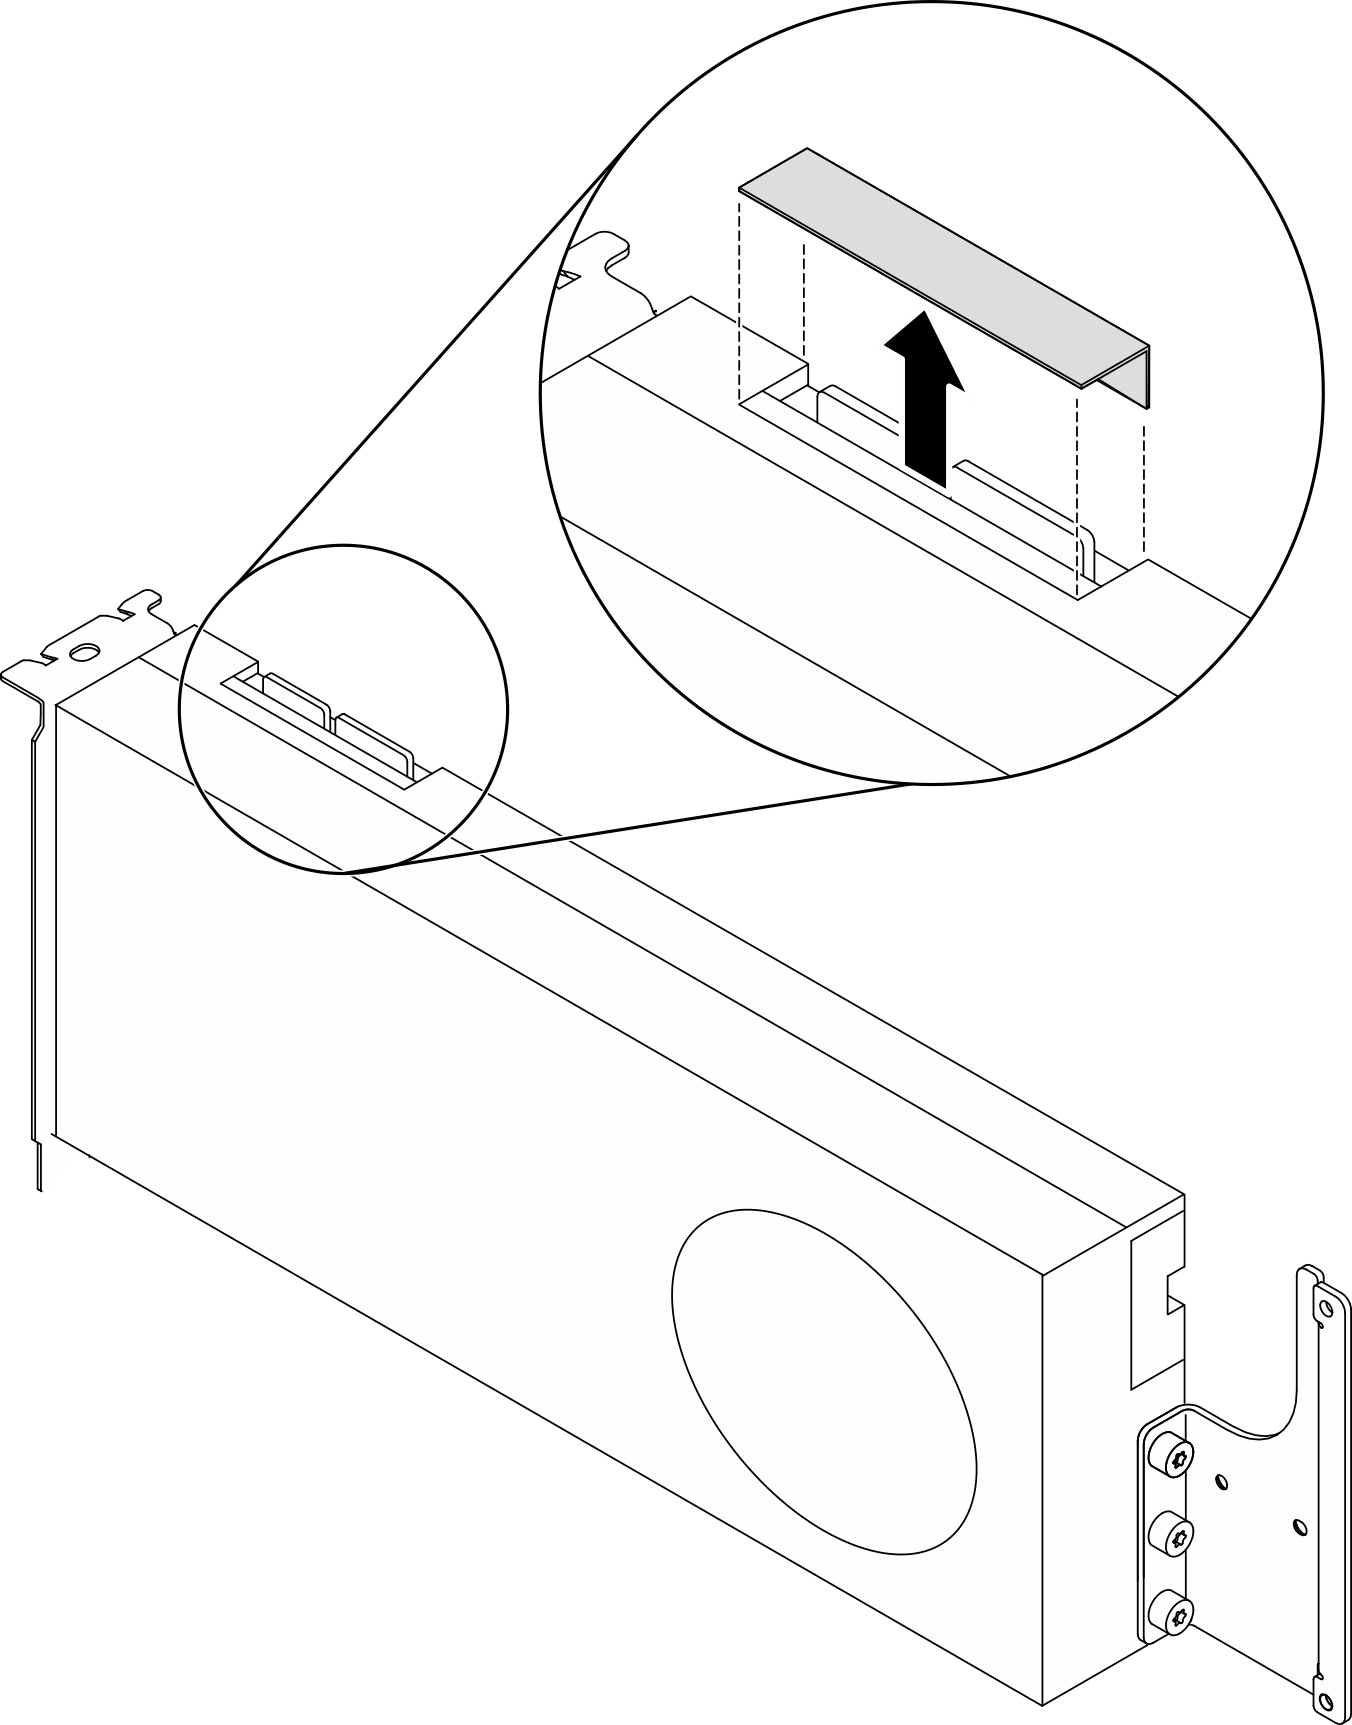
- Remove the link connector cover from the GPU.Figure 1. Removing the link connector cover from the GPU
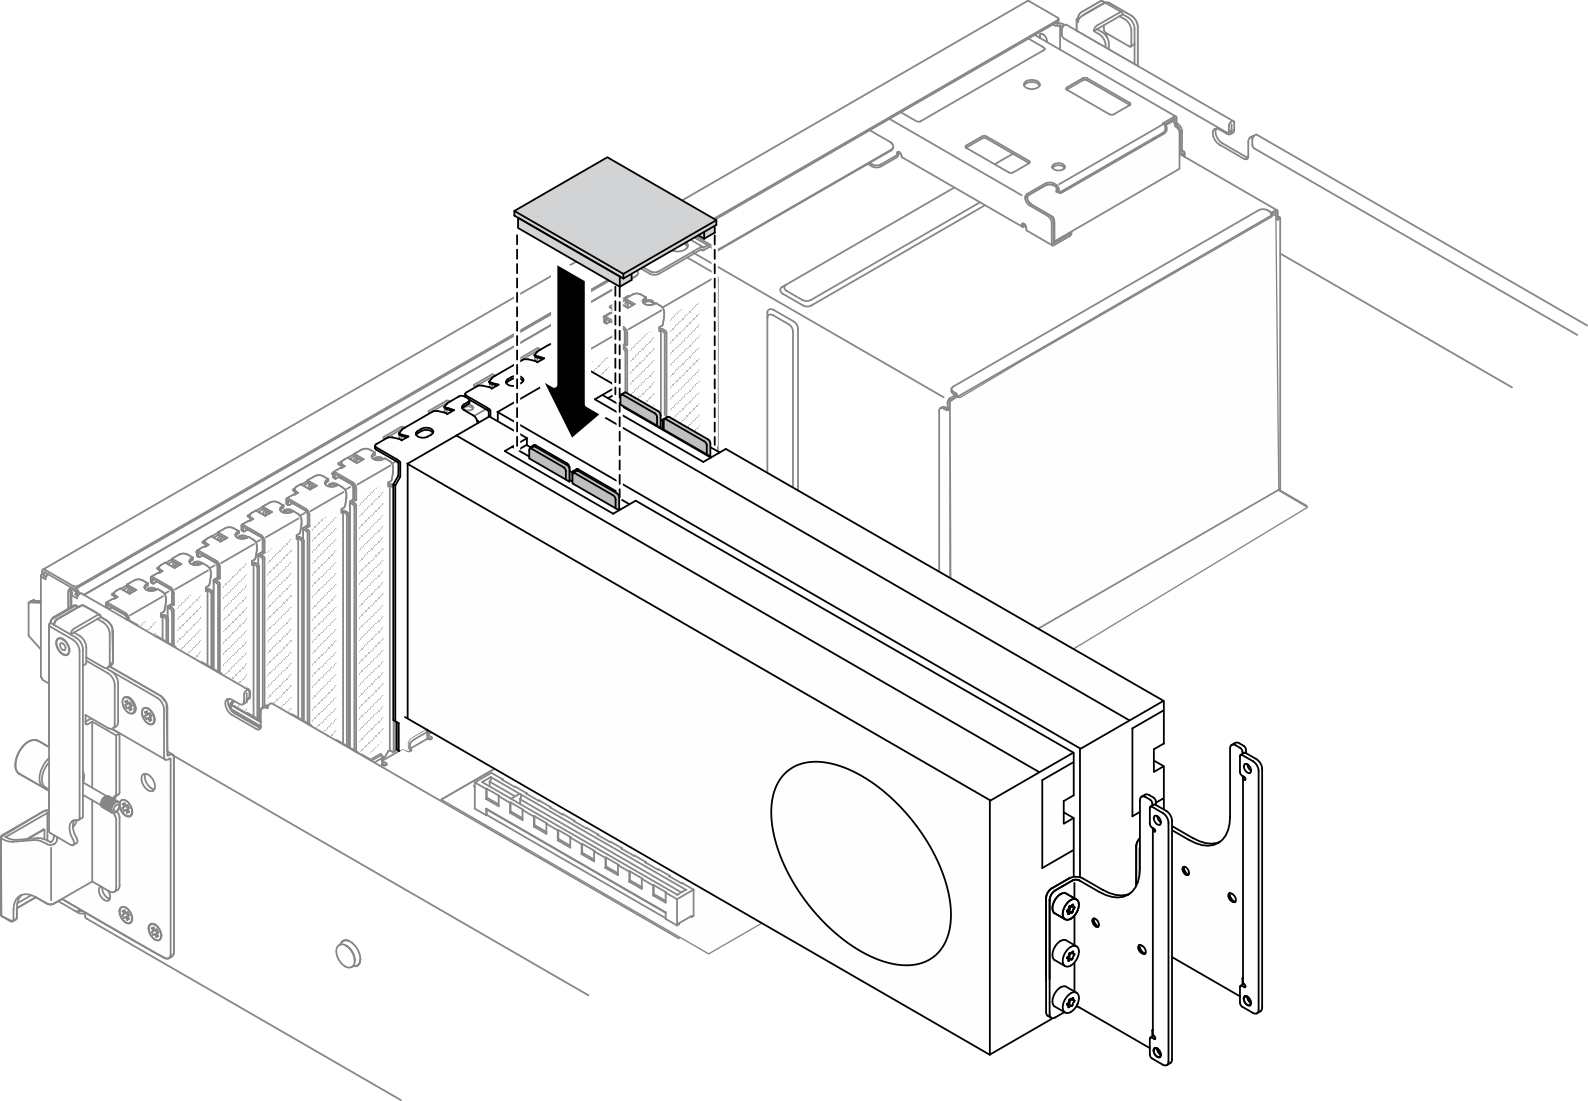
- Align the GPU adapter link bridge to the link connectors on the GPUs; then, install the GPU adapter link bridge to the GPUs until it clicks into place.NoteDepending on the configuration, there may be one or three GPU adapter link bridges on the GPU. When linking a GPU pair, all link connectors on the GPUs must be linked.Figure 2. Installing the GPU adapter link bridge
Give documentation feedback