Remove the 2.5-/3.5-inch drive cage assembly
Follow instructions in this section to remove the 2.5-inch or 3.5-inch drive cage assembly.
About this task
Attention
Read Installation Guidelines and Safety inspection checklist to ensure that you work safely.
Procedure
- Based on your configuration, follow the corresponding procedures to remove the 2.5-inch or 3.5-inch drive cage assembly.
Remove the 2.5-inch drive cage assembly:
 Loosen the two thumbscrews that secure the 2.5-inch drive cage assembly to the chassis.
 Slide the drive cage assembly out of the chassis.Figure 1. Removing the 2.5-inch drive cage assembly
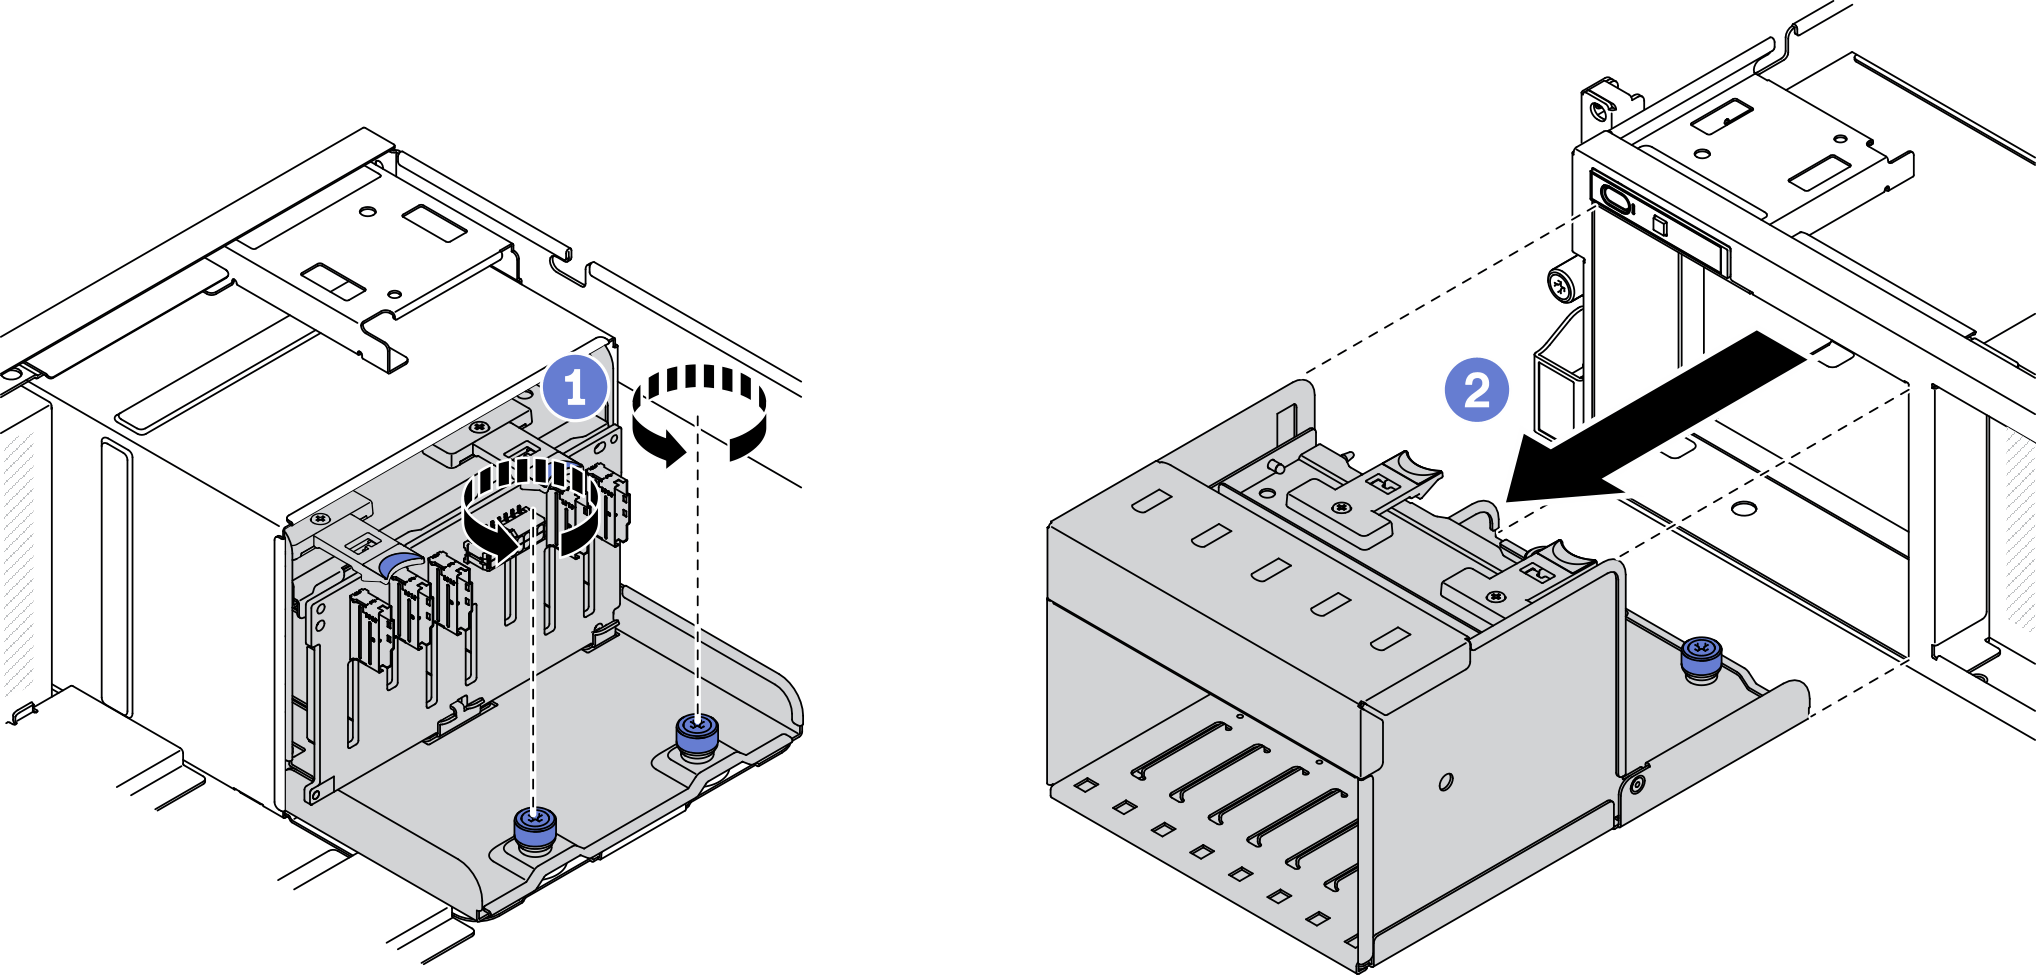
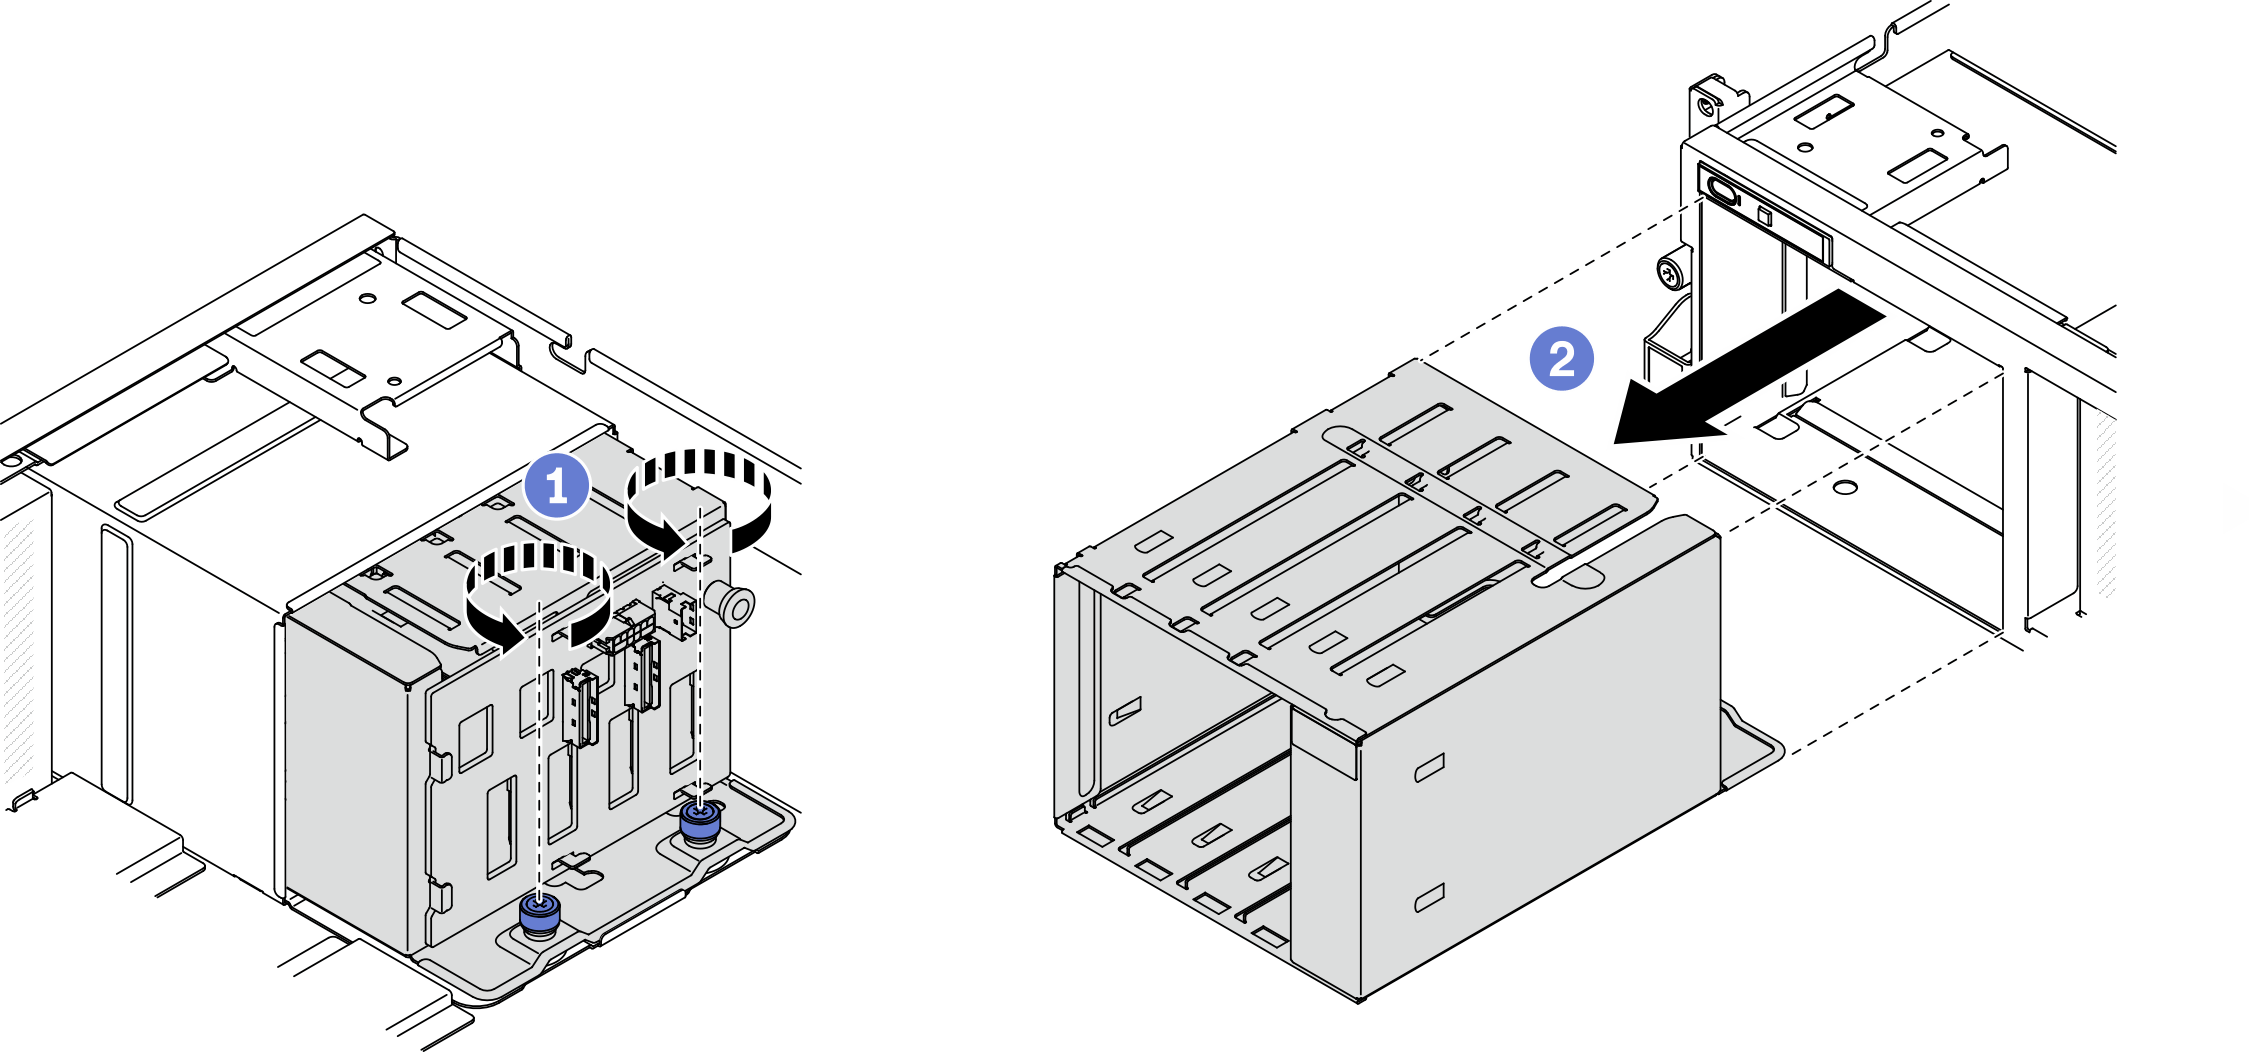
Remove the 3.5-inch drive cage assembly:
- Loosen the two thumbscrews that secure the 3.5-inch drive cage assembly to the chassis.
- Slide the drive cage assembly out of the chassis.Figure 2. Removing the 3.5-inch drive cage assembly
After you finish
If you are instructed to return the component or optional device, follow all packaging instructions, and use any packaging materials for shipping that are supplied to you.
Demo video
Give documentation feedback