Install the front I/O expansion board
Follow instructions in this section to install the front I/O expansion board.
About this task
Attention
- Read Installation Guidelines and Safety inspection checklist to ensure that you work safely.
- Touch the static-protective package that contains the component to any unpainted metal surface on the server; then, remove it from the package and place it on a static-protective surface.
Note
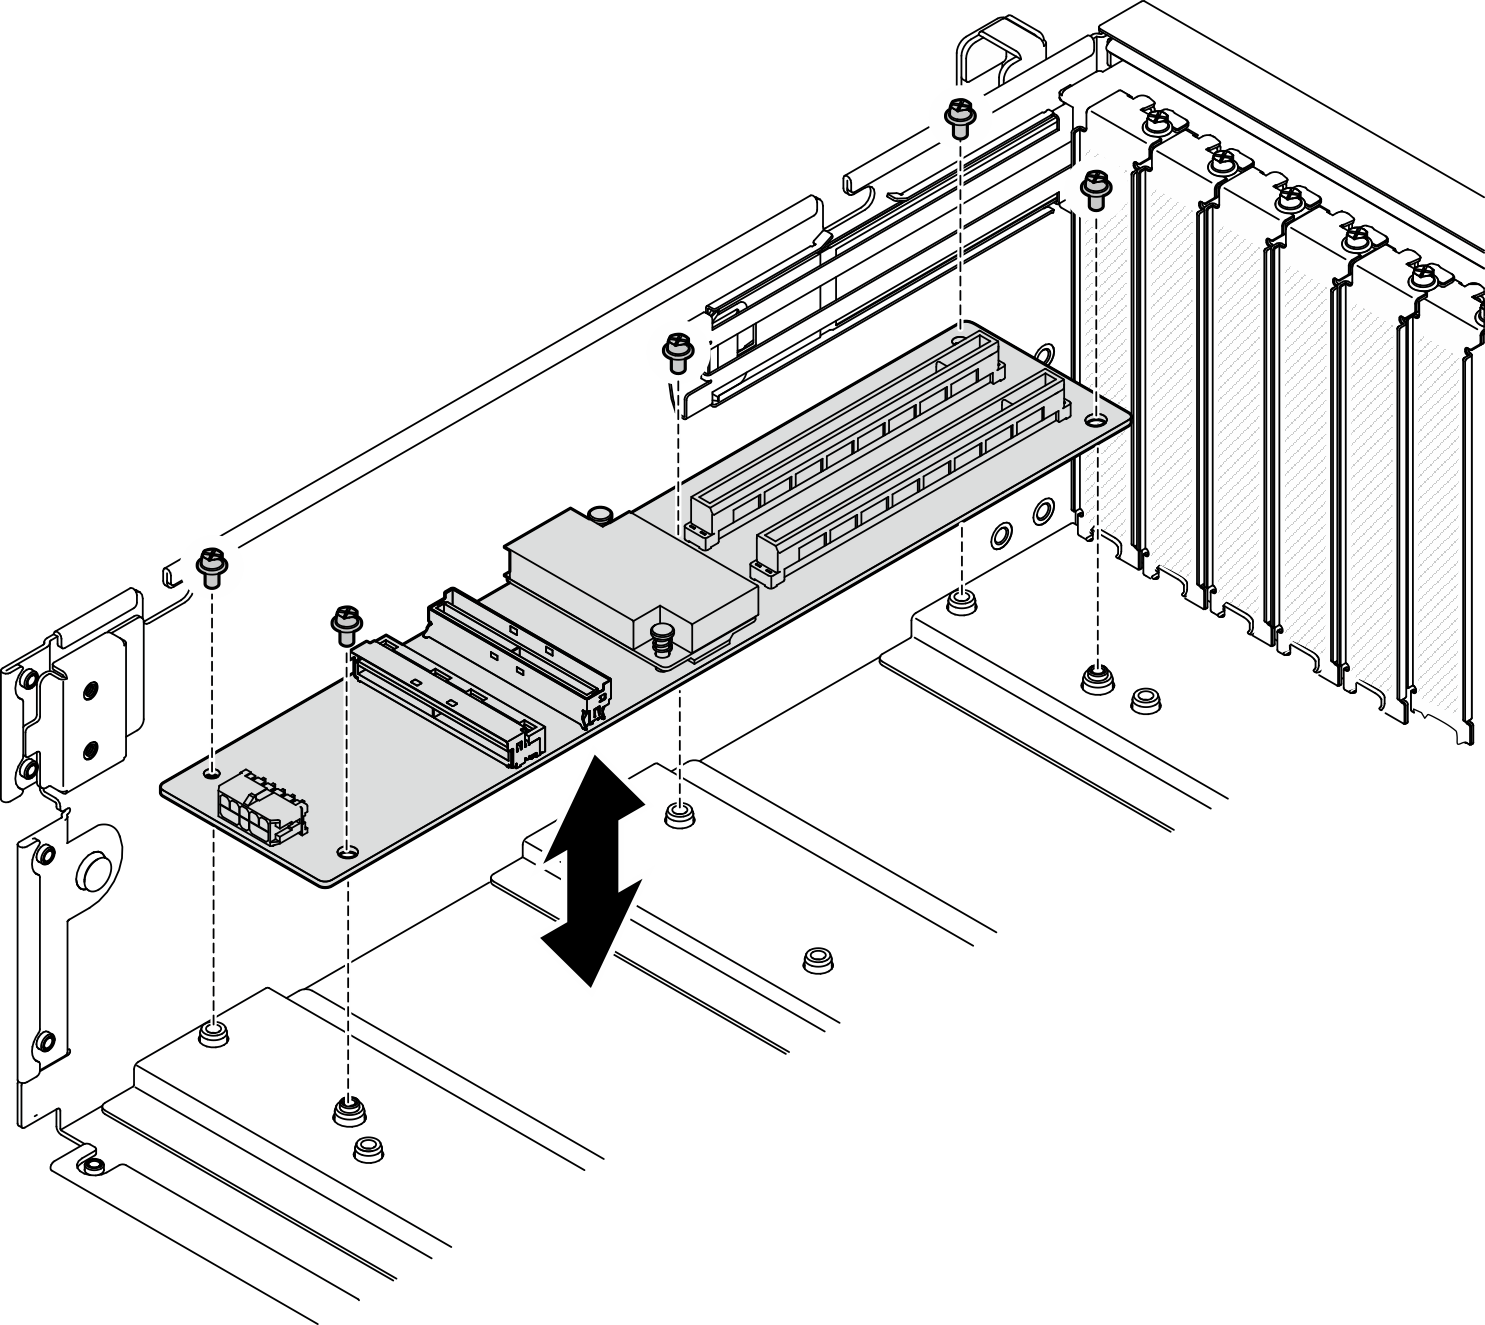
The front I/O expansion board might look different from the illustrations in this section.
Firmware and driver download: You might need to update the firmware or driver after replacing a component.
Go to Drivers and Software download website for ThinkSystem SR675 V3 to see the latest firmware and driver updates for your server.
Go to Update the firmware for more information on firmware updating tools.
Procedure
- Fasten the five screws to secure it to the chassis.Figure 1. Front I/O expansion board installation
- If applicable, fasten the screw to secure the front I/O expansion board heat sink to the chassis.Figure 2. Screw installation

After you finish
- Reinstall the front PCIe adapter(s). See Install a front PCIe adapter.
- Complete the parts replacement. See Complete the parts replacement.
Demo video
Give documentation feedback