Remove an upper PCIe adapter
Follow instructions in this section to remove an upper PCIe adapter. The procedure must be executed by a trained technician.
About this task
Attention
- Read Installation Guidelines and Safety inspection checklist to ensure that you work safely.
- Power off the server and peripheral devices and disconnect the power cords and all external cables. See Power off the server.
Note
The PCIe adapter might look different from the illustration.
Procedure
- Make preparation for this task.
- Pull the system shuttle to the stop position.
 Press the two blue release latches.
 Rotate the two release levers until they are perpendicular to the shuttle.
 Pull the shuttle forward until it stops.AttentionTo avoid damage, push the two release levers back and ensure they lock into place after extending the system shuttle to its stop position.Figure 1. Pulling the system shuttle to the stop position
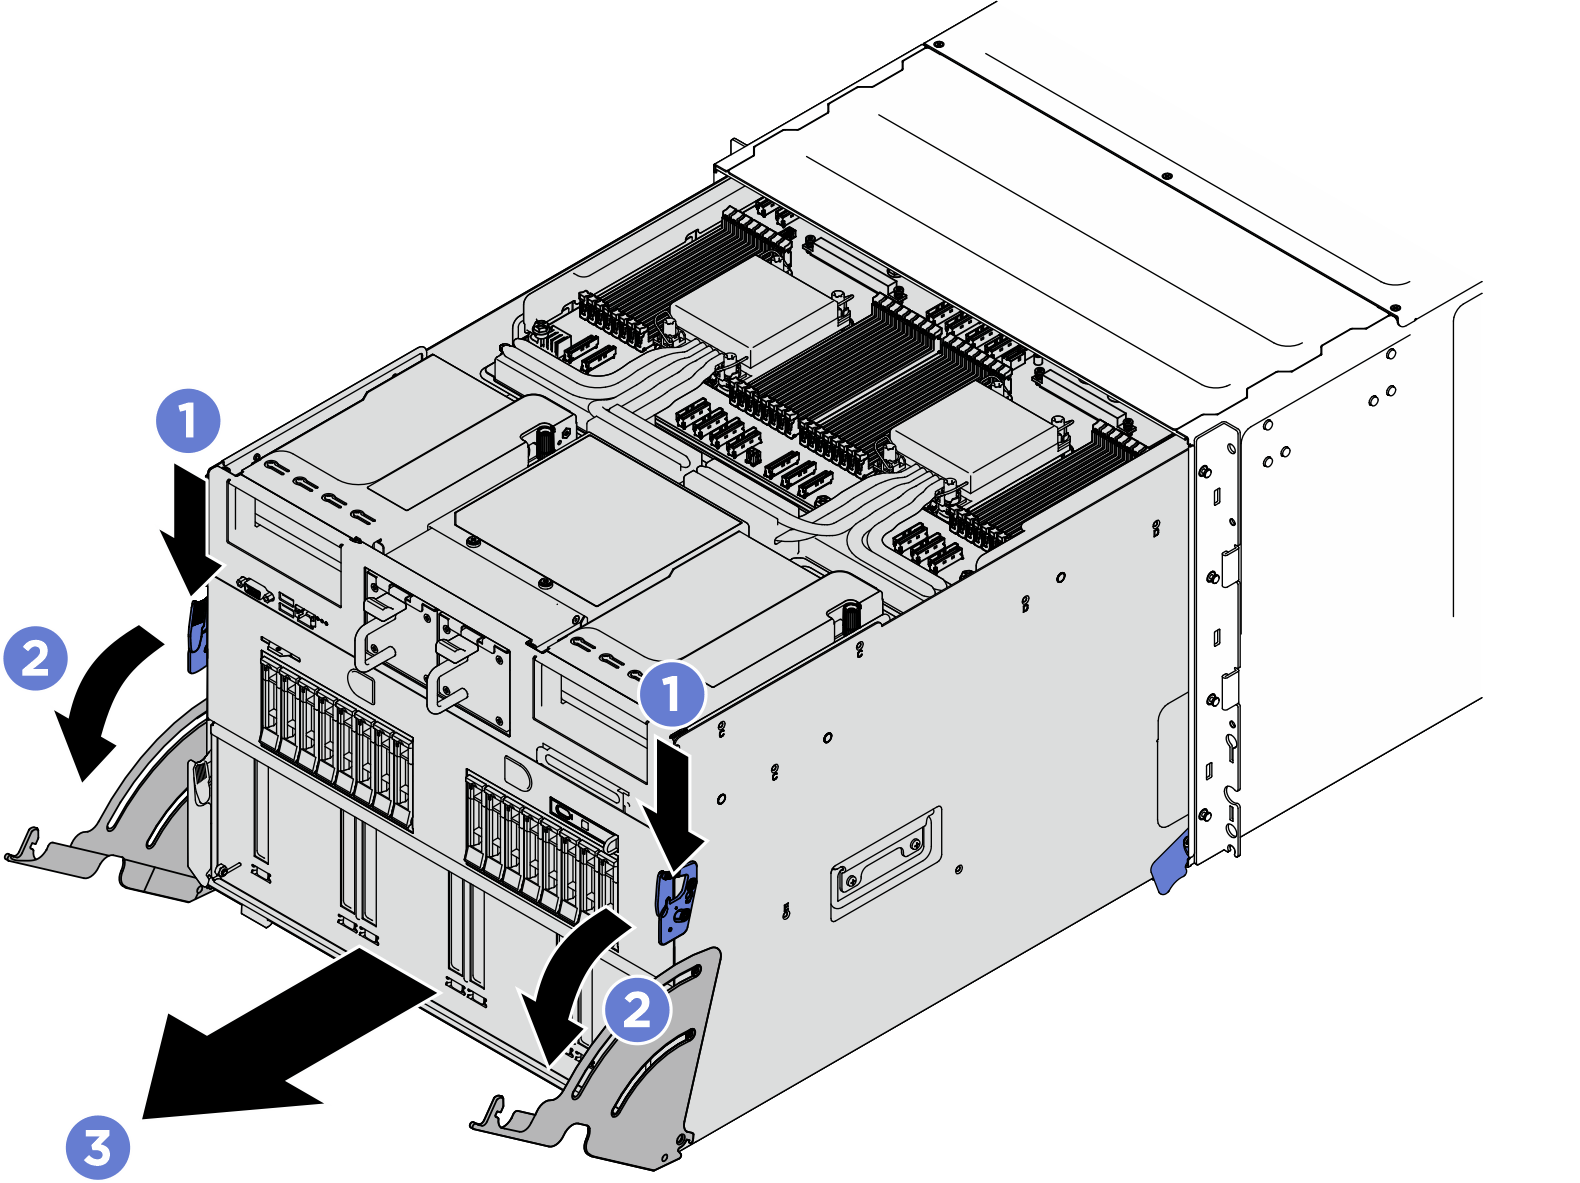
- Pull the system shuttle to the stop position.
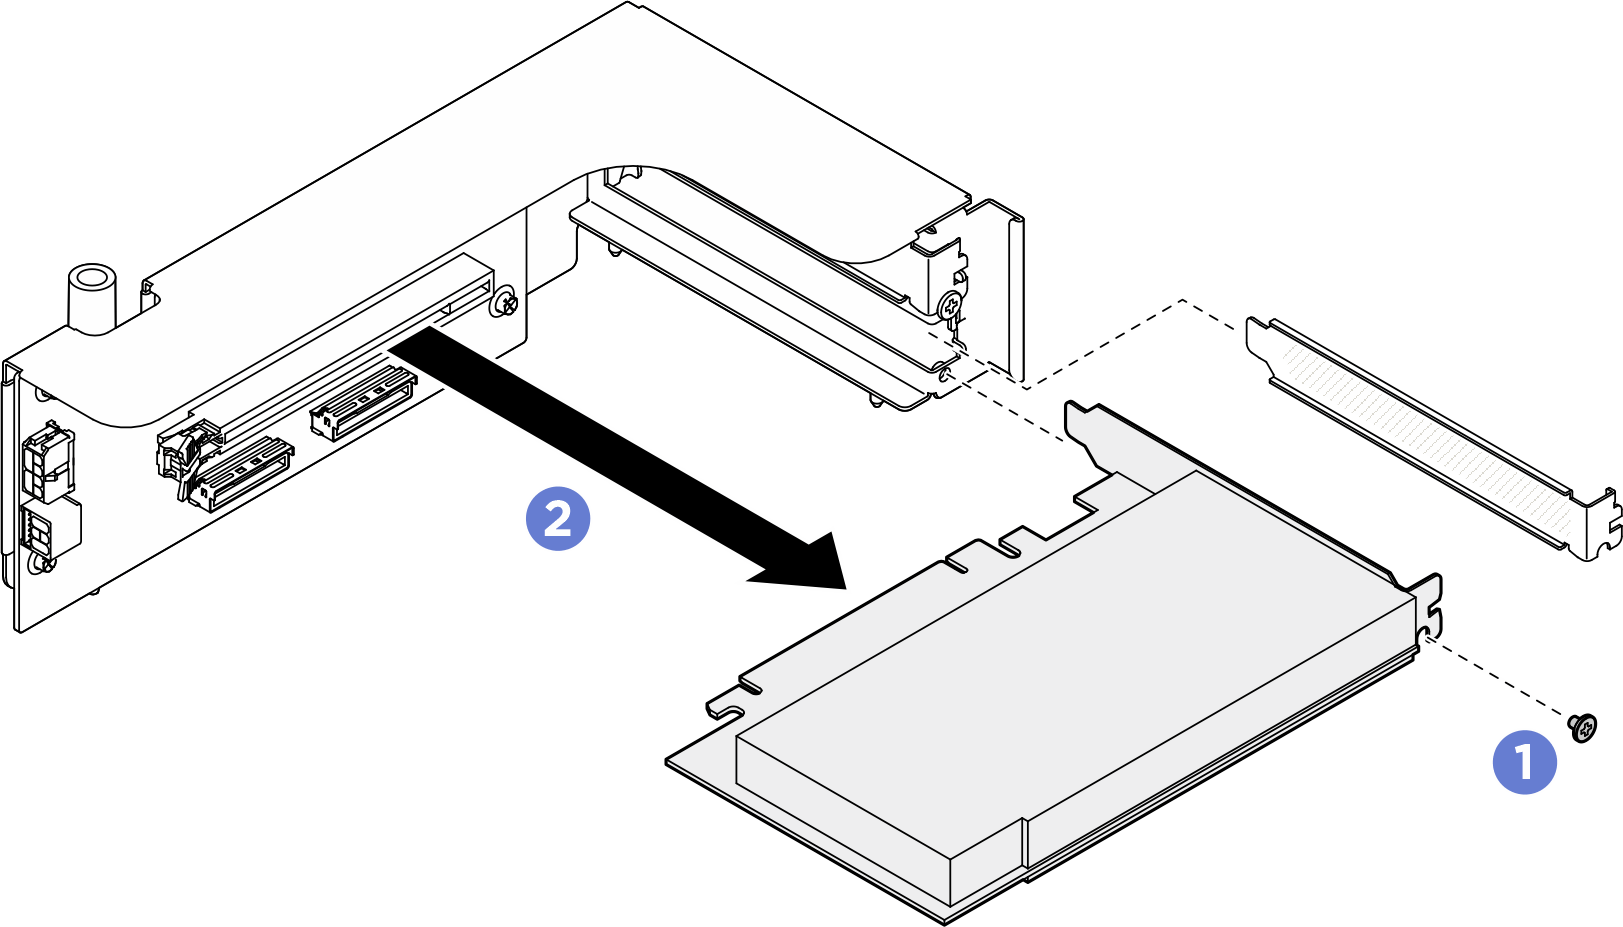
- Remove the upper PCIe adapter.
- Unfasten the screw that secures the PCIe adapter to the PCIe riser.
- Grasp the PCIe adapter by its edges and carefully pull it out of the PCIe slot.Figure 2. Upper PCIe adapter removal
After you finish
If you are instructed to return the component or optional device, follow all packaging instructions, and use any packaging materials for shipping that are supplied to you.
Give documentation feedback