Install the processor air baffle
Follow instructions in this section to install the processor air baffle. The procedure must be executed by a trained technician.
About this task
Attention
- Read Installation Guidelines and Safety inspection checklist to ensure that you work safely.
- Touch the static-protective package that contains the component to any unpainted metal surface on the server; then, remove it from the package and place it on a static-protective surface.
Note
- If you are installing a new processor air baffle, attach the service label to the surface of the new processor air baffle if necessary.
- Close the retaining clip on each end of the memory module connector before installing the processor air baffle for proper cooling.
Procedure
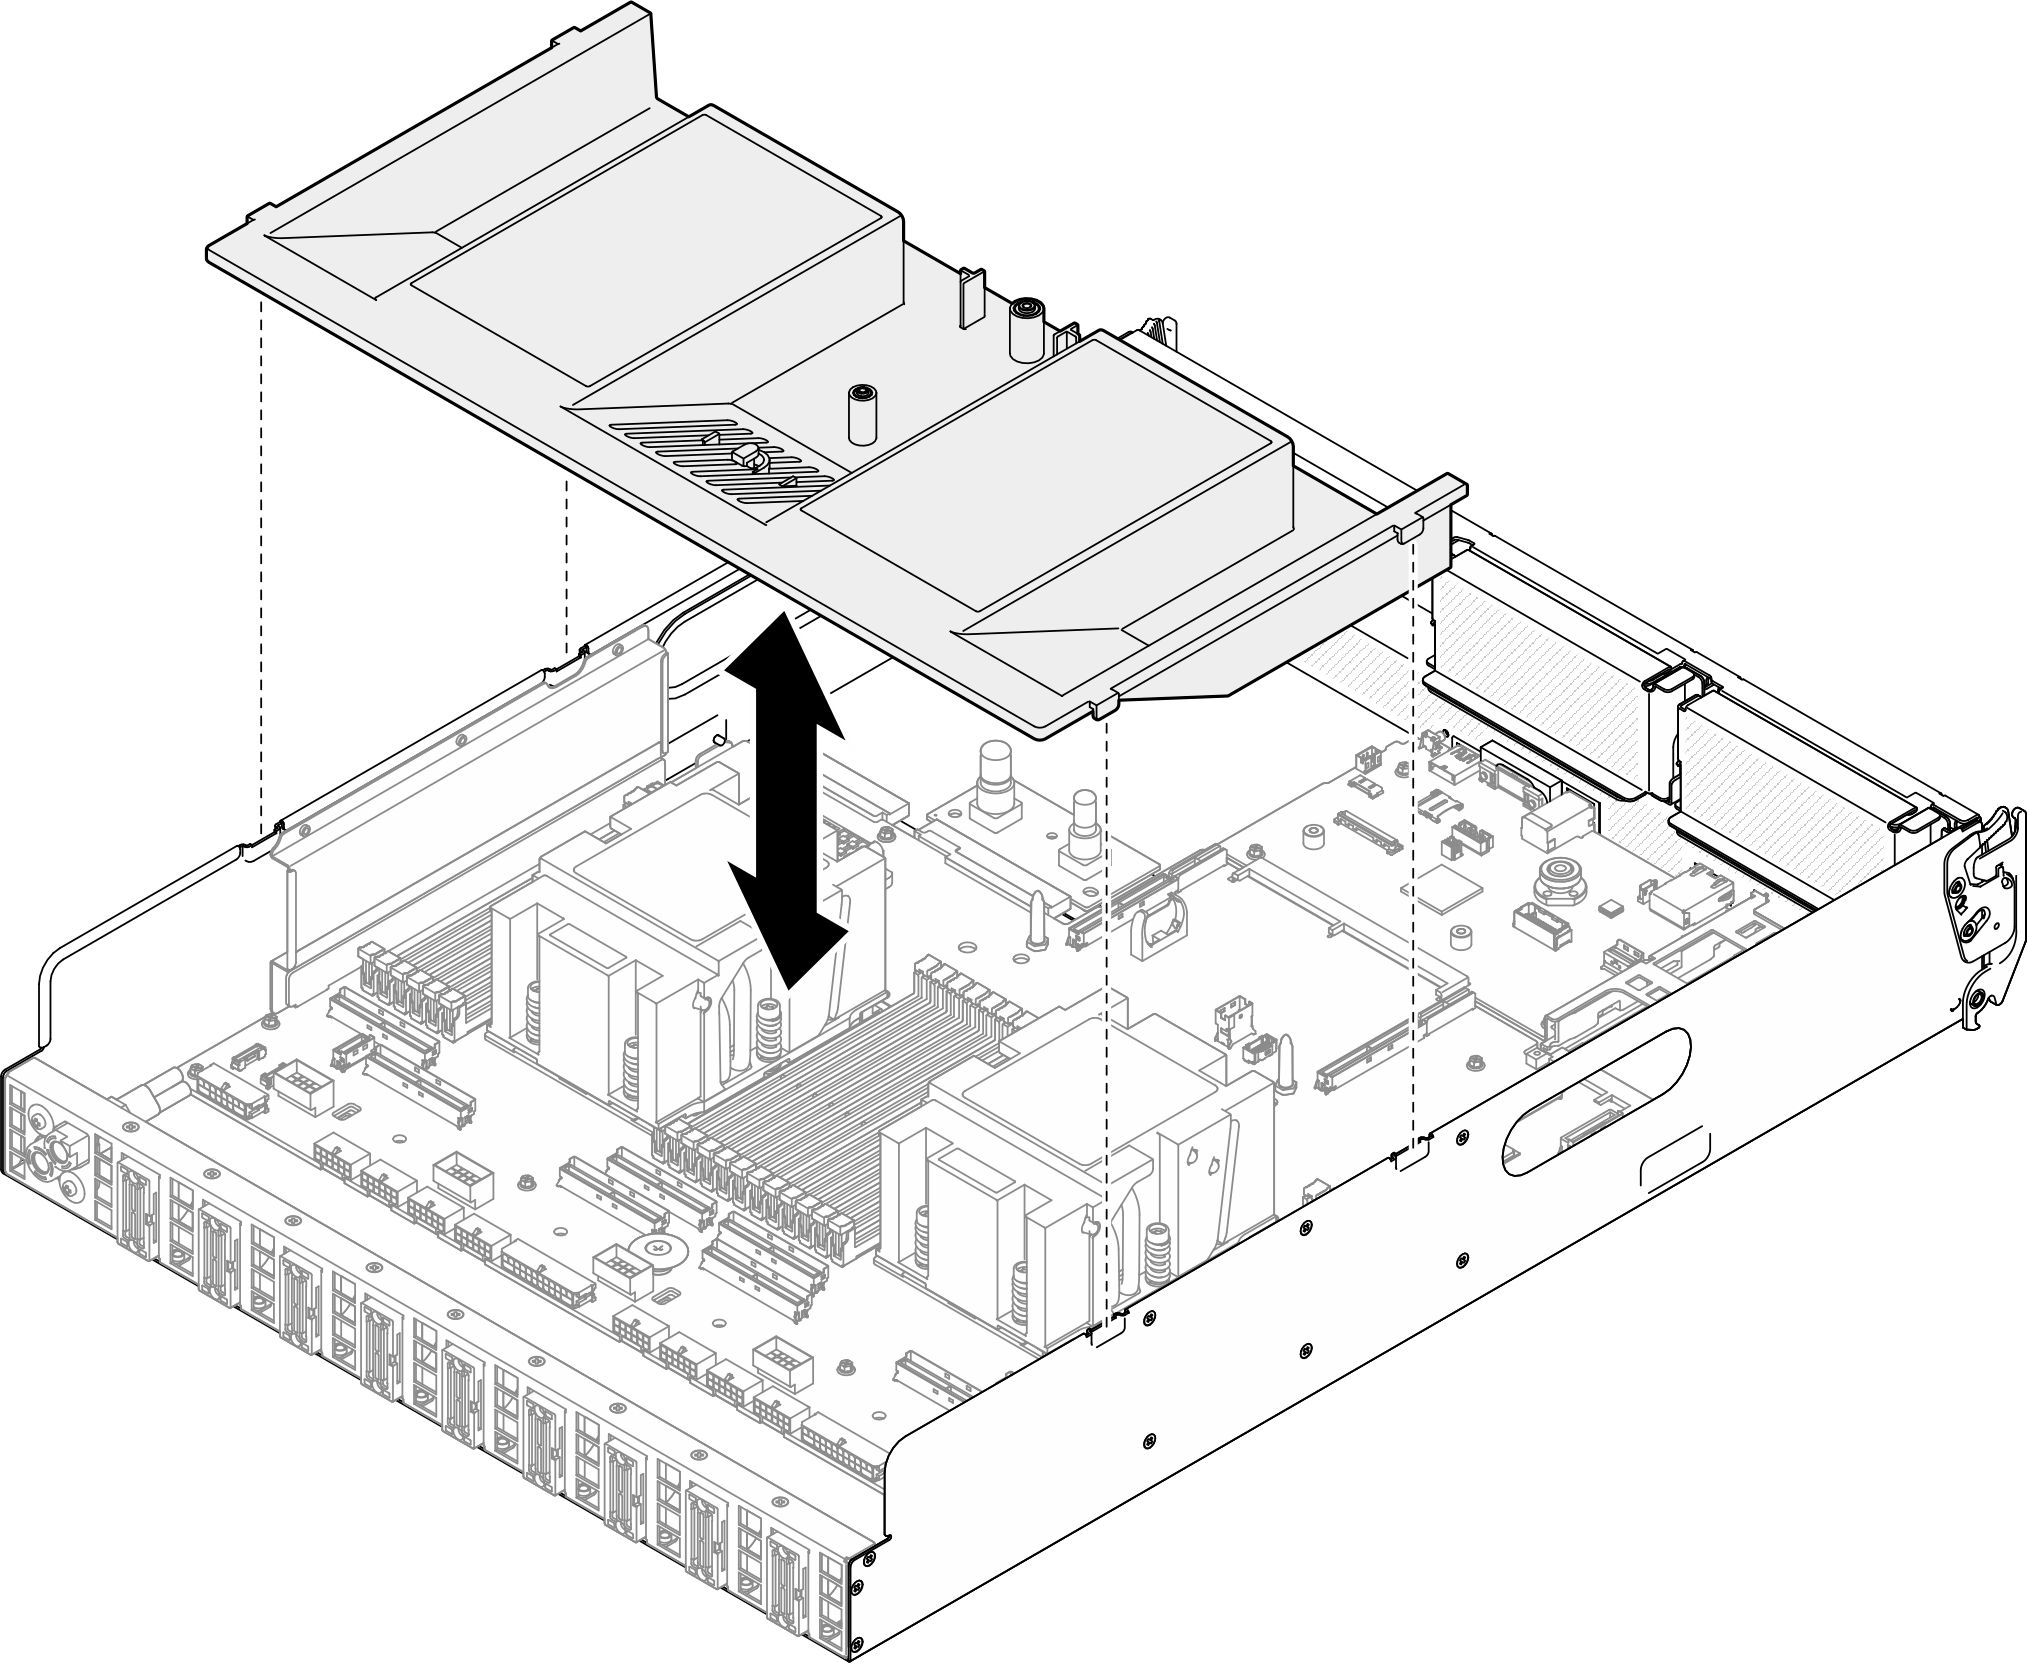
- Align the processor air baffle tabs with the slots on both sides of the 2U compute shuttle; then, lower the processor air baffle into the 2U compute shuttle until it is securely seated.Figure 1. Processor air baffle installation
- If applicable, connect the M.2 backplane cables to the system board assembly.Figure 2. M.2 backplane cable connection
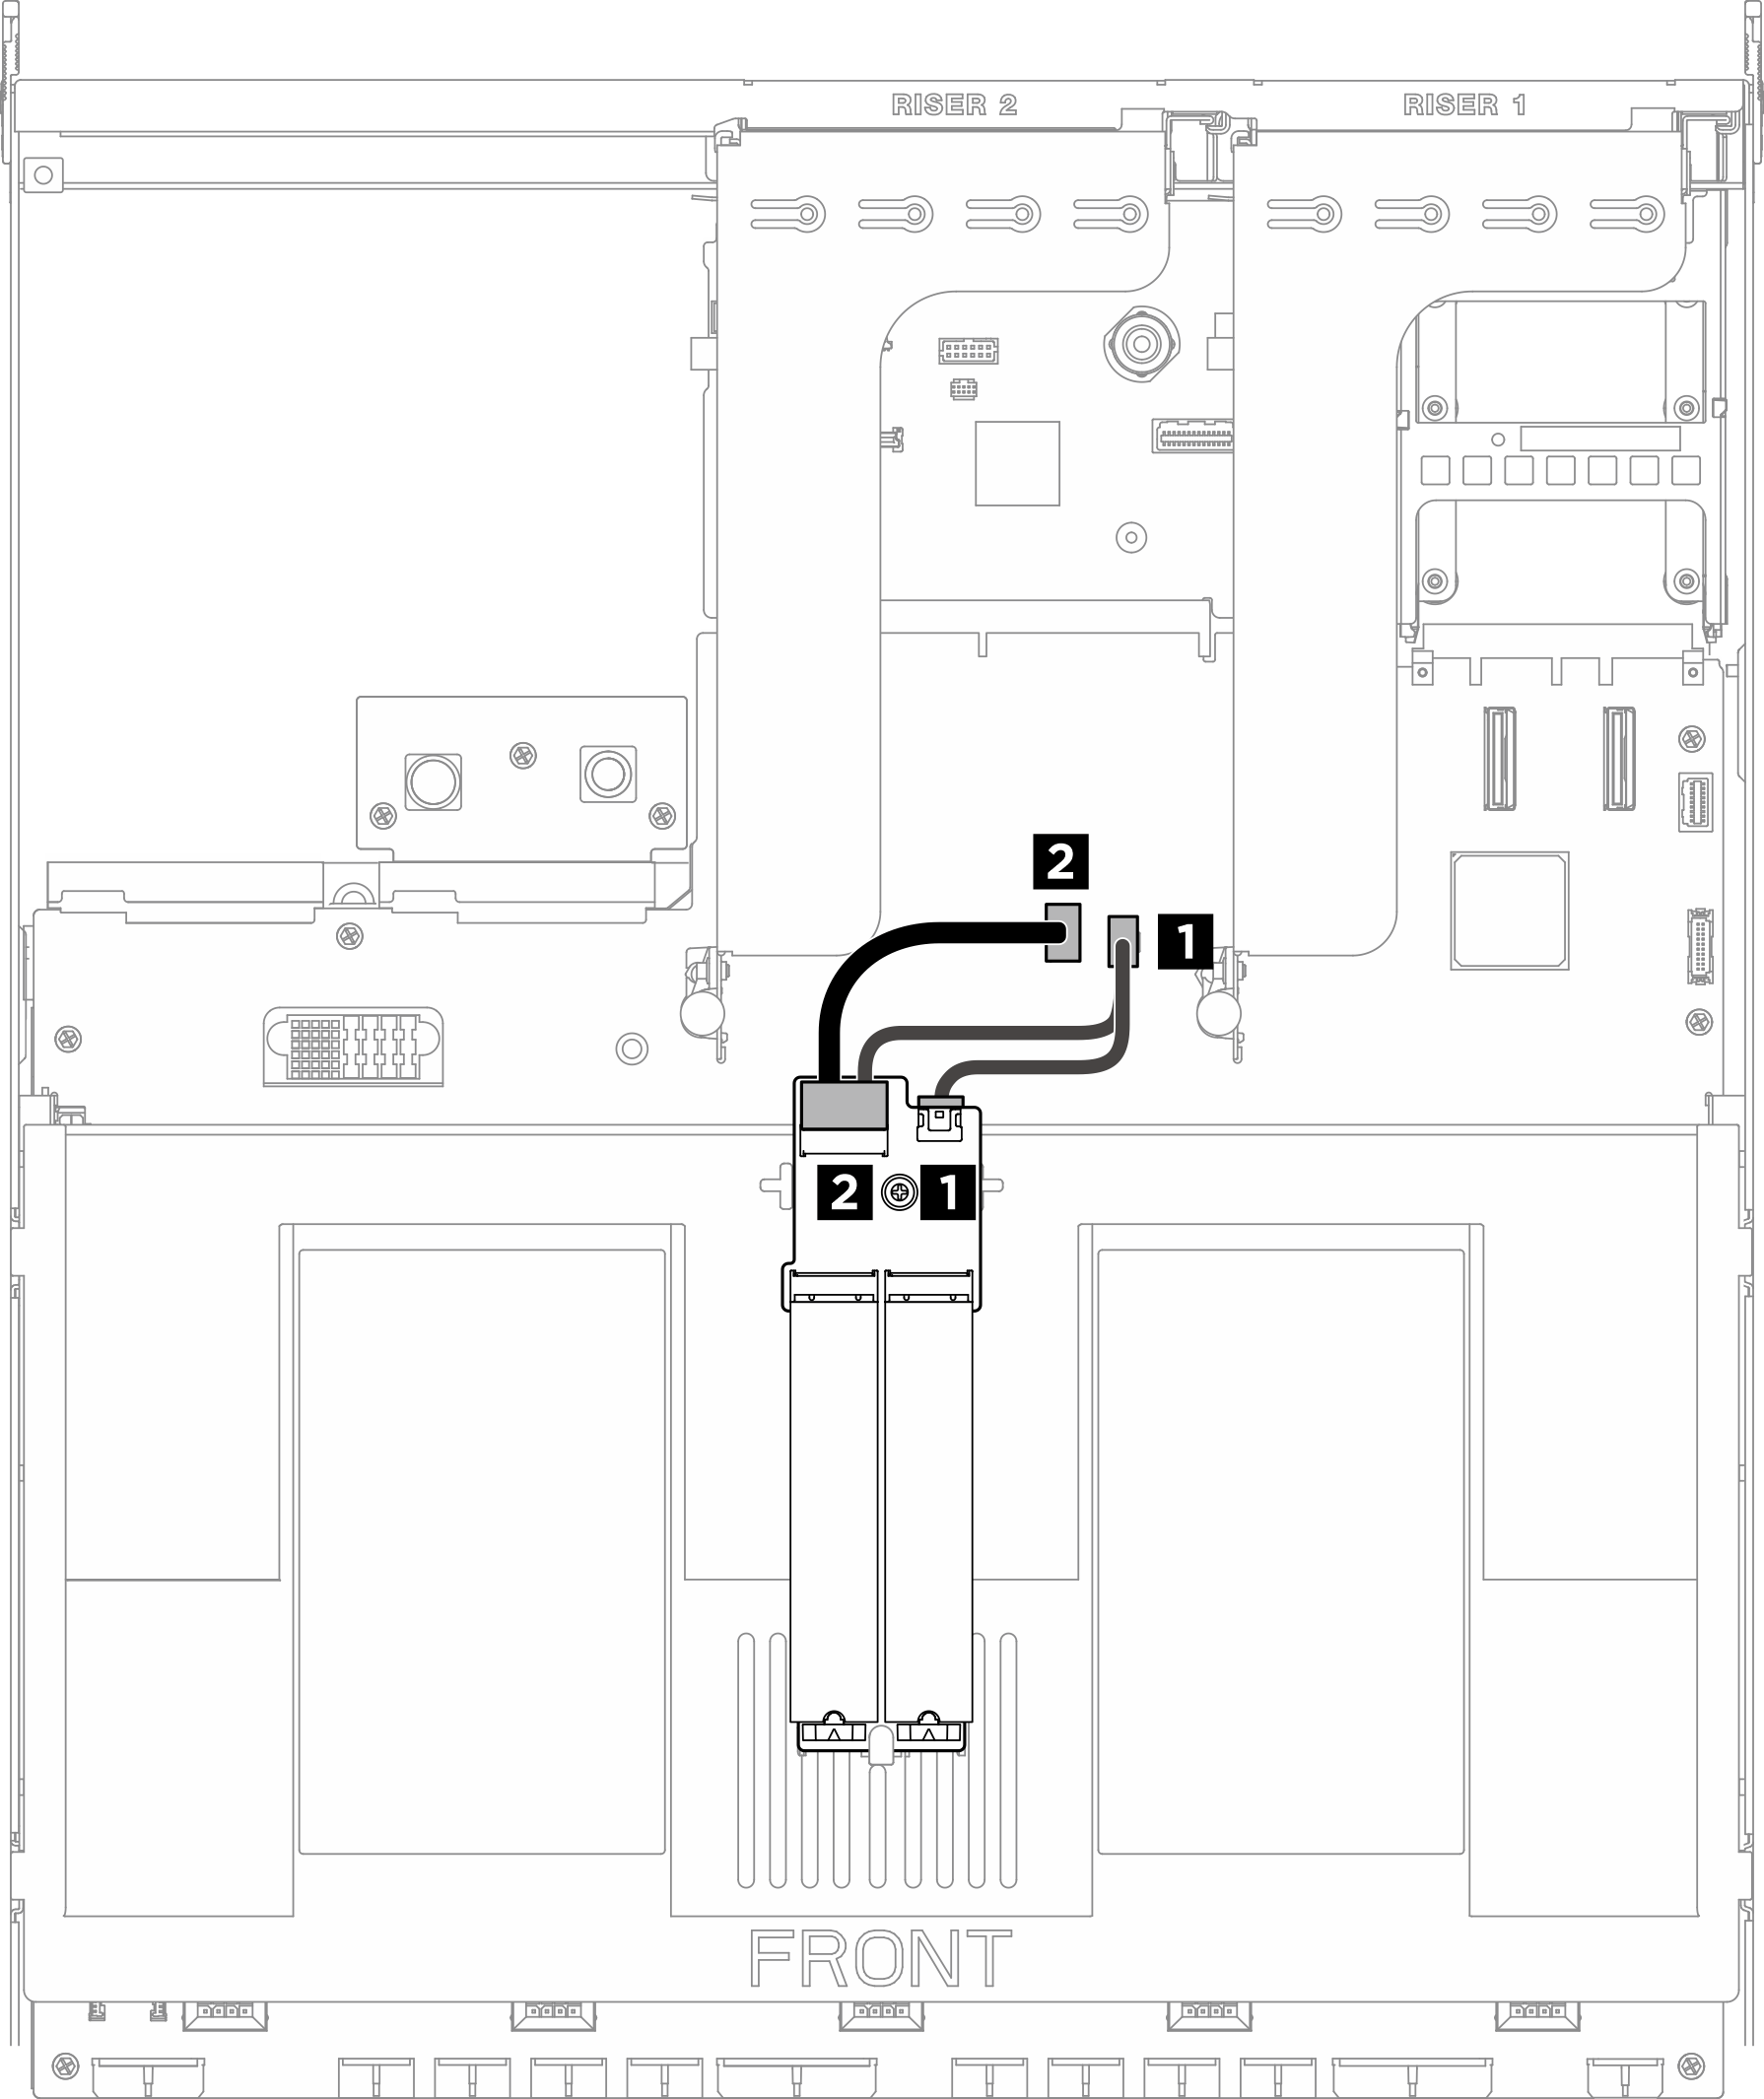
Cable From To 1 M.2 backplane: Power connector System board assembly: M.2 power connector 2 M.2 backplane: Signal connector System board assembly: M.2 signal connector
After you finish
- Reinstall the 2U compute shuttle. See Install the 2U compute shuttle.
- Complete the parts replacement. See Complete the parts replacement.
Give documentation feedback