Remove the M.2 backplane
Follow instructions in this section to remove the M.2 backplane. The procedure must be executed by a trained technician.
About this task
Attention
- Read Installation Guidelines and Safety inspection checklist to ensure that you work safely.
- Power off the server and peripheral devices and disconnect the power cords and all external cables. See Power off the server.
- If one or more NVMe solid-state drives are to be removed, it is recommended to disable them beforehand via the operating system.
- Before you remove or make changes to drives, drive controllers (including controllers that are integrated on the system board assembly), drive backplanes or drive cables, back up all important data that is stored on drives.
- Before you remove any component of a RAID array (drive, RAID card, etc.), back up all RAID configuration information.
Procedure
After you finish
If you are instructed to return the component or optional device, follow all packaging instructions, and use any packaging materials for shipping that are supplied to you.
Give documentation feedback
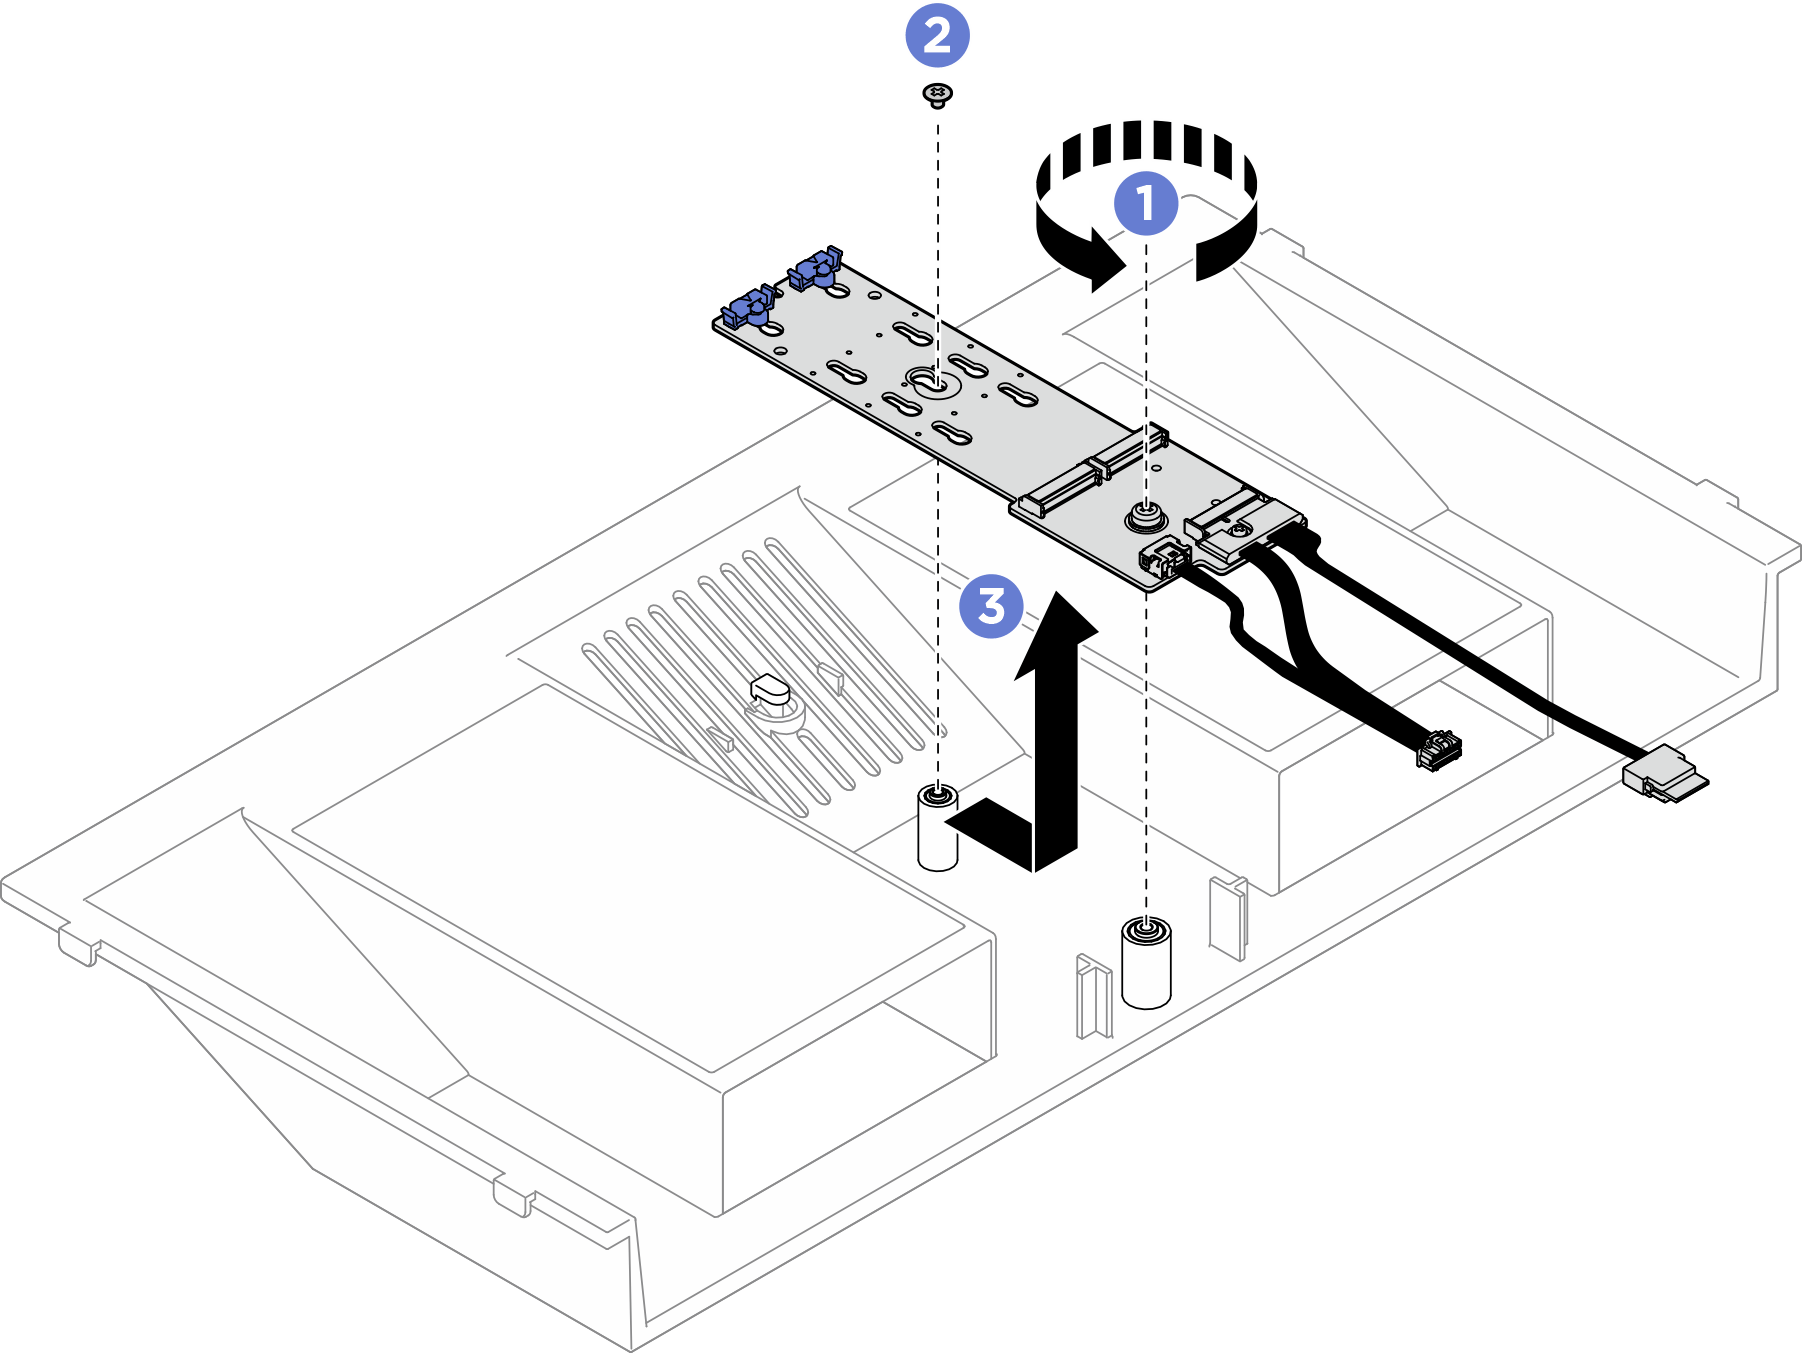
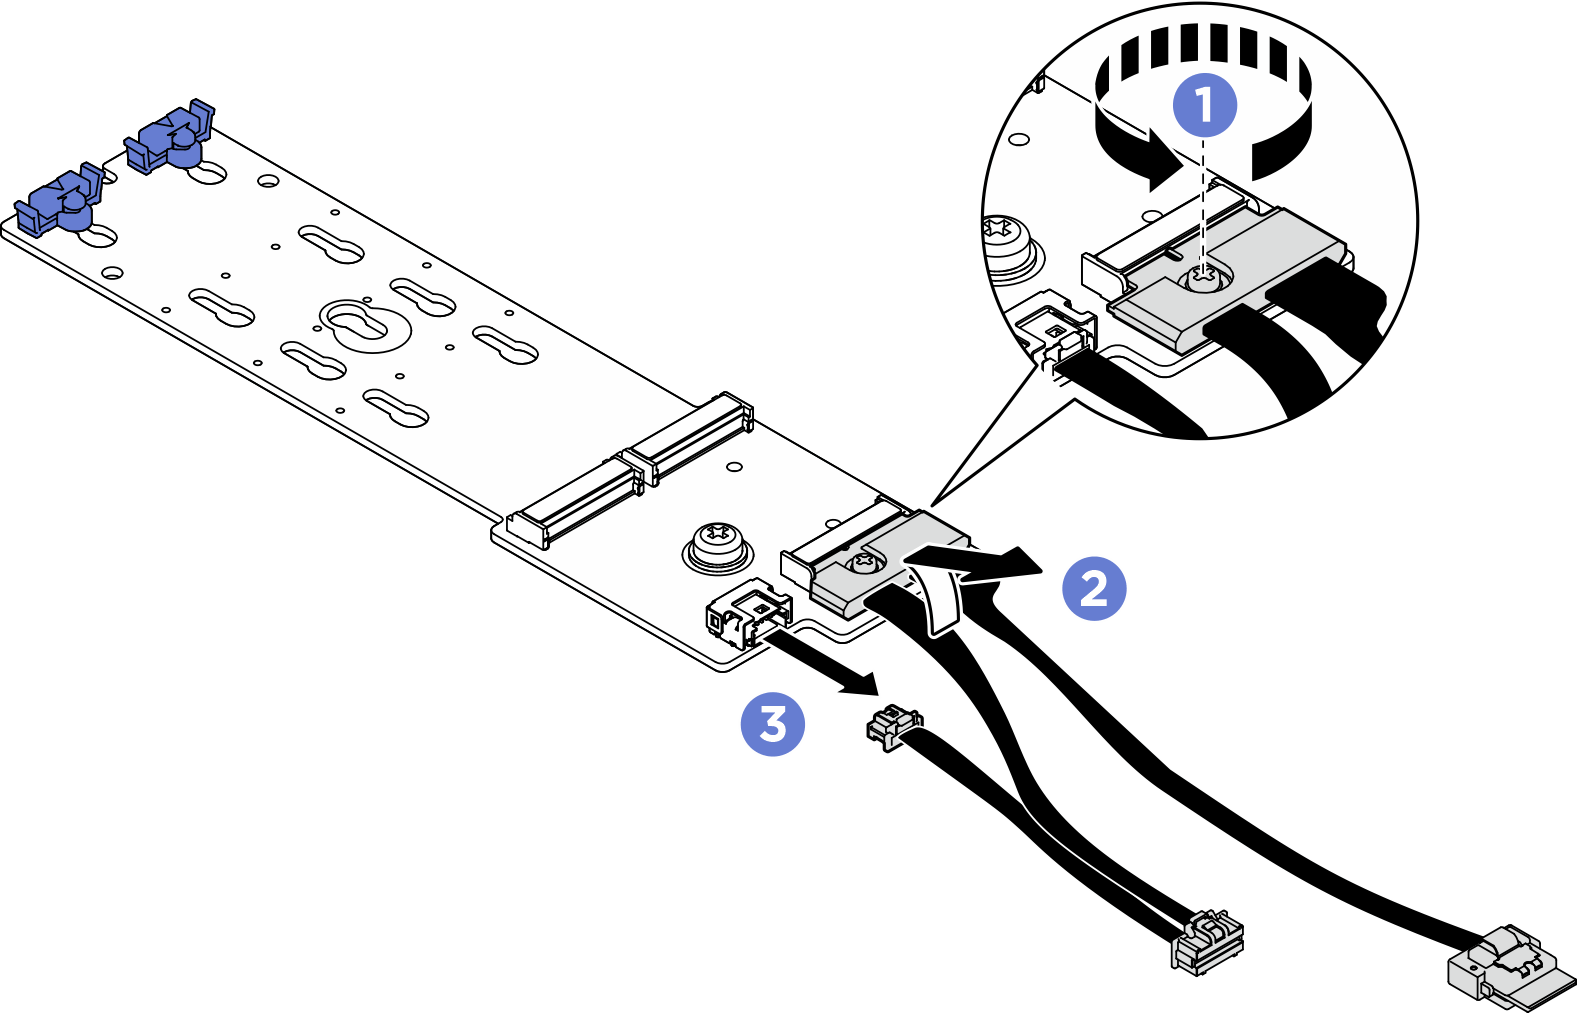
 Unfasten the screw that secures the end of the M.2 backplane to the processor air baffle.
 Unfasten the screw that secures the middle of the M.2 backplane to the processor air baffle.
 Slide the M.2 backplane backward, and lift it out of the processor air baffle.
