Install the PCIe riser assembly
Follow instructions in this section to install the PCIe riser assembly.
About this task
Attention
Go over Installation Guidelines to ensure that you work safely.
Touch the static-protective package that contains the component to any unpainted metal surface on the server; then, remove it from the package and place it on a static-protective surface.
Two zones could be installed with a PCIe riser assembly. See the following instructions for supported risers and installation procedure.
- Zone 1 (PCIe slot 1 to 3):
- This zone supports the following types of riser assembly:
- Follow the instructions in Install the PCIe riser assembly to zone 1 to install a riser assembly.
- Zone 2 (PCIe slot 5 to 6):
- This zone supports x16/x16 FH/HL PCIe riser.
- Follow the instructions in Install the PCIe riser assembly to zone 2 to install a riser assembly.
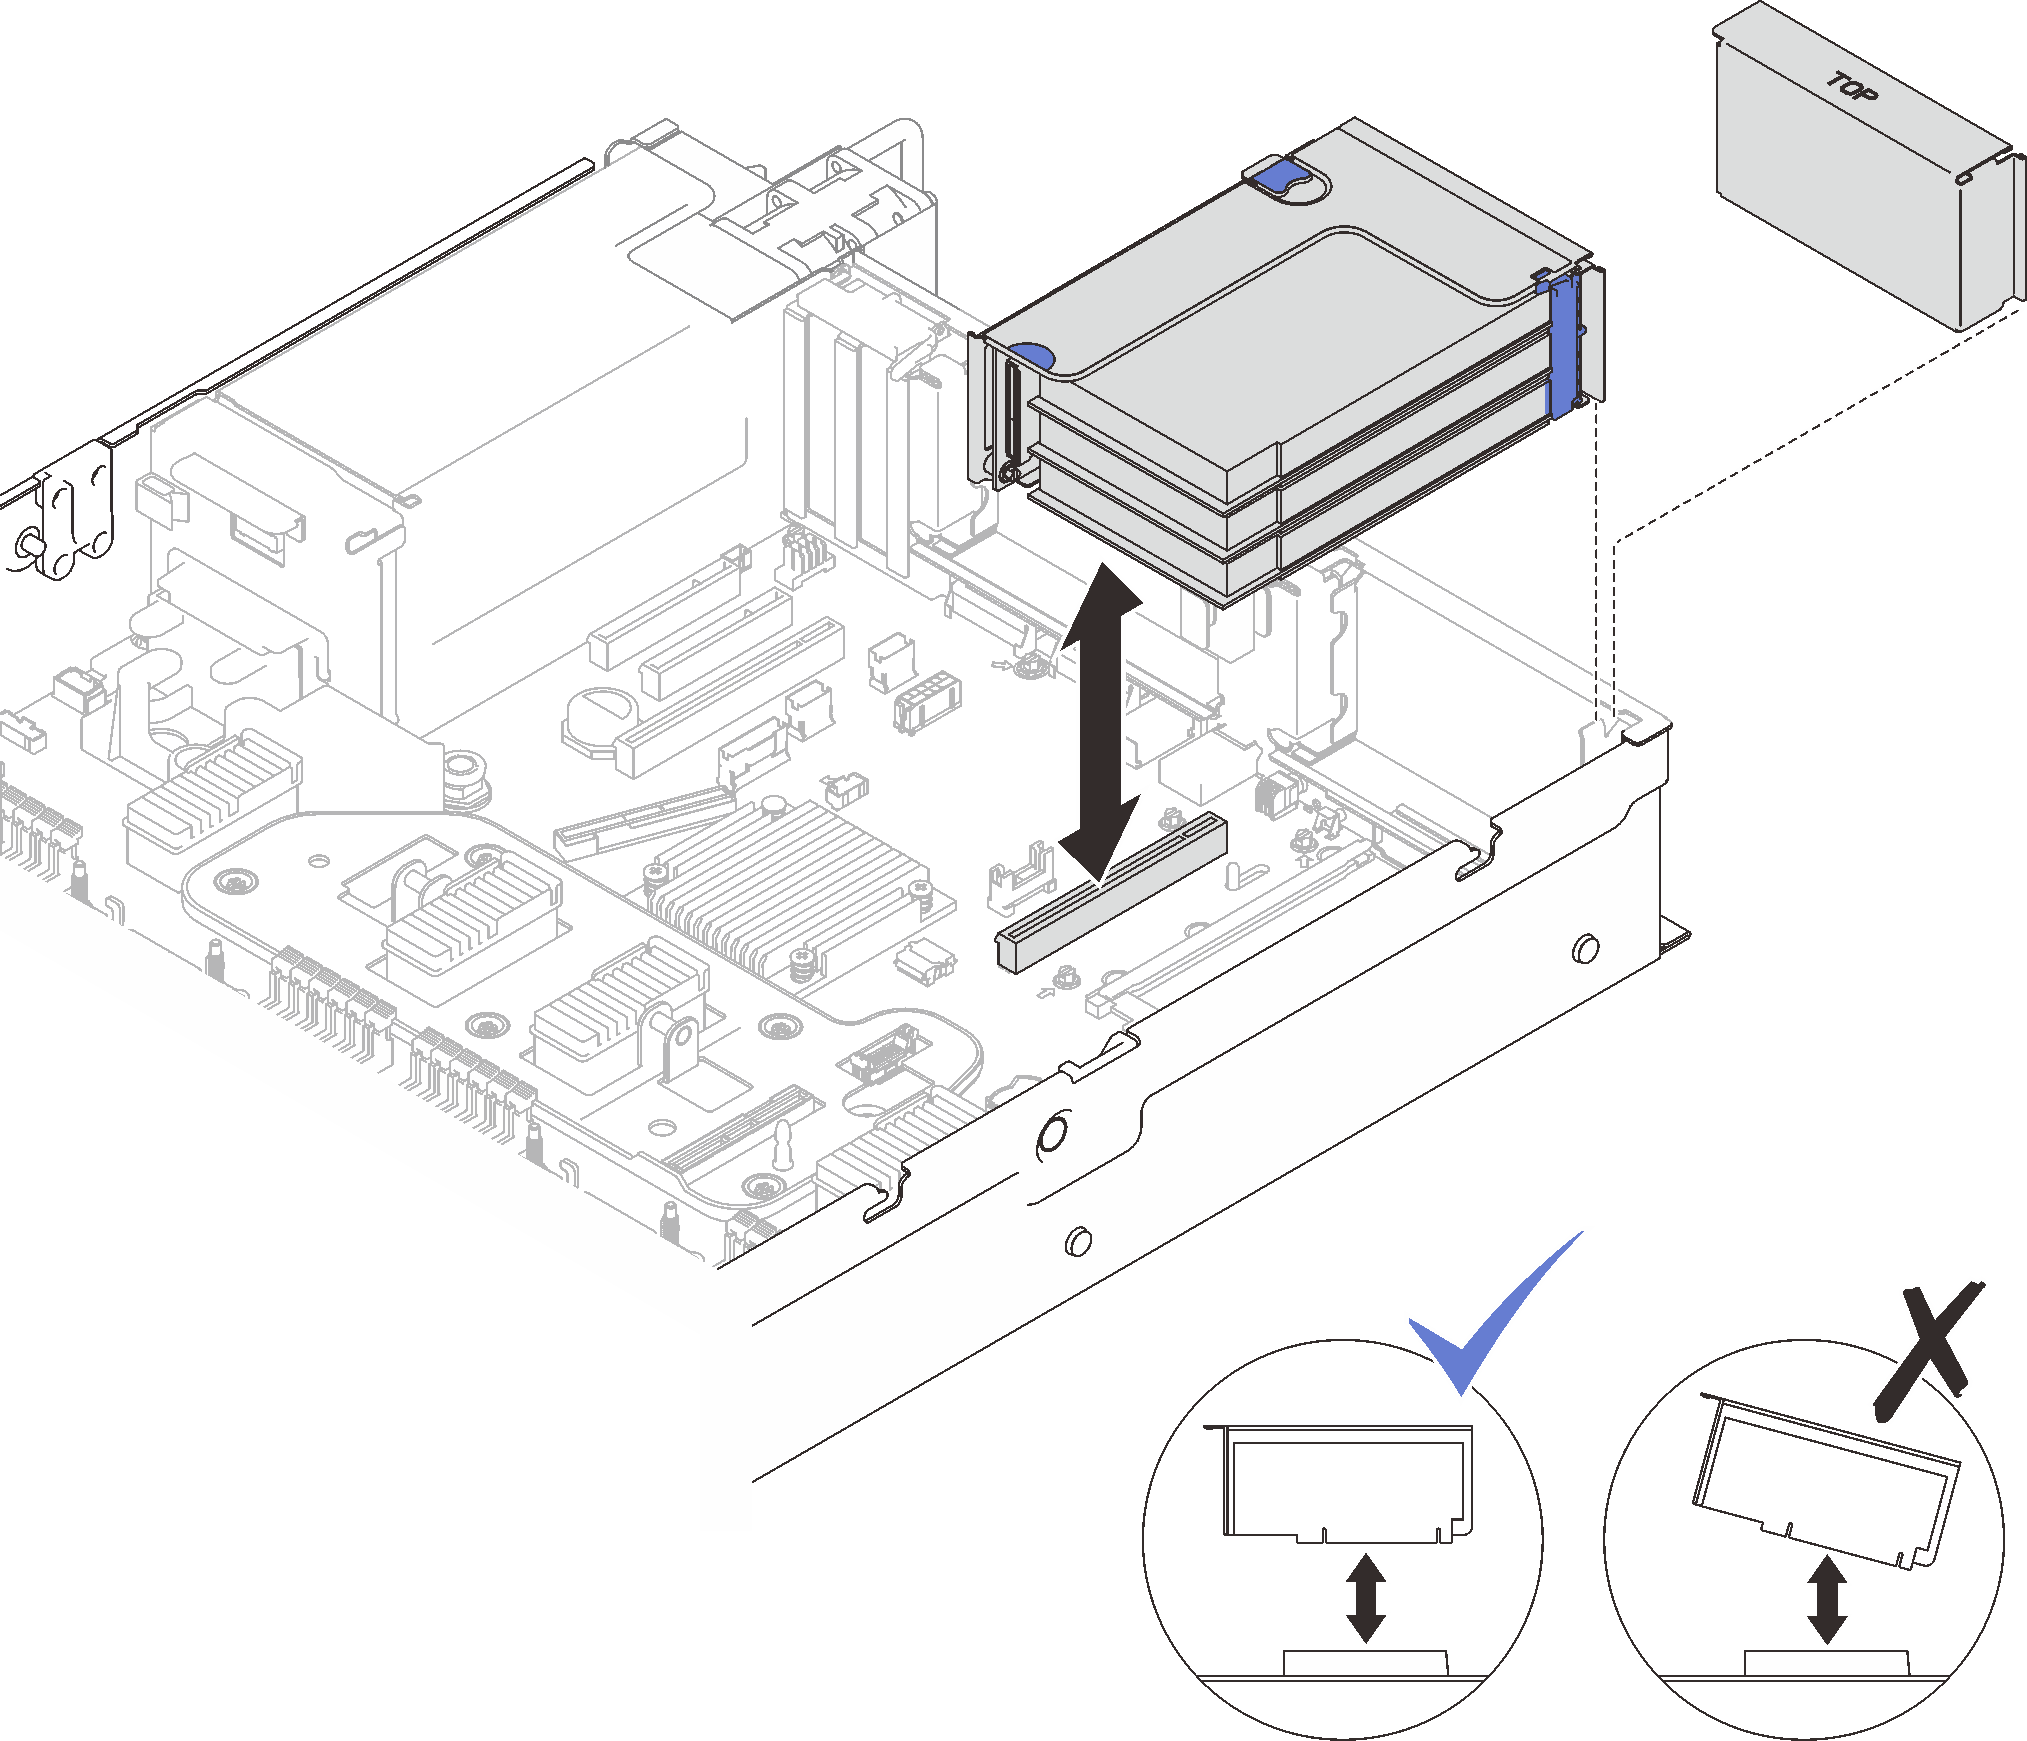
Install the PCIe riser assembly to zone 1
Procedure
- Align the PCIe riser assembly with the connector on the system board, and push it in.Figure 1. Installing the PCIe riser assembly to zone 1
- If you are installing x16/x16/x16 riser assembly, connect the two PCIe cables to the system board.Figure 2. Connecting PCIe cables from x16/x16/x16 riser to the system board
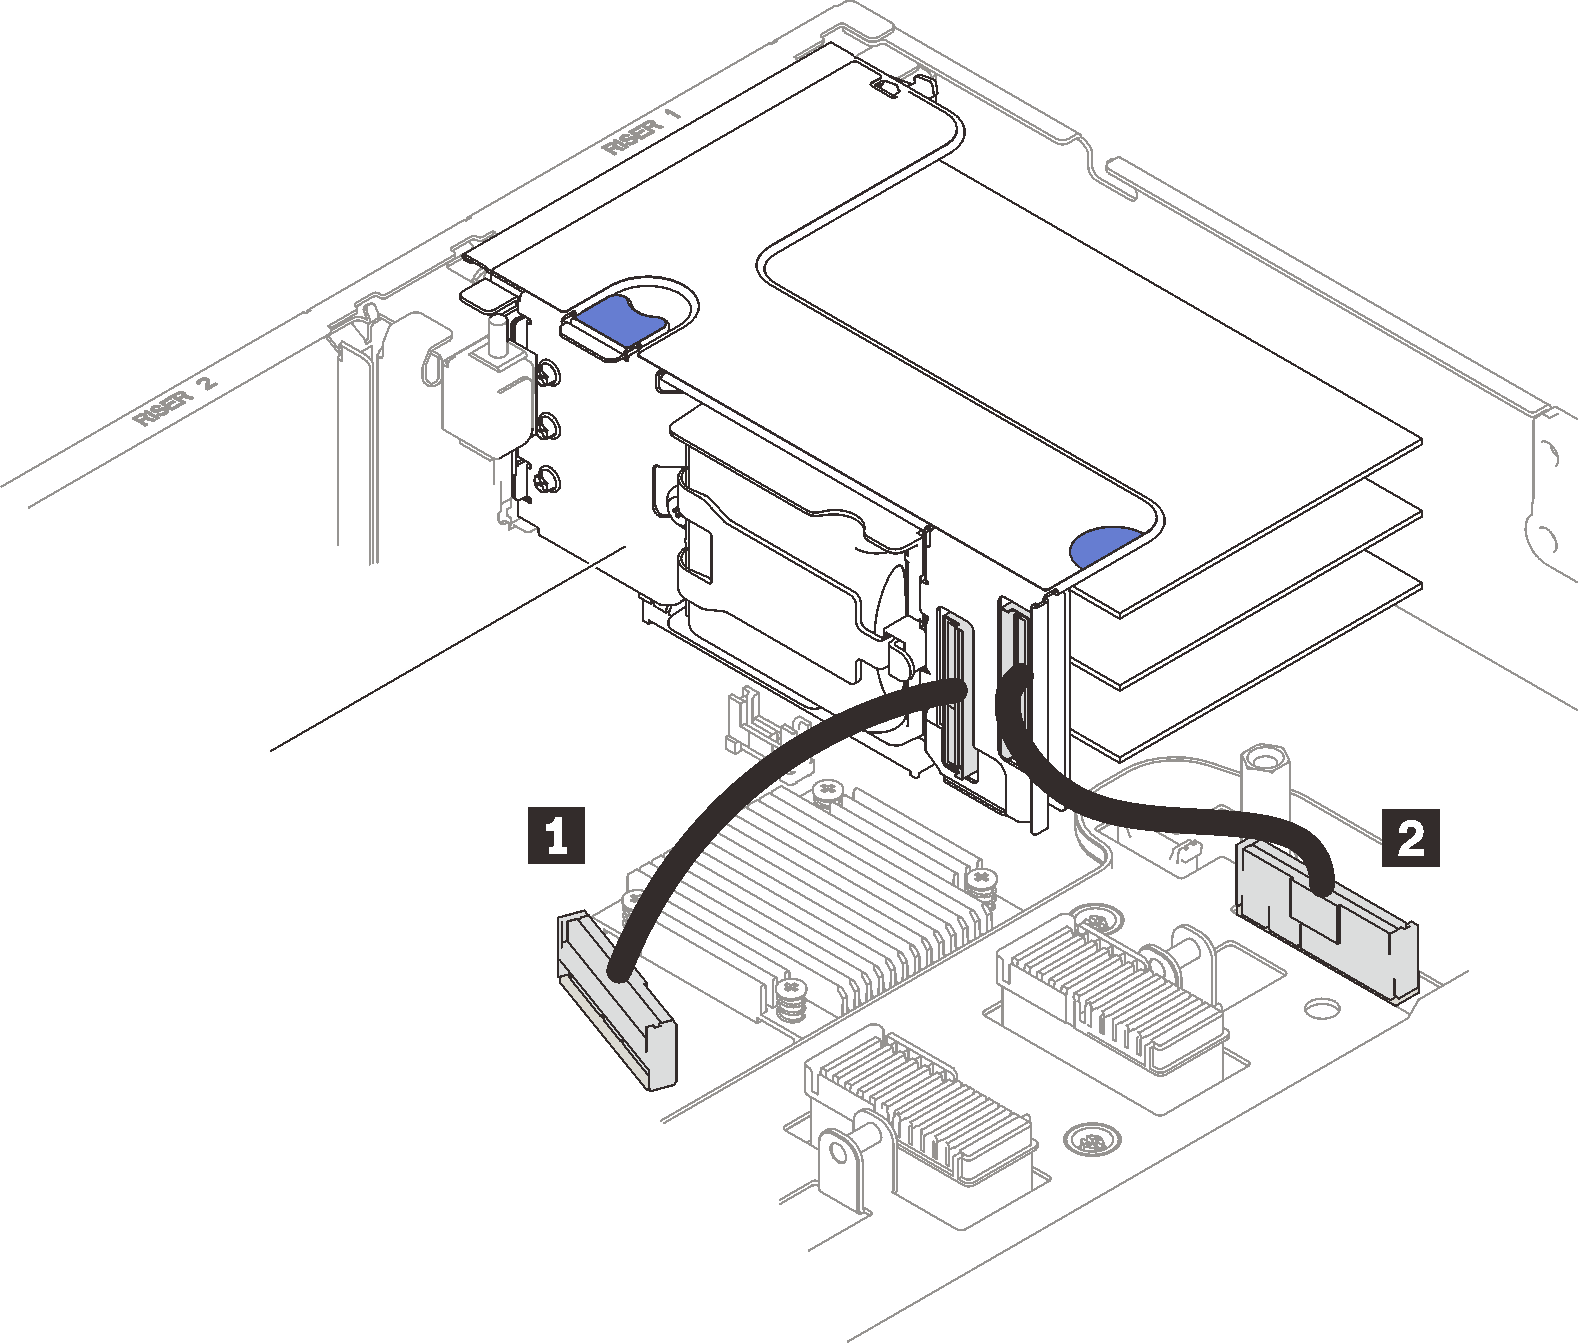
1 PCIe connector 1 2 PCIe connector 2
Demo video
Install the PCIe riser assembly to zone 2
Procedure
Install the PCIe riser assembly to zone 2.
Figure 3. Installing the PCIe riser assembly to zone 2
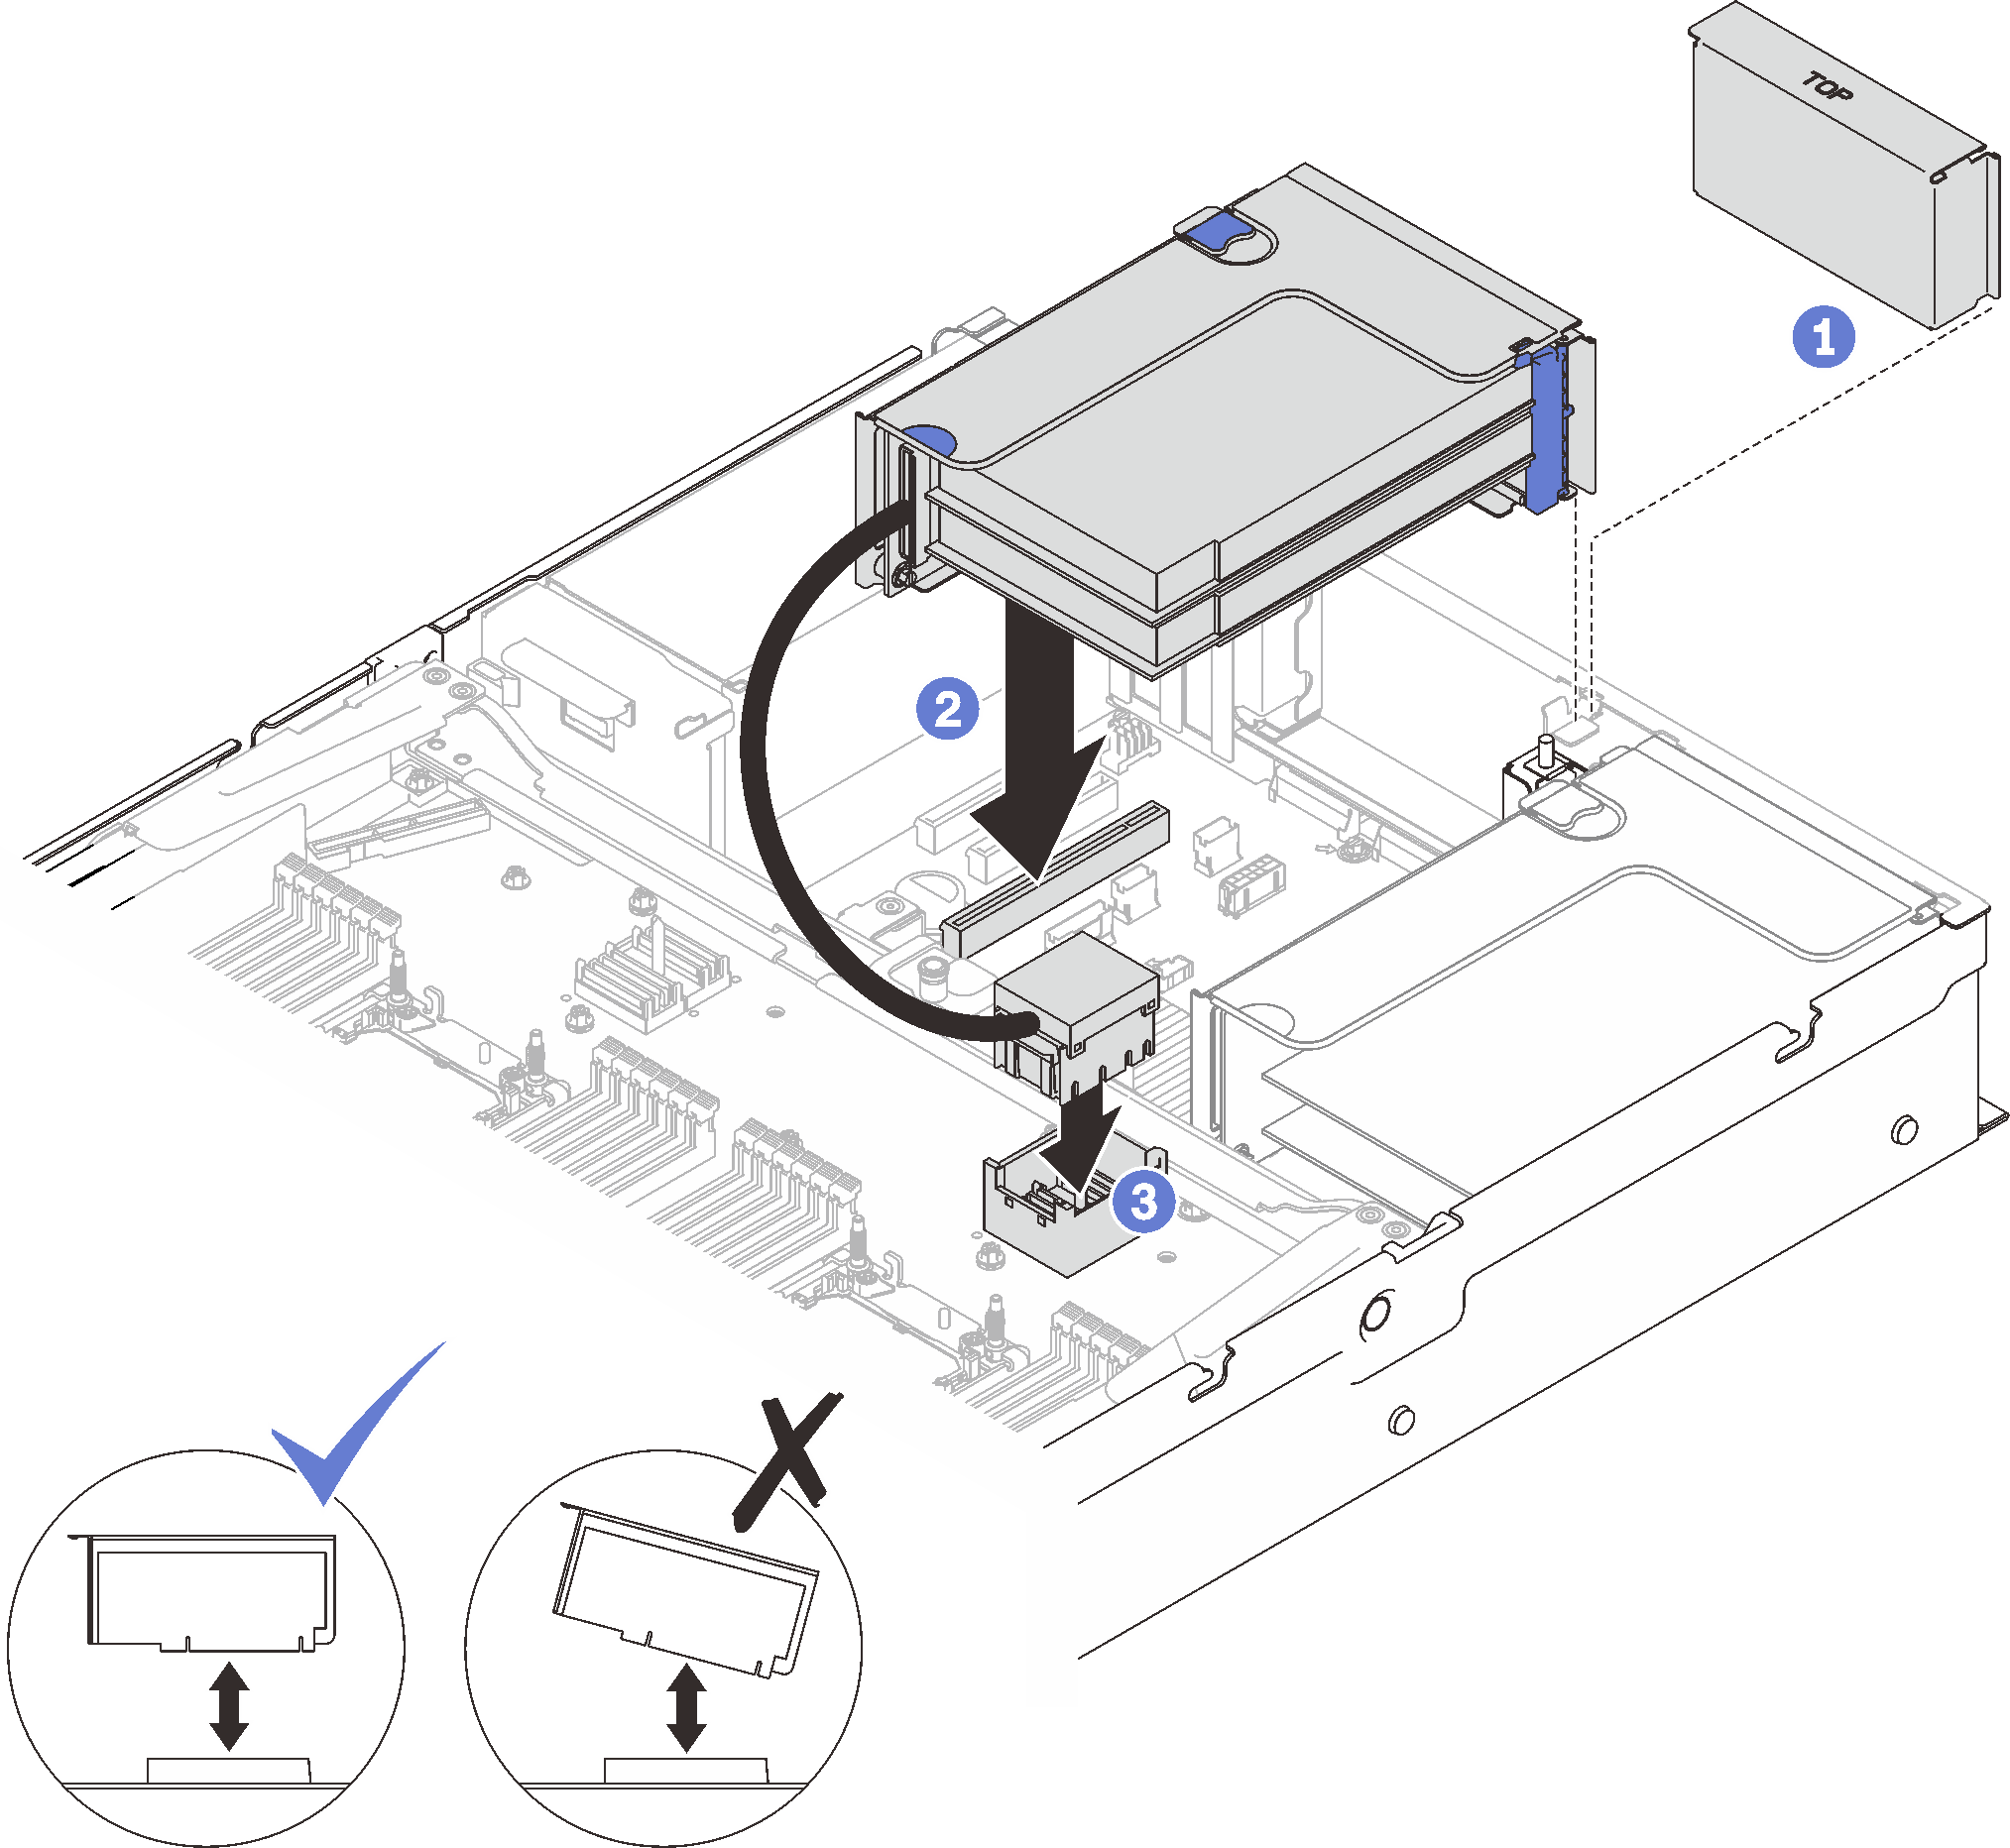
 If a filler has been installed, remove it.
 Align the PCIe riser assembly with the connector on the system board, and push it in.
 Connect the PCIe cable to PCIe connector 5 on the processor and memory expansion tray.
After this task is completed
- Reconnect all the required cables.
Proceed to complete the parts replacement (see Complete the parts replacement).
Demo video
Give documentation feedback