Install a PCIe adapter
Follow this procedure to install a PCIe adapter.
About this task
Read Safety inspection checklist and Installation guidelines to ensure that you work safely.
Touch the static-protective package that contains the component to any unpainted metal surface on the server; then, remove it from the package and place it on a static-protective surface.
The PCIe adapter might look different from the illustration.
Make sure to read and follow the documentation that comes with the PCIe adapter.
PCIe slot support
PCIe slot 1: PCI Express 4.0 x16 (FHHL 75W PCIe adapter)
PCIe slot 2: PCI Express 3.0 x1 (FHHL, 25W PCIe adapter)
PCIe slot 3: PCI Express 3.0 x4 in x16 slot (FHHL, 25W PCIe adapter)
The RAID adapter should be installed in PCIe slot 1.
Pentium processor supports up to PCI Express 3.0.
When installing PCIe x8/x16 adapter to PCIe Slot 3, the PCIe adapter performance might be degraded due to the bandwidth of PCIe slot 3 (x4).
For a list of the supported PCIe adapters, see Lenovo ServerProven website.
The PCIe adapter might look different from the illustration.
Make sure to read and follow the documentation that comes with the PCIe adapter.
- A video of this procedure is available at YouTube.
About this task
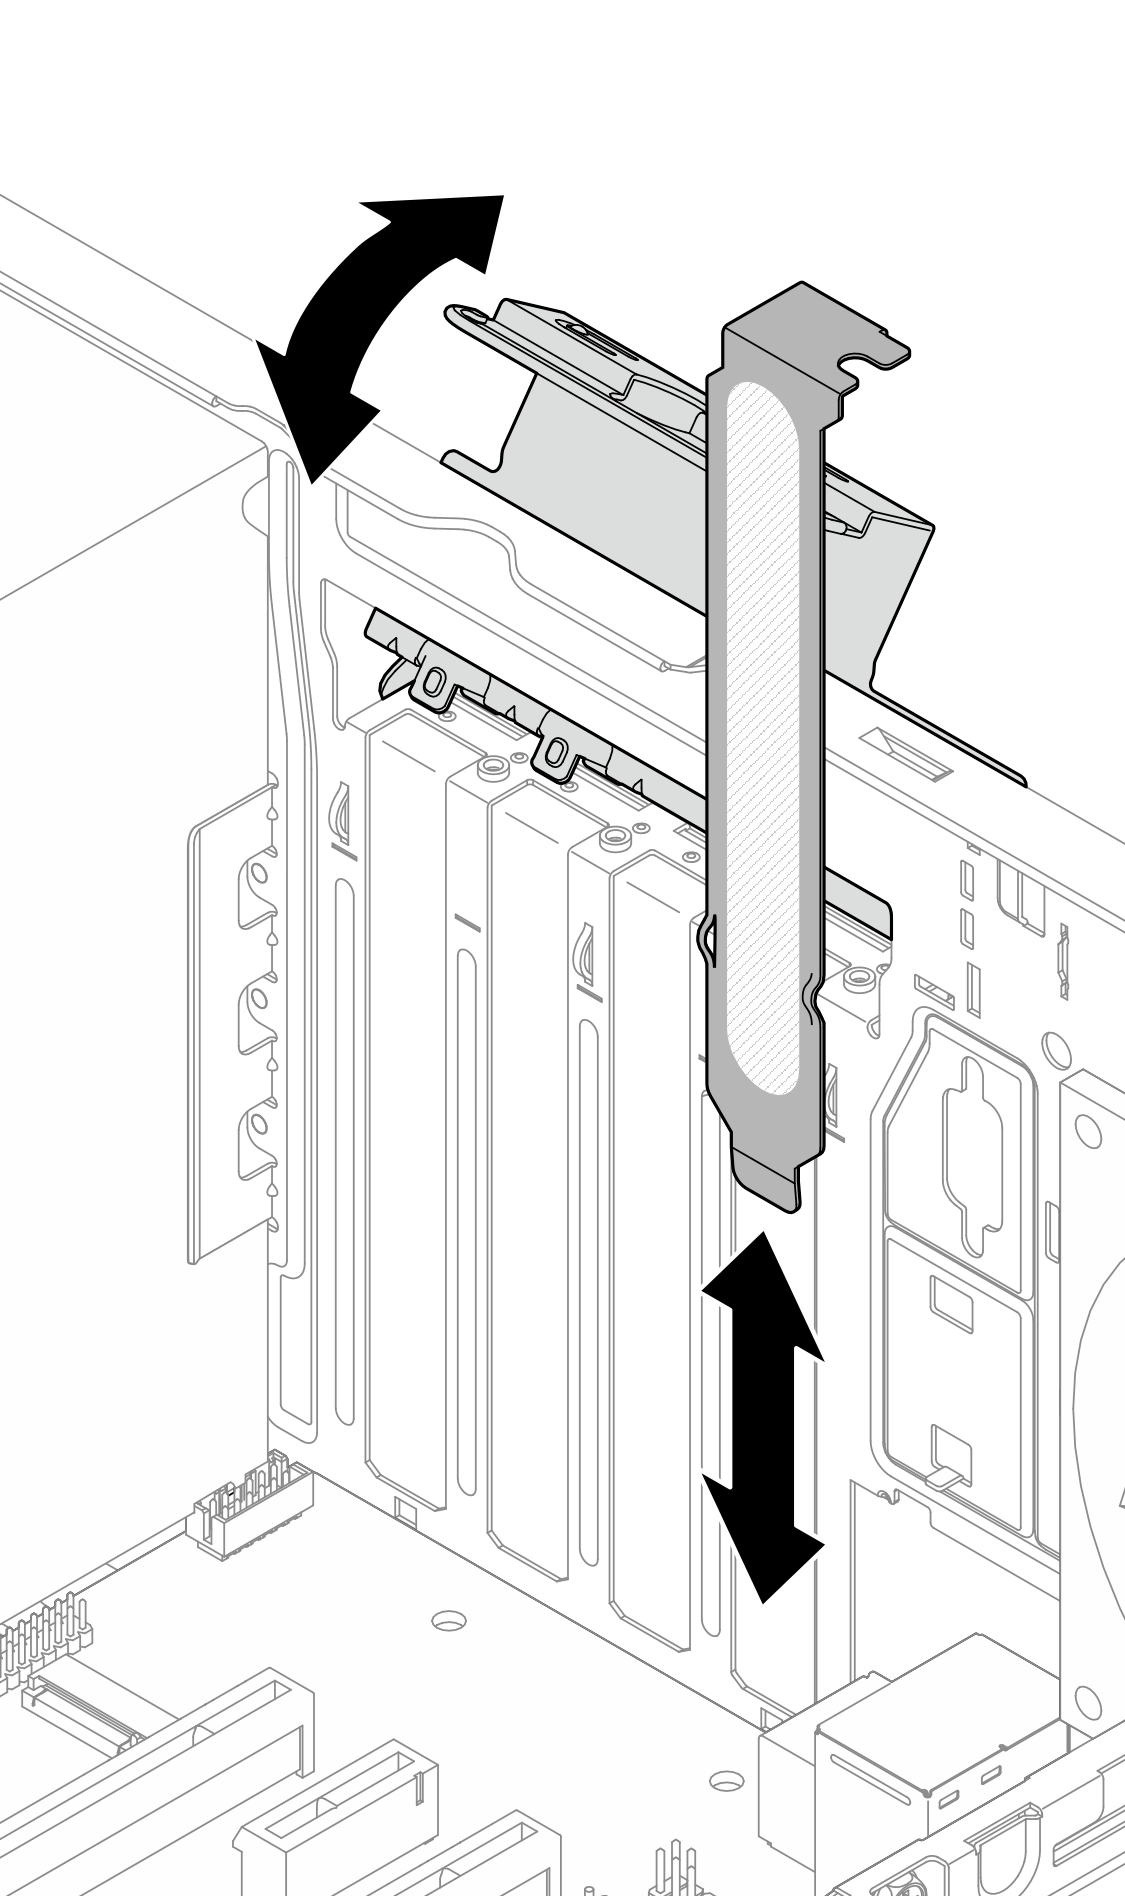
- If a bracket is installed in the chassis, open the PCIe adapter retainer bracket and remove the bracket from the chassis. Keep the bracket for future use.Figure 1. Removing a PCIe adapter bracket
- Install the PCIe adapter.
 Align the PCIe adapter to the slot; then, gently press both ends of the PCIe adapter until it is securely seated in the slot with
  the retaining clip clicks into the locked position.
 Rotate the PCIe adapter retainer towards the chassis until it snaps into locked position.Figure 2. Installing a PCIe adapter
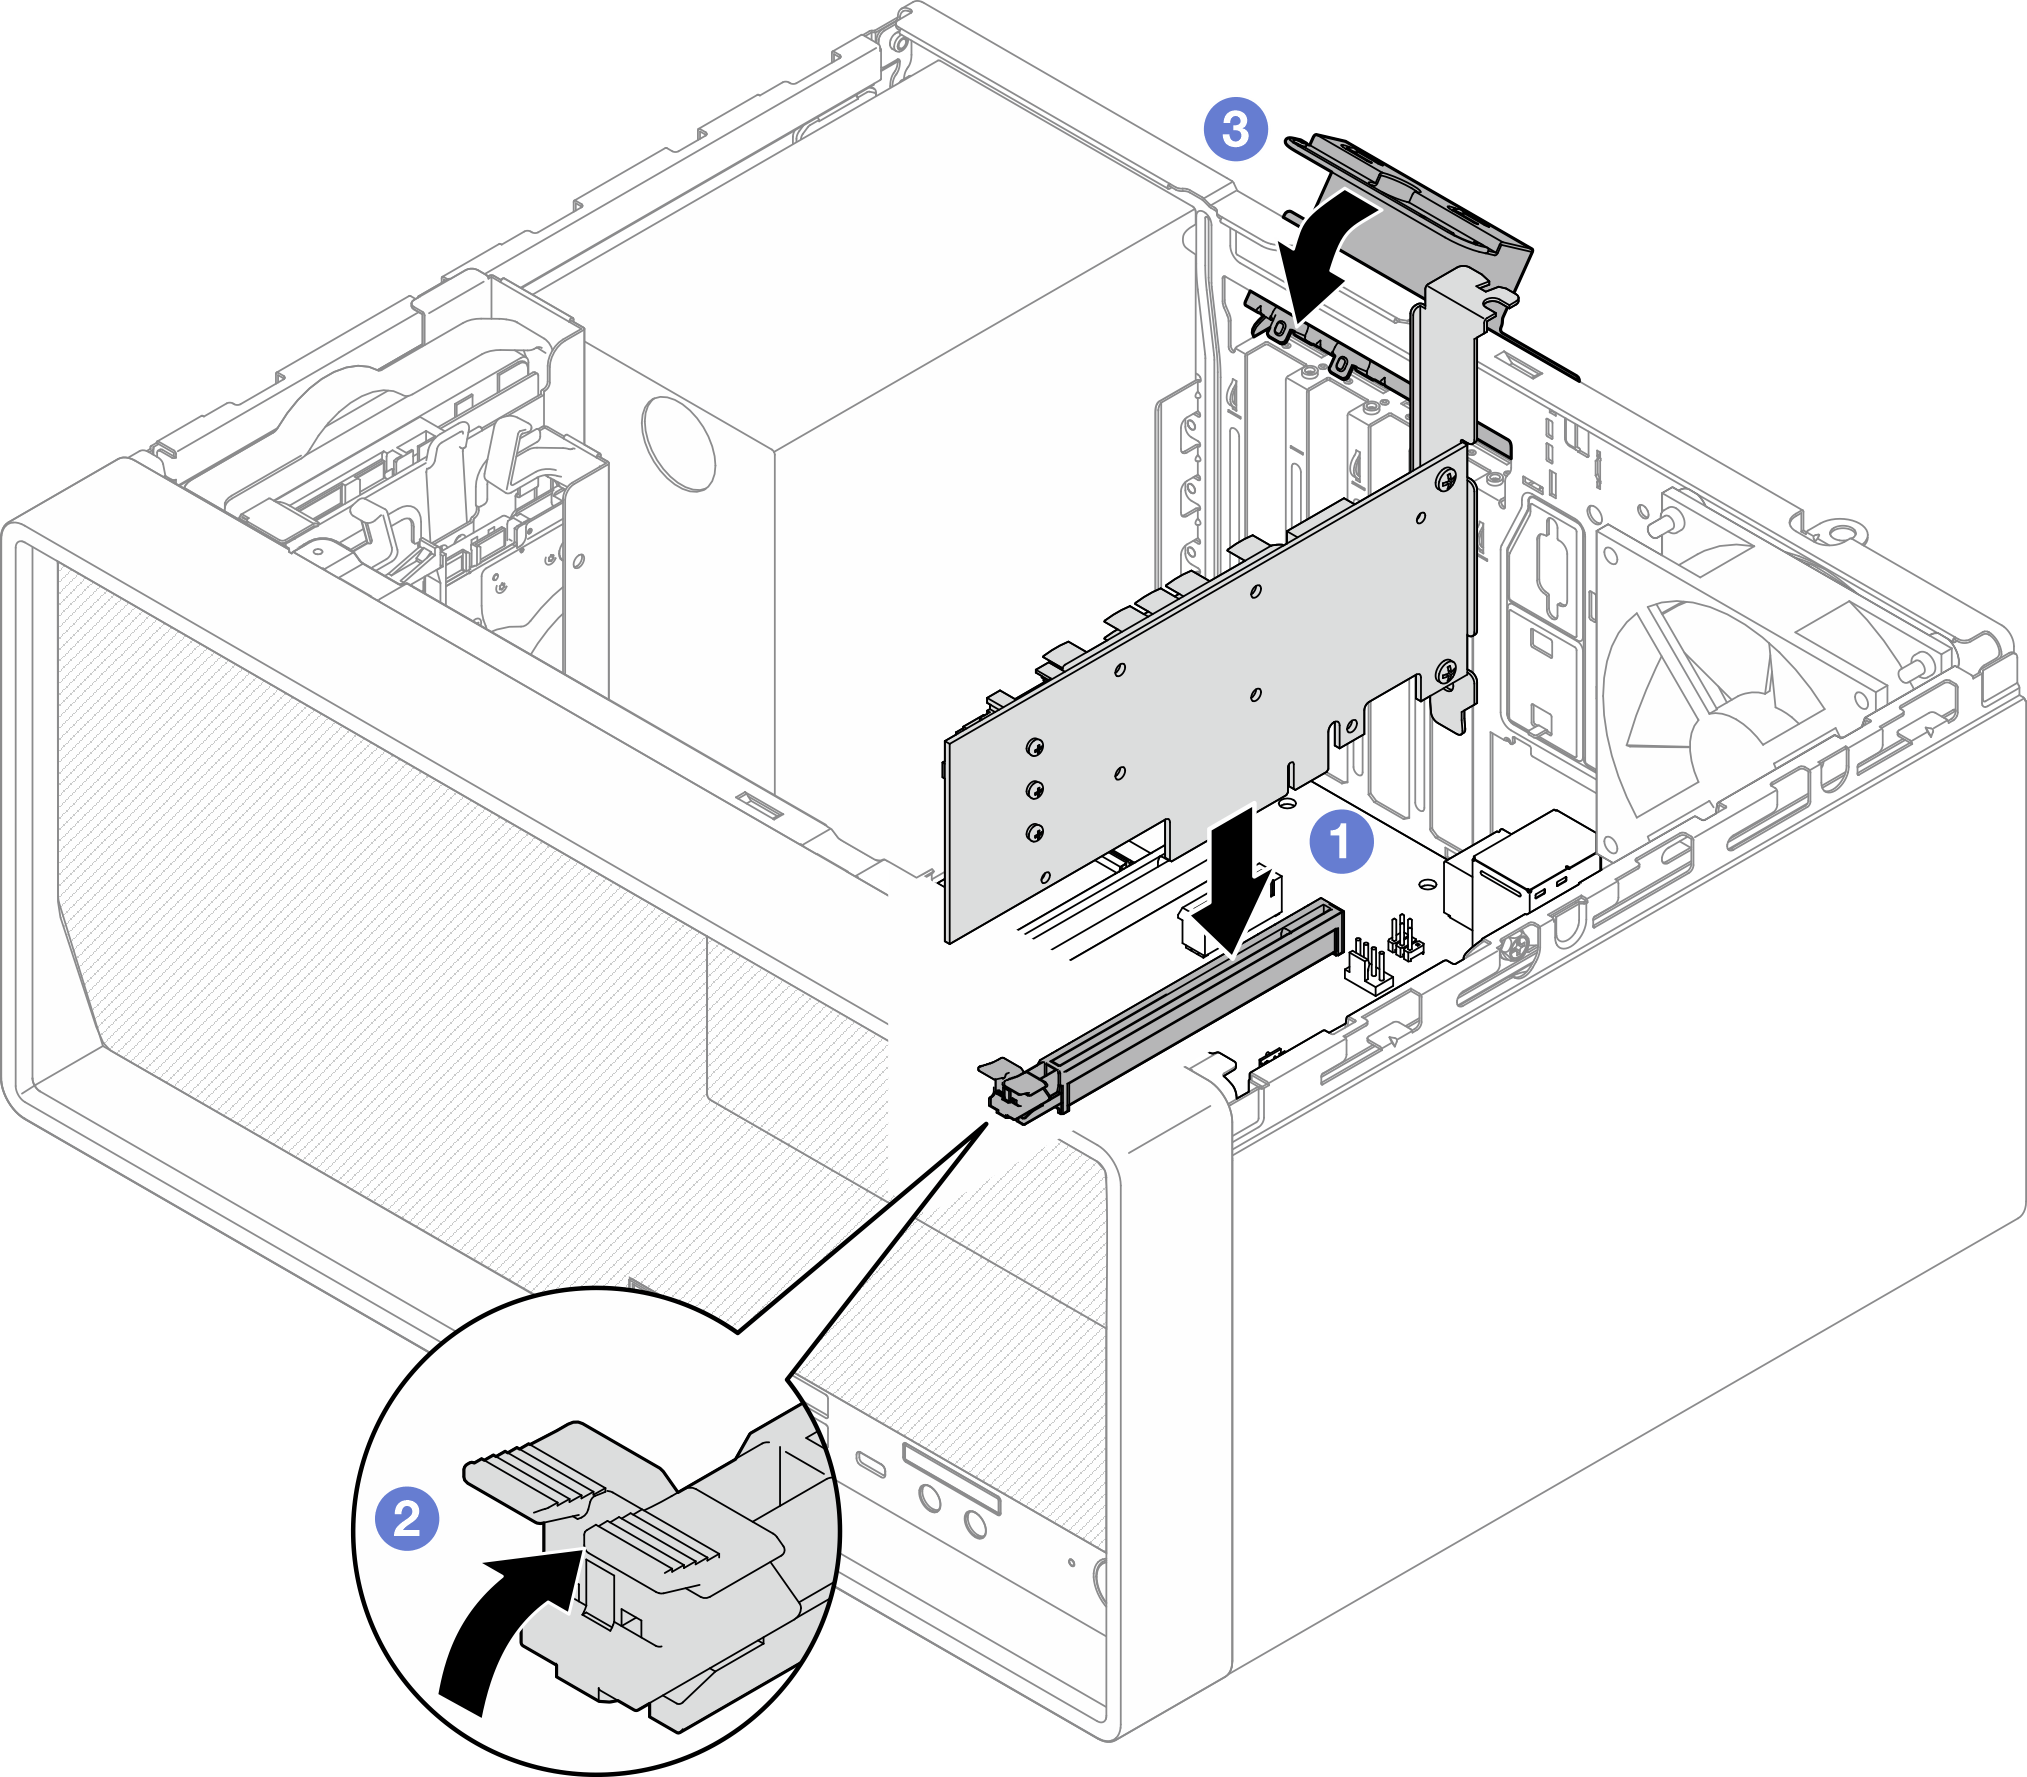
Proceed to complete the parts replacement, see Complete the parts replacement.