Install the drive cage (bay 1-2)
Follow this procedure to install the bay 1 drive cage bay 2 drive cage.
S002
CAUTION
The power-control button on the device and the power switch on the power supply do not turn off the electrical current supplied to the device. The device also might have more than one power cord. To remove all electrical current from the device, ensure that all power cords are disconnected from the power source.
About this task
Attention
Read Safety inspection checklist and Installation guidelines to ensure that you work safely.
Watch the procedure
- A video of this procedure is available at YouTube.
Procedure
Note
Install the bay 1 drive cage first; then, proceed to install the bay 2 drive cage.
- Install the bay 1 drive cage.
 Align the bay 1 drive cage to the slots on chassis; then, install it into the chassis. Make sure the drive cage is seated correctly in the chassis.
 From the inside of the chassis, fasten the screw that secures the bay 1 drive cage to the chassis.
 From the outside of the chassis, fasten the screw that secures the bay 1 drive cage to the chassis.Figure 1. Installing drive cage to bay 1
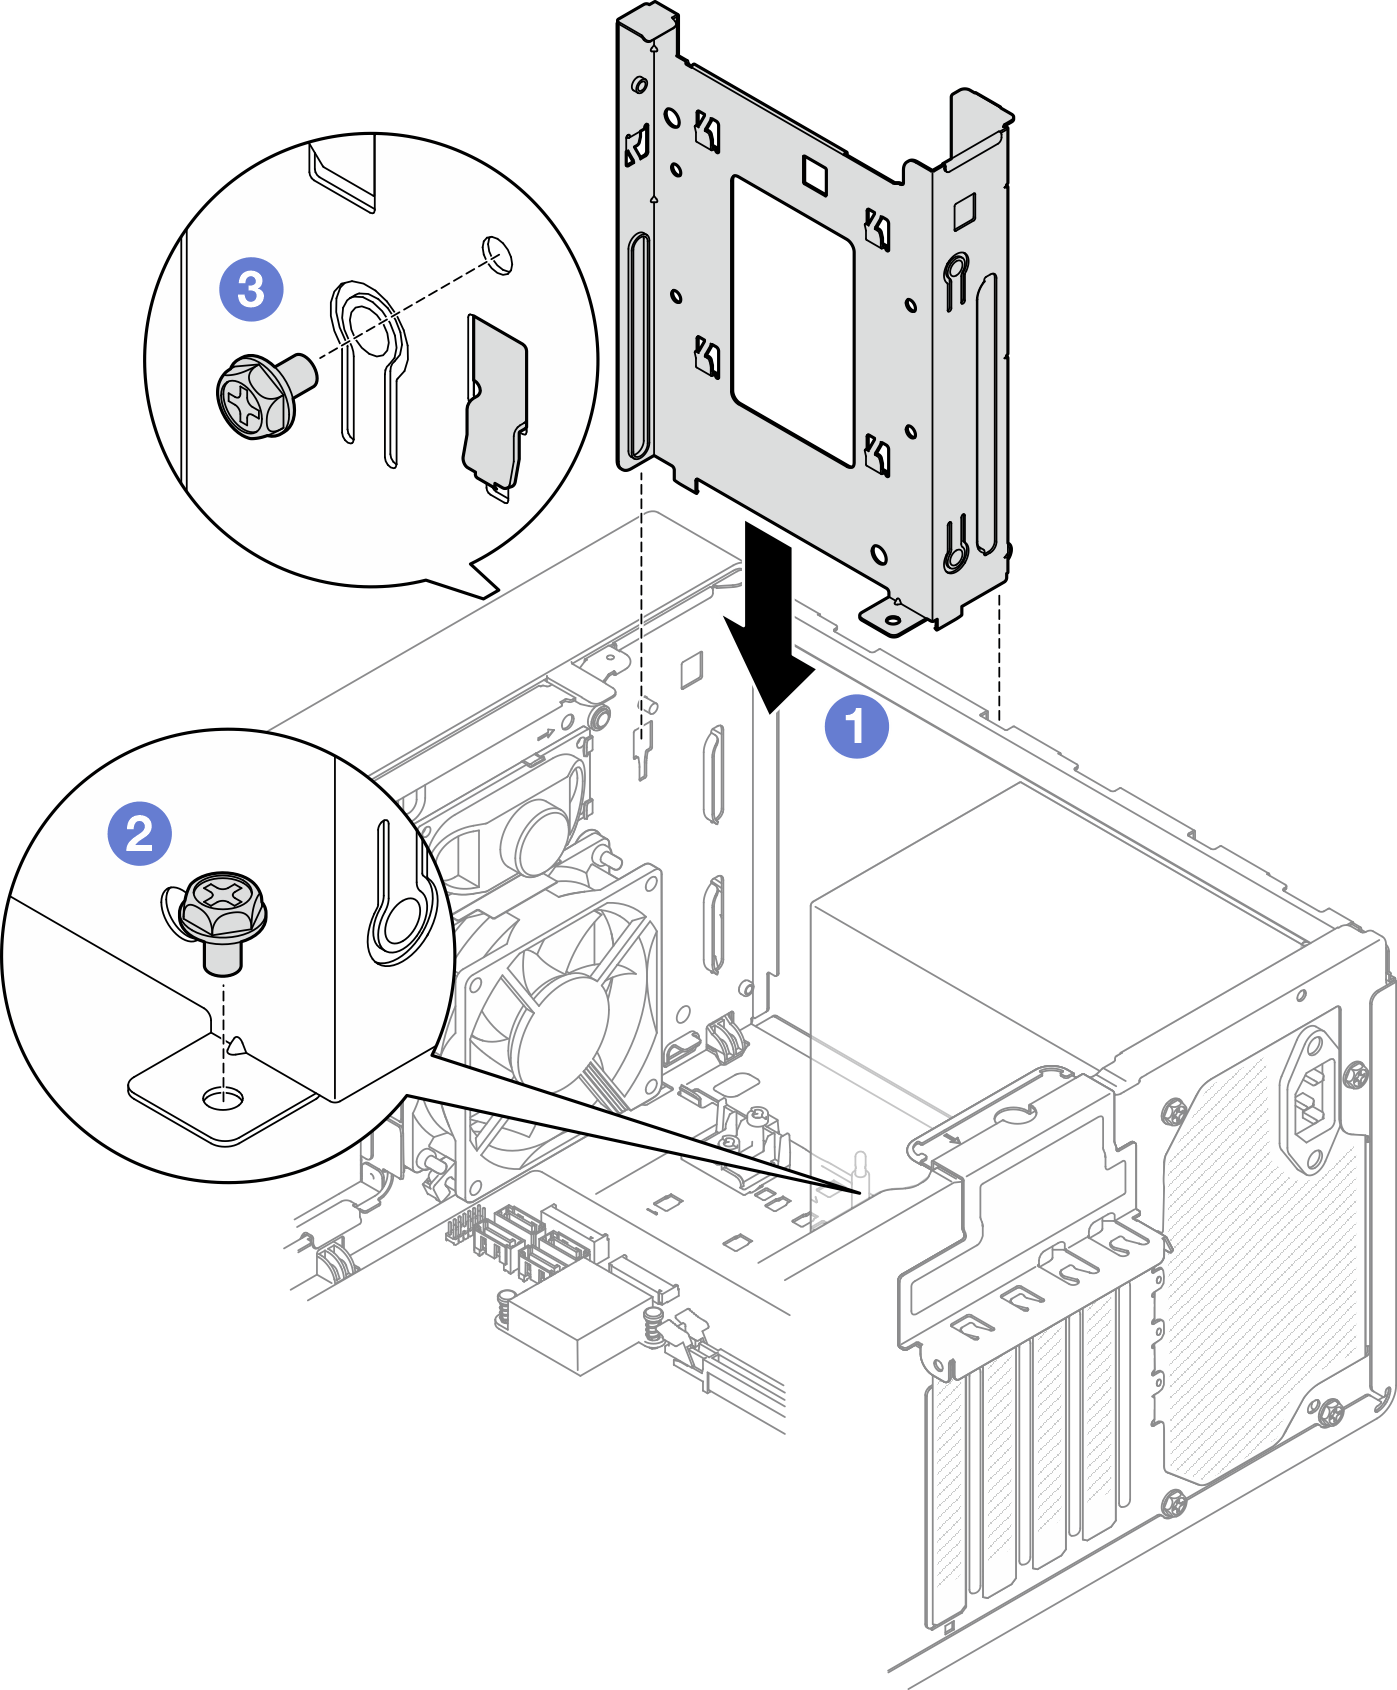
- Install the bay 2 drive cage.
Align the four hooks on both drive cages, and attache bay 2 drive cage to bay 1 drive cage; then, slide the bay 2 drive cage downward until the four hooks on both drive cages are fully engaged. Make sure the latch on the bay 2 drive cage is also engaged with the hook on bay 1 drive cage.
Figure 2. Installing the drive bay 2 cage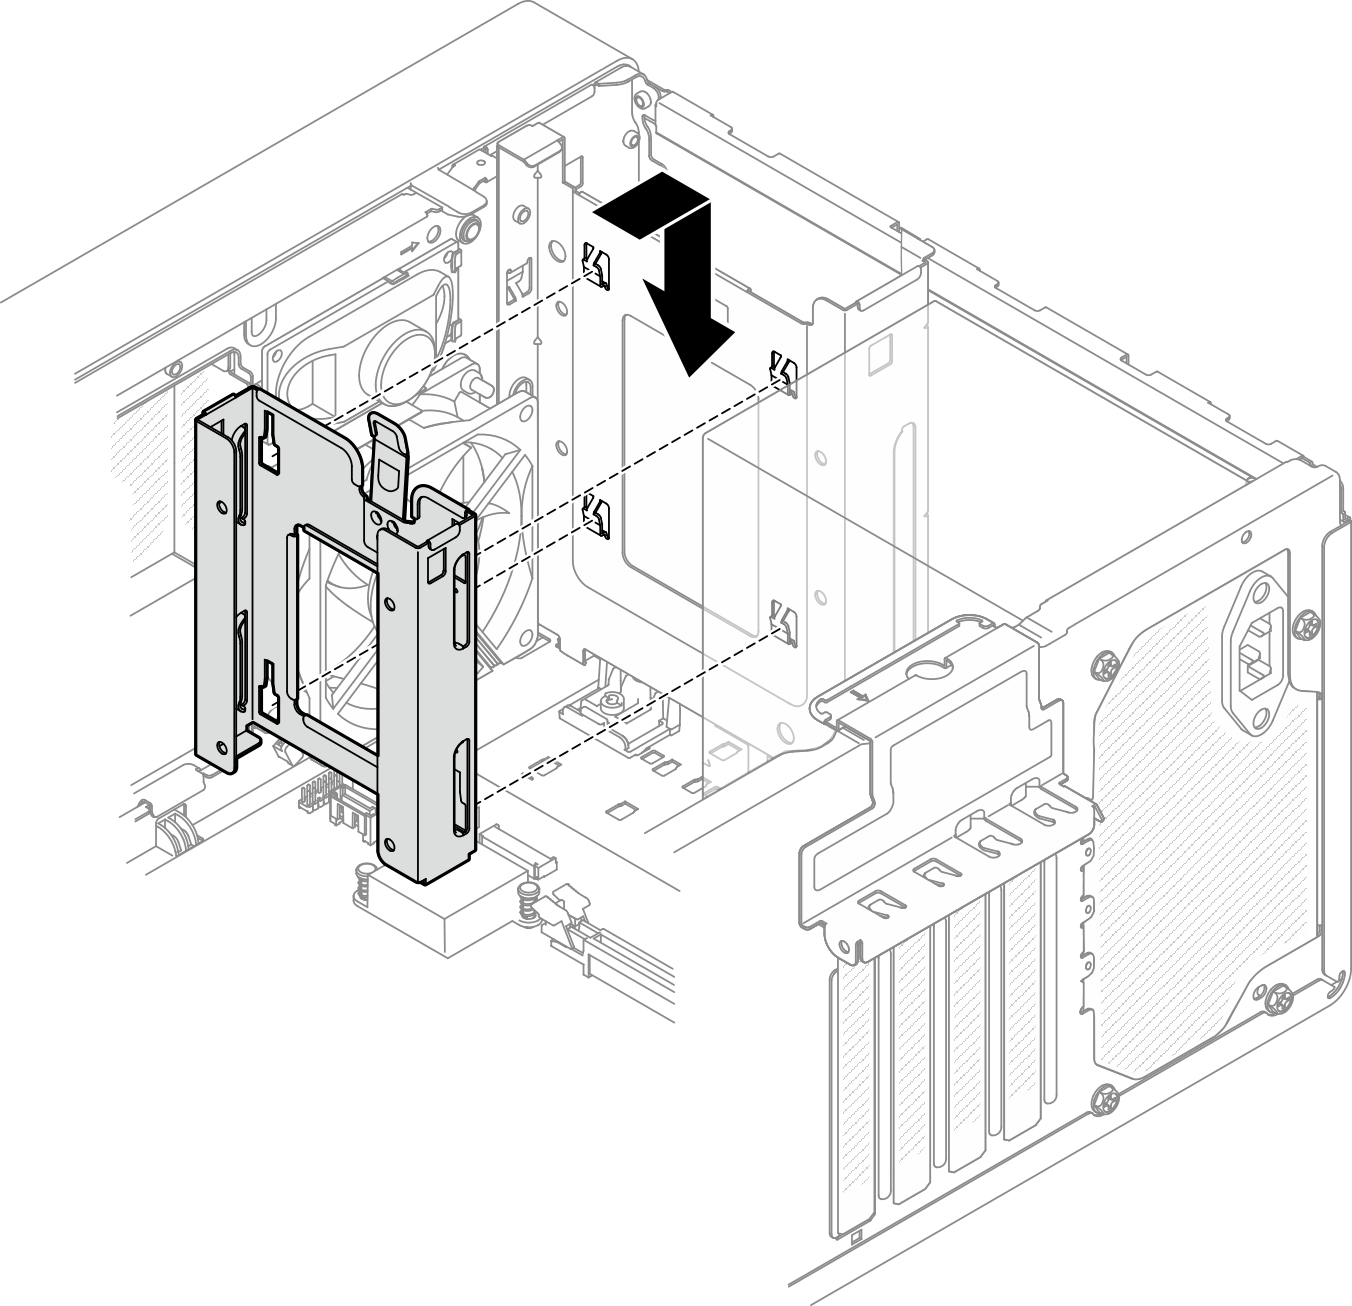
After you finish
Install simple-swap drives if necessary, see Install a simple-swap drive (bay 1-2).
Complete the parts replacement, see Complete the parts replacement.
Give documentation feedback