Install the intrusion switch

Follow this procedure to install the intrusion switch.

S002
disconnect all power
CAUTION
The power-control button on the device and the power switch on the power supply do not turn off the electrical current supplied to the device. The device also might have more than one power cord. To remove all electrical current from the device, ensure that all power cords are disconnected from the power source.

About this task

Attention
  1. Read Safety inspection checklist and Installation guidelines to ensure that you work safely.

  2. Touch the static-protective package that contains the component to any unpainted metal surface on the server; then, remove it from the package and place it on a static-protective surface.

Watch the procedure
  • A video of this procedure is available at YouTube.

Procedure

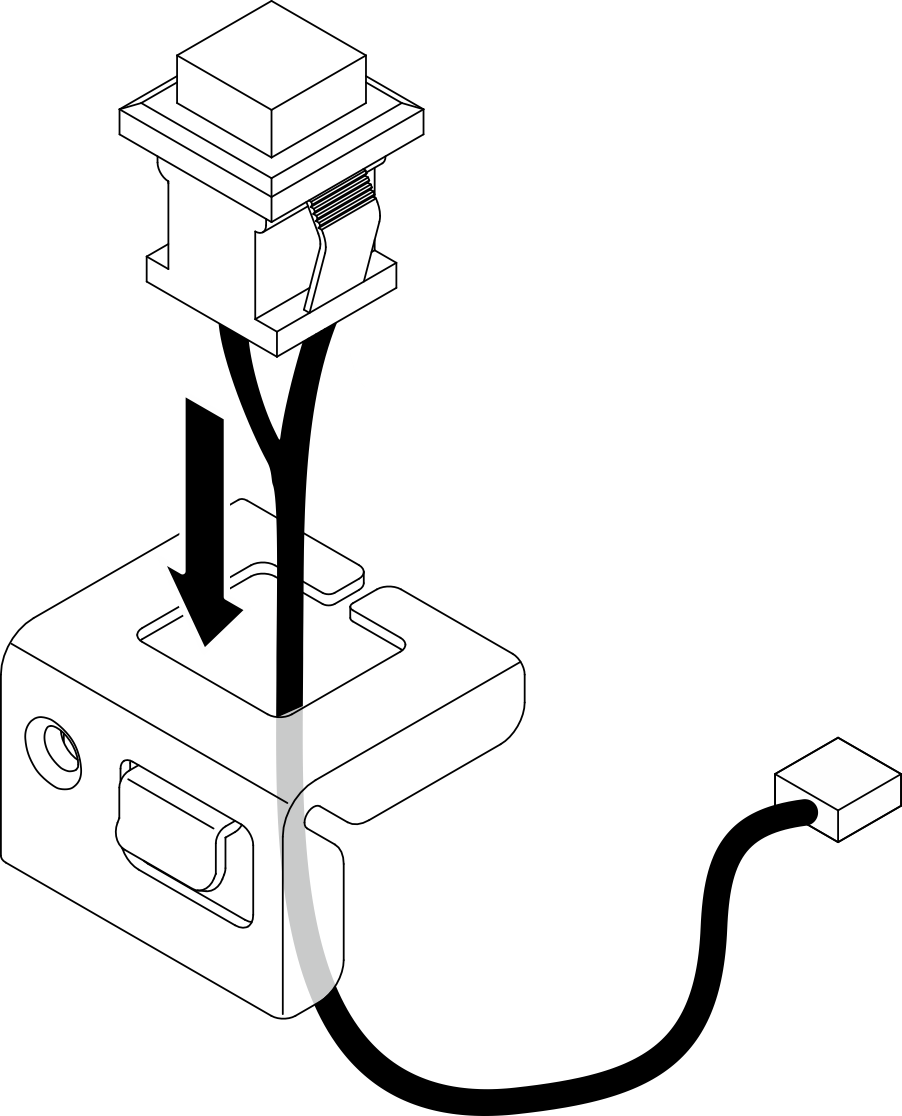
  1. (Optional) If you are installing an intrusion switch option, assemble the intrusion switch. Insert the intrusion switch into the bracket until it click into place.
    Figure 1. Assembling the intrusion switch
    Assembling the intrusion switch
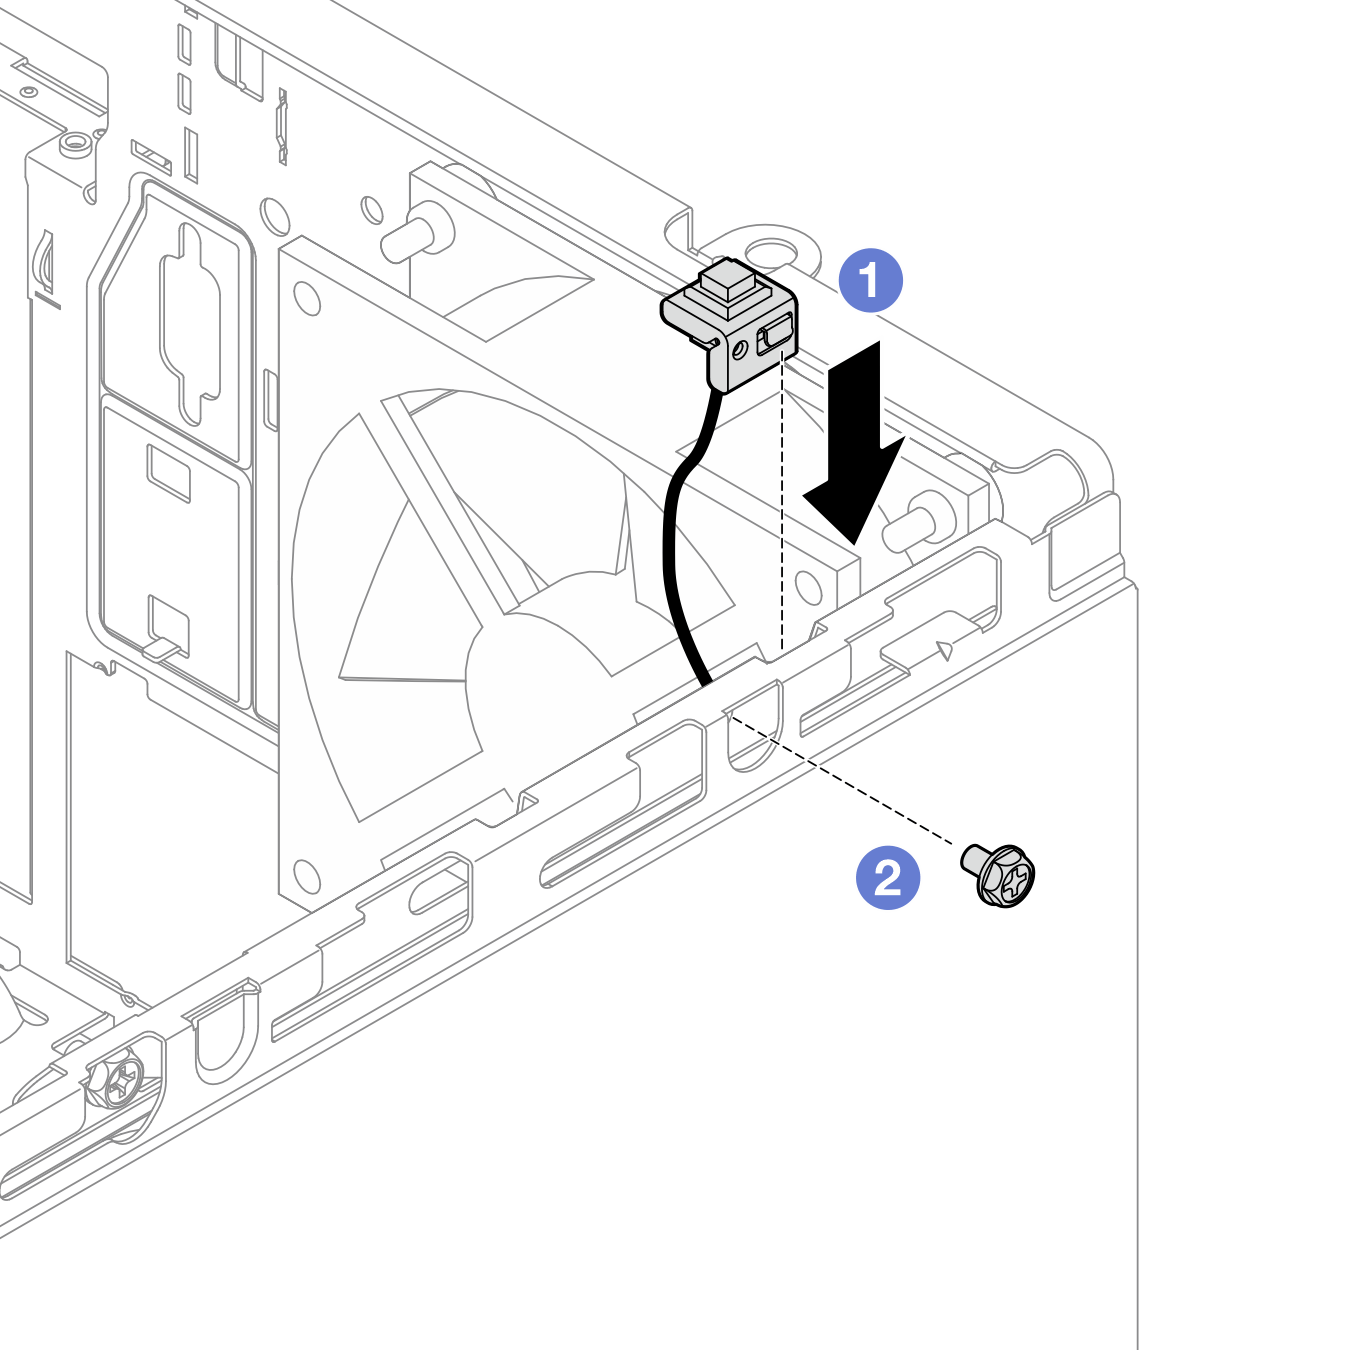
  2. Install the intrusion switch.
    1. Align the intrusion switch to the slot on the chassis.
    2. Fasten the screw to secure the intrusion switch to the chassis.
      Figure 2. Installing the intrusion switch
      Installing the intrusion switch
  3. Connect the intrusion switch cable to the system board, see Internal cable routing.
  4. Enable intrusion switch feature in BIOS Setup Utility.
    1. Before the operating system starts up, repeatedly press and release F1 to start text-based BIOS interface.

    2. Go to Setup Utility > Security > Chassis Intrusion Detection, and press Enter.

    3. Select Enabled, and press Enter.

    4. To save settings and exit the Setup Utility, press F10. Select Yes in the displayed window, and press Enter.

After you finish

Proceed to complete the parts replacement, see Complete the parts replacement.