Install a hot-swap drive
Use this information to install a hot-swap drive.
About this task
Hazardous energy present. Voltages with hazardous energy might cause heating when shorted with metal, which might result in spattered metal, burns, or both.
Read Installation guidelines to ensure that you work safely.
Prevent exposure to static electricity, which might lead to system halt and loss of data, by keeping static-sensitive components in their static-protective packages until installation, and handling these devices with an electrostatic-discharge wrist strap or other grounding system.
The following notes describe the type of drives that your server supports and other information that you must consider when you install a drive.
For a complete list of supported optional devices for the server, see: Lenovo ServerProven website
The drive bays are numbered to indicate the installation order (starting from number “0”). Follow the installation order when you install a drive. See Front view.
The drives in a single RAID array must be the same type, same size, and same capacity.
Procedure
- Install the hot-swap drive.Figure 1. Hot-swap drive installation
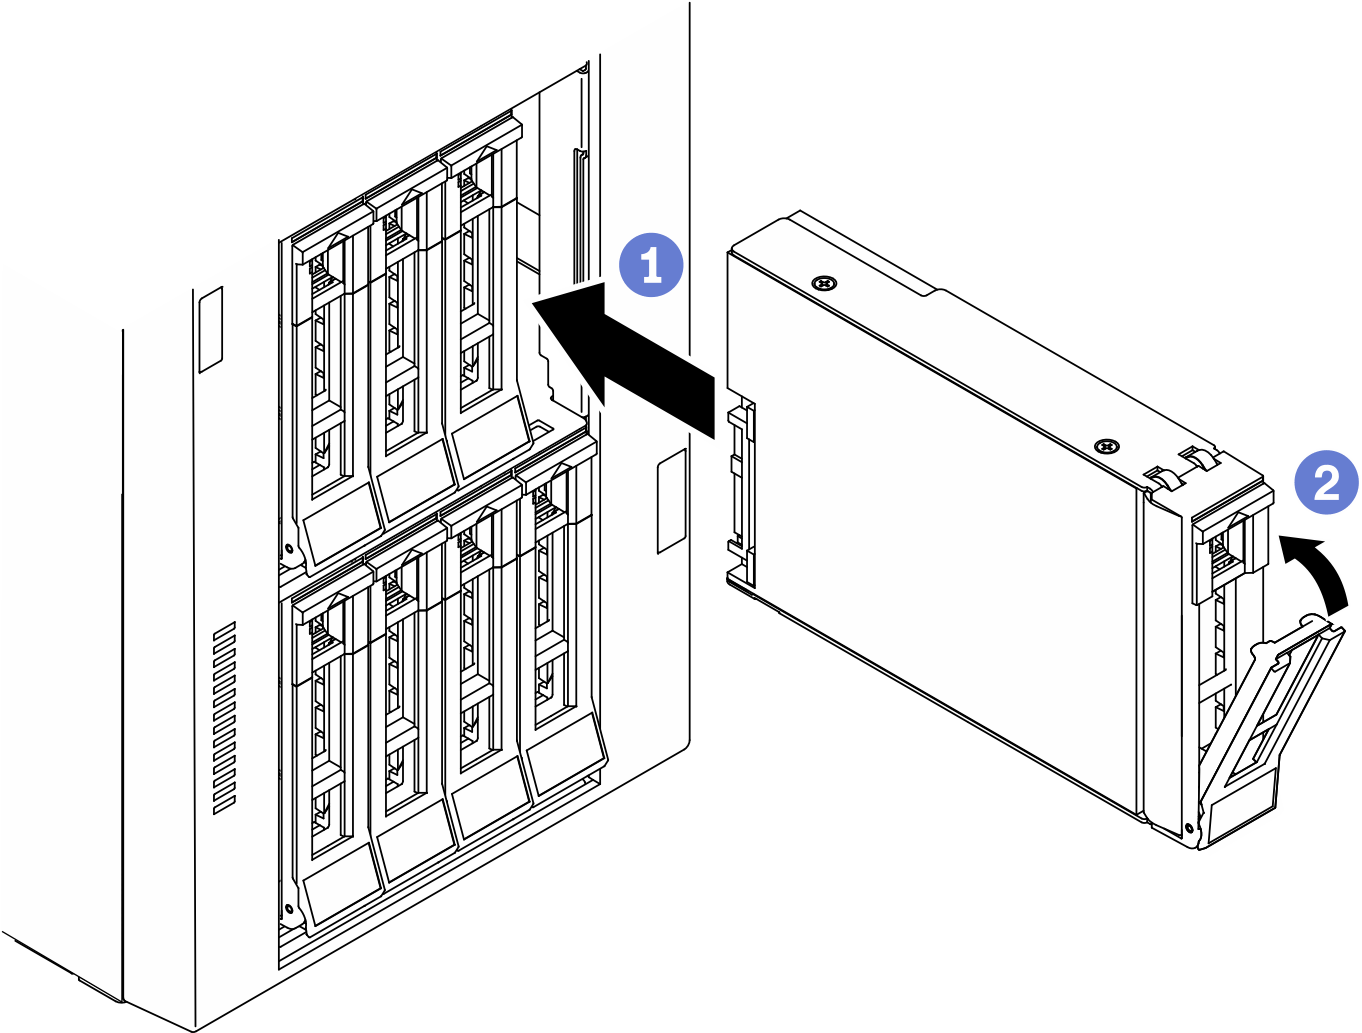
 Ensure that the tray handle is in the open position. Slide the drive into the drive bay until it snaps into position.
 Close the tray handle to lock the drive in place.
After you finish
Install other drives or drive fillers if necessary.
NoteAll the drive bays must be occupied. This means that each bay must have a drive or drive filler installed.Close the security door; then, use the key to lock the server cover.
Check the drive LEDs to verify that the drive is operating correctly.
Drive LED Status Description Drive activity LED (top) Solid green The drive is powered but not active. Blinking green The drive is active. Drive status LED (bottom) Solid yellow The drive has an error. Blinking yellow (blinking slowly, about one flash per second) The drive is being rebuilt. Blinking yellow (blinking rapidly, about four flashes per second) The RAID adapter is locating the drive. Use the Lenovo XClarity Provisioning Manager to configure the RAID if necessary. For more information, see:
Complete the parts replacement. See Complete the parts replacement.
Demo video