Processor settings
Certain processor-specific features for virtualization must be enabled for the solution to perform as designed.
To check/modify the Processor settings, follow these steps:
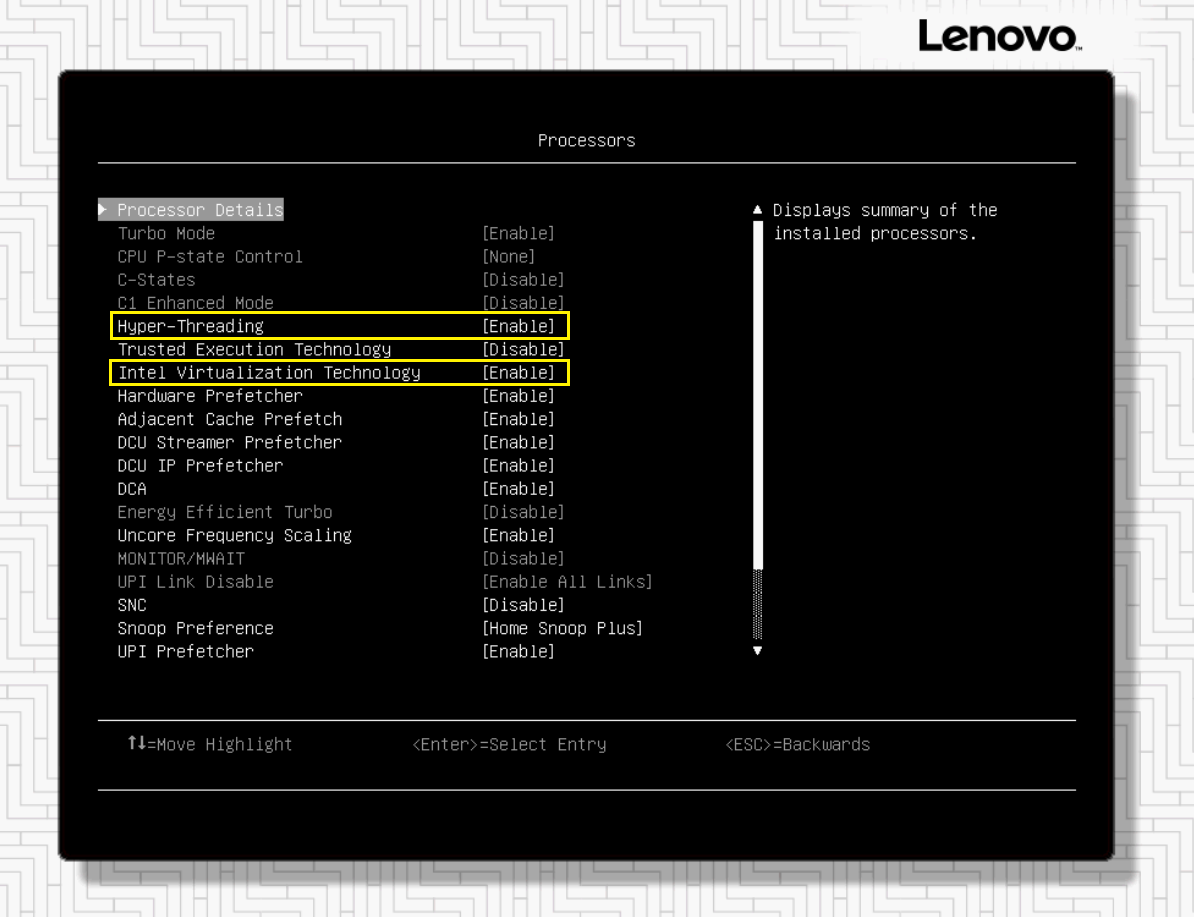
- Navigate to . Ensure that Hyper-Threading and Intel Virtualization Technology are set to Enable, as shown in the following figure. If they are not, select a setting, press Enter and use the arrow keys to select Enable before pressing Enter again. Once these settings have been made, press Esc key to return to the System Settings screen, and then proceed to Security settings.Figure 1. System Settings screen with Hyper-Threading and Intel Virtualization Technology set to Enable
Give documentation feedback