User Management
This section allows you to view the current list of user slots for the server.
To open the User Management page, click .
By default, the complex password policy is enabled under Global Setting. To change the setting, click Global Setting, disable Password Complex, and then click Save.
Supported operations on users
To view this page, you must have operator privileges.
To delete a user from the list, click
 in the upper right corner.
To modify a user, click the user slot to enter the User Management Configuration page and then modify its configurations.
To add a user, select a free slot to open the User Management Configuration page and then set its configurations.
It is advised that the anonymous user's privilege and password should be modified immediately as a security measure.
To modify or add a user, you must have administrator privileges.
User Management Configuration
The User Management Configuration page includes the following configurations.
- Username: Enter the name of the user.
A user name is a case-sensitive string of 1 to 16 alpha-numeric characters that must start with an alphabetical character.
Special characters like hyphen (-), underscore (_), and at sign (@) are supported.
Change Password: Select this check box to enable password changing. When adding a new user, this option is not displayed, and you can directly set the password.
Password Size: Select the preferred size for the password.
- Password and Confirm Password: Enter and confirm your password, which must consist of at least one upper case letter, alpha-numeric characters, and special characters.Note
The Password field is mandatory and should have a minimum of 8 characters when the SNMP status is enabled.
This field will not allow more than 16 or 20 characters based on the value of the Password size.
- If Password Complex is enabled under Global Setting, follow the rules below:
No other characters, in particular, spaces or white-space characters, are allowed.
At least one letter must be contained.
At least one number must be contained.
- At least two of the following types must be contained:
An upper-case letter
A lower-case letter
A special character
A password may have no more than 2 consecutive instances of the same character.
A password must not be the same as an associated user ID or the user ID in a reverse order.
A password must contain a minimum of 8 and a maximum of 20 characters.
BMC prevents duplicated passwords.
- Enable User Access: Check the boxes to enable network access for the user. Upon enabling, the corresponding IPMI messaging privilege will be assigned to the user.NoteIt is recommended that the IPMI messaging option should be enabled as well if user is created through IPMI.
Privilege(Channel 1) and Privilege(Channel 8): Select the privilege assigned to the user which could be Administrator, Operator, User, OEM, or None.
KVM Access: Select this check box to assign the KVM privilege for the user.
VMedia Access: Select this check box to assign the VMedia privilege for the user.
NoteThe term VMedia represents H5Viewer, JViewer, VMapp, and VMCLI clients.
It is recommended that the privileges support to KVM and VMedia should be provided only to the Admin user and shouldn’t be provided to User and Operator privilege level users. The Admin user can provide the privilege support to User and Operator privilege level users at their own risk.
VMedia privilege only restricts initiating or starting media redirection. If a device is already being redirected and attached to the host, then it will be visible as a normal device in the host. Hence, it will be accessible to all the KVM sessions, including sessions for KVM privilege only as well.
While modifying the KVM and VMedia access by logged in User, it will prompt you with the alert message to log out the current session to reflect the changes.
- SNMP Access: Disabled by default. The user needs to select this check box to enable SNMP access.NoteSNMP Access is only used to set SNMP permissions for users. If you want to use the SNMP service, please make sure
SNMP Service Switch on Dashboard has been enabled. 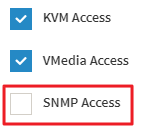
SNMP Access level: Select the SNMP access level for the user.
- SNMP Authentication Protocol: Select an SNMP authentication protocol for the user.NoteThe
Password field is mandatory whenever the authentication protocol is changed. SNMP Privacy Protocol: Select the encryption algorithm to be used for the SNMP settings.
- Email Format: Specify the format for sending e-mail. Two types of formats are available:
AMI-Format: The subject of this mail format is Alert from (your Hostname). The mail content includes sensor information such as sensor type and description.
FixedSubject-Format: This format displays the specific subject and message configured for e-mail alerts for the specified user.
Email ID: Enter the e-mail ID for the user. If the user forgets the password, a new password will be mailed to this e-mail ID.
NoteThe SMTP server must also be configured for this option.
The maximum allowed size for Email ID is 64 bytes, including user name and domain name.
Existing SSH Key: If available, the uploaded SSH key information will be displayed, which is read-only.
Upload SSH Key: Click Browse and select the SSH key file.
NoteSSH key file should be of pub type.
Click Save to save the changes and return to the user list.
Click Delete to delete the existing user.