Installing a heat sink
Use this information to install a heat sink retention module.
Read the safety information in Safety and Installation guidelines.
If you are replacing a server component in the server, you need to turn off the server and peripheral devices, and disconnect the power cords and all external cables.
To install a heat sink retention module, complete the following steps.
- Align the heat sink to the retainer bracket tabs and place the heat sink on top of the microprocessor, thermal material side down.Figure 1. Install the heat sink
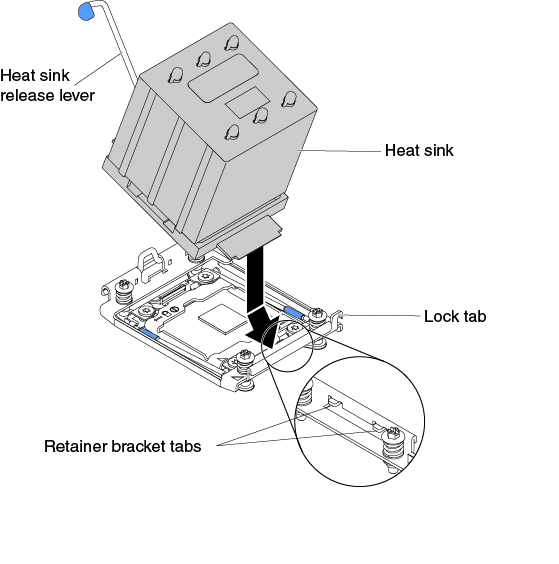 AttentionMake sure that you install each heat sink with its paired microprocessor.
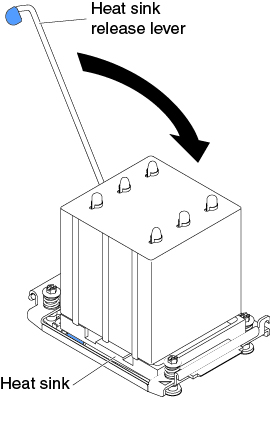
 - Rotate the heat sink release lever to the closed position and hook it underneath the lock tabFigure 2. Rotate the heat sink release lever to the closed position
If you have replaced a server component or installed an optional device in the server, you need to reconnect the power cords and all external cables, and turn on the server and peripheral devices.
Give documentation feedback